

The world of Hazzard has for millenia been a haven amongst the myriad plagues on humanity. Deep in the galactic south amongst the Segmentum Pacificus and home to the Redeemer chapter of Space Marines, Hazzard has for generations been left to its own devices – fuelling it’s economy with the large scale distribution and production of Luna Luceat liquor, of which the Imperium at large has an insatiable demand for.
Understandably.
However, with grim inevitability, war has come to Hazzard, and the populace will not simply stand by and let their homes be overrun by Ork monstrosities, leering mutants, agents of the Ruinous Powers or devouring Tyranids – in support of their gene-enhanced Redeemer brethren, the Hazzard PDF fixes bayonet, raises lasgun to shoulder, and with a rebel yell cries “NONE SHALL PASS!”


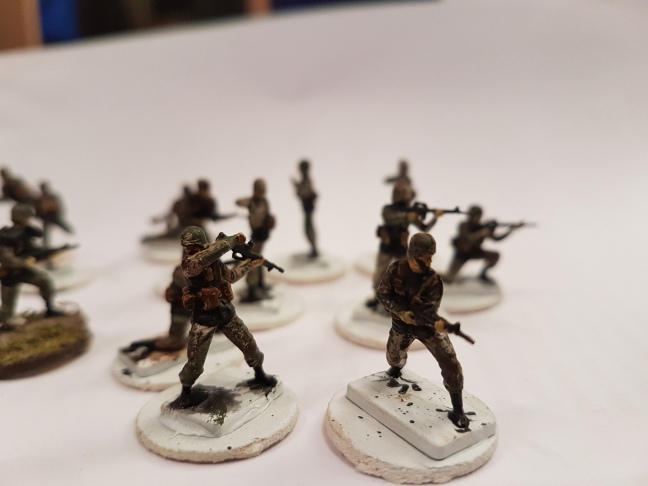
Let’s be honest, Imperial Guard were always the force it was going to be easiest to do in 1/72 (or 20mm, whatever is your poison), and these guys are from our epic 2012 eBay haul– Plastic Soldier Review criticised the posing of the guy smashing someone’s face in with his M16, but frankly to me, that’s 40k all over… Give me my laser! I want to hit someone in the face with it!
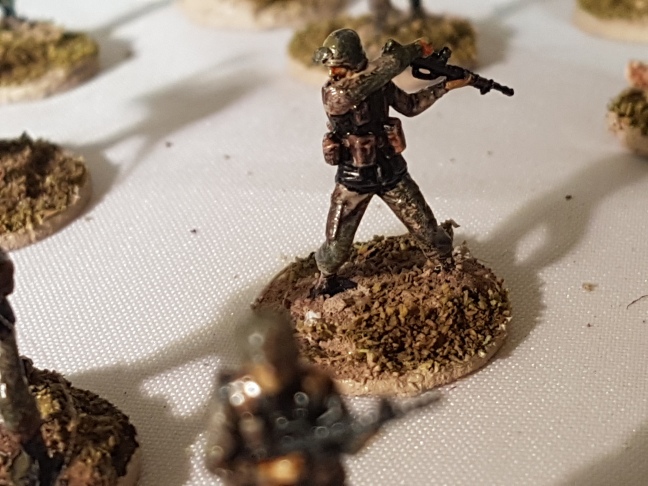
Anyway, I’ve been trying to improve my painting skills a little recently, so I thought I’d share what I’ve managed to do – these guys (I think) look pretty tidy considering how weeny they are.
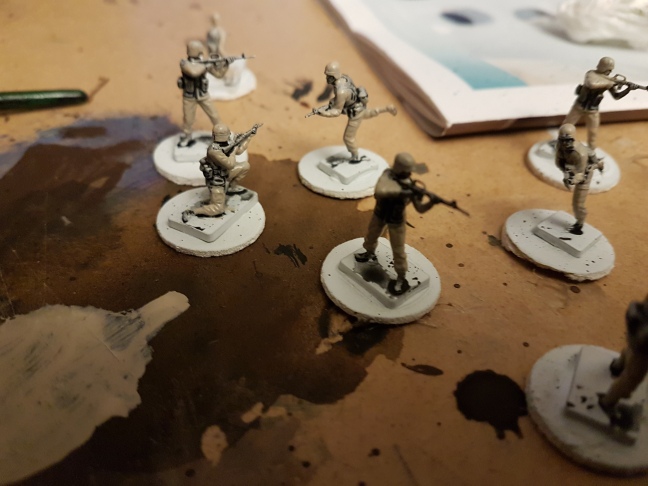
- Prime & Prewash
Finally got myself some spray primer for £1 in white – but taking a cue from the airbrush crowd and their pre-shade technique, I decided to wash my lads in black ink and then drybrush them, creating a more 3D surface to layer paint on. Let’s be honest, at this scale, we need all the help we can get! One word of advice – thinning your ink too far will result in it not adhering to the primer, but the result should give you a good strong surface to paint on.


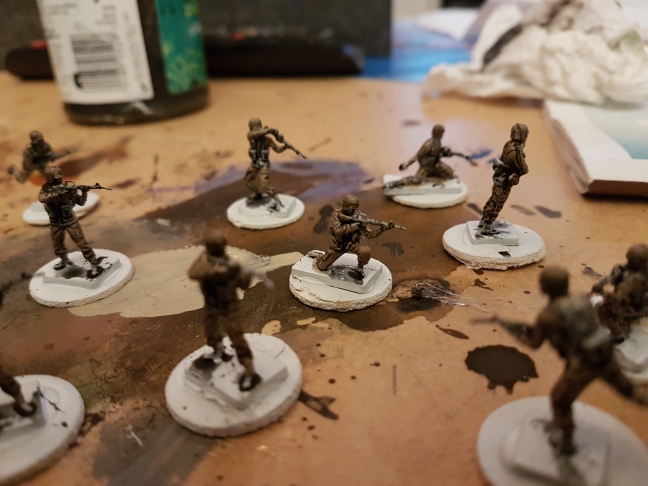
2. Basecoat
The prevailing wisdom seems to be thin your paints (especially when you’re working with cheapy acrylics like we do)- pre-wash and drybrush should help with detailing here. I started with the tan, thinned down as per tutorials:
3. Wash Basecoat
Thinned down some Vallejo Brown ink for this part, don’t overload the brush though, you want to keep control over this and make sure it doesn’t go everywhere.
4: Drybrush Basecoat
As it sounds, back to the basecoat colour and drybrush to bring a more 3D effect, bringing out the details. Be sparing with this, don’t overload your brush.

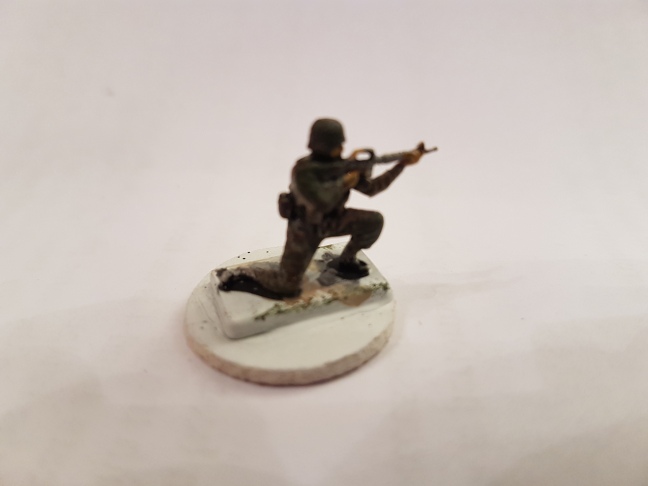
5: Camouflage Pattern
Trying to imply a digital camo pattern at this scale is lunacy, so I cheated – sponge chipping. Bit of sponge dunked in Vallejo Russian Green, dab off the excess so you don’t smear it all over the model and dab on. Then do the same with another bit of sponge and Burnt Umber craft paint.


6: Black detailing
Simple – thinned down black craft paint (with water and Vallejo Black Ink) on the lasgun which is definitely not an M16, boots and because these are based on the Rogue Trader Imperial Guard, the flak armour too
7: Skin – thinned down flesh tone craft paint, washed with thin (possibly too thin, these lads do look a bit pasty) Vallejo Skin Wash. Really important to use a detail brush here and not overload it, with models this small there’s not much room for error.


8: Stowage – these guys have load bearing harnesses which I picked out in tan and then washed in Vallejo Brown ink, being as careful and as neat as I could..
9: Basing! Dead easy – I use hole punched 20mm circles of thick cardstock, glued the models on before painting, and then when they were done it was PVA glue and a little carton of dust swept off the garage floor (muy muy skinflint).
Then, when that’s dry, a few dabs with a toothpick and dunk it in some flock to mix it up a little, and edge the bases with the colour of your choice (I used the tan here)


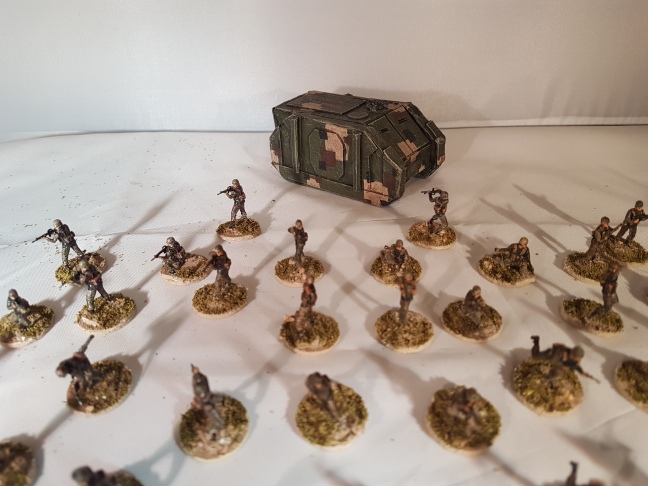
BOOM! 40 Guardsmen, done. Now, they’re just lasgun wielding grunts at the minute- without a leader, without a plan..
But that will change, as I’m planning to boost their numbers and bring in some more “Modern US” forces with heavy weapons to be 40k’ified. And some armour, of course. Can’t have Guard sans tanks. My recycling bin is going to be very empty in the next few weeks….
Hope that’s given you a few ideas, see you soon for some more thriftiness!

oops sorry, one more… yah definitely some surgery at knees and shoulders needed.
[image: Inline image 1]
LikeLike
Awesome tutorial, and perfect timing for me. I have a few sets of 1/72 scale now, an odd mix: some childhood ones I found at my parents a couple years ago, and whatever was lying around in that dusty shelf of the hobby shop I went to recently.
Don’t know if you can get ‘robot defender’ in England but for $1.25 CDN at my local Dollar Tree (probably like 70p I bet) and a blade, some surgery, superglue, plastic bits and some paint, I am sure it’ll be a great customizable little dreadnought robot , it’s about 5.5 inches tall, so about 33 feet at 1/72. The figure is a Warsaw pact soldier in cool CBW mask.
[image: Inline image 5]
If you can’t get it or something similar in England, let me know i’ll send you some in exchange for a detailed pic of your m85 combat platform and the plan to your paper Rhino ;).
Another thing I have been playing with and it’s working out really well is this thrifty idea for simple post-holocaust/warzone buildings from Germy. I can’t get the dominoes at my Dollar plus store but they do have a set of 4 ‘interlocking playmats’ made of EVA foam, measuring 38.8 cm square and 8mm thick. For 3.50$ CDN (look pretty much like this except they were all differently coloured sheets) I cut out about 36 houses at the 4cm by 8 cm he uses. I like that the wall shapes don’t come out all cleanly and uniformly cut when I do it by hand. I find that on this structure at 1/72 the narrower corrugations on the sleeve from a $tarBux drink looks a bit better maybe than box-cardboard, and no peeling! … though it is curved so cutting is necessary-looking for a similar corrugated cardboard in a bigger sheet. Anyway, almost ready to start painting it all up as he does on the link. I have a second set of mats I may try a set of different sized buildings, maybe 6 cm by 10 cm. Then the stackable multi-story buildings can also make a ledge or walkway.
Pete
On Mon, May 8, 2017 at 4:12 PM, Skinflint Games wrote:
> skinflintgames posted: “The world of Hazzard has for millenia been a haven > amongst the myriad plagues on humanity. Deep in the galactic south amongst > the Segmentum Pacificus and home to the Redeemer chapter of Space Marines, > Hazzard has for generations been left to its own devic” >
LikeLiked by 1 person
Hi Peter, glad you enjoyed it! The images haven’t come through unfortunately, but the stuff you’re working on sounds cool 🙂 I’ll check out Robot Defender too.
As for the Rhino – check out Wyloch’s Crafting Videos, I used his templates scaled down (but not by enough – I’d scale back to 2/3 size). This is the one you want: https://www.youtube.com/watch?v=PCghVB5sTdg&list=PLOt6UN-cmqk1zHORa-HfJ5JFw7i2ChTF1&index=7
The M85s? They’re the tops from Ella’s Kitchen Baby Food pouches! Glued some card on them as panelling, cocktail sticks for arms, weapons from cardboard and a bit of greenstuff, done! The whole force is getting a facelift in a bit anyway, not happy with the way they look, so better pics will be coming 🙂
LikeLike