

January is Austerity Month here at Skinflint HQ, we’ve blown all our cash on gin, biscuits and Last Jedi tickets – so that means a hobby budget of £0 for the first month of 2018. But does that mean that we have to stop making stuff? Of course not – thriftiness is the mother of invention.
And in that vein, I grabbed the glue gun and ventured into the box of Interestingly Shaped Crap that all we gamers keep hidden away in the depths of a cupboard..

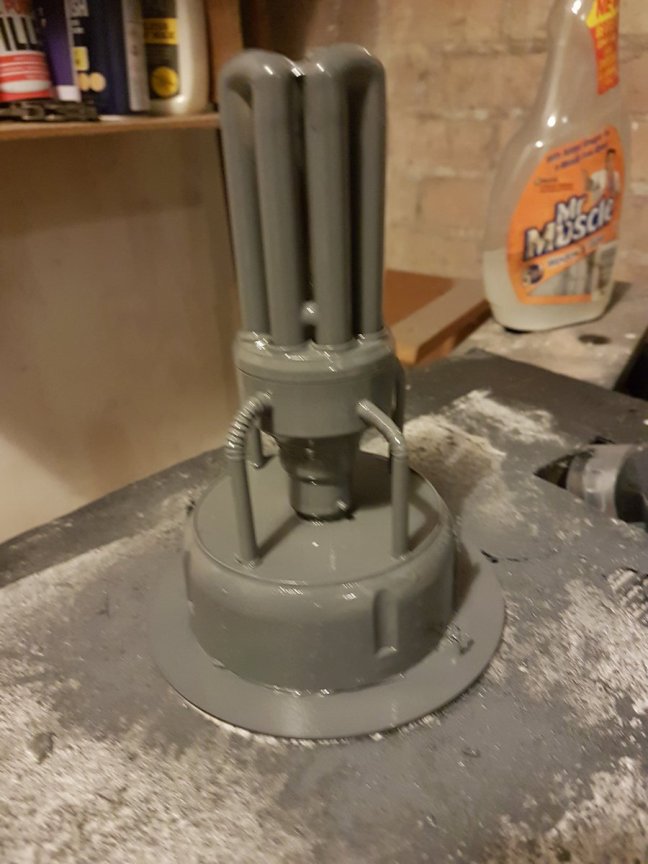
I knew when that bulb went that it was Too Interestingly Shaped to throw away (and as luck would have it, I had another one.. stay tuned) – it put me in mind of the Imperial Plasma Reactors from Dawn Of War, screaming to be turned into something sci-fi-esque… and pawing through my box I discovered the Q-tip box lid which could serve as a base/fuel tank/ reactor core, which set the basic shape in my mind. I used a mix of hot glue, tacky glue and polystyrene cement to attach these together (with mixed results, as you’ll see later on..), and then cut some drinking straws to size to function as power conduits/ coolant pipes. A good tip here – drinking straws have very little surface area for contact and glueing, so filling them with something solid is a good idea. I glued a bit of kebab skewer inside each one, meaning I had a decent contact area with the bulb and the lid. I then added a few bits of cardboard detailing to be a control panel of some kind, and trimmed a sheet of granny grating to create access ladders.
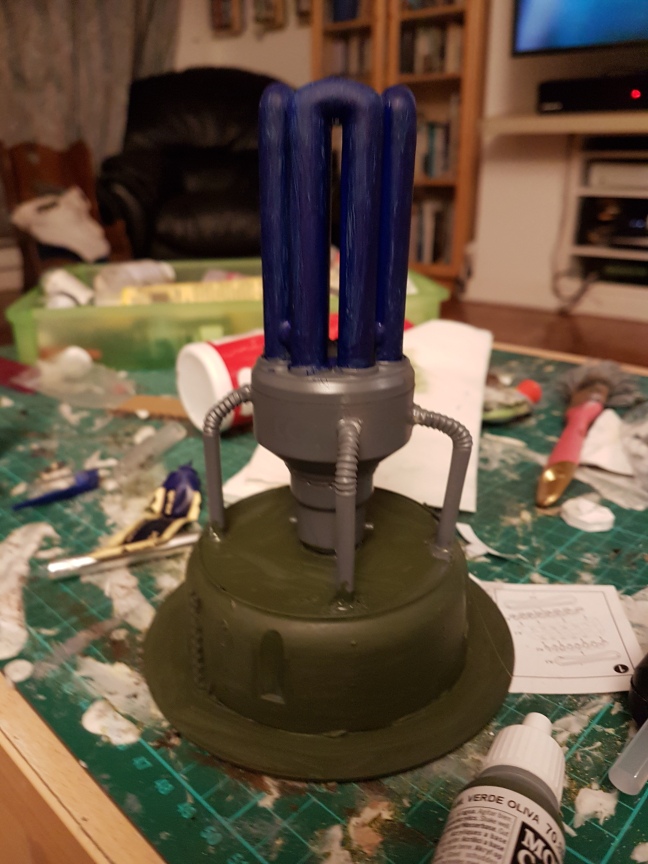
I wanted something that could serve as both an Imperial piece for 40k or Epic and a suitable clunky retro-sci fi piece that could conceivably be a part of a 1950’s superscience project, so I picked Vallejo Olive Drab for the base and body, a generic Boltgun Metal equivalent over a black undercoat for the base of the bulb and the tubular part got painted blue in preparation for a cool forcefield trick I saw on a Warhammer TV post.
Unfortunately, I encountered a few problems during this phase – for a start, thinnning down my black paint meant that it refused to adhere to the primer.. and then, the water in the acrylic paints began to reactivate the tacky glue (which is just regular PVA with isopropyl alcohol added for faster drying) – meaning the model literally came apart on me!

So after much swearing, and a few consultations on Facebook, I (sorry Dan) slightly reneged on the “no money” pledge of January and bought some superglue and No More Nails, which seems to have done the trick.


After the initial colouring, I washed the olive drab with Army Painter Green Tone, pin washed the detail parts (rivets, ladders etc) with a homebrew wash of green and black paint thinned with water and detergent, then drybrushed up with Vallejo Olive Drab, lightened with cheap tan craft paint for highlighting. I added a few streaks and pin washed Vallejo Smokey Ink, and sponge chipped with grey, black and metallic for a weathered appearance.
Following Duncan Rhodes (hallowed be his name)’s advice, I created the forcefield effect by stippling on purple and light blue patches, before outlining the lightning patterns faintly in grey and going over them with white.
I camouflaged the No More Nails residue around the base by painting it up as mud, highlighting up from dark brown to light brown – and here it is in situ:


A fair few flaws in the detail, but not too shabby from two feet away.
Guarded by Squad Beauregard from the Hazzard 1977th:

And there you go, a cheap and (relatively) simple scratchbuild! And now I know a little more about glues and paint… the next model should go alot more smoothly.
Hmm, famous last words. Never mind – till next time, stay thrifty and happy gaming to you all!


Dodgy plasma reactor melting its supports and held together with an emergency repair job. I can’t think of anything that typifies the 40K ethos more! 😀
Regards, Chris
LikeLiked by 1 person
Cheers Chris! Yeah, when you put it like that… totally meant to do it 🤣👍
LikeLike