Jager March! New units for the League Of European Nations…

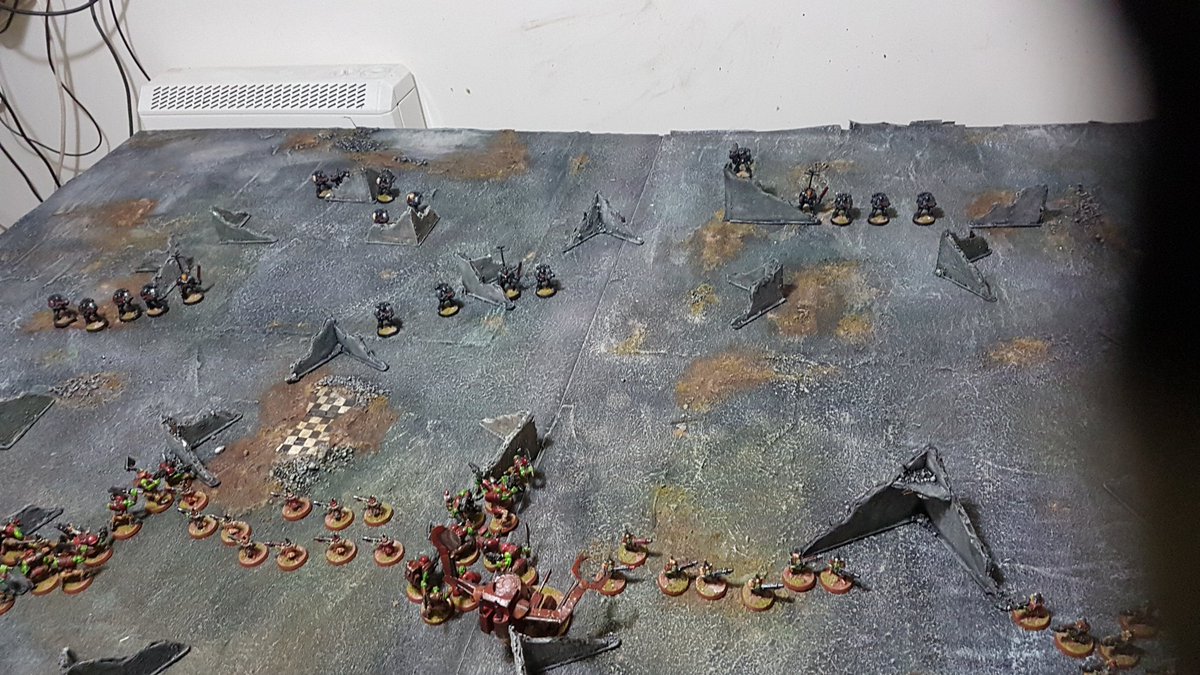
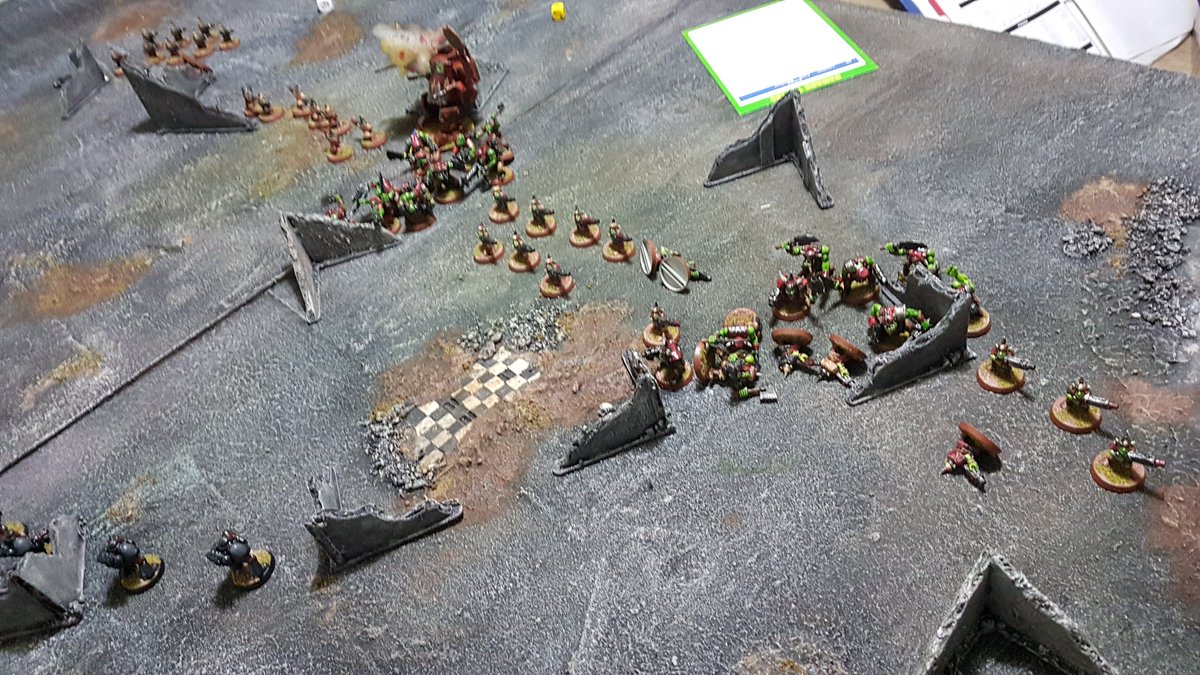
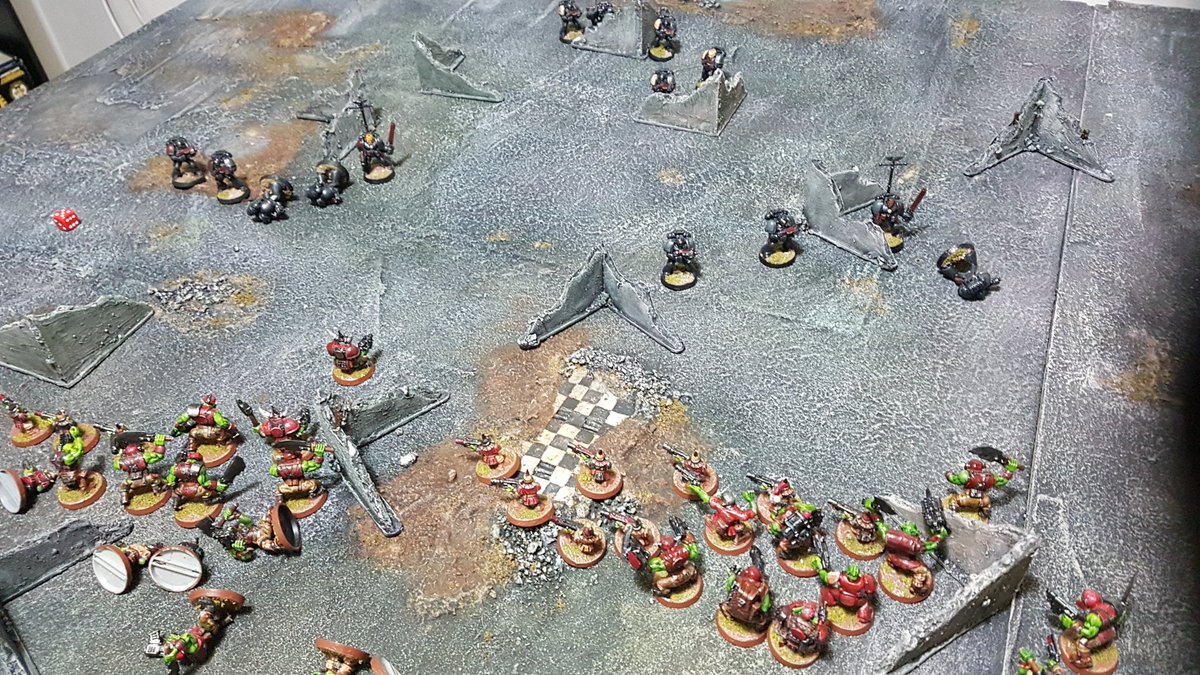
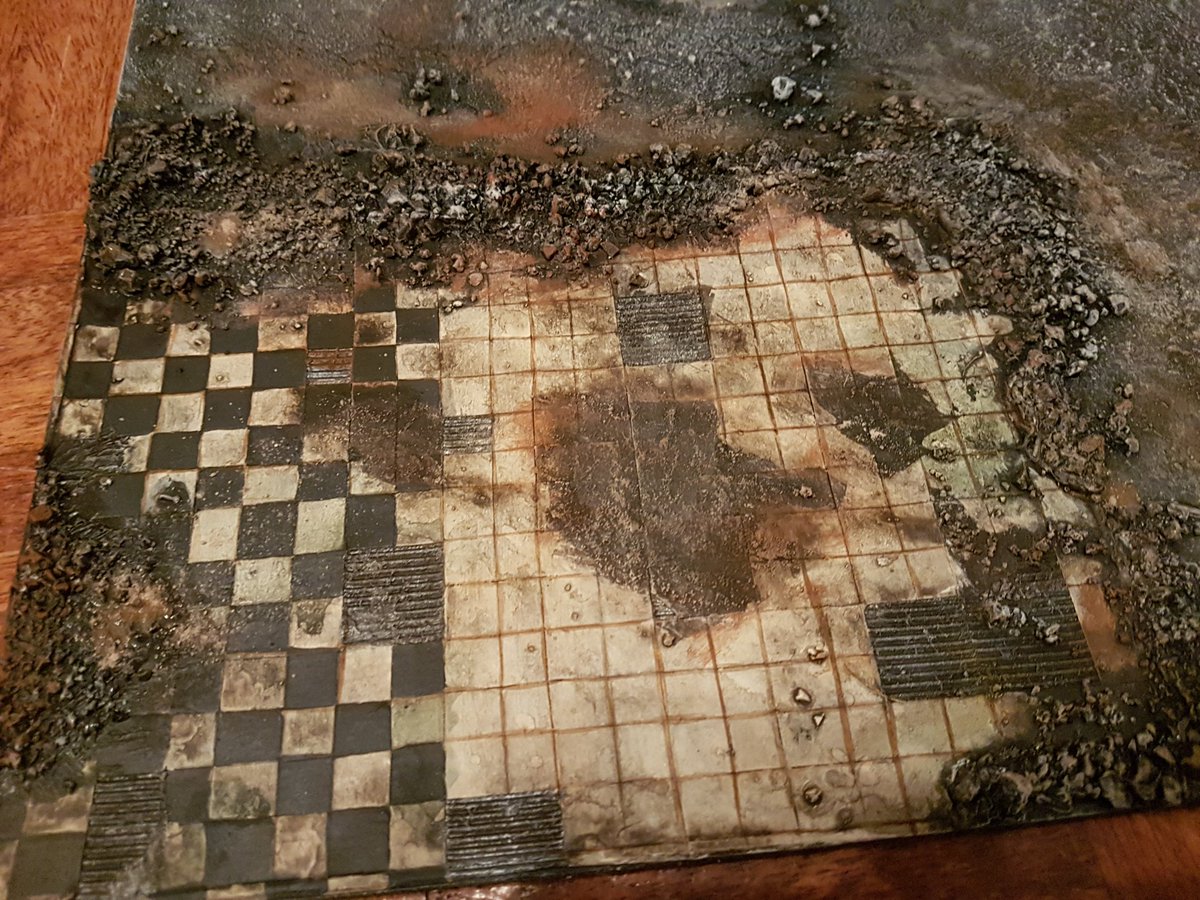
It’s good to get back to your roots. With all the 40k and granny grating shenanigans that have been going on of late, you’d be forgiven for thinking that we’d forgotten about our first love – our own game, “Apocalypse: Earth” set in an alternate WW2 in the 1950s between the West and the Holy Soviet Empire that is not at all inspired by a popular computer game from the late 90s.

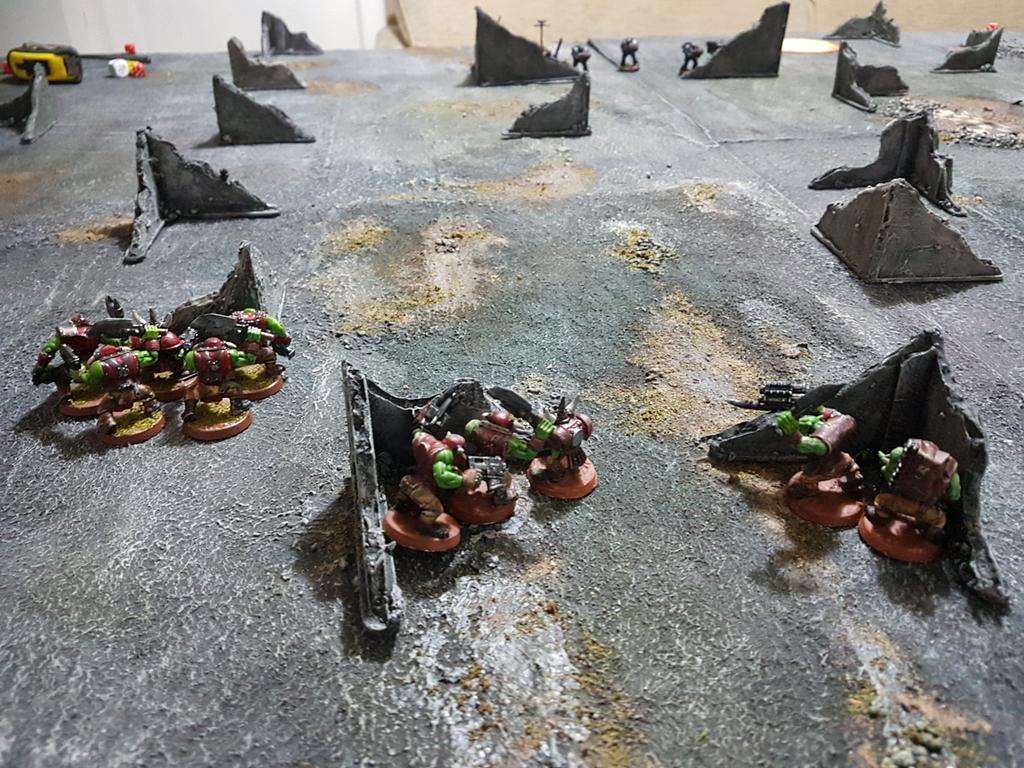
I’ve had custody of the “goodies”, the Atlantic Alliance – UK, US & Commonwealth – while Dan has been commanding the Holy Soviet Empire forever, but in the last couple of years I’ve been investigating the League Of European Nations… short version, Germany (sort of) wins WWI, sets up a proto-EU, the UK doesn’t bankrupt itself in WWI and as a result the Commonwealth and US go into partnership more or less as equals.

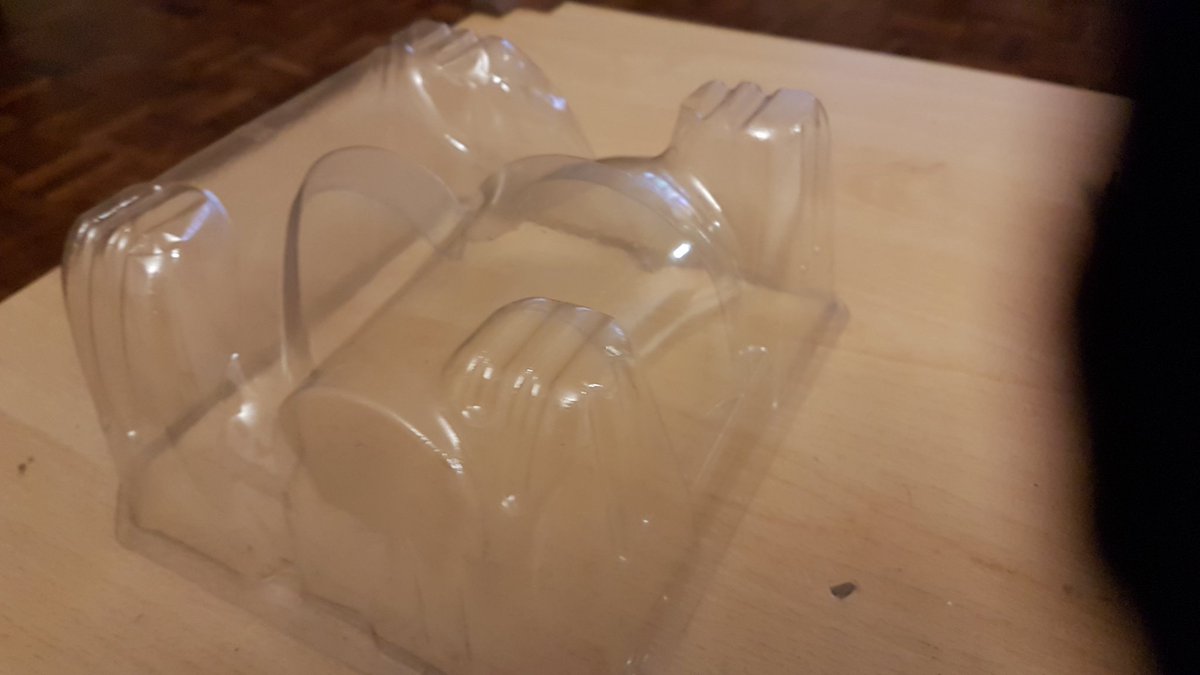
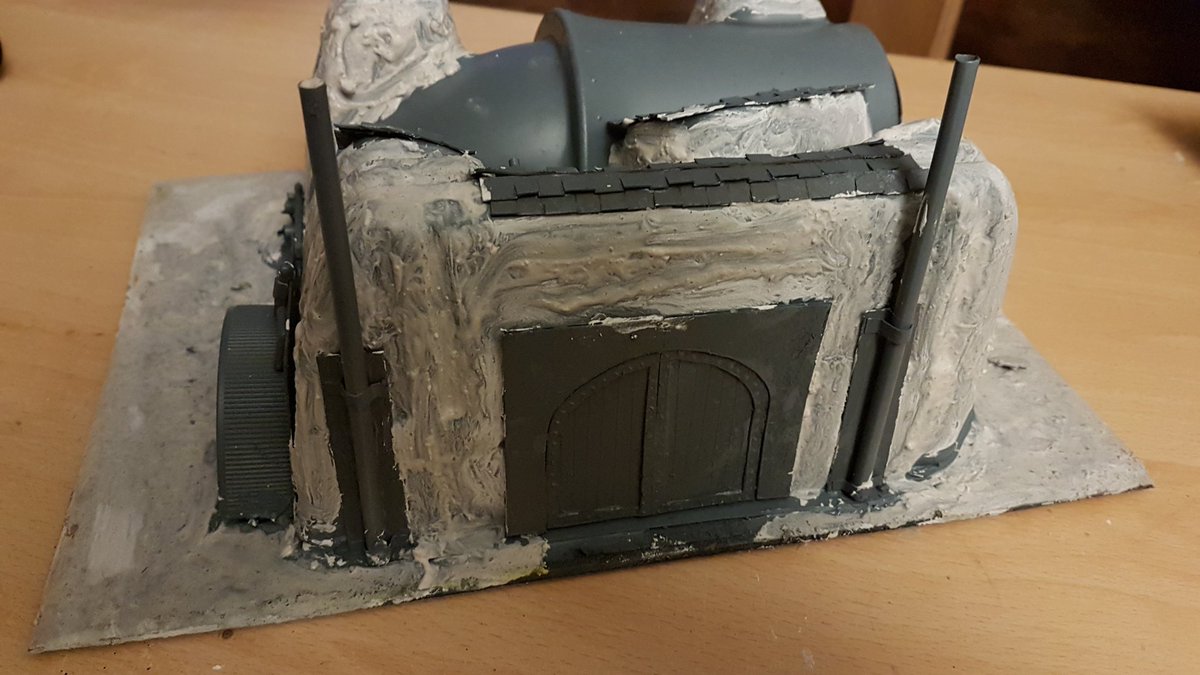
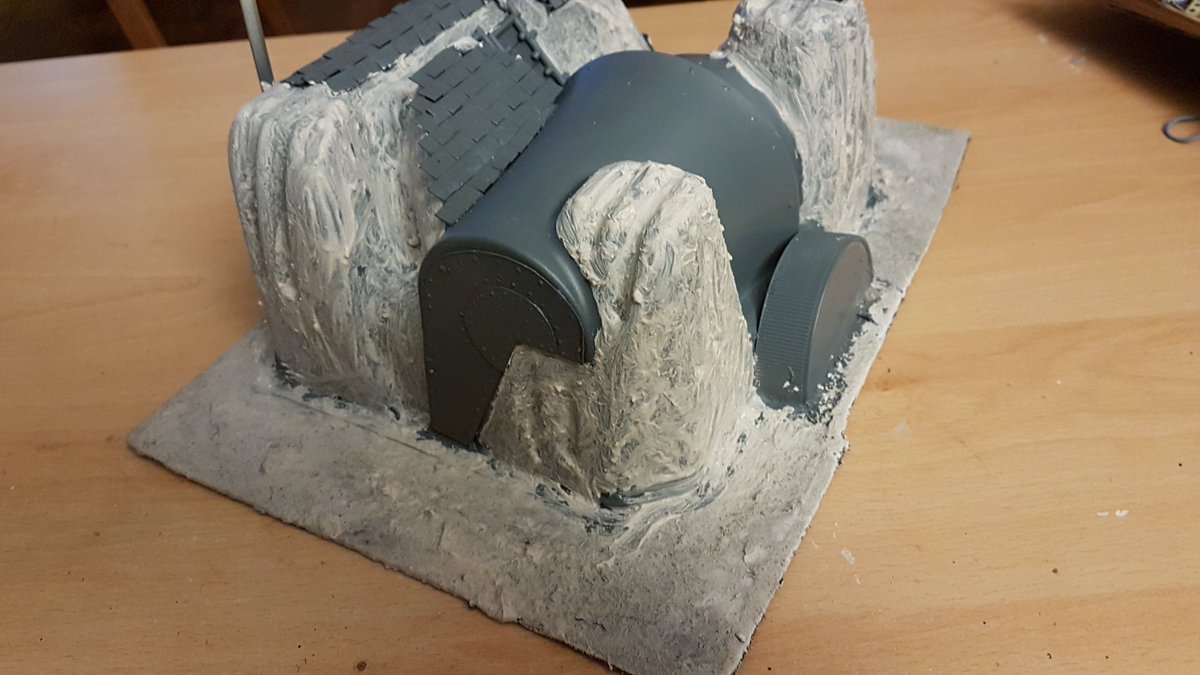
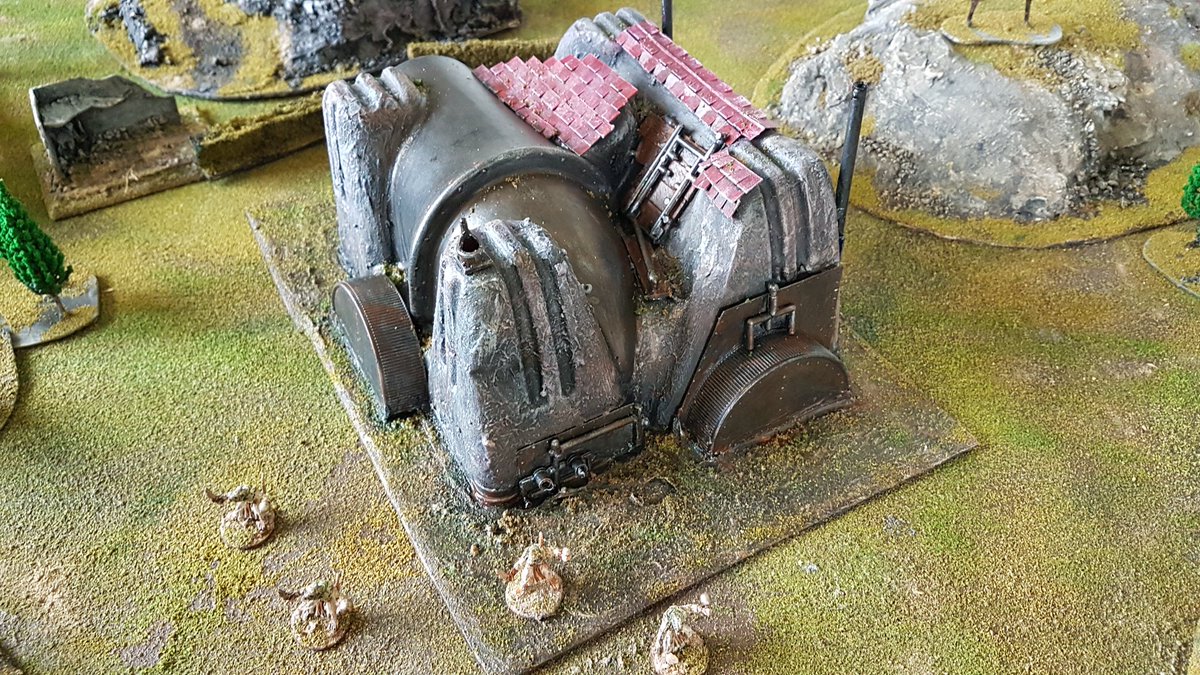
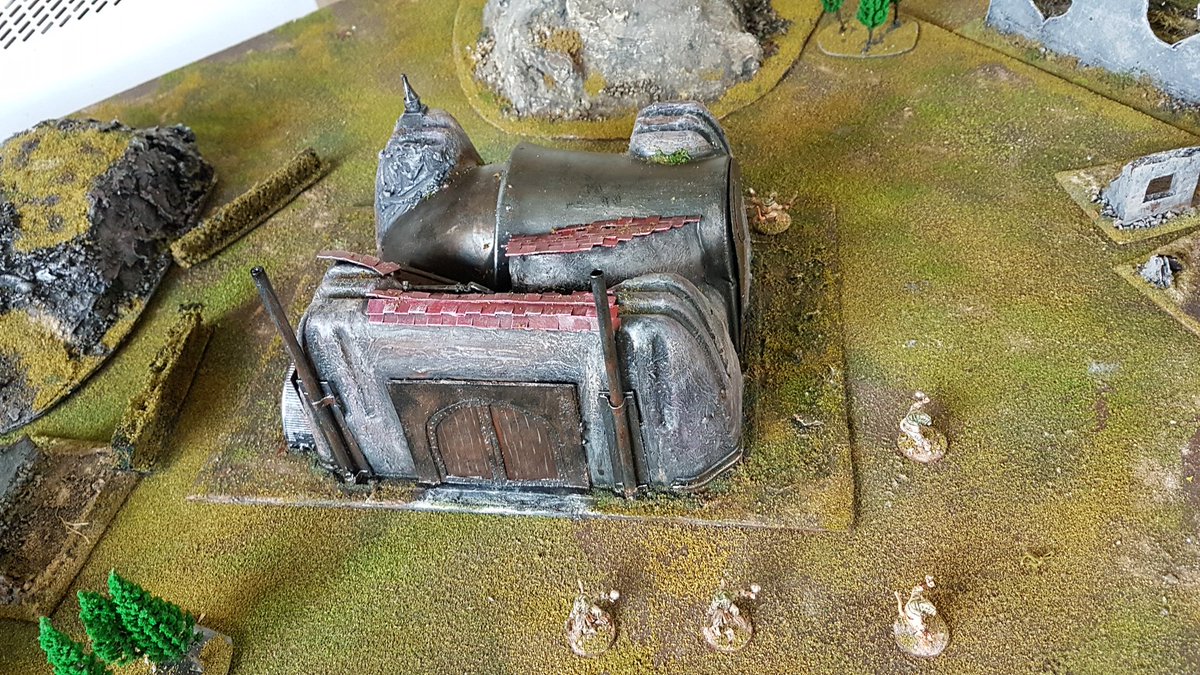
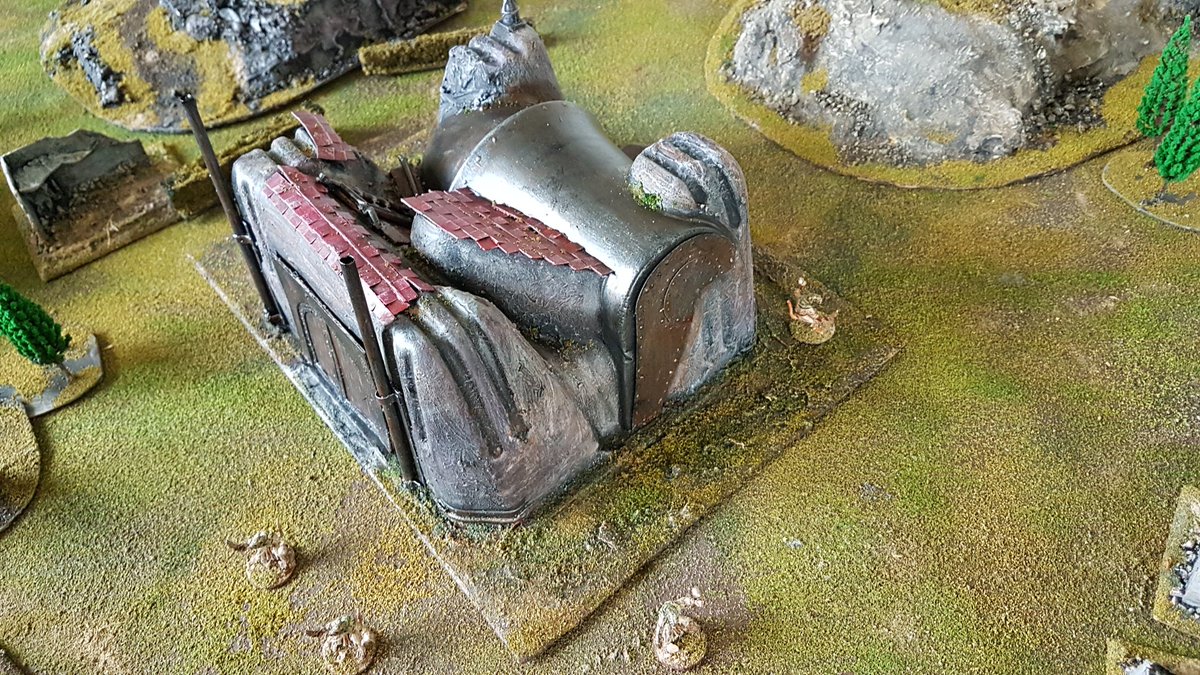
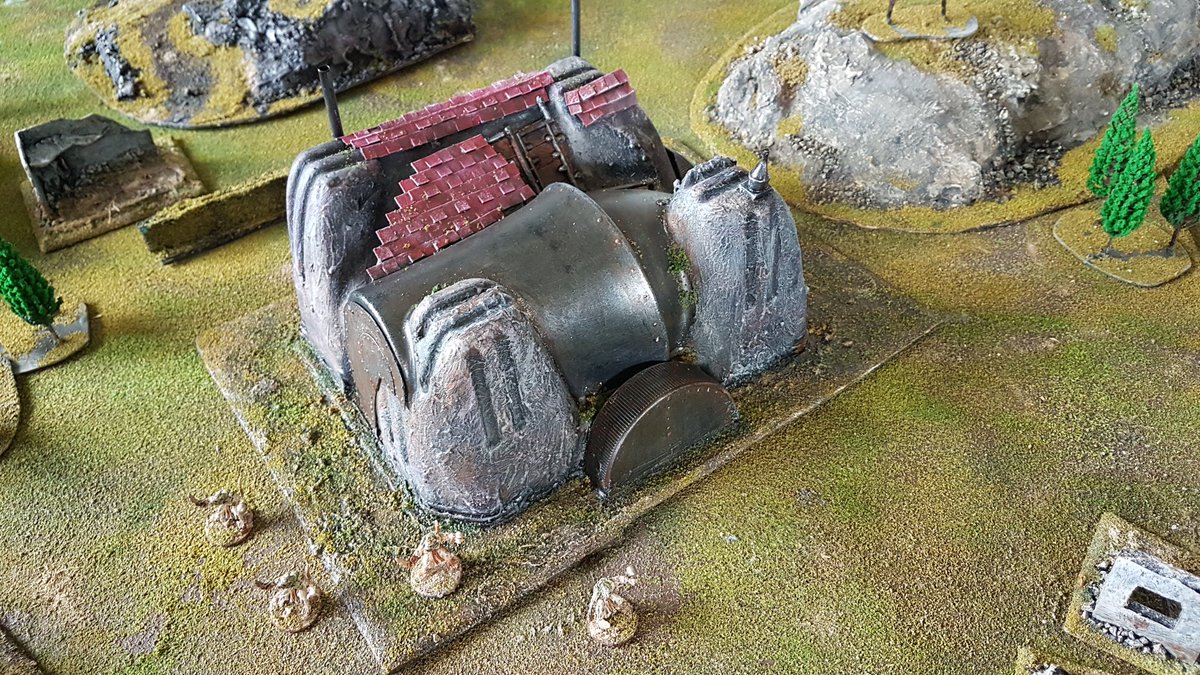
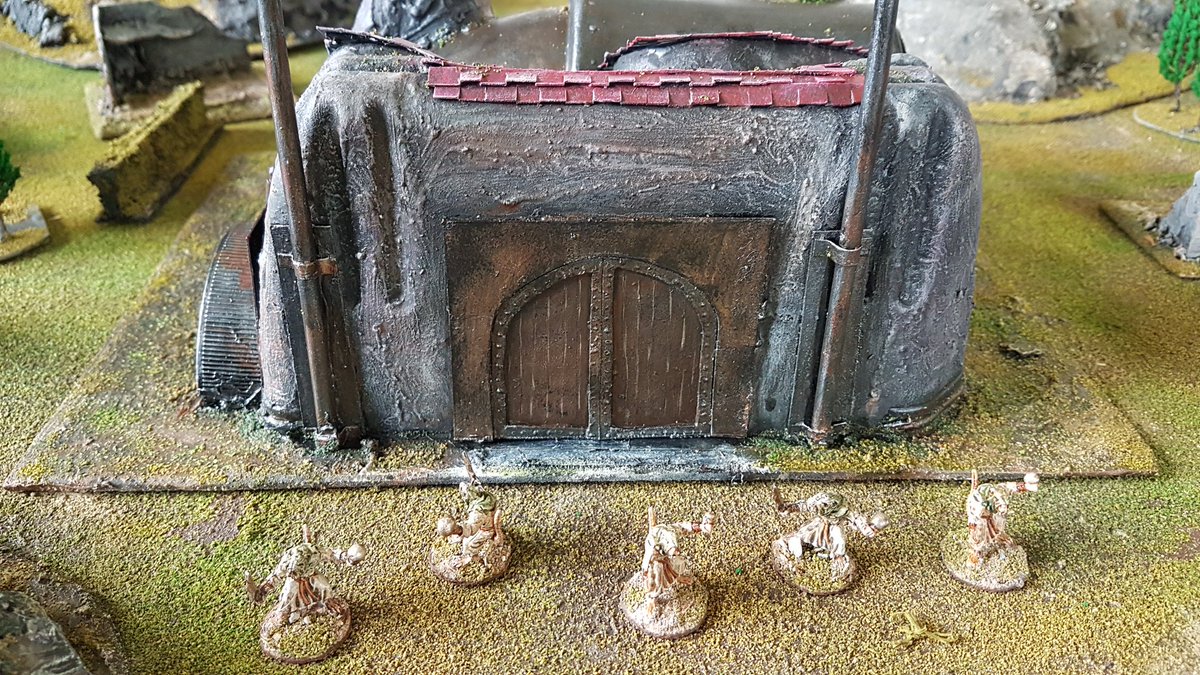
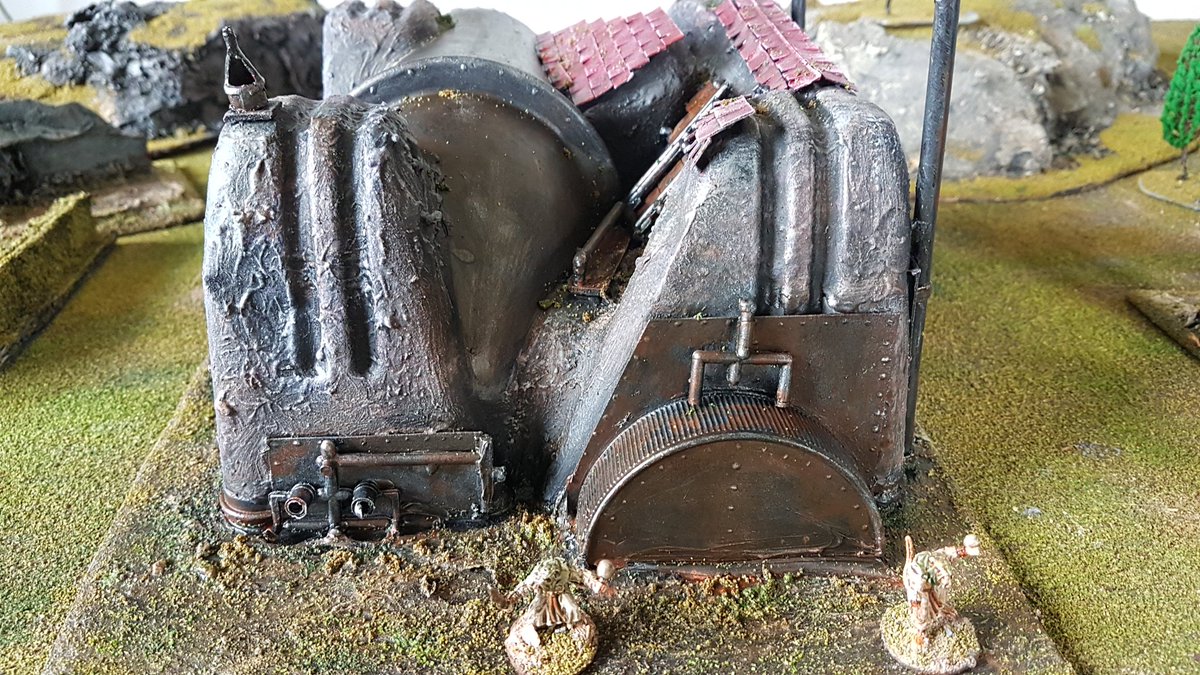
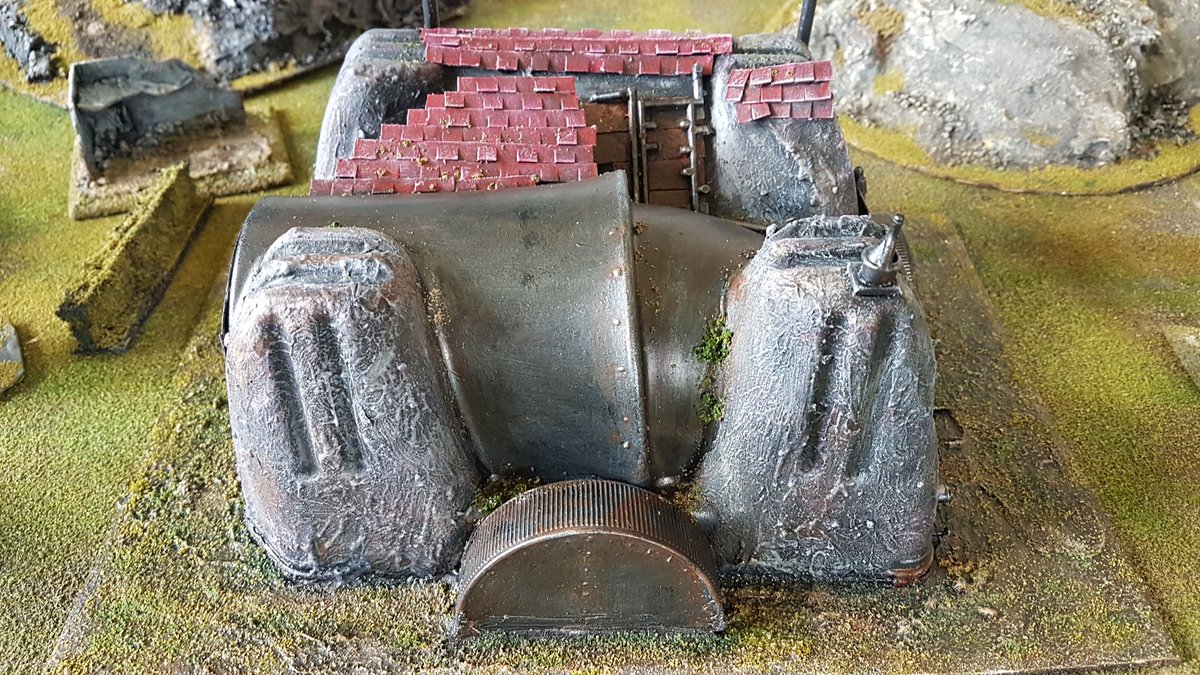
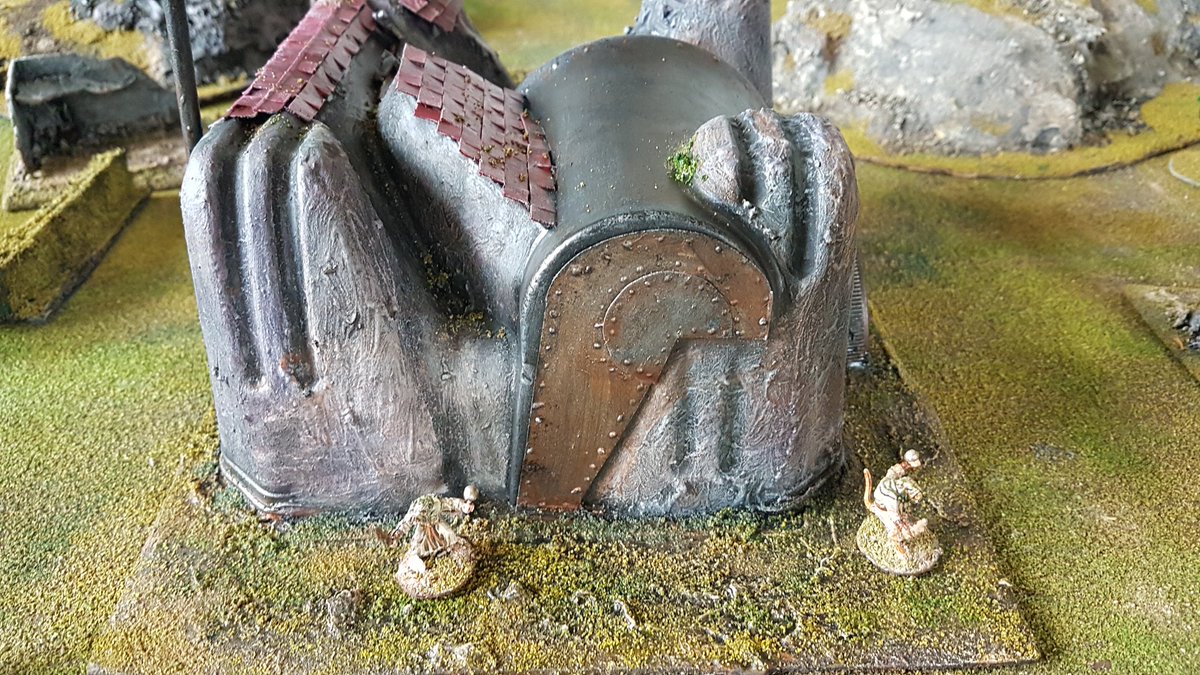
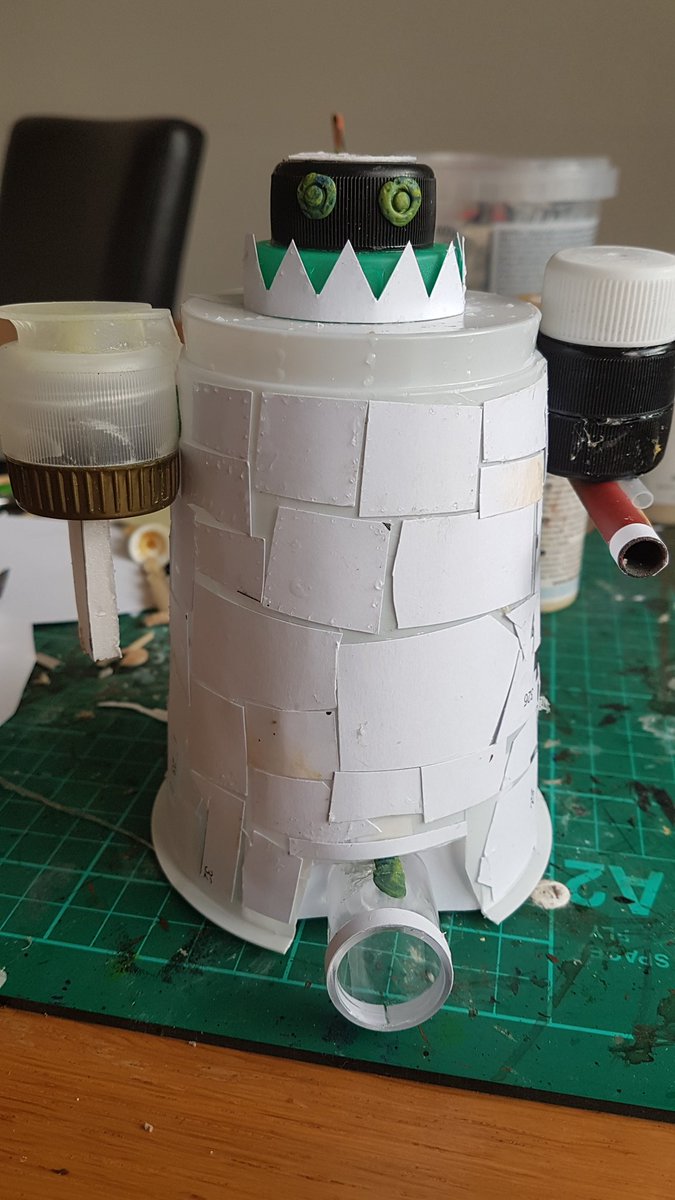
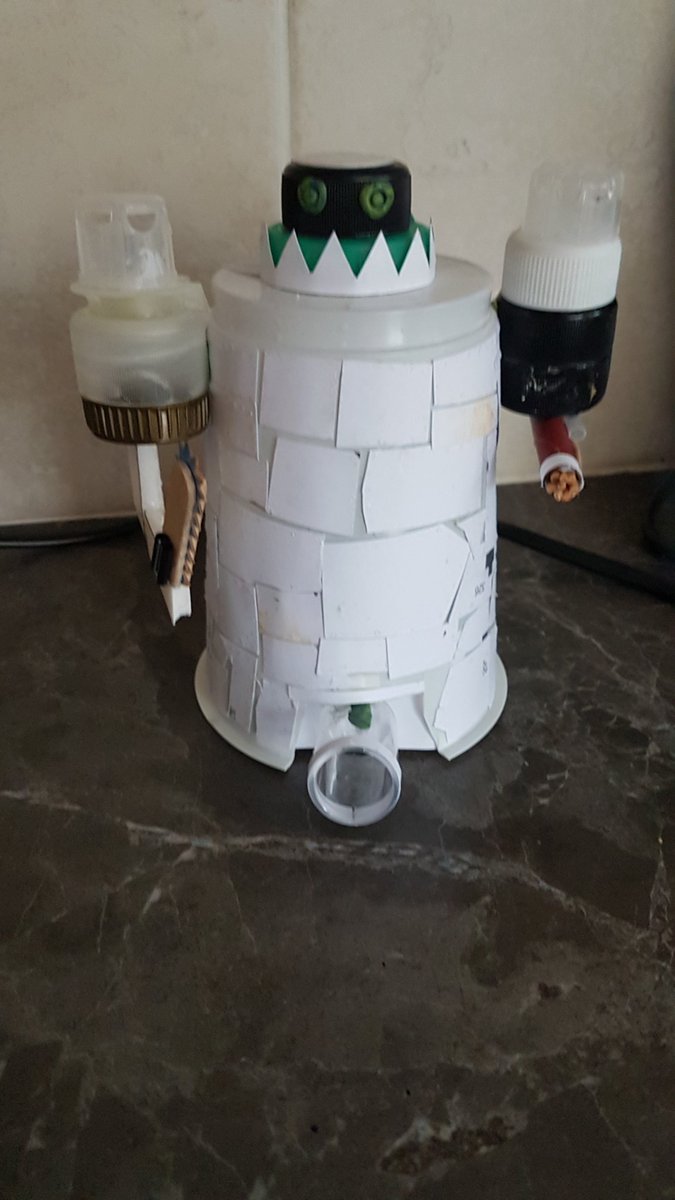
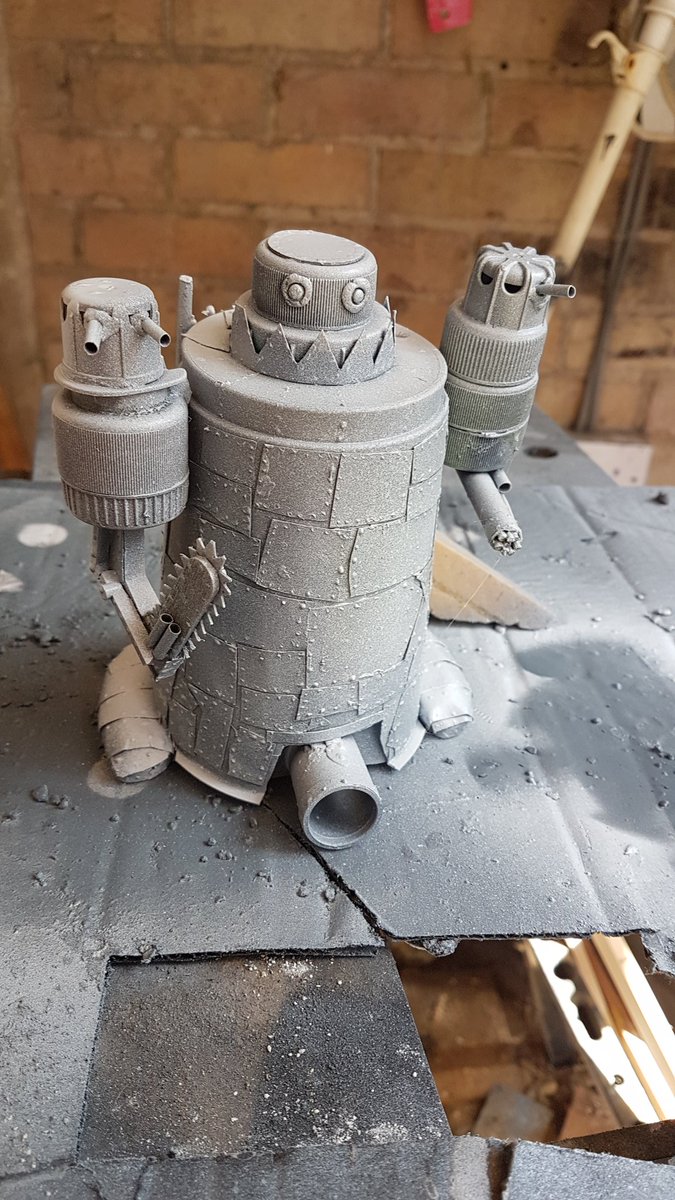
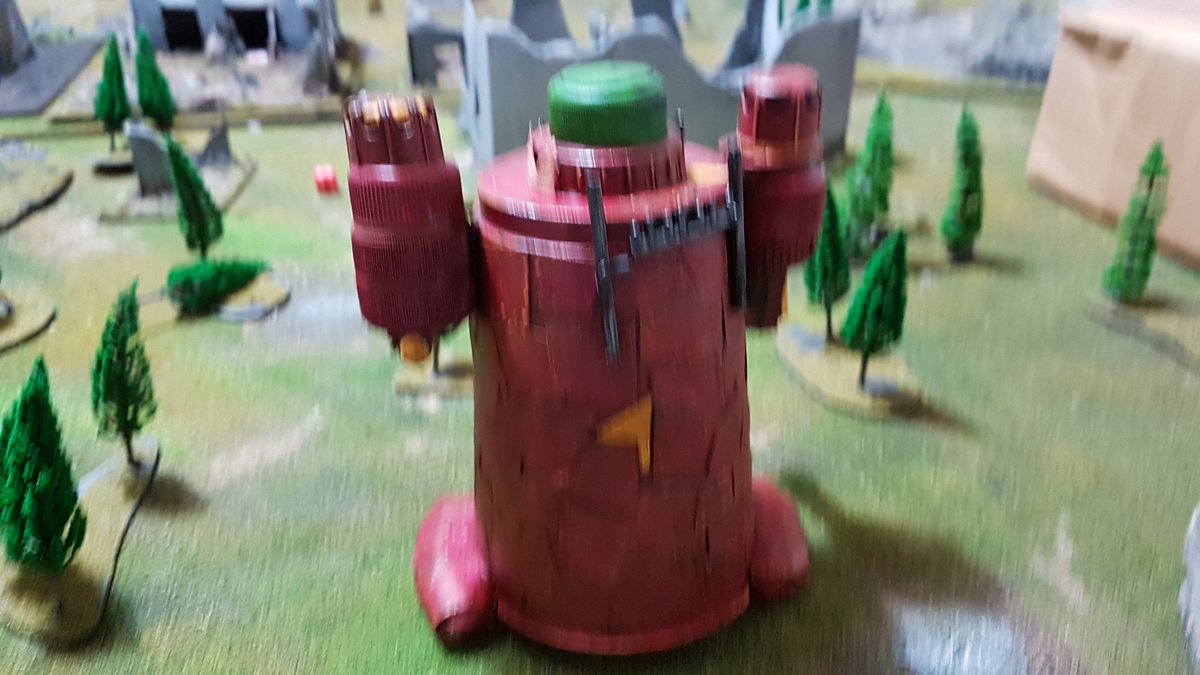
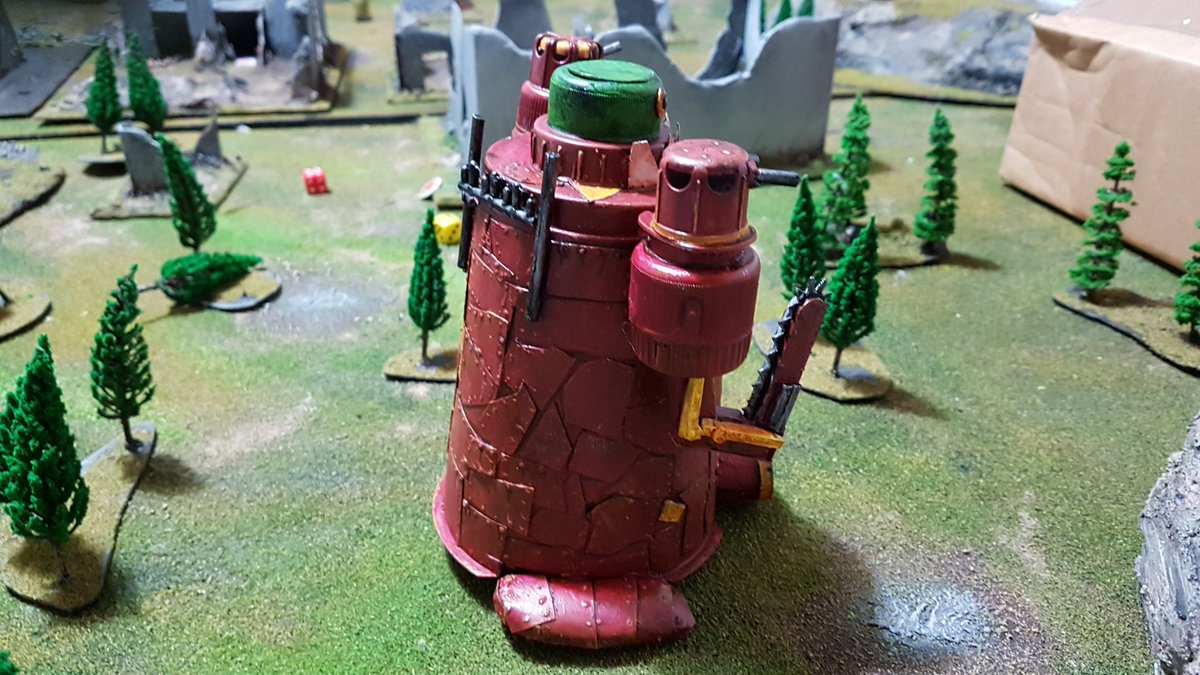
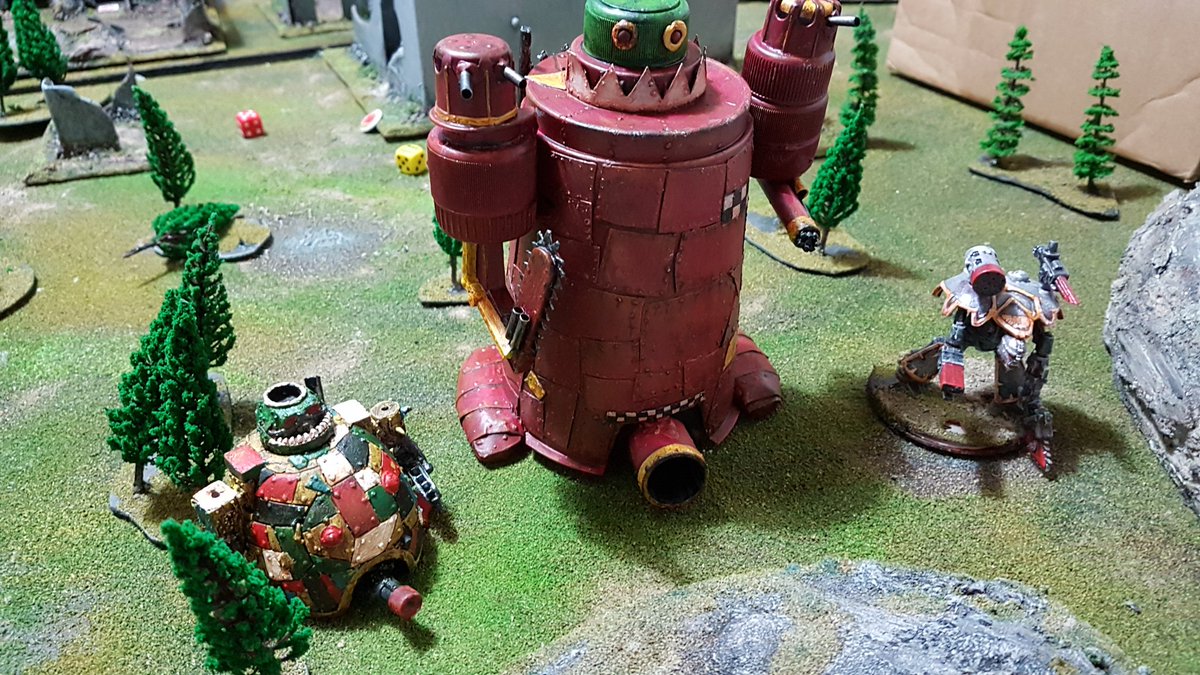
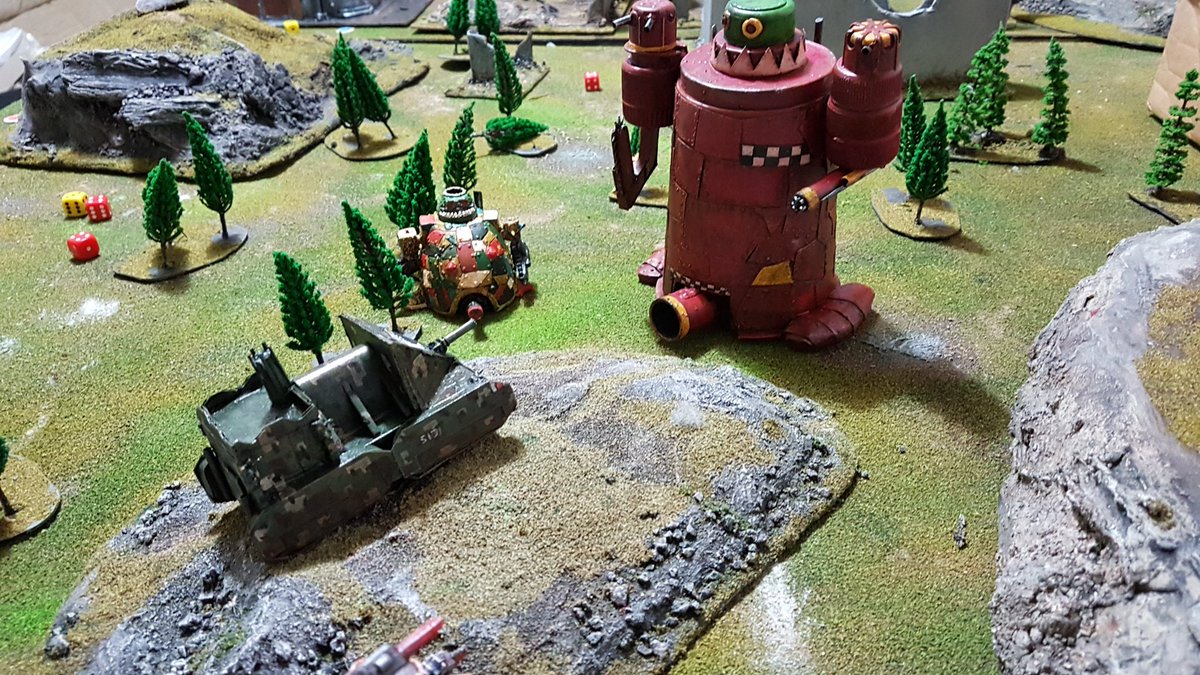
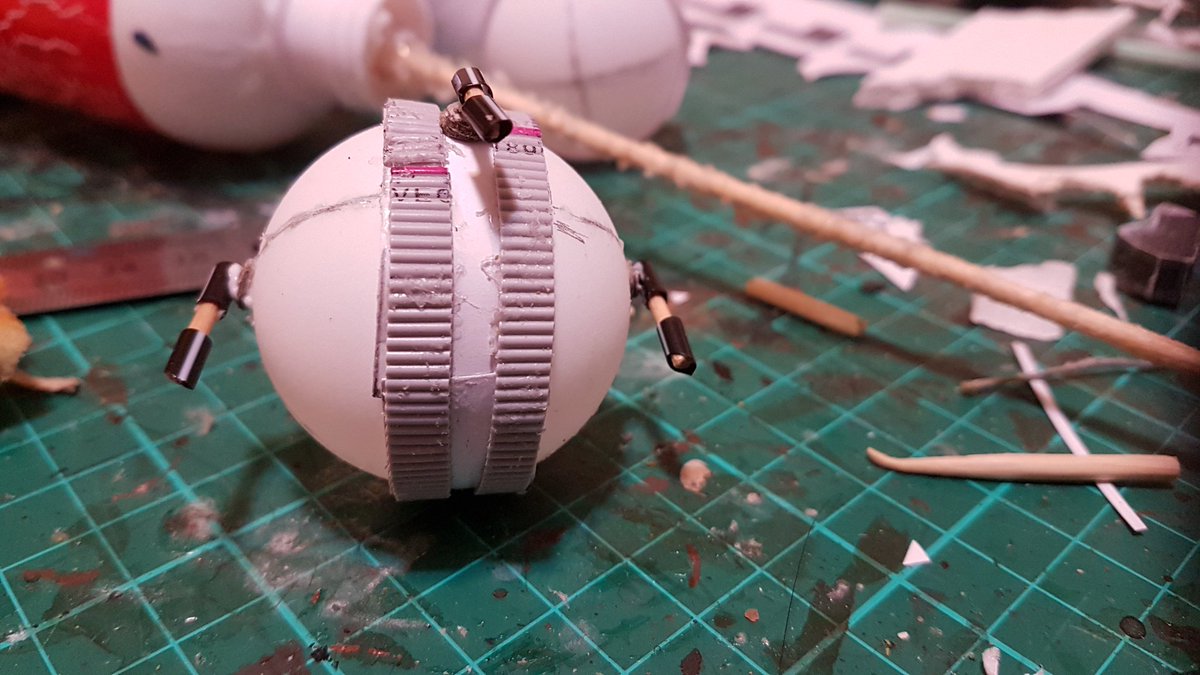
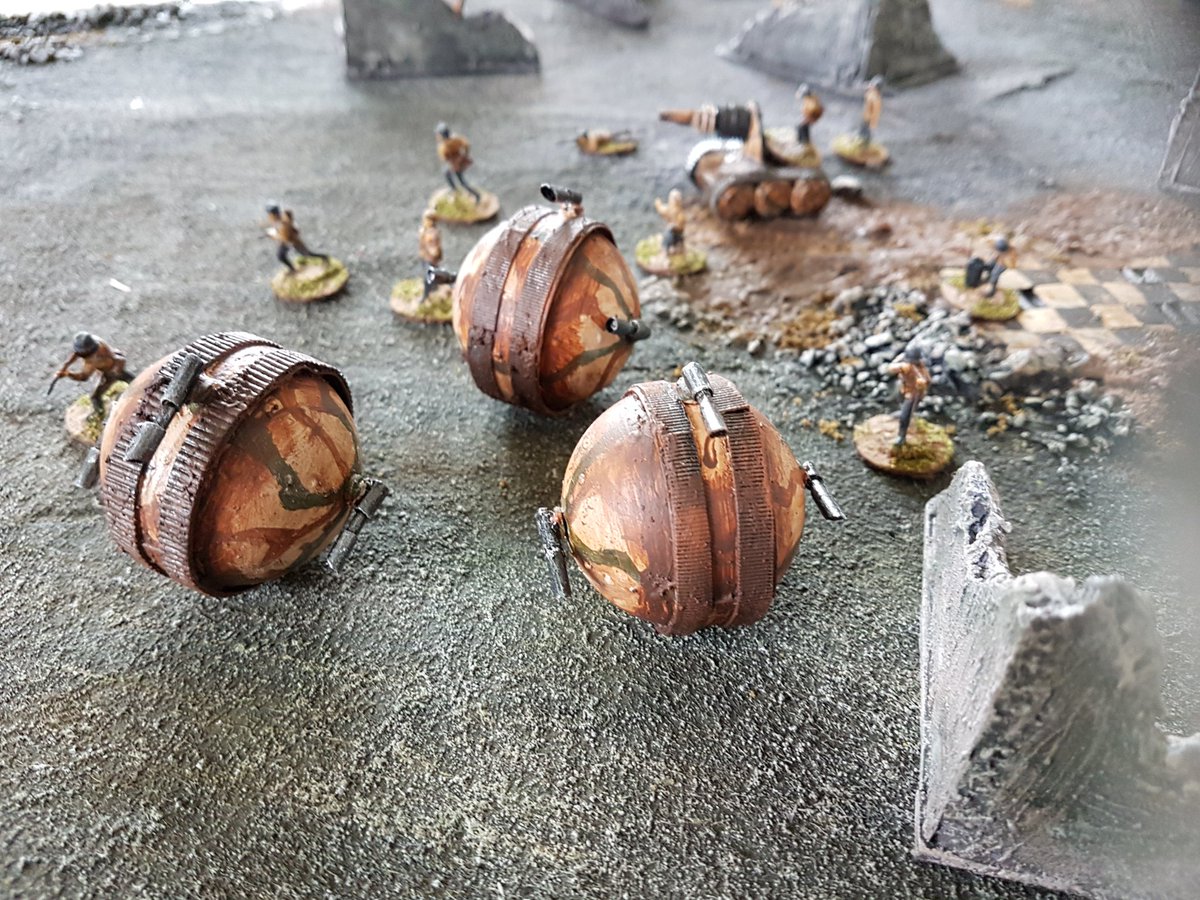
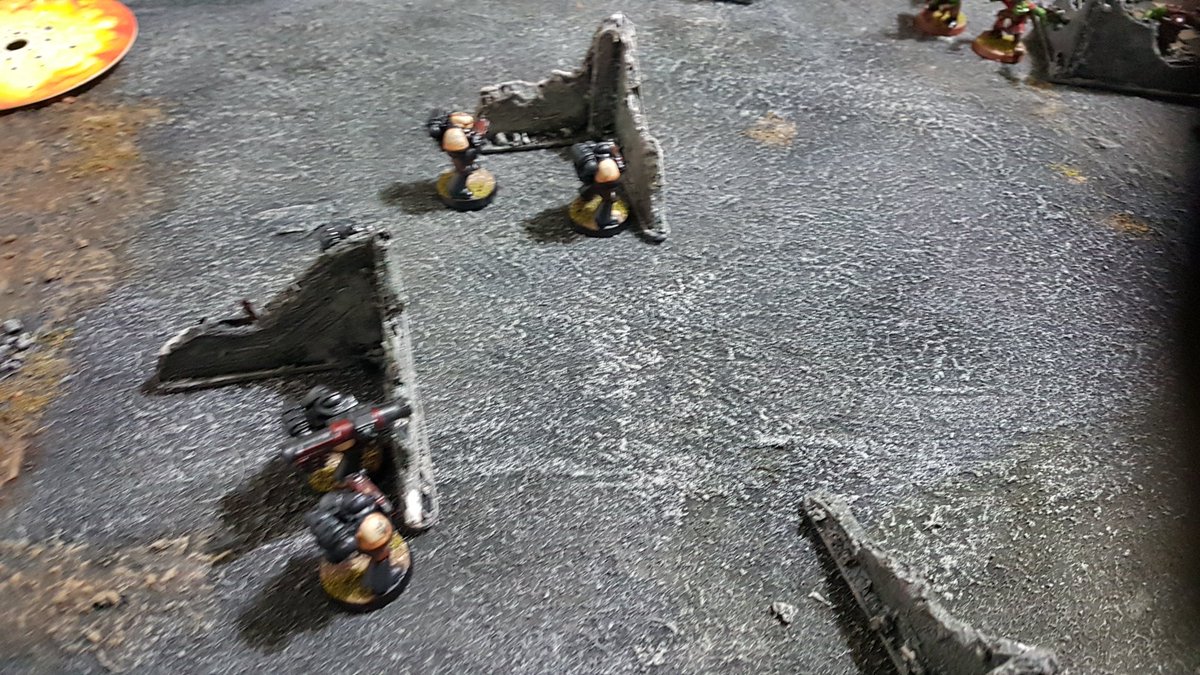
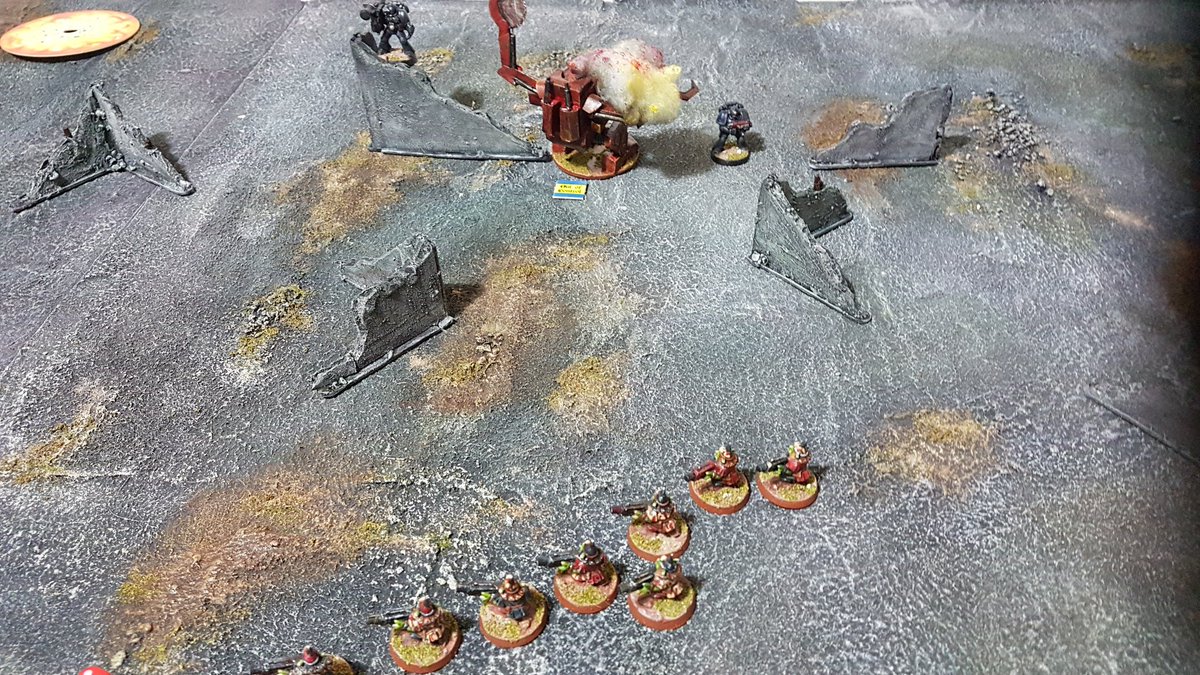
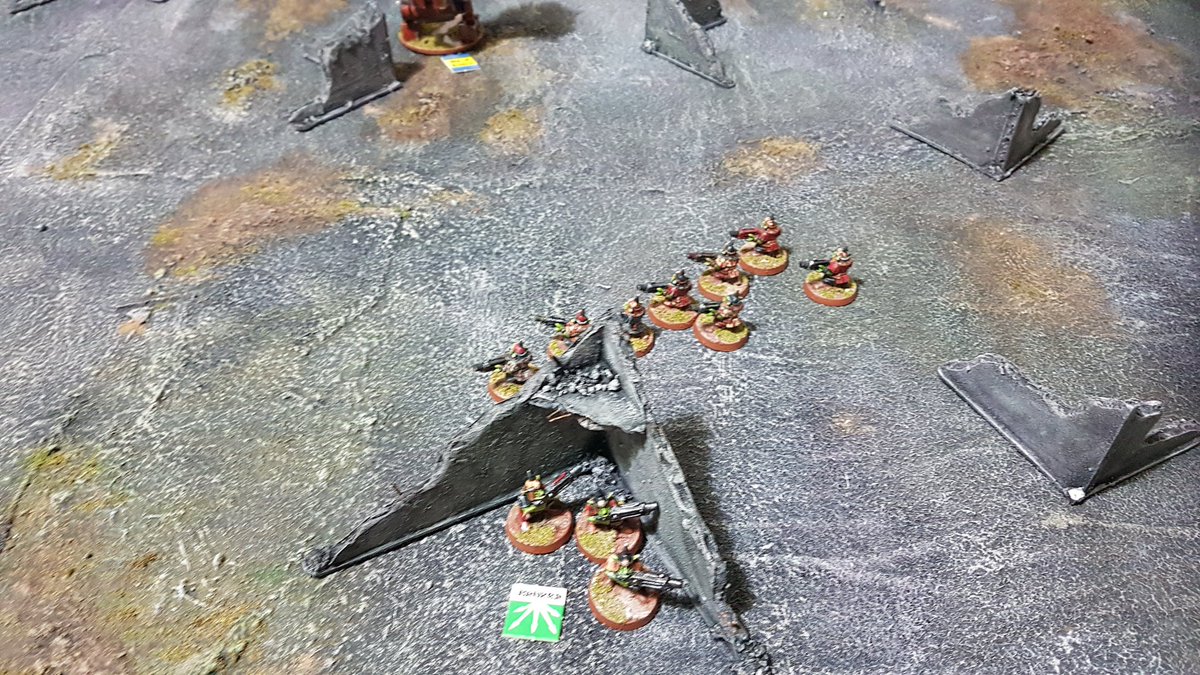
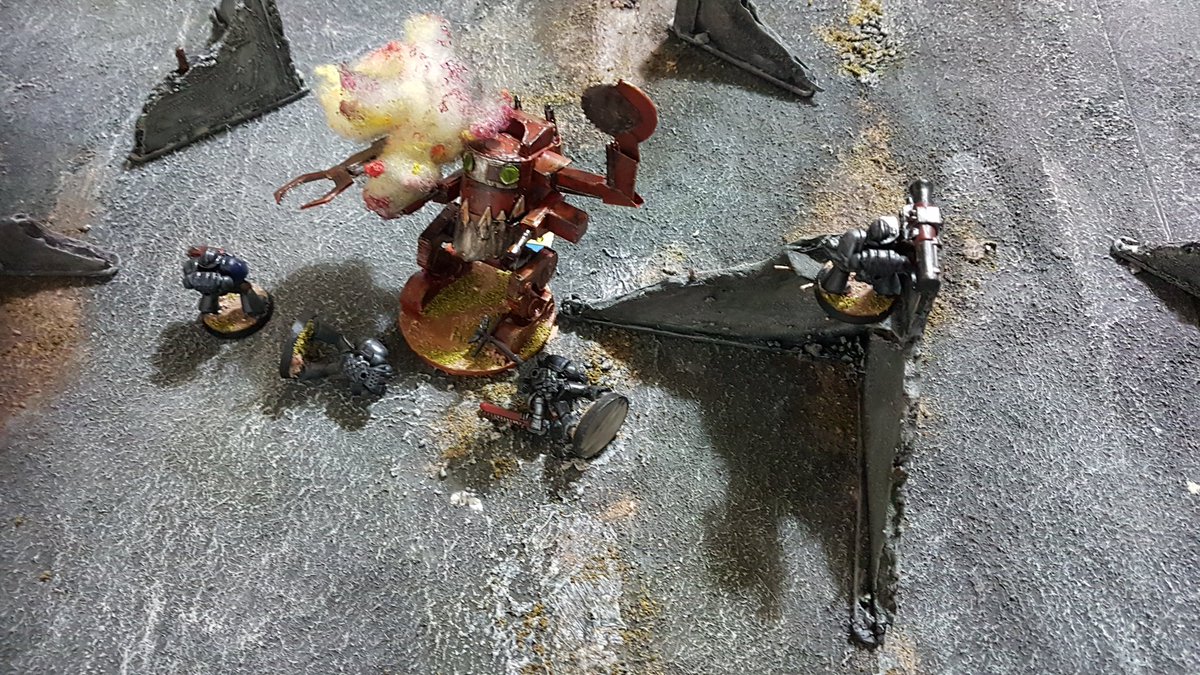
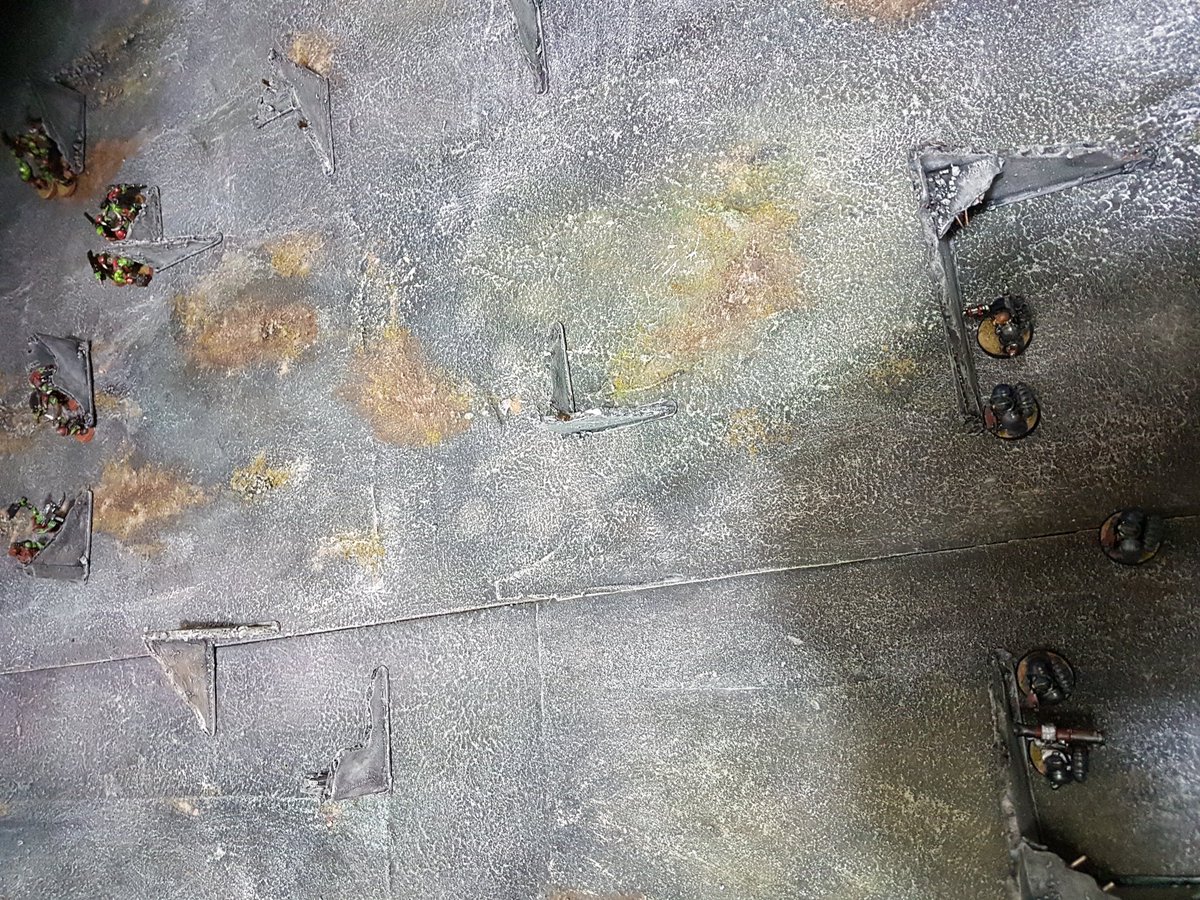
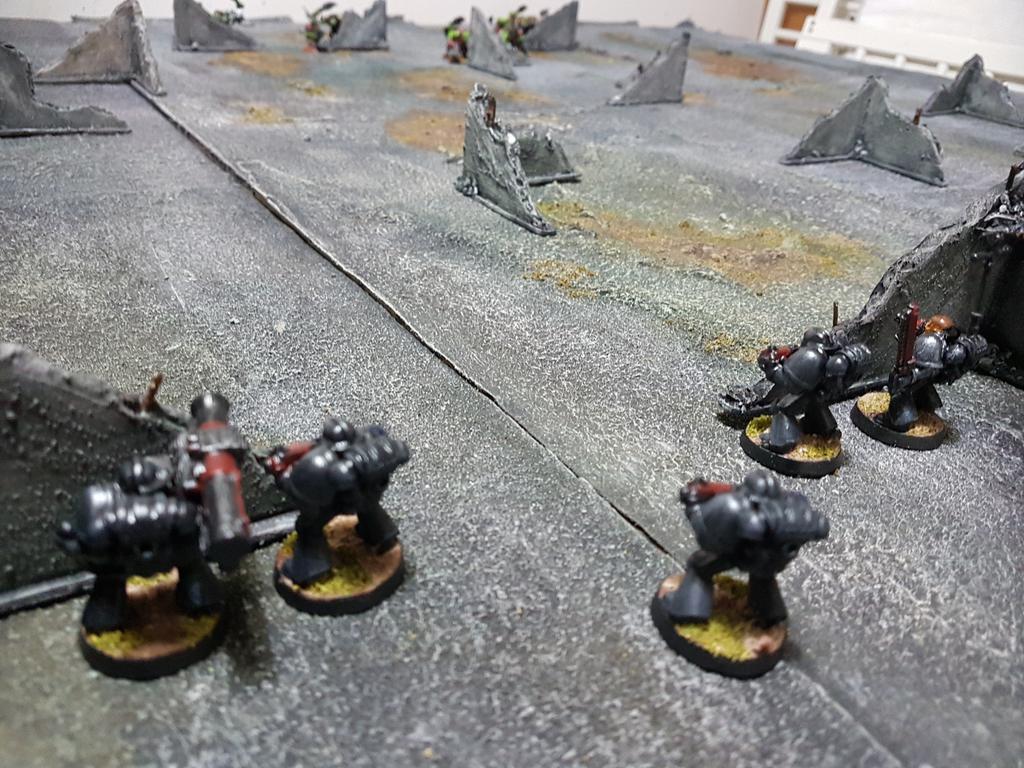
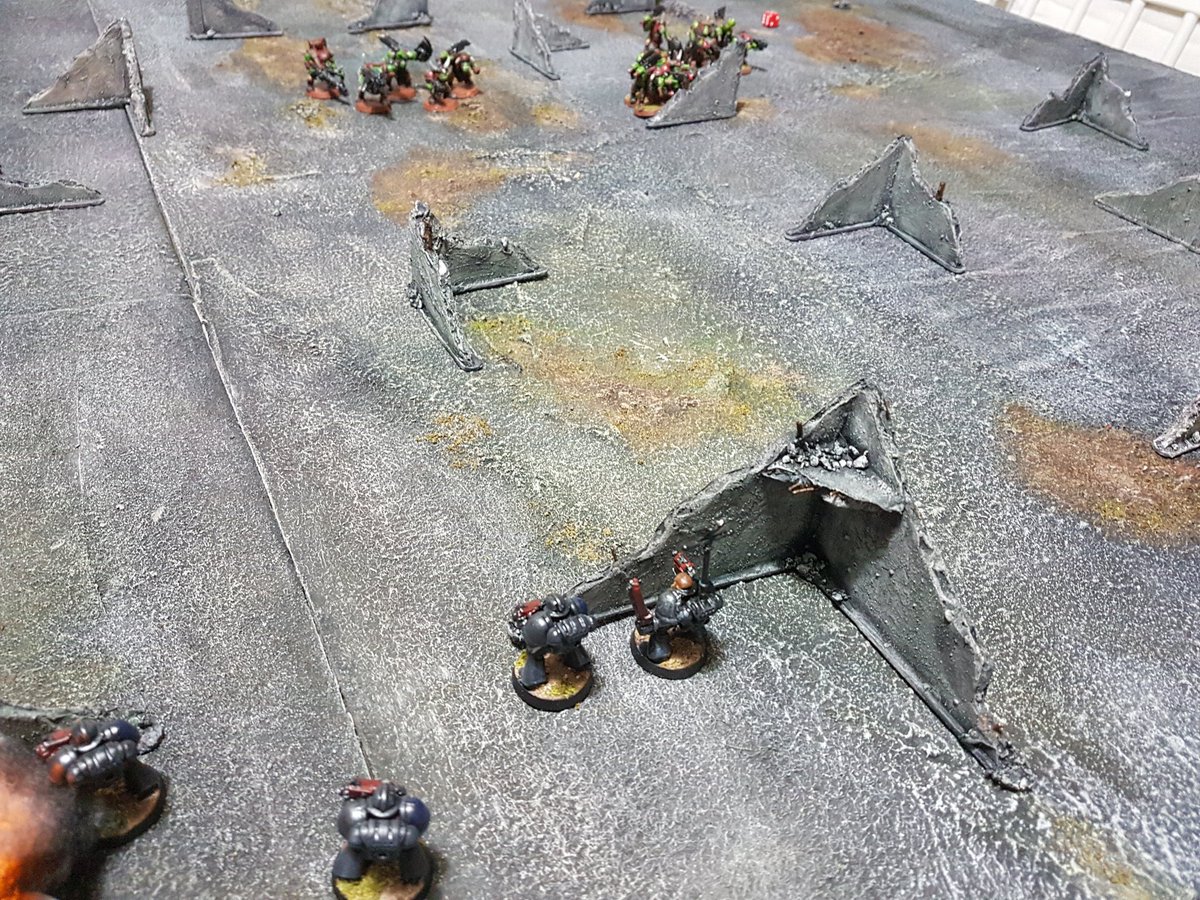
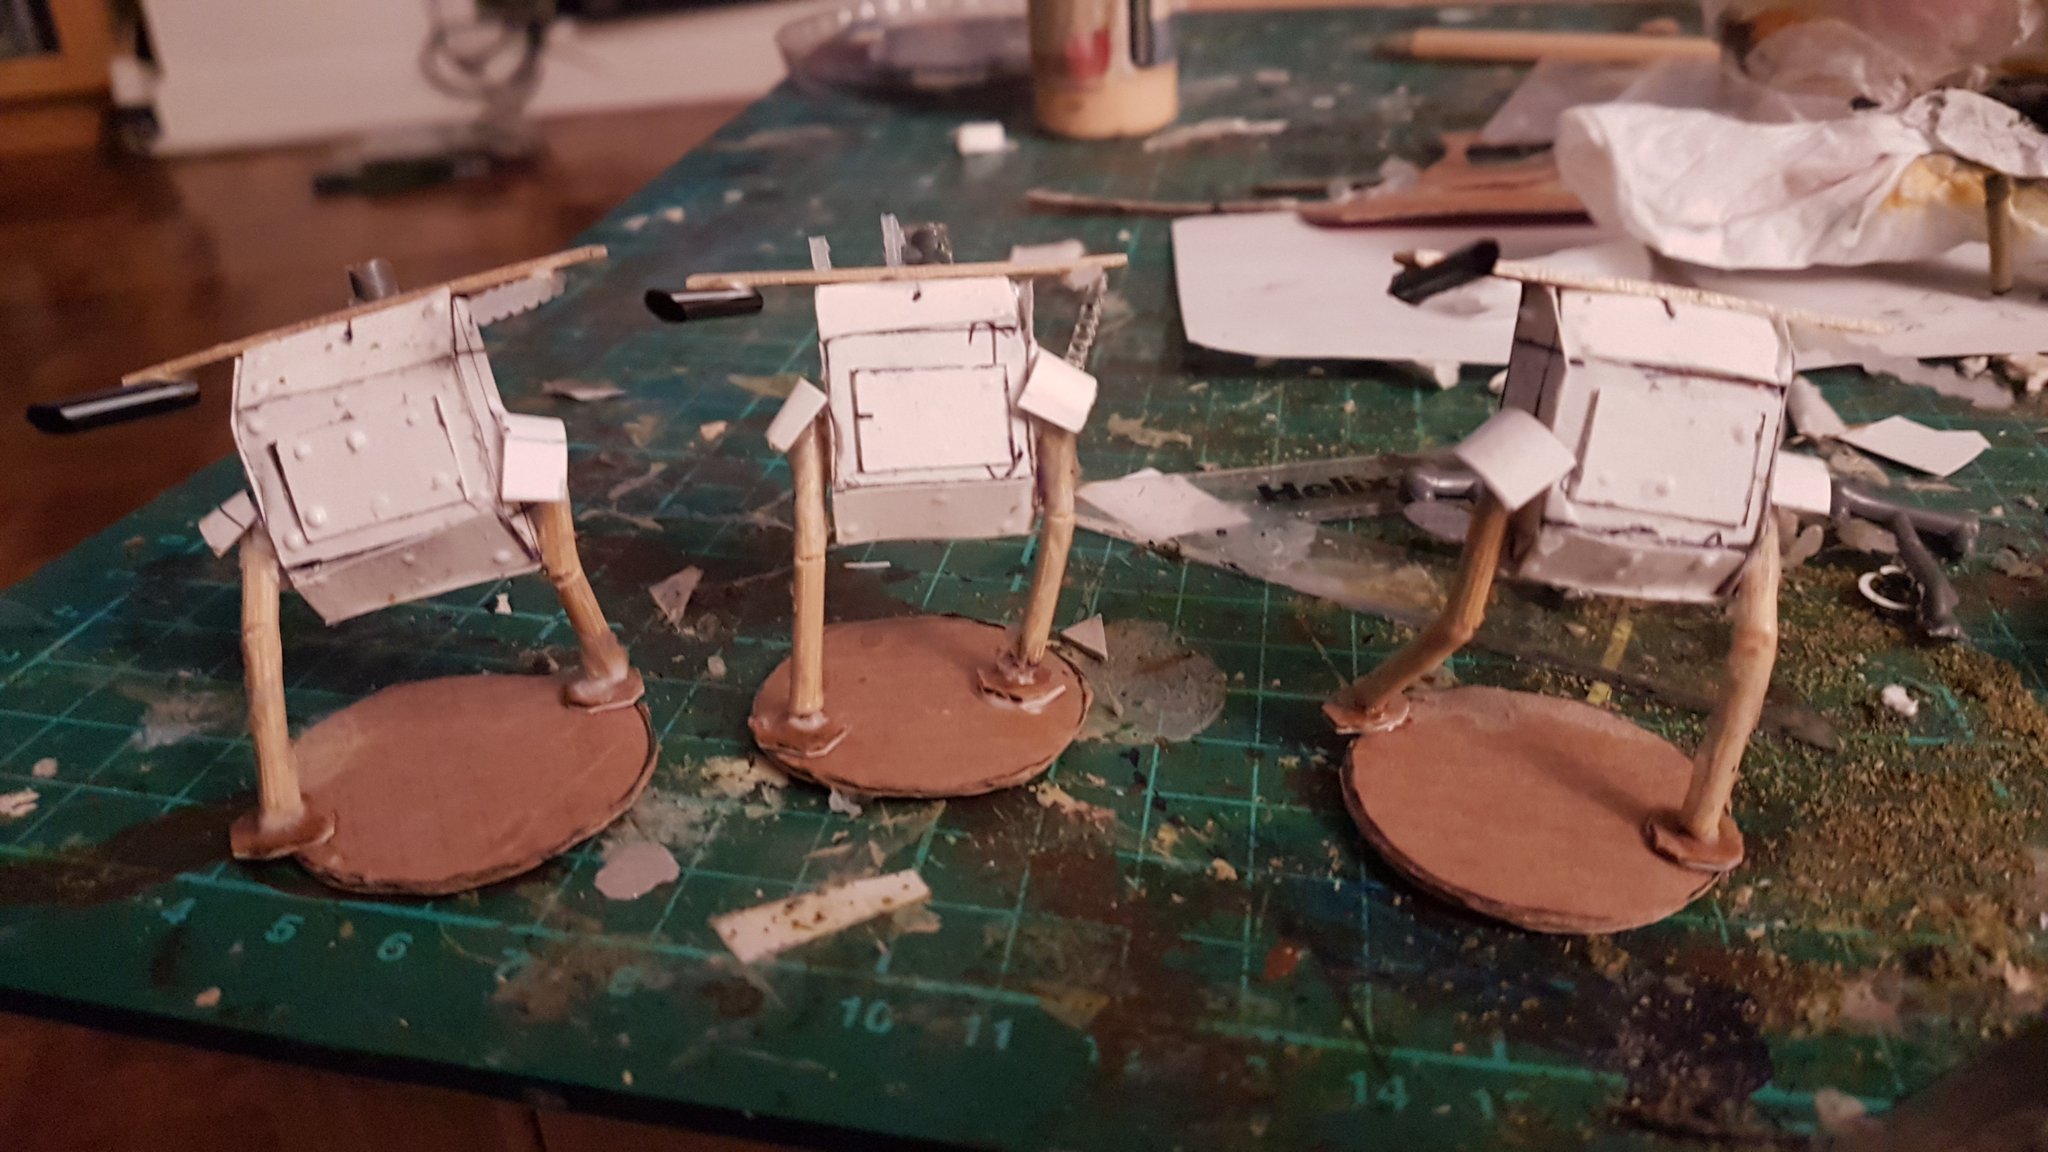
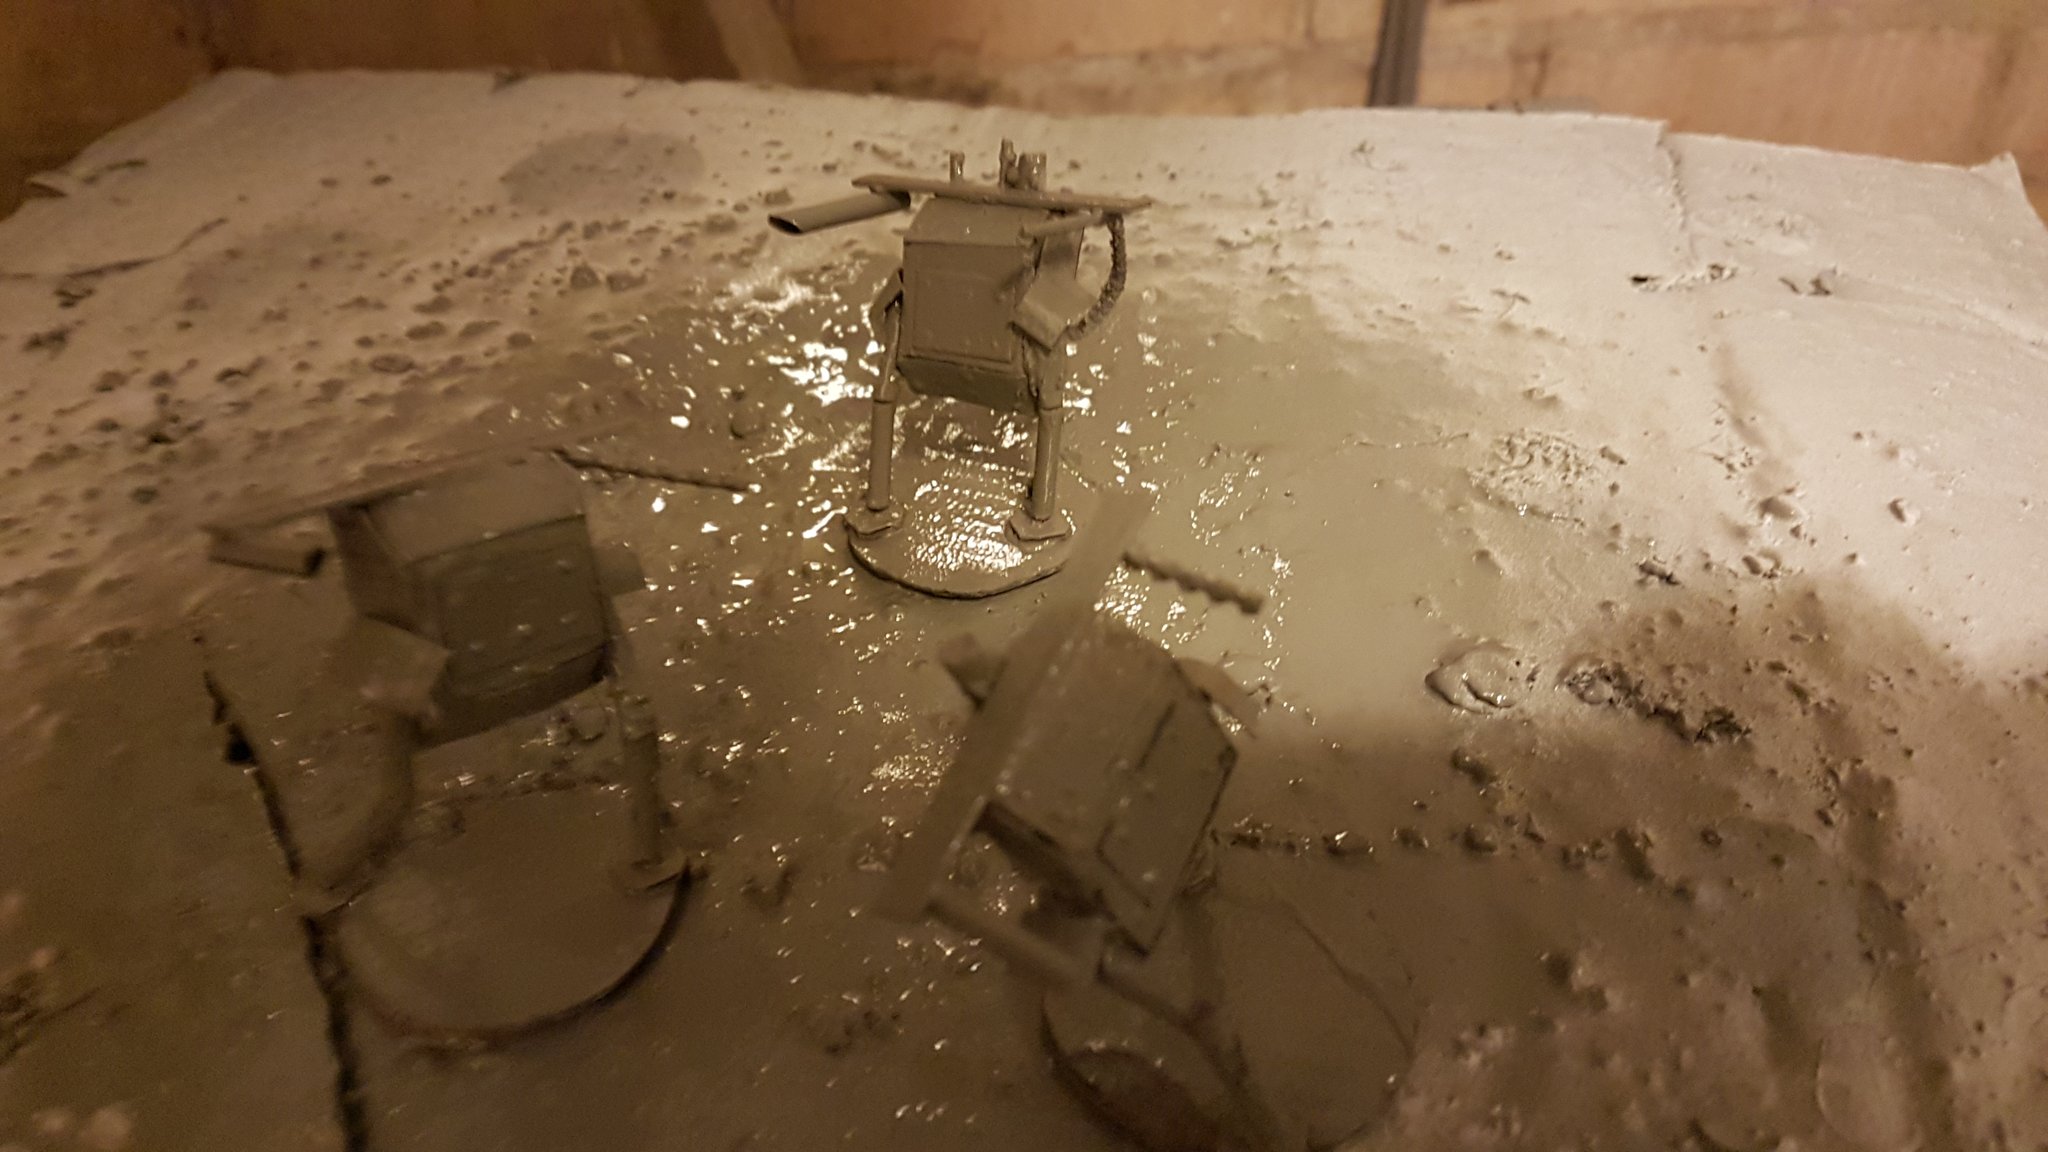
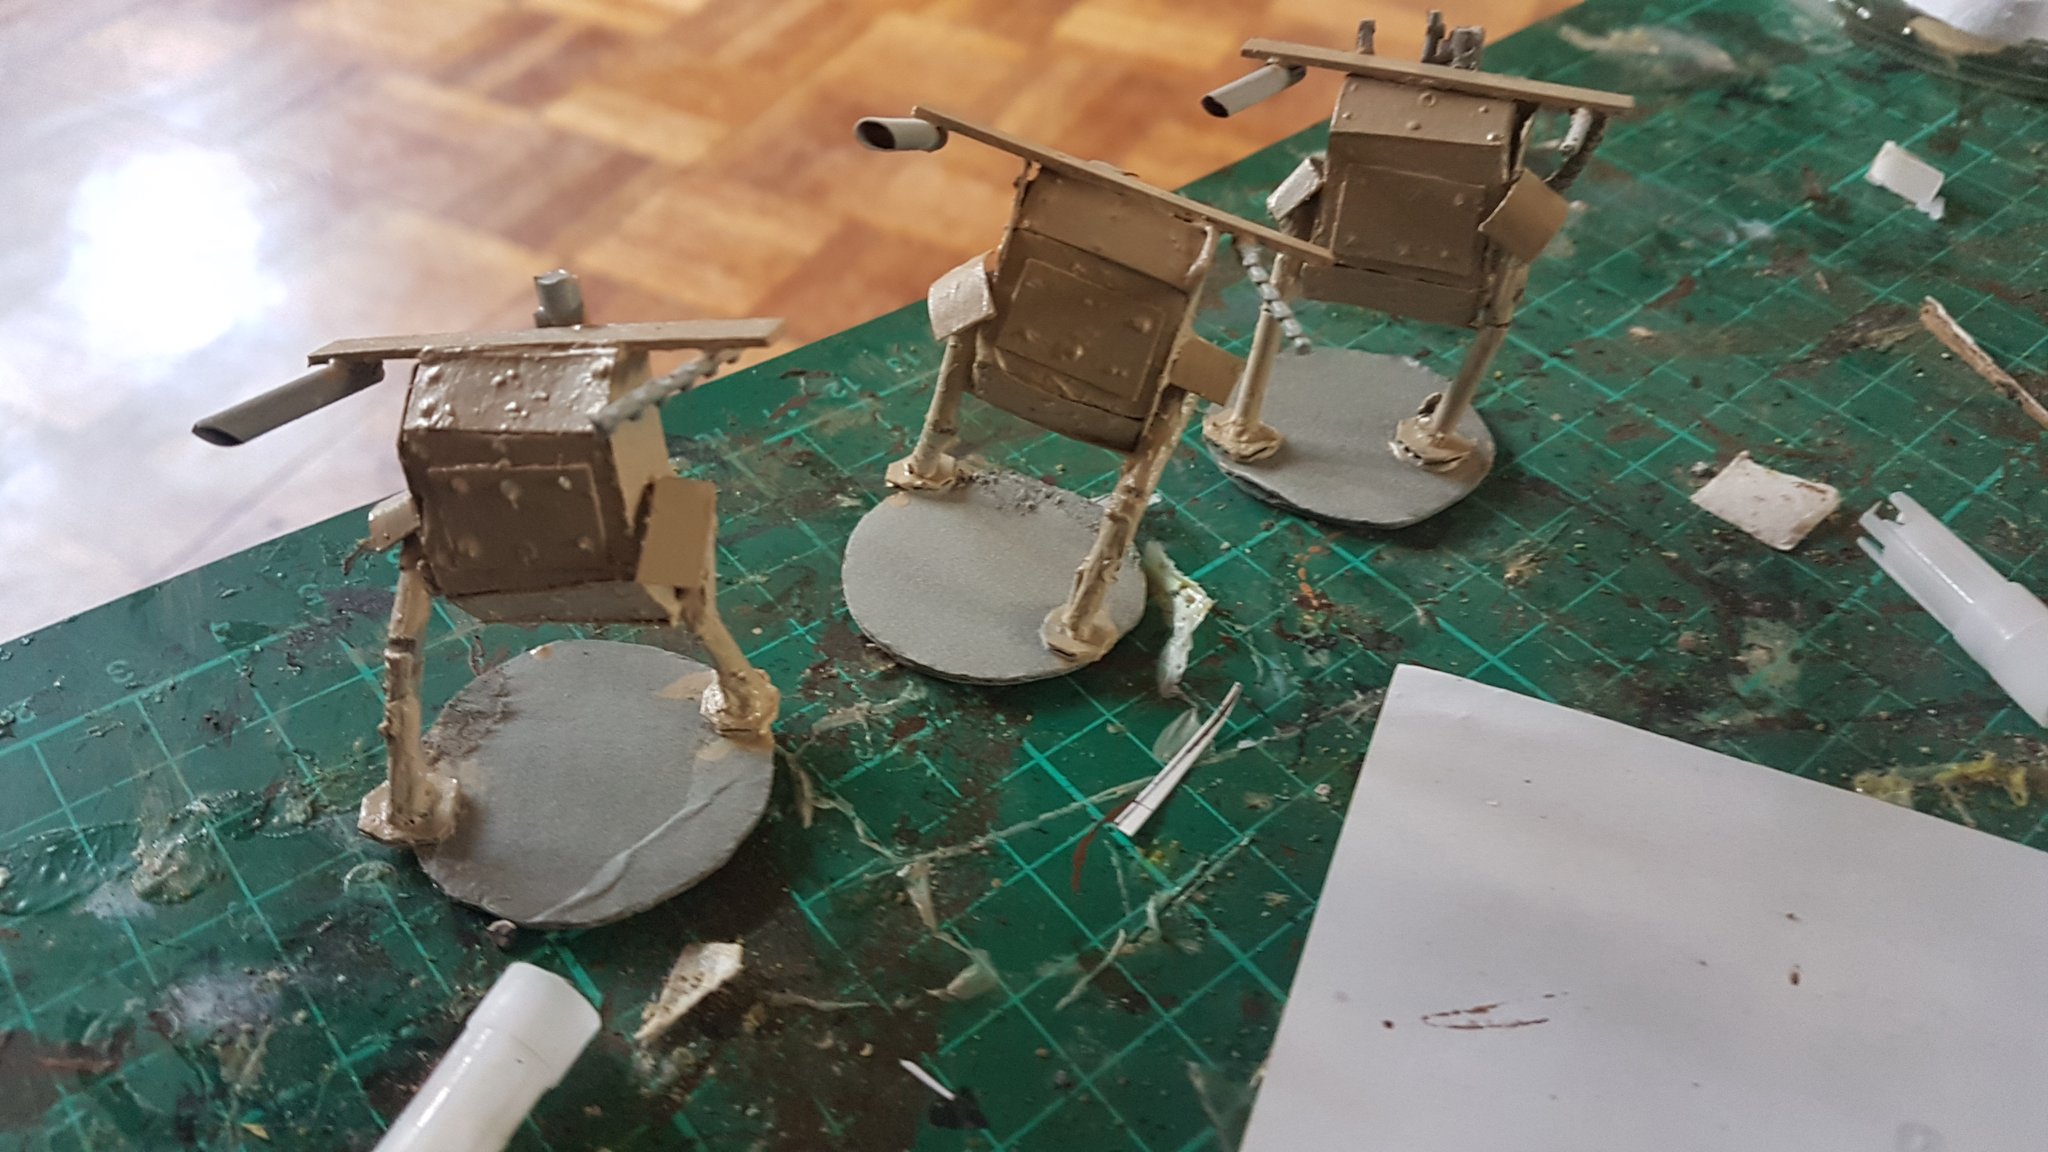
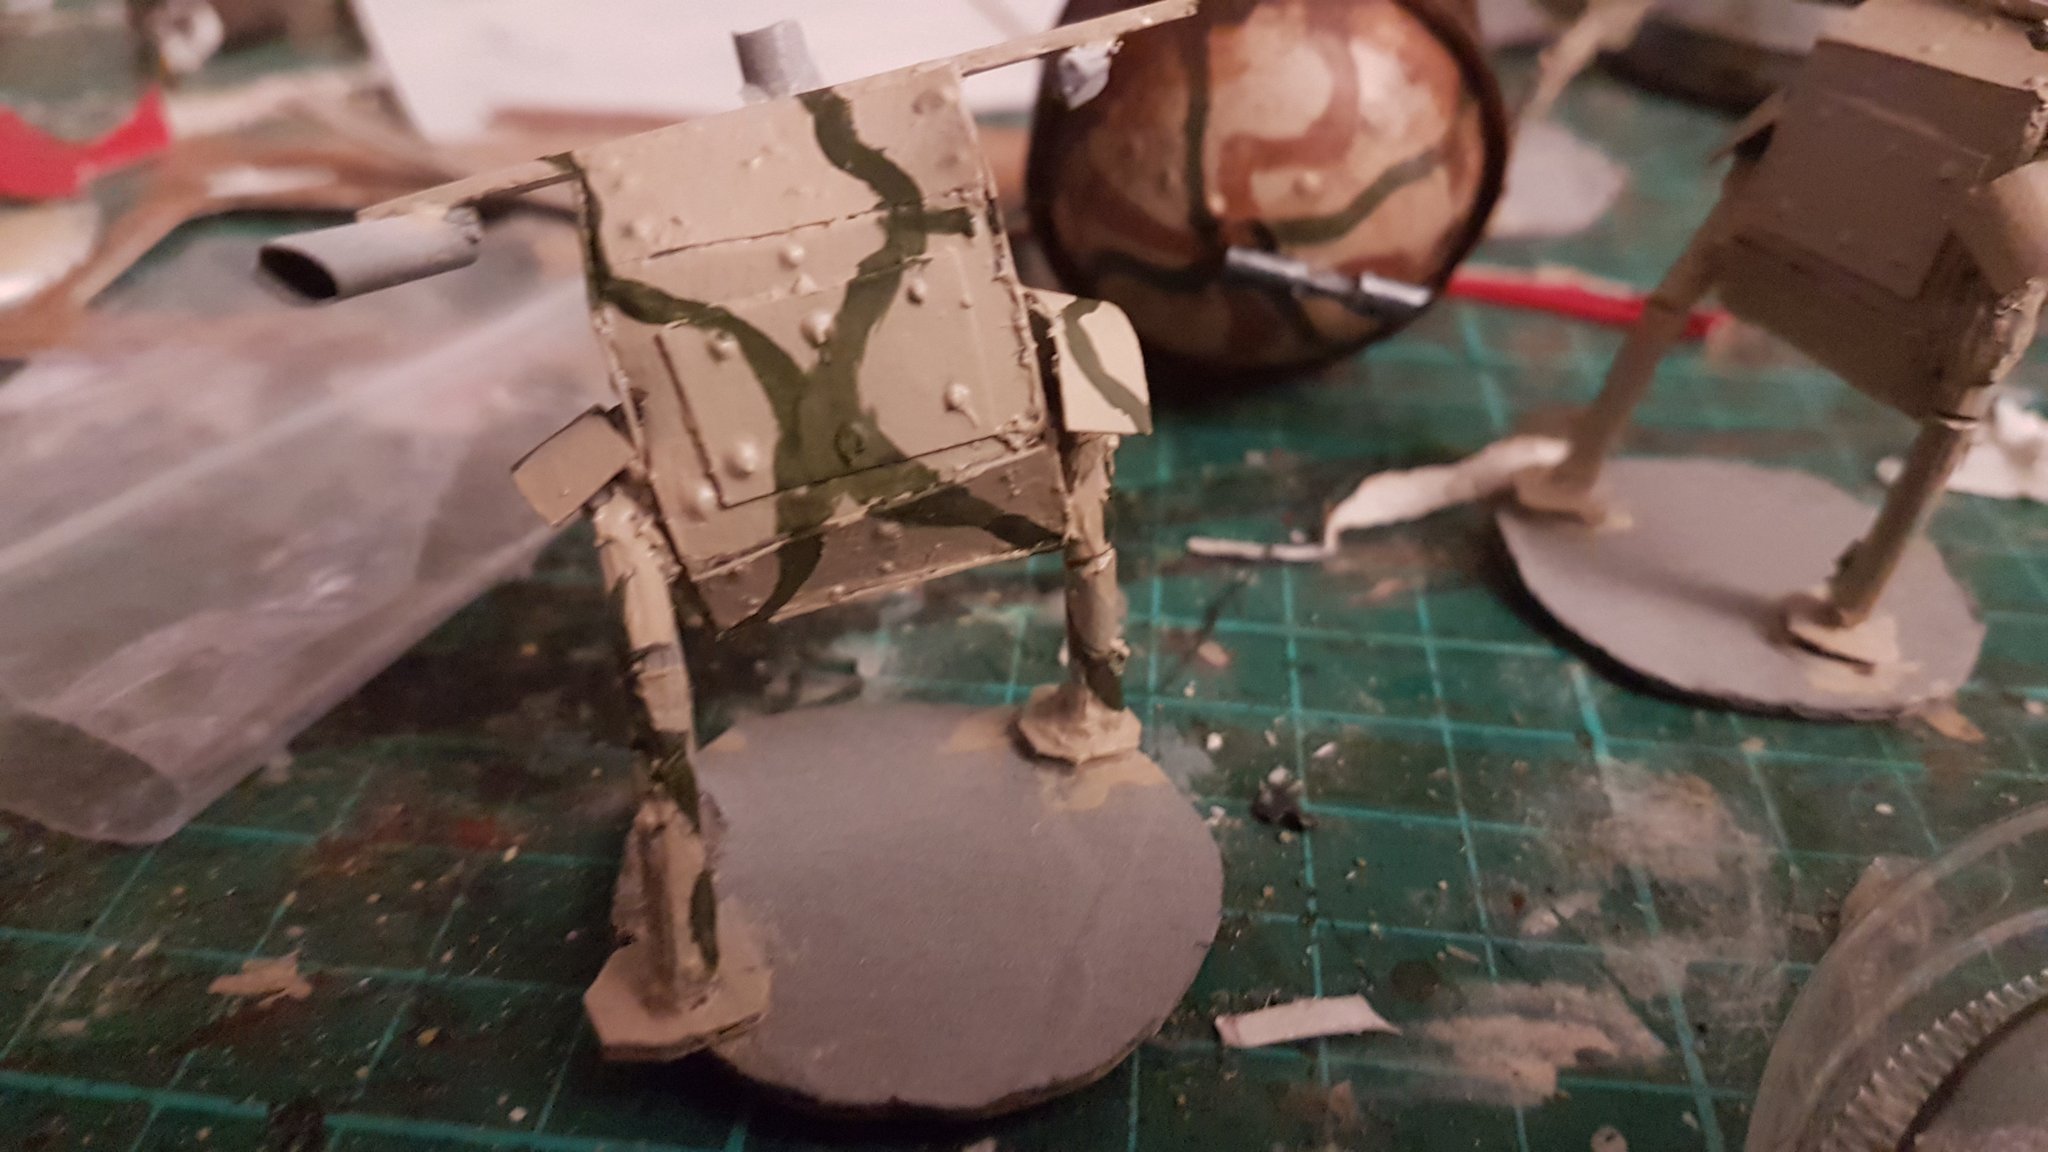
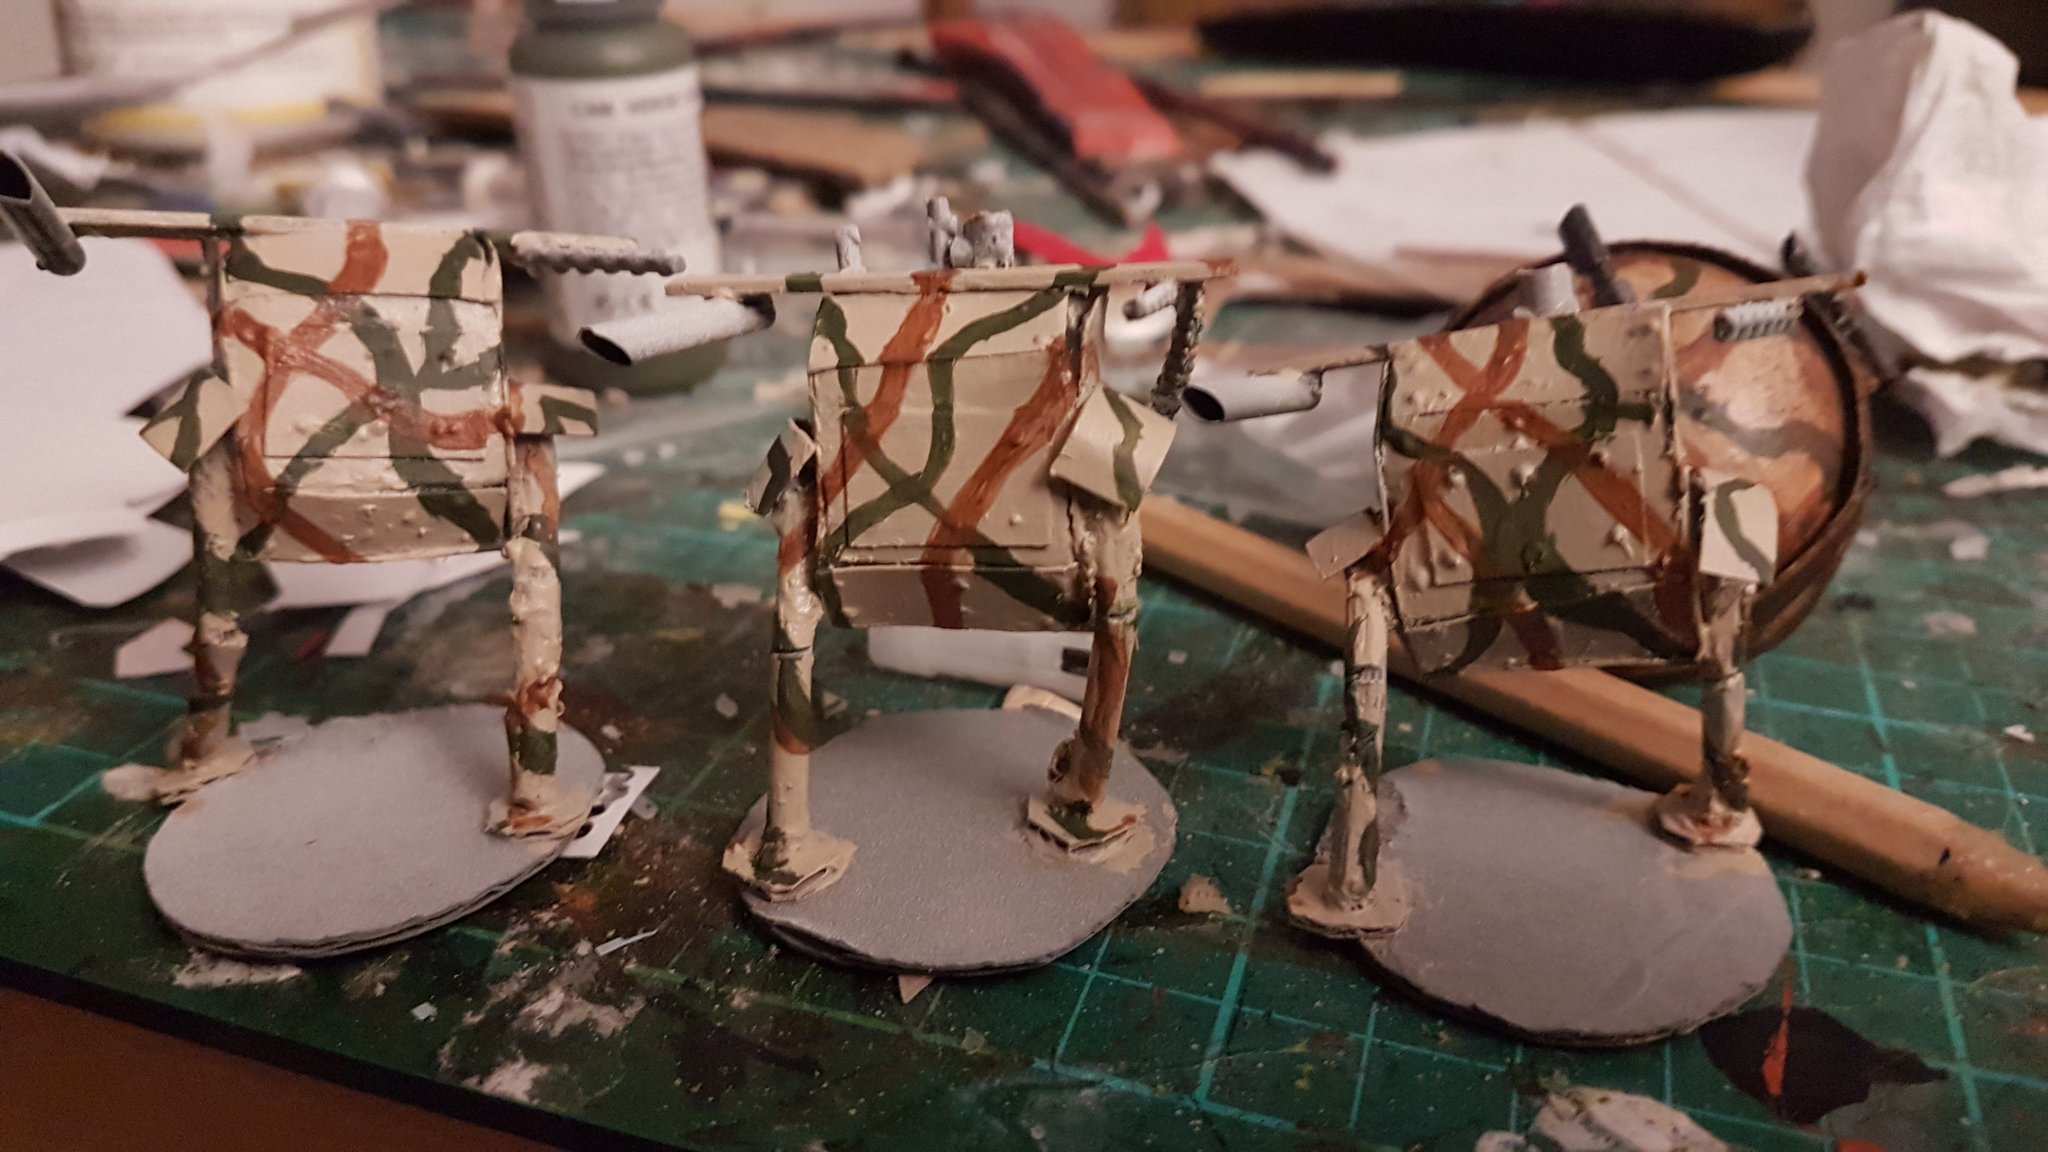
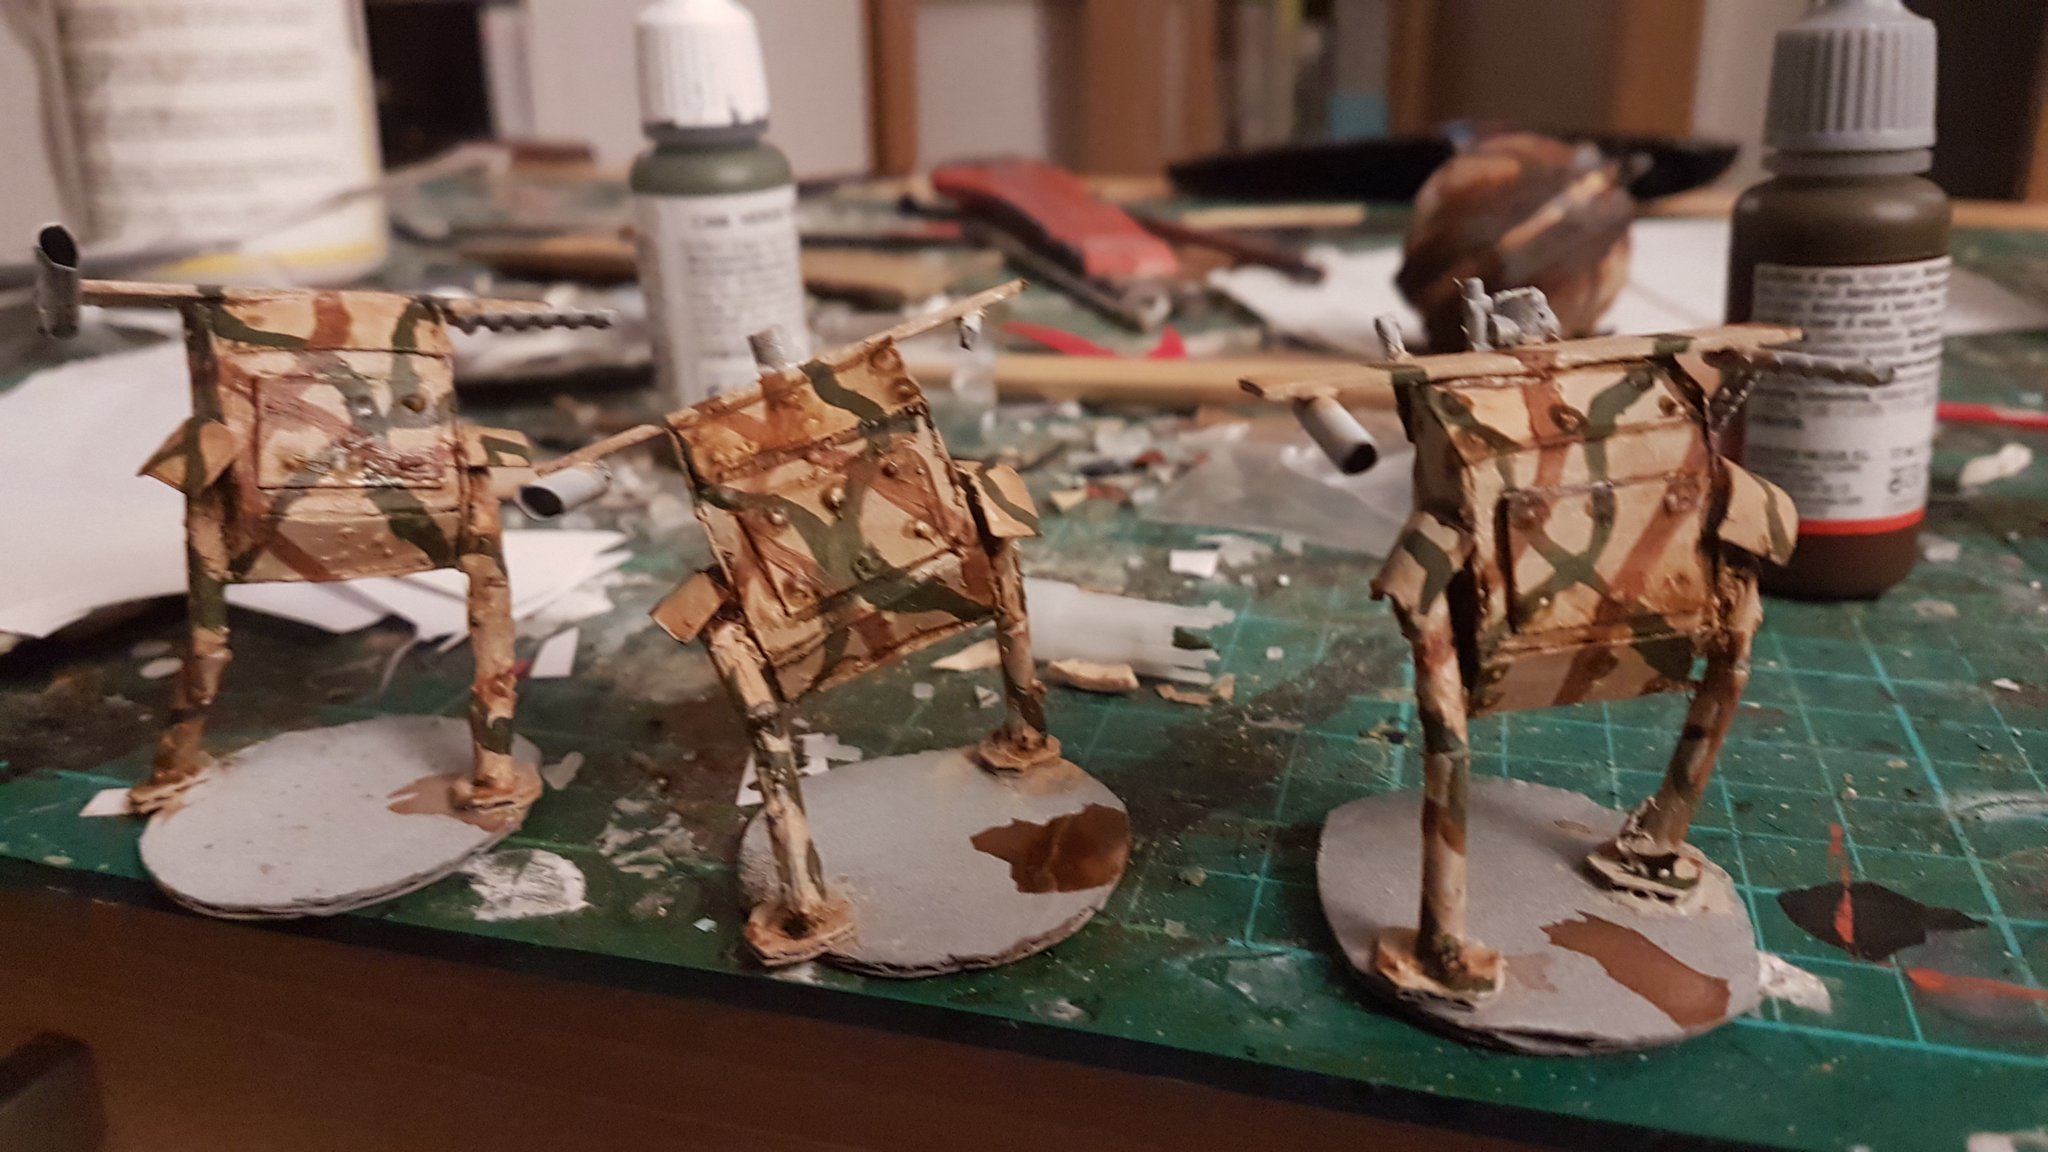
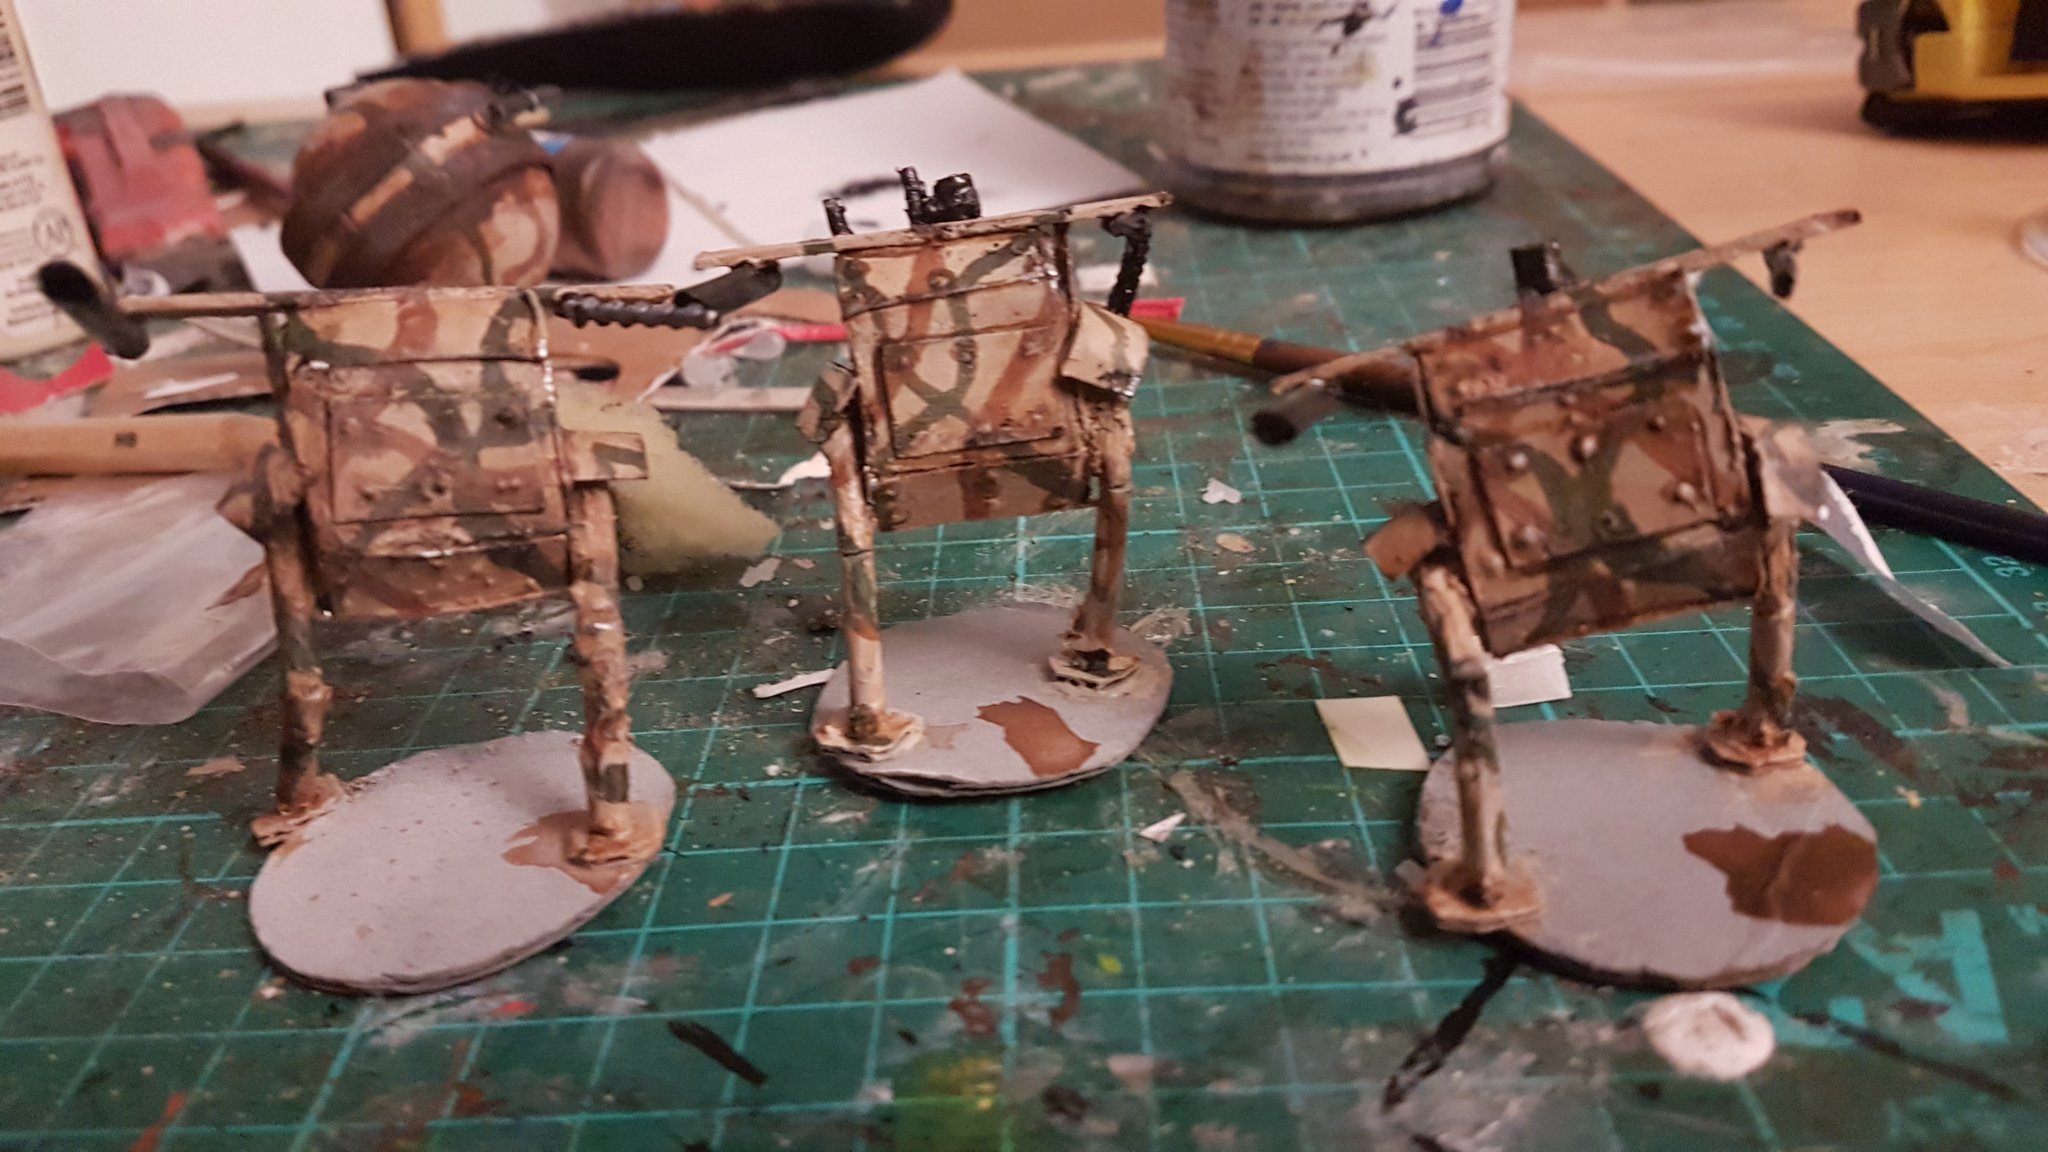
In the original rulebook (from 2014!!) I made reference to a League unit called a Panzerjager, which is basically a walking light tank/ power armour suit, but at that time I had no idea how I might go about making one…

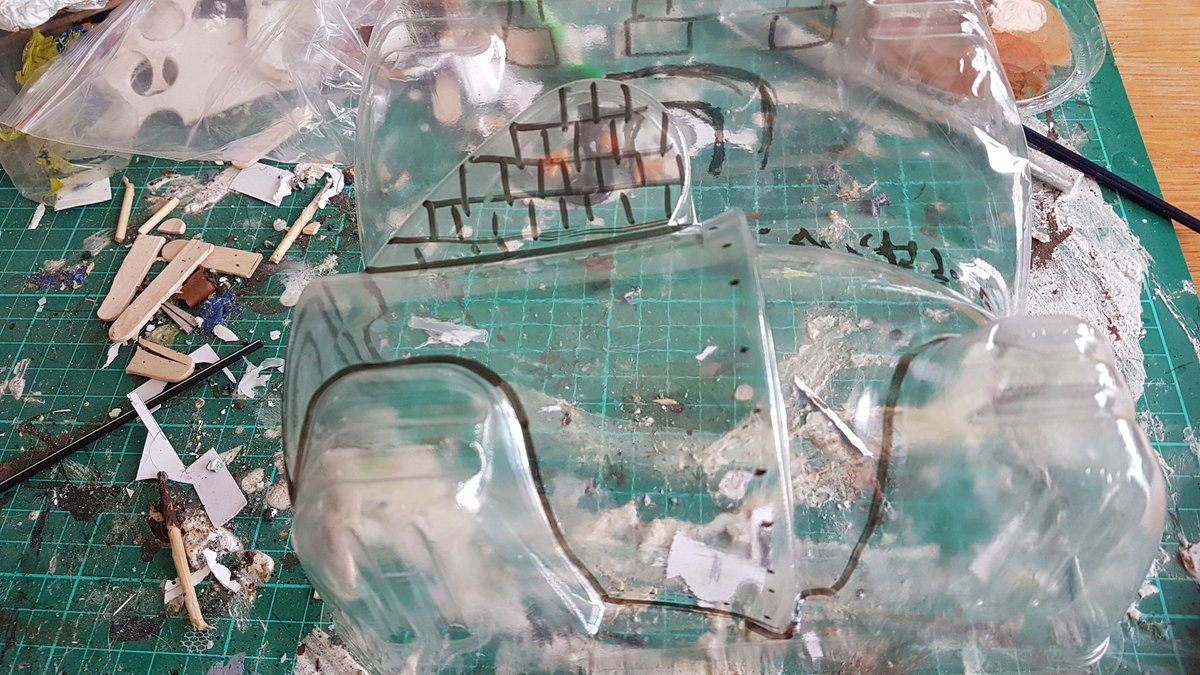
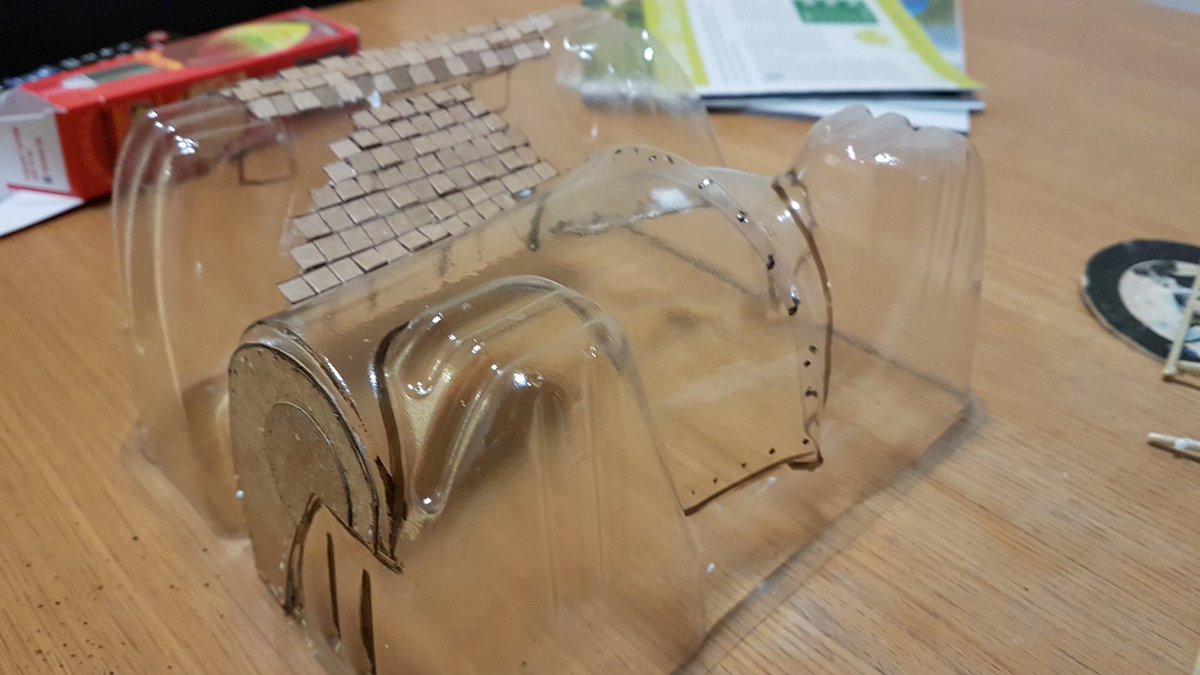
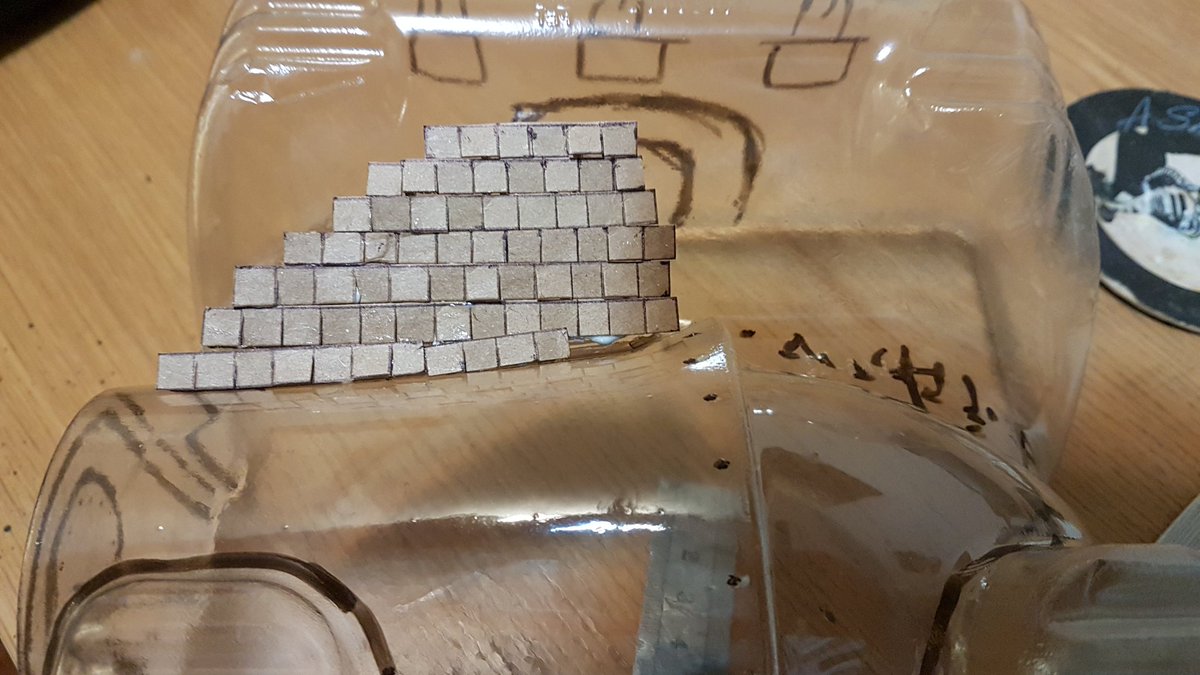
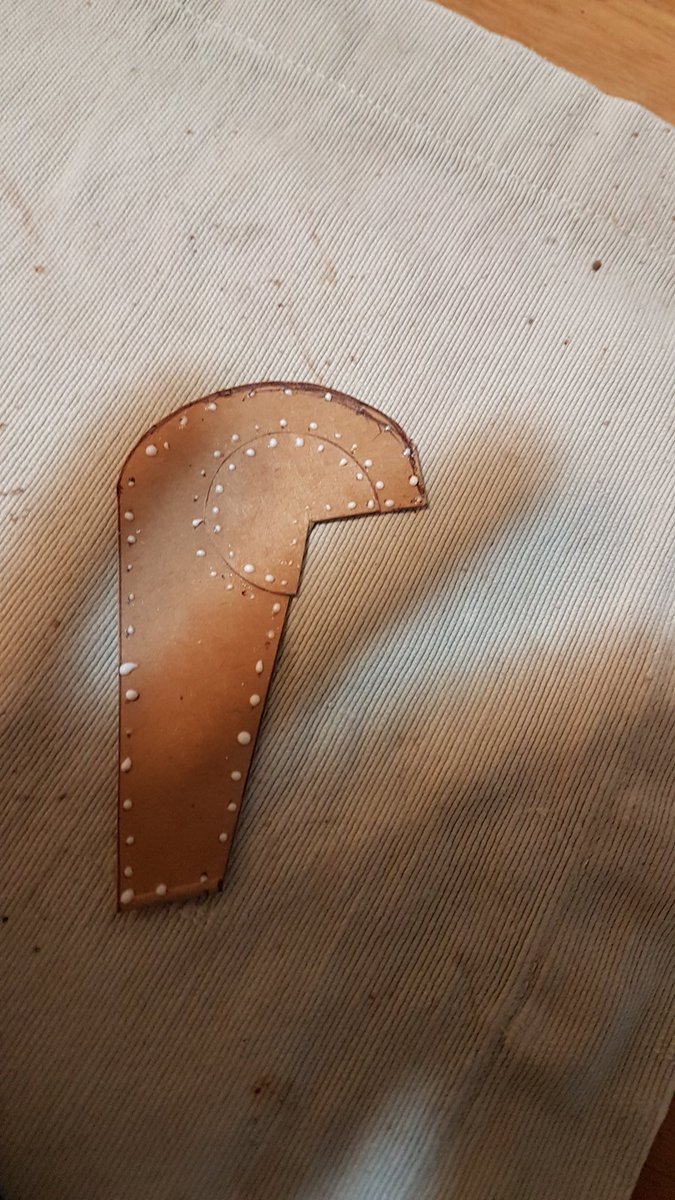
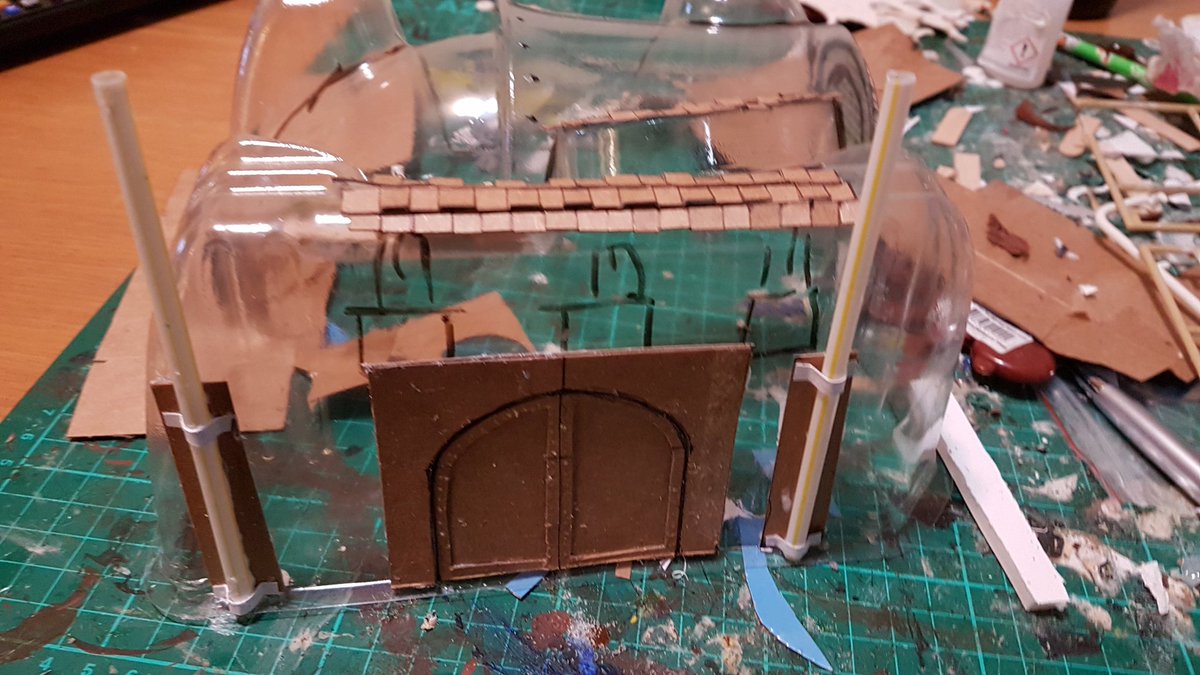
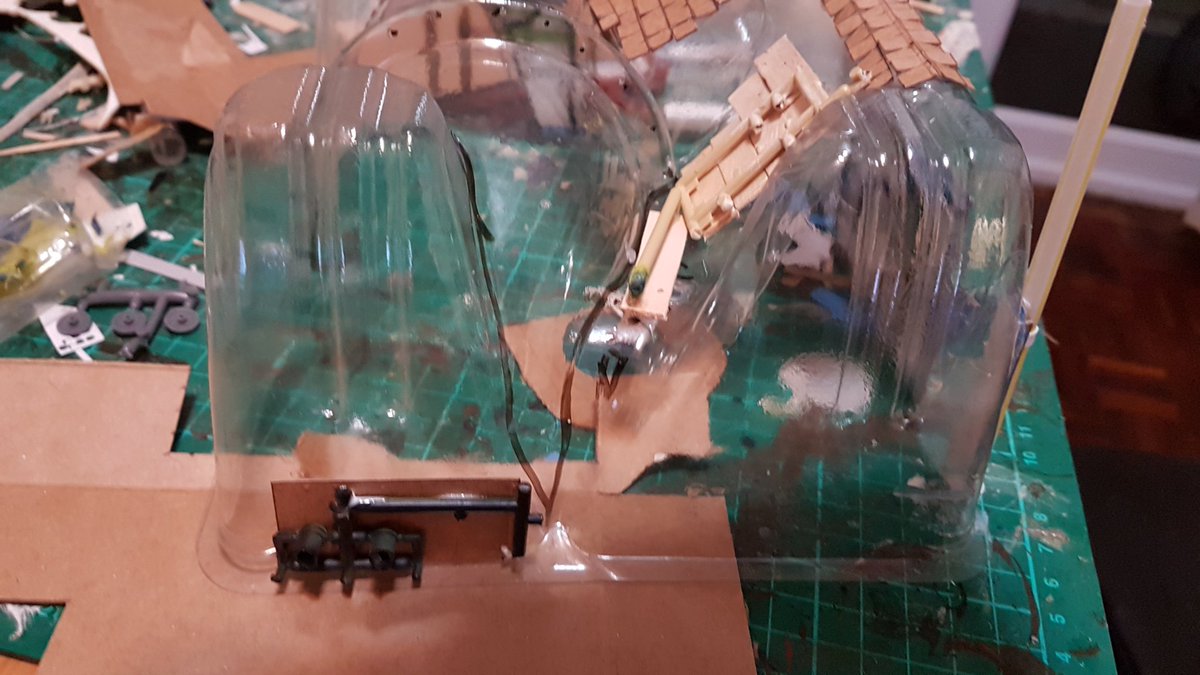
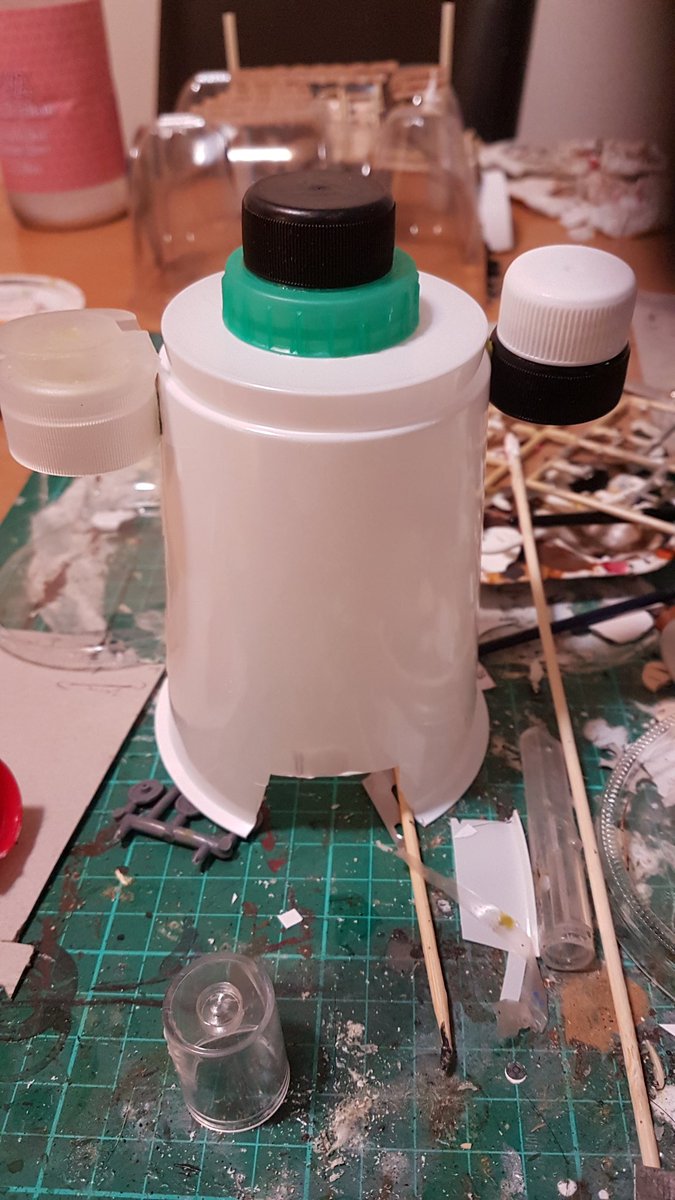
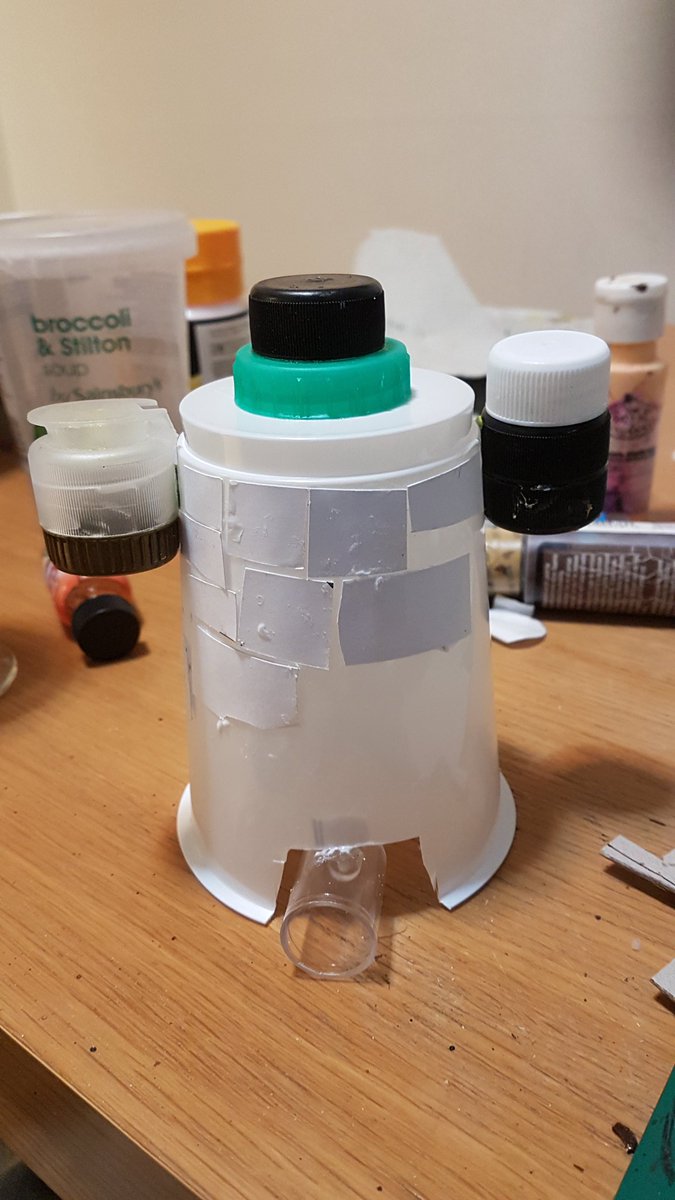
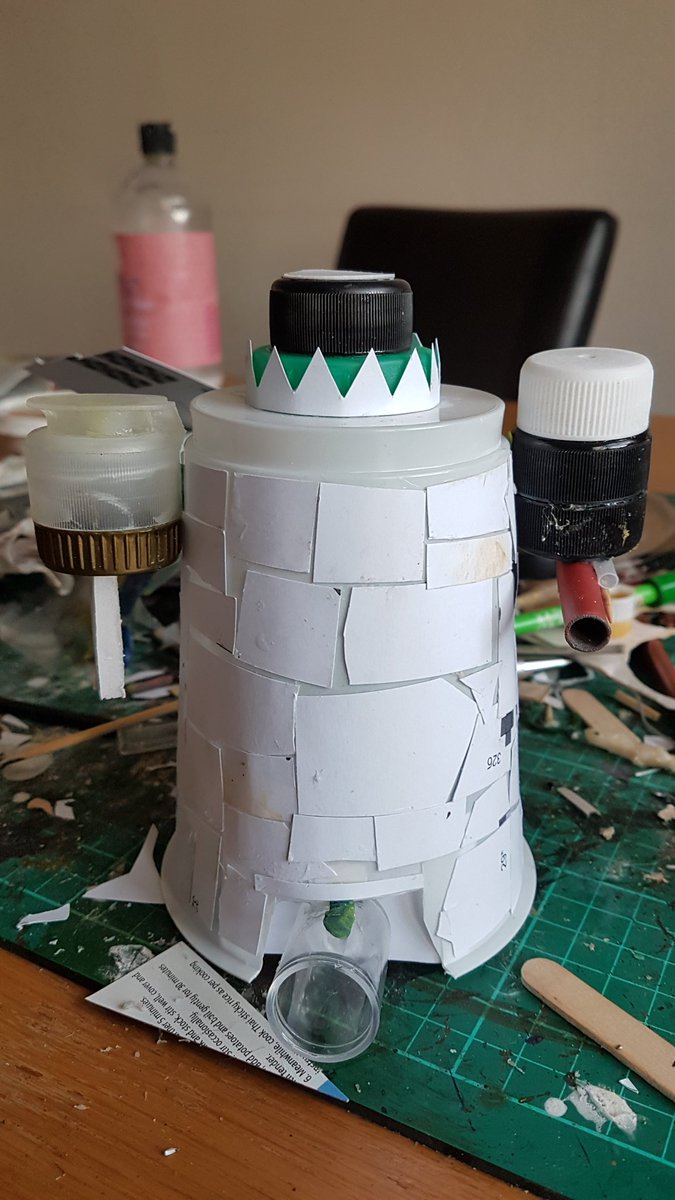
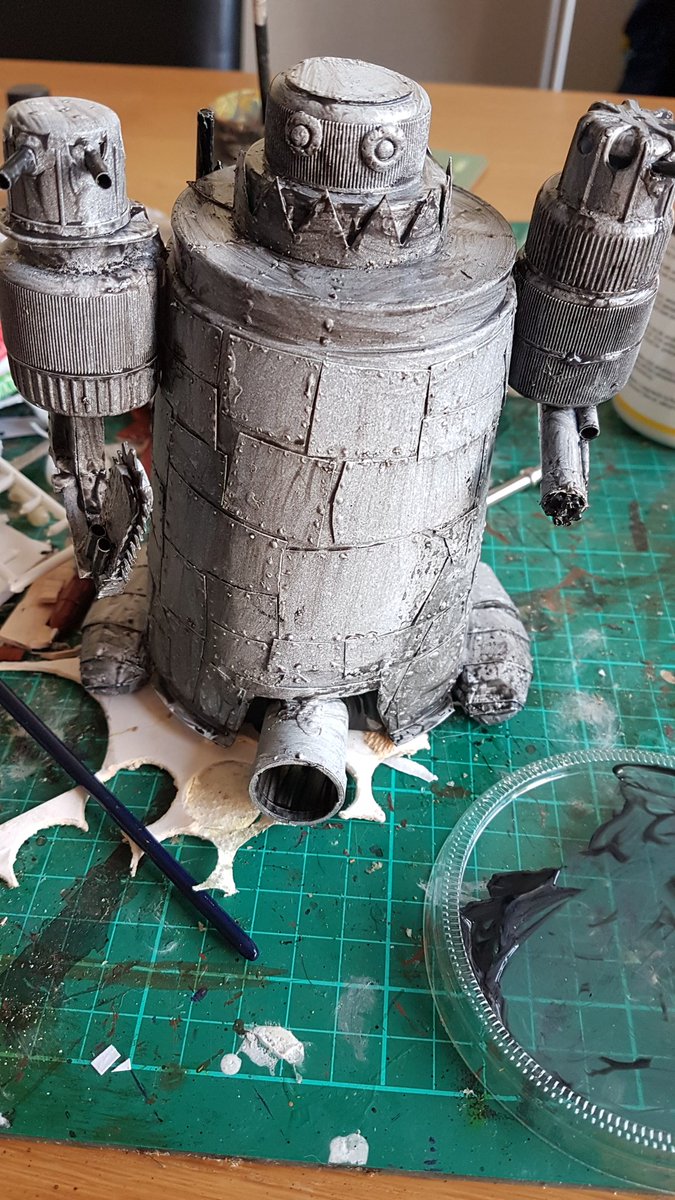
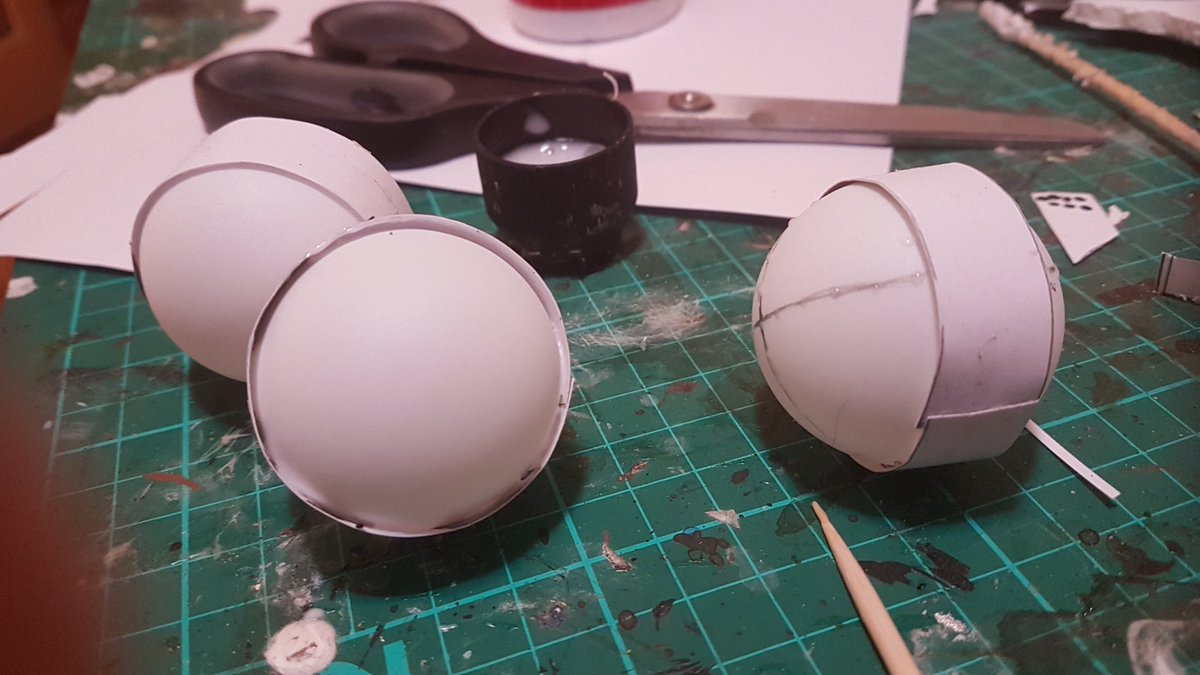
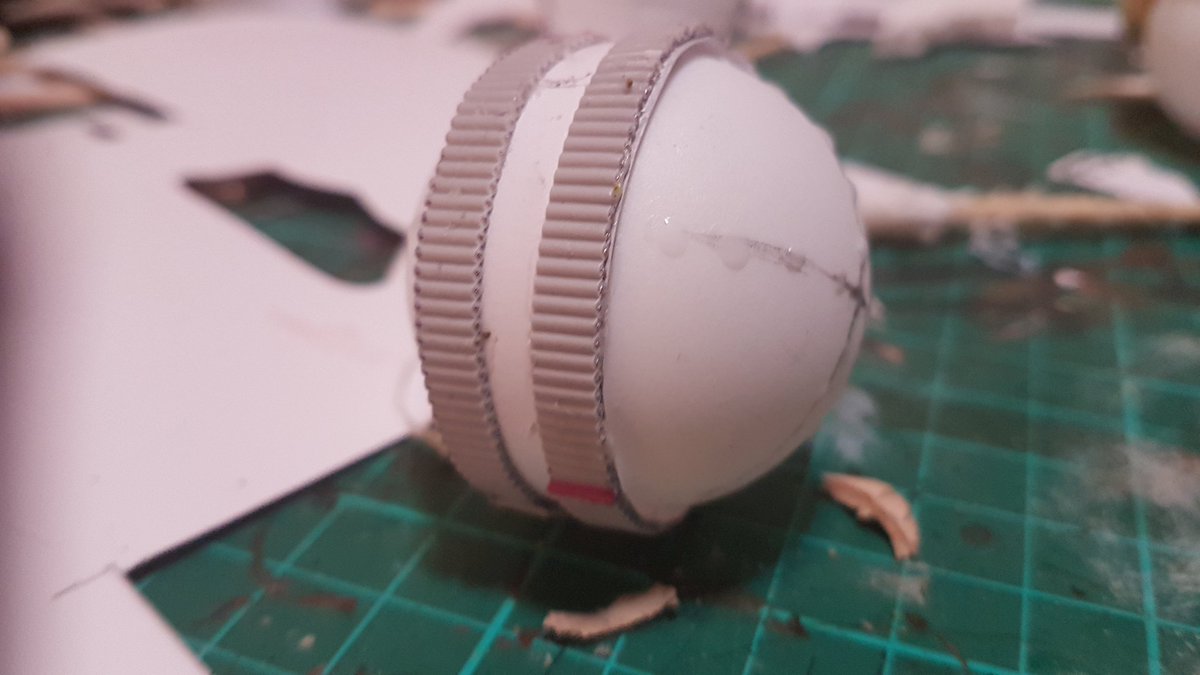
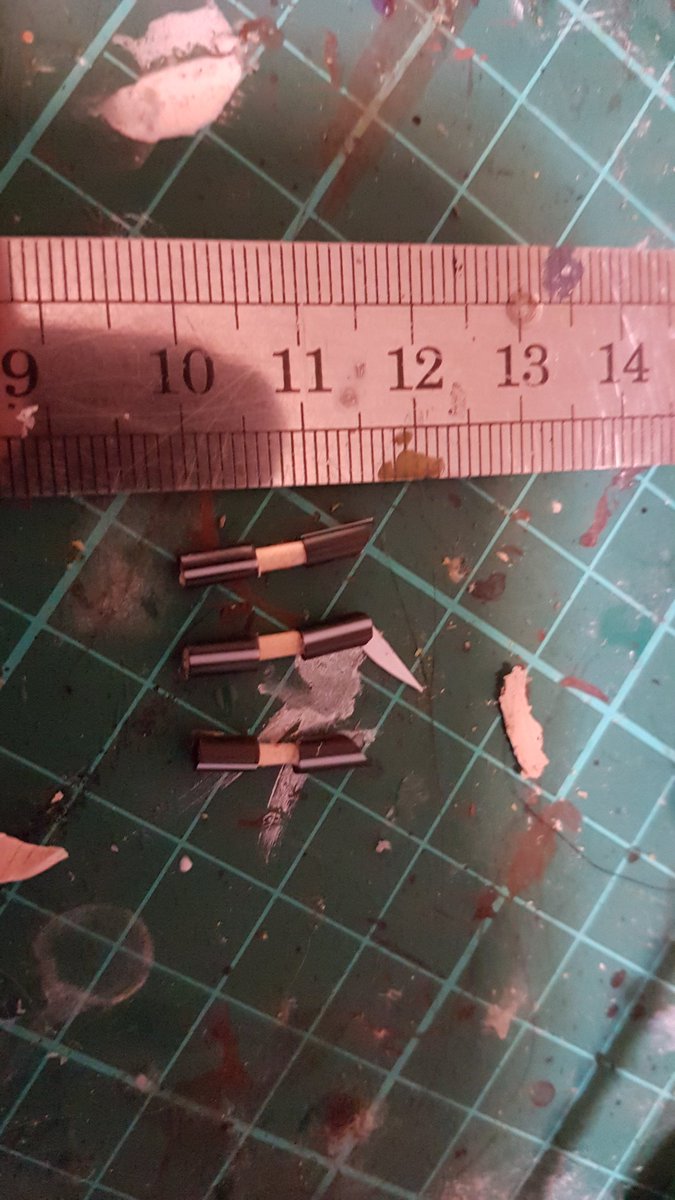
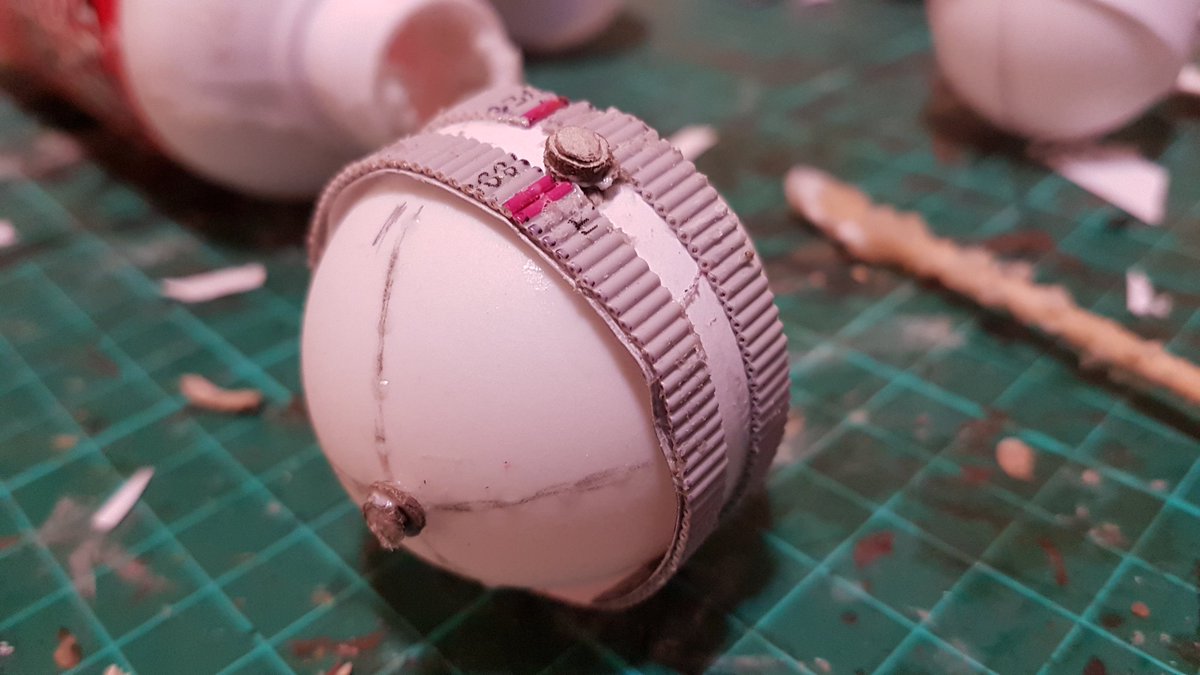
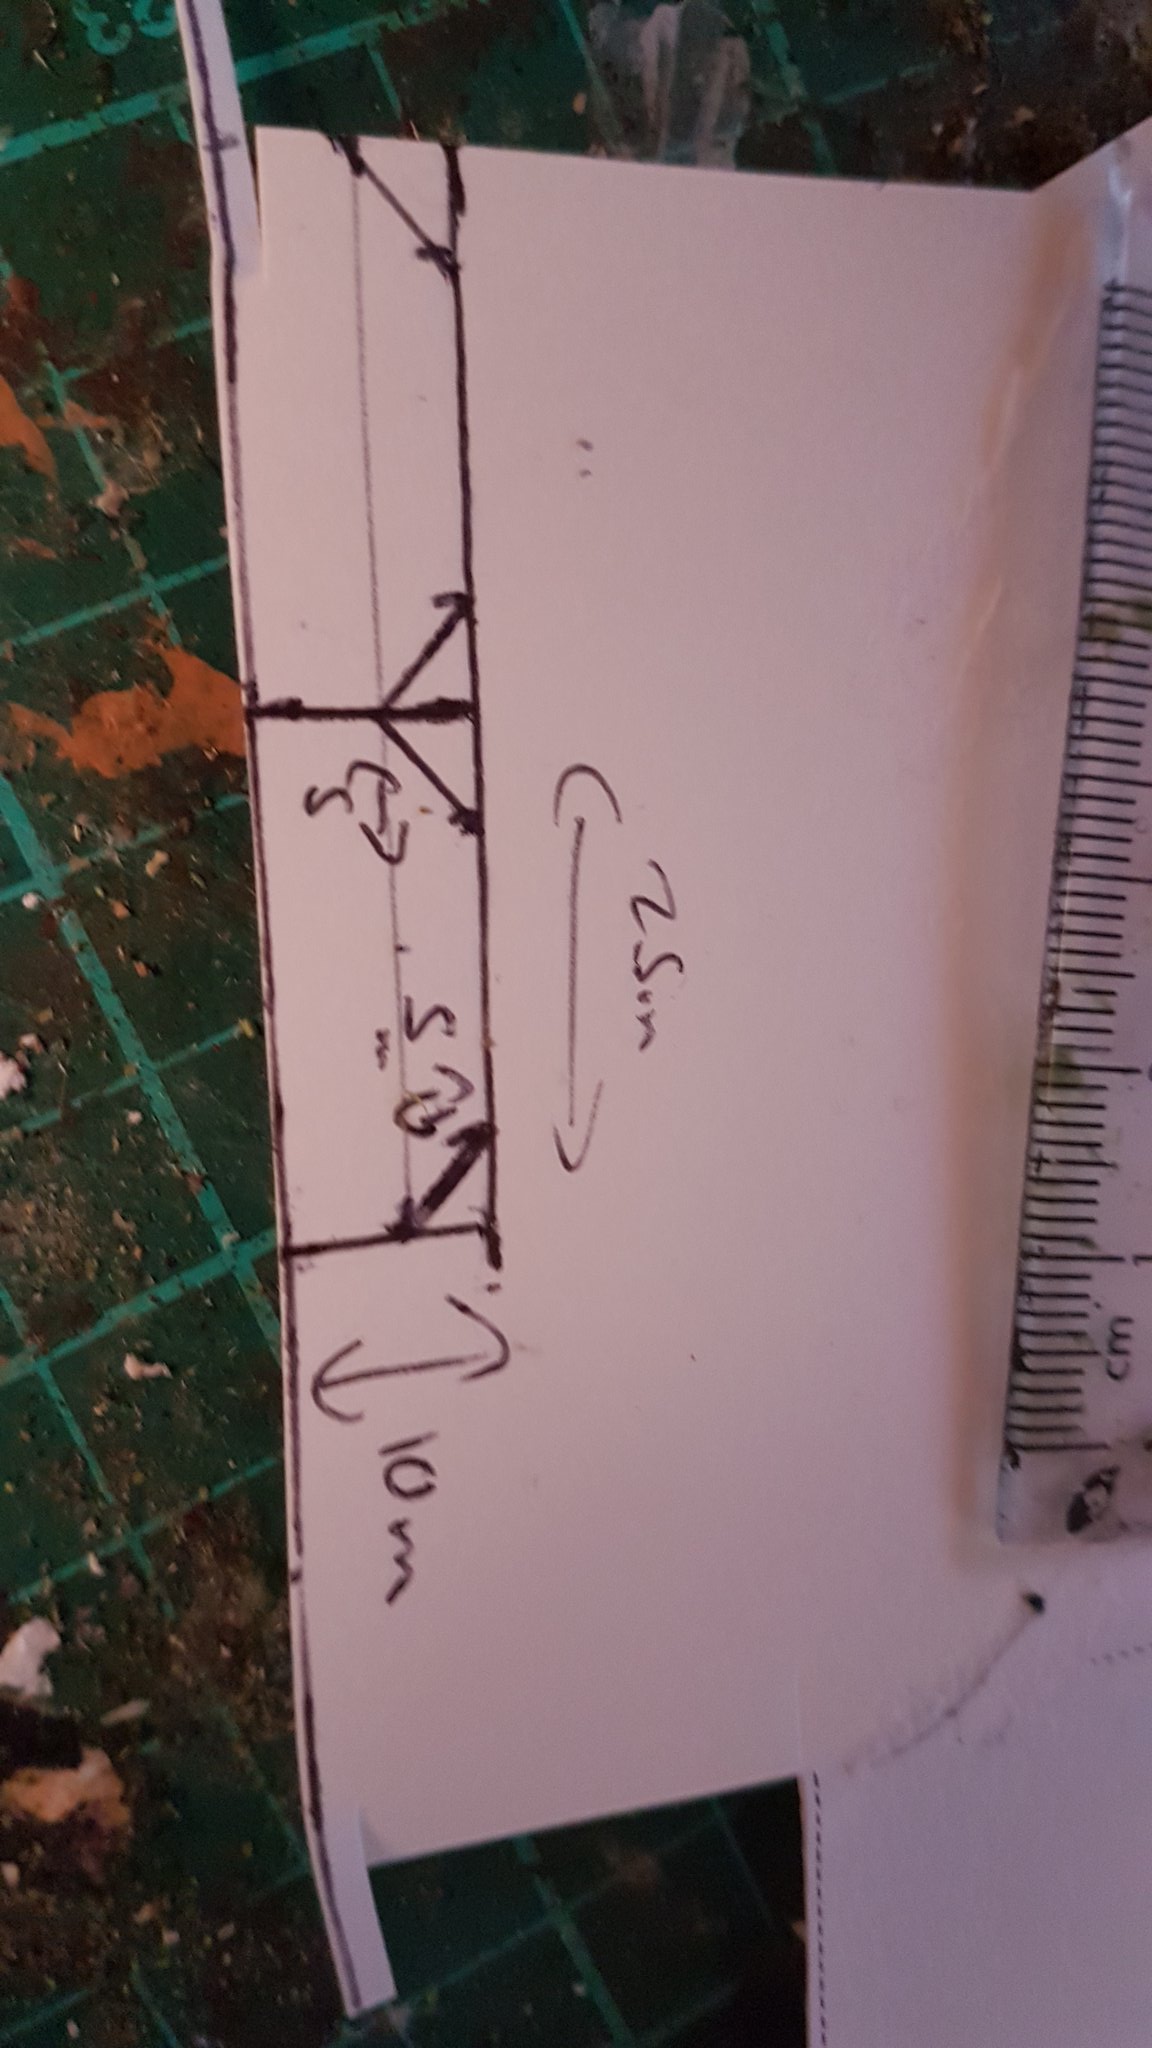
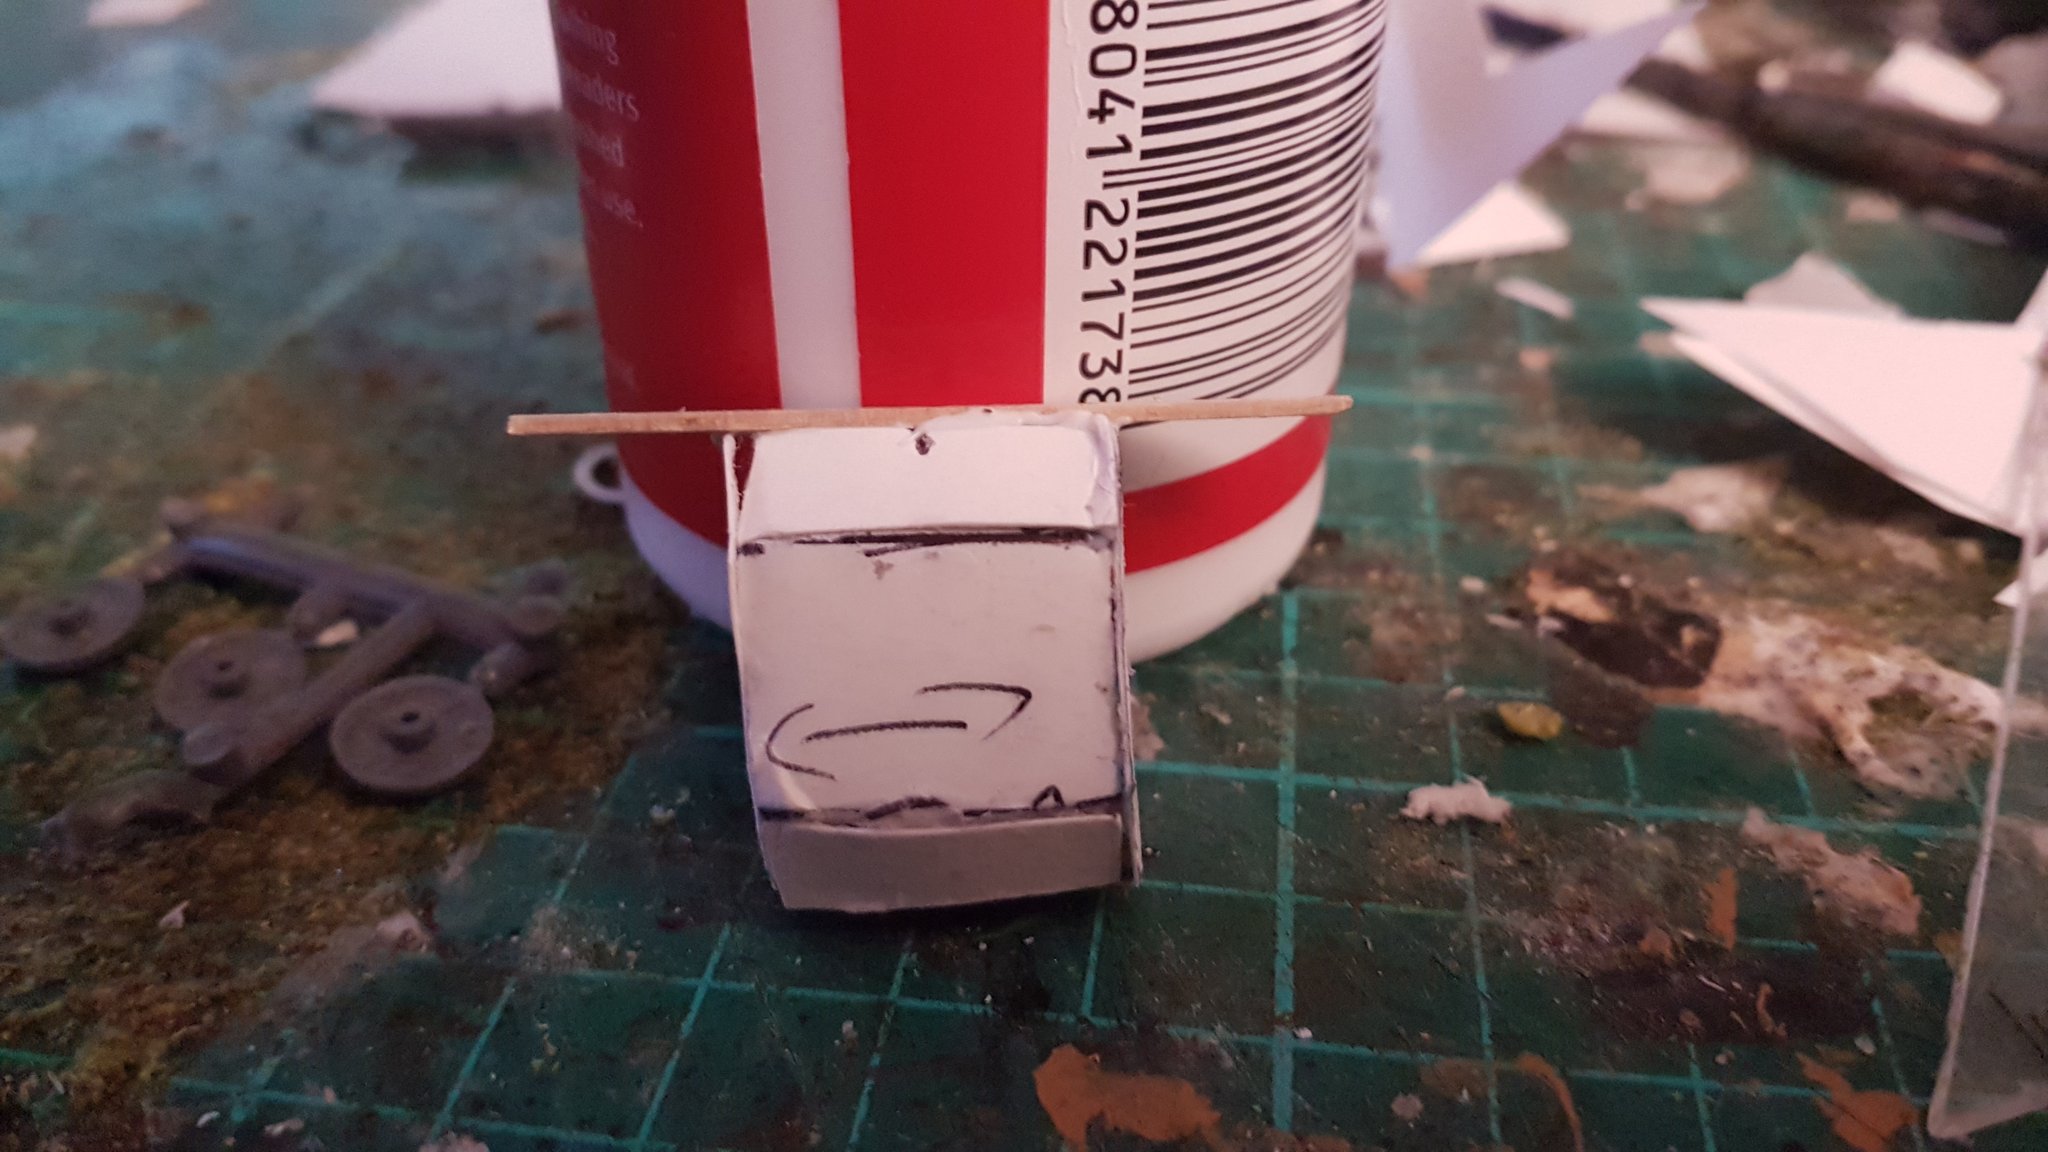
Fast (fast?) forward seven years, and I am SO much older and wiser. So, allow me to walk you through the construction process… you’ll need foamboard, cardboard, a straw, a coffee strawer and a kebab skewer… and yeah, a bit of granny grating, and some sprue.

Here’s where we start – 5mm thick foamcore, 20 x 25mm wide – we’re going to glue these on top of each other to create 3 lots of 2 foamcore bodies. These form the core of the models.
Now we taper the upper layer – 5mm off either edge.
Next we encase the main torso in thin cardboard – this is just cheap stuff from The Works, but cereal box or even printer paper should do the job just as well
Cardstock covering the foamboard torso, next a 4.5cm chunk of coffee stirrer to provide the “shoulders” (the black marks on the centre are there to ensure accurate alignment)

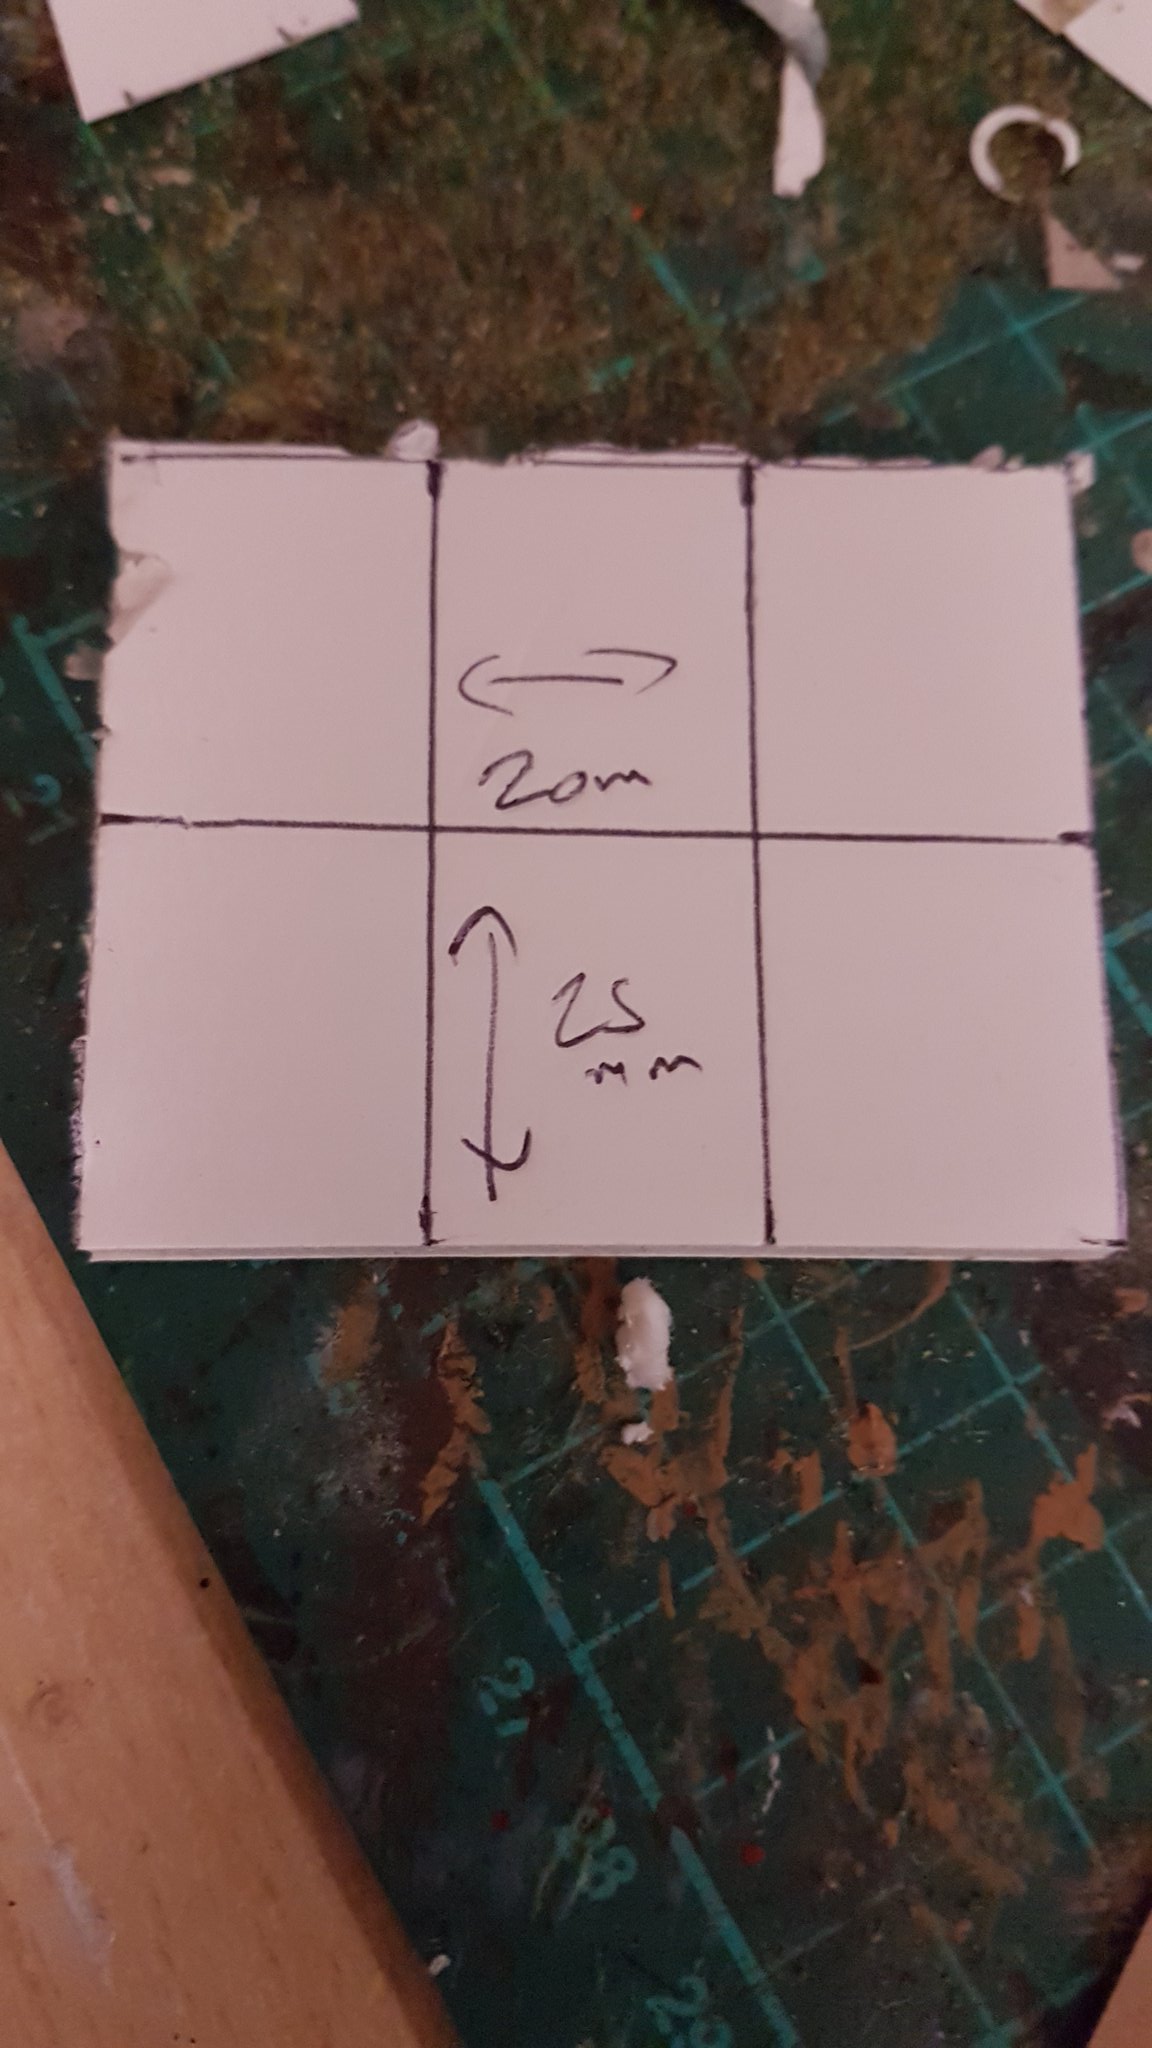
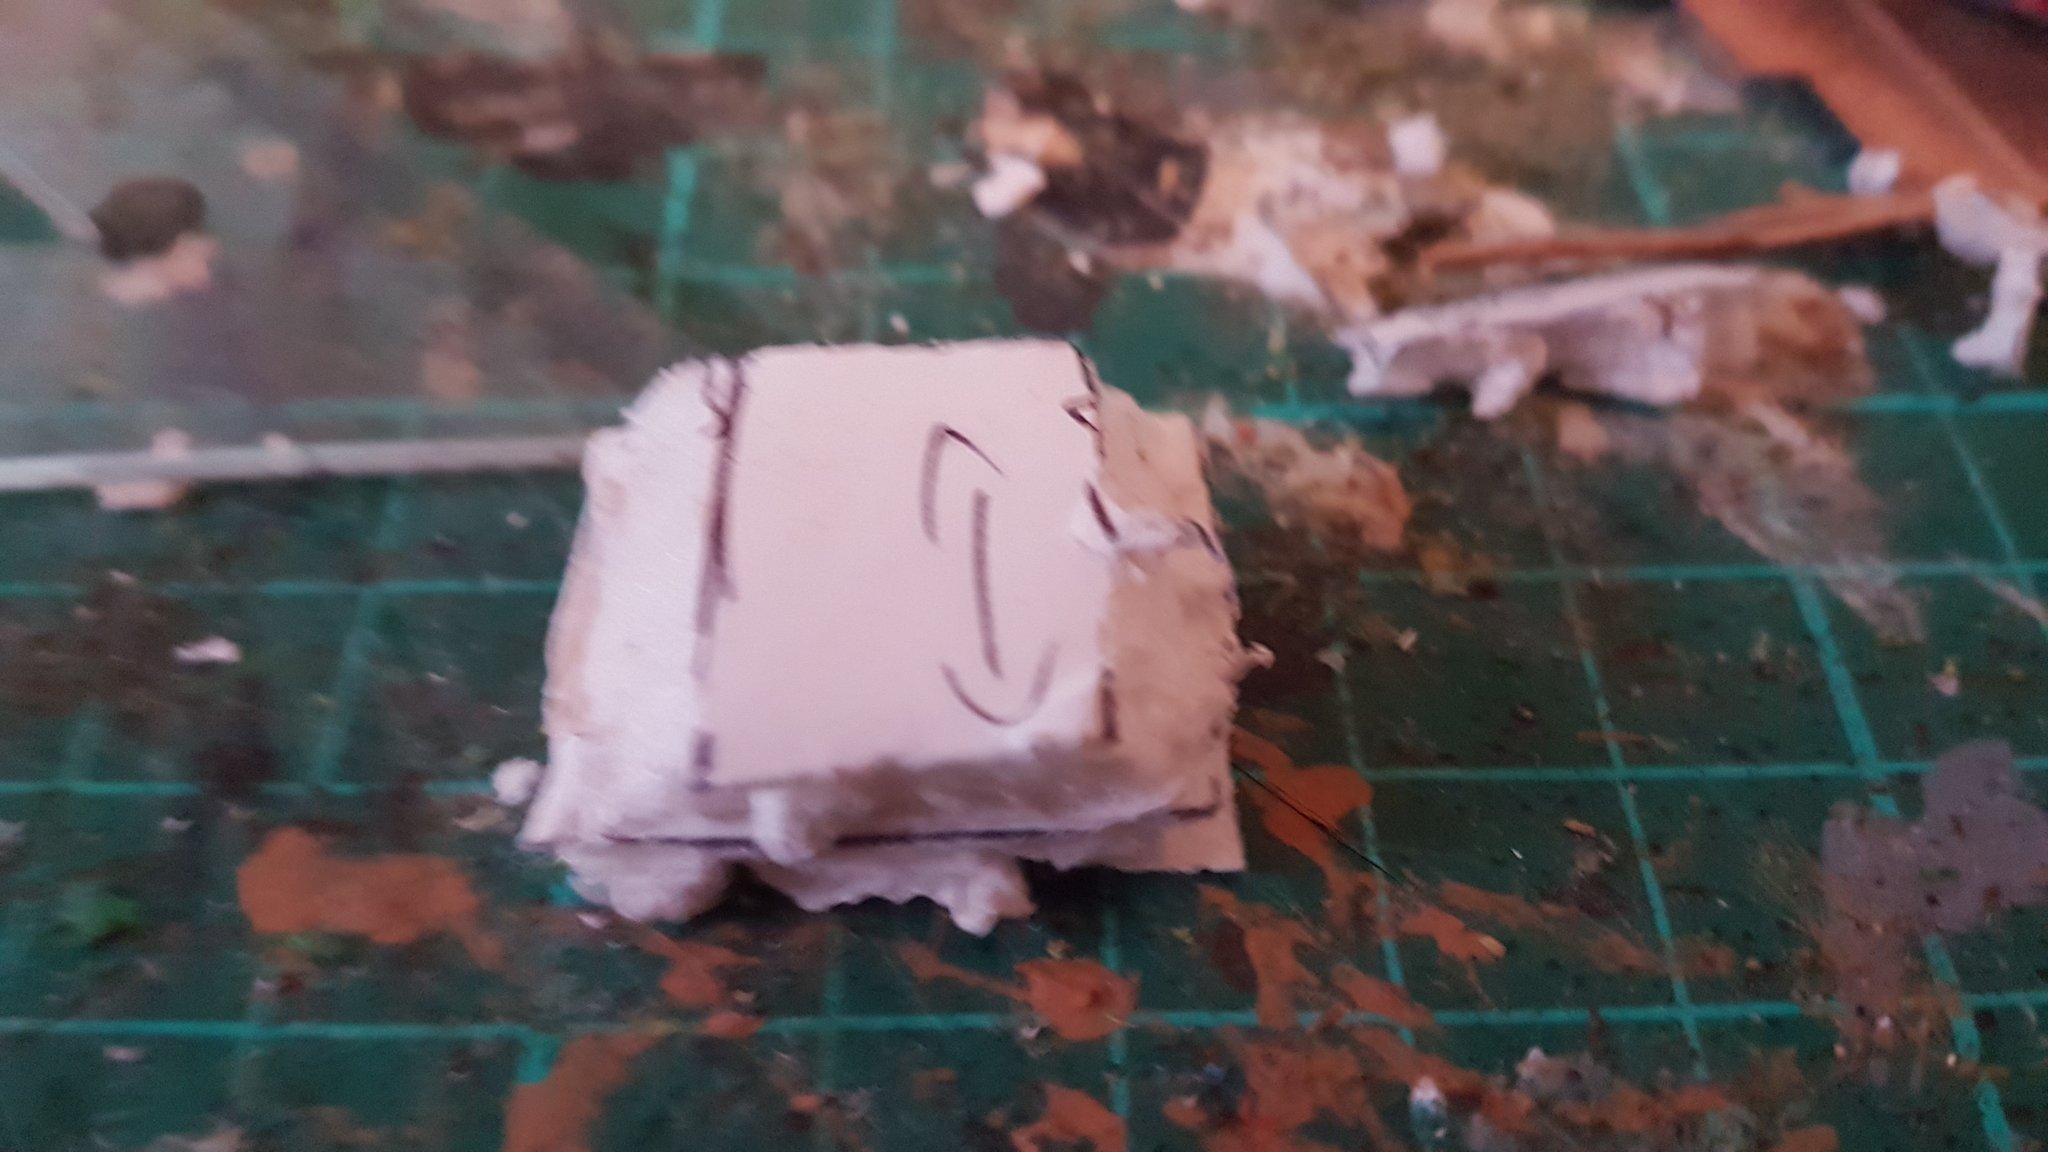
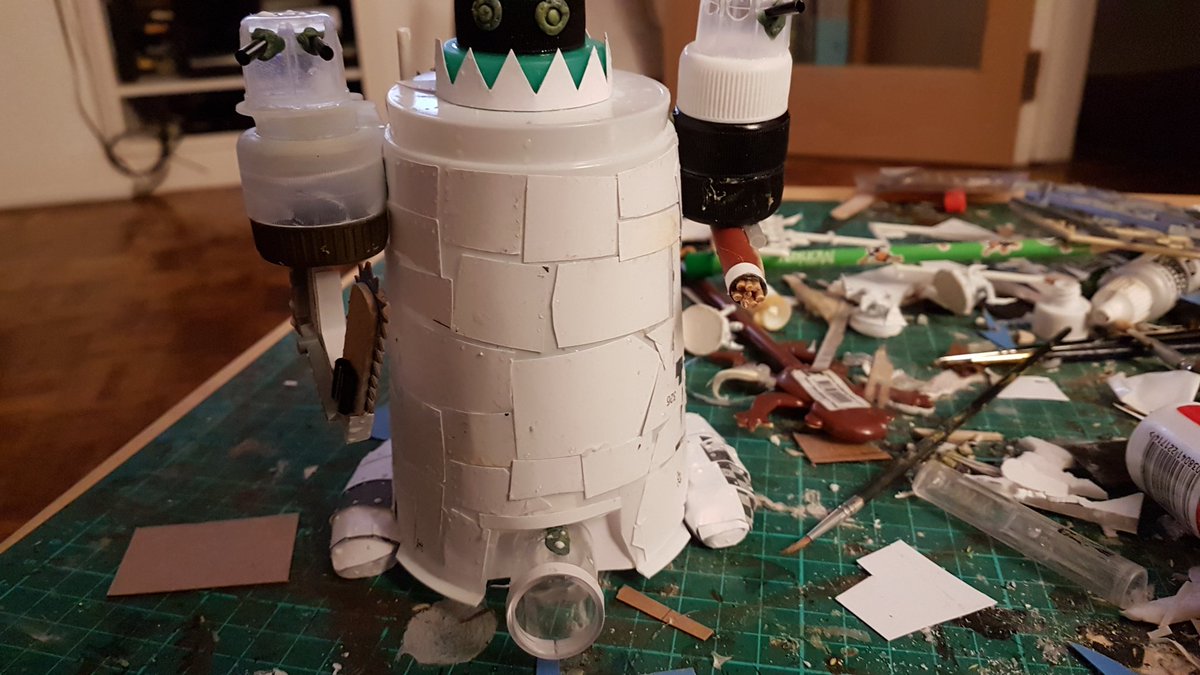
Now, full disclosure, I built these while watching the England – Denmark game, which meant that my attention did wander at times… as a result, the next few steps didn’t get documented…..

Legs from kebab skewers, broken in the middle and sealed with superglue… laser cannon cut from drinking straw, machinegun from (you guessed it) granny grating, and exhaust pipes on the back clipped from sprue and superglued on. Rivets are blobs of PVA dabbed on with a cocktail stick.
Out to the shed for priming…
Based with two coats of Crafter’s Choice tan…
Camo patterns added with Vallejo Russian Green
And Americana Light Cinammon craft paint
Washed with (very) thin Vallejo Brown Ink
Pin wash of neat Vallejo Smokey Ink
Drybrushed with bone craft paint (Americana Buttermilk)…
And done! Bases were painted chocolate brown then added sand and flock… I superglued a piece of gravel to each base partly for scenic reasons and partly to impart some weight to these models, as being simply cardboard, foamboard and straw for the most part they had a tendency to fall over when someone nearby coughed (although you could make the case for that being a COVID early warning system)
Taking the field (in this case Bose Cliff) with some friends….

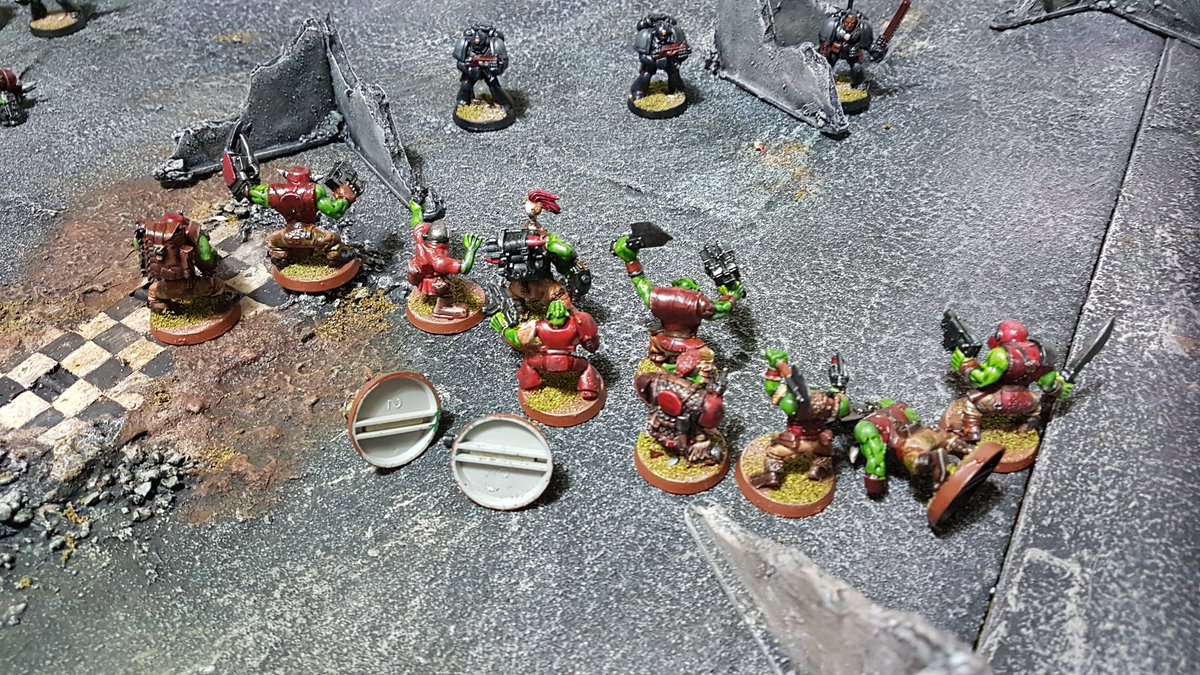
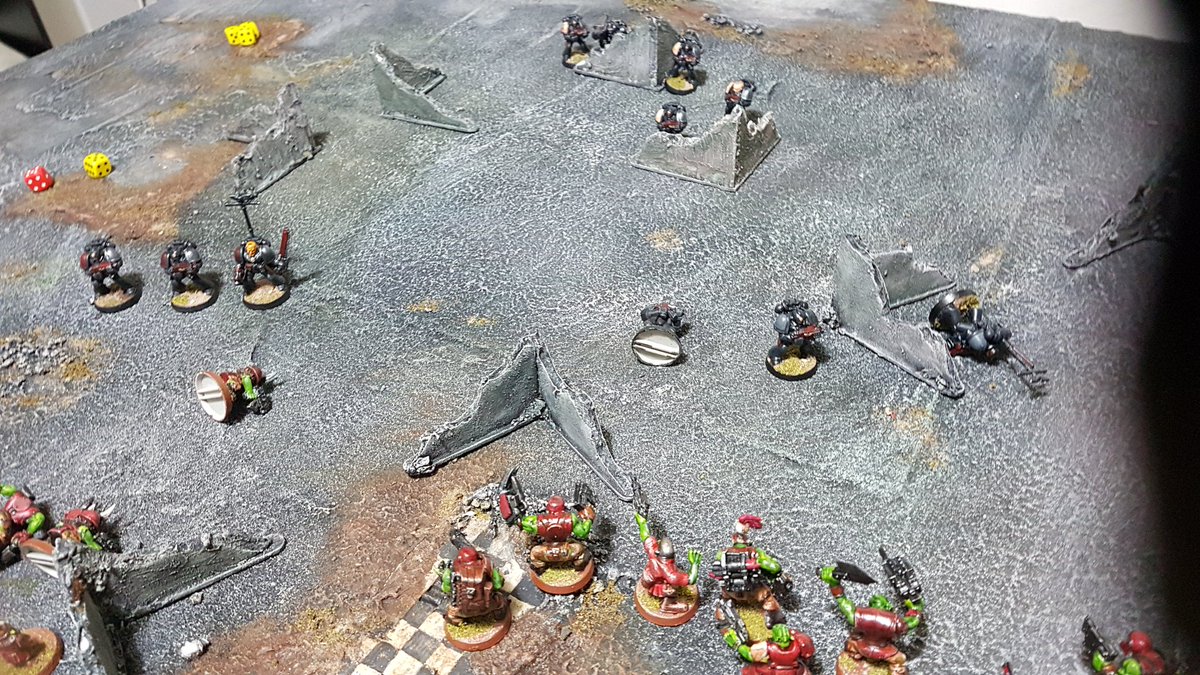
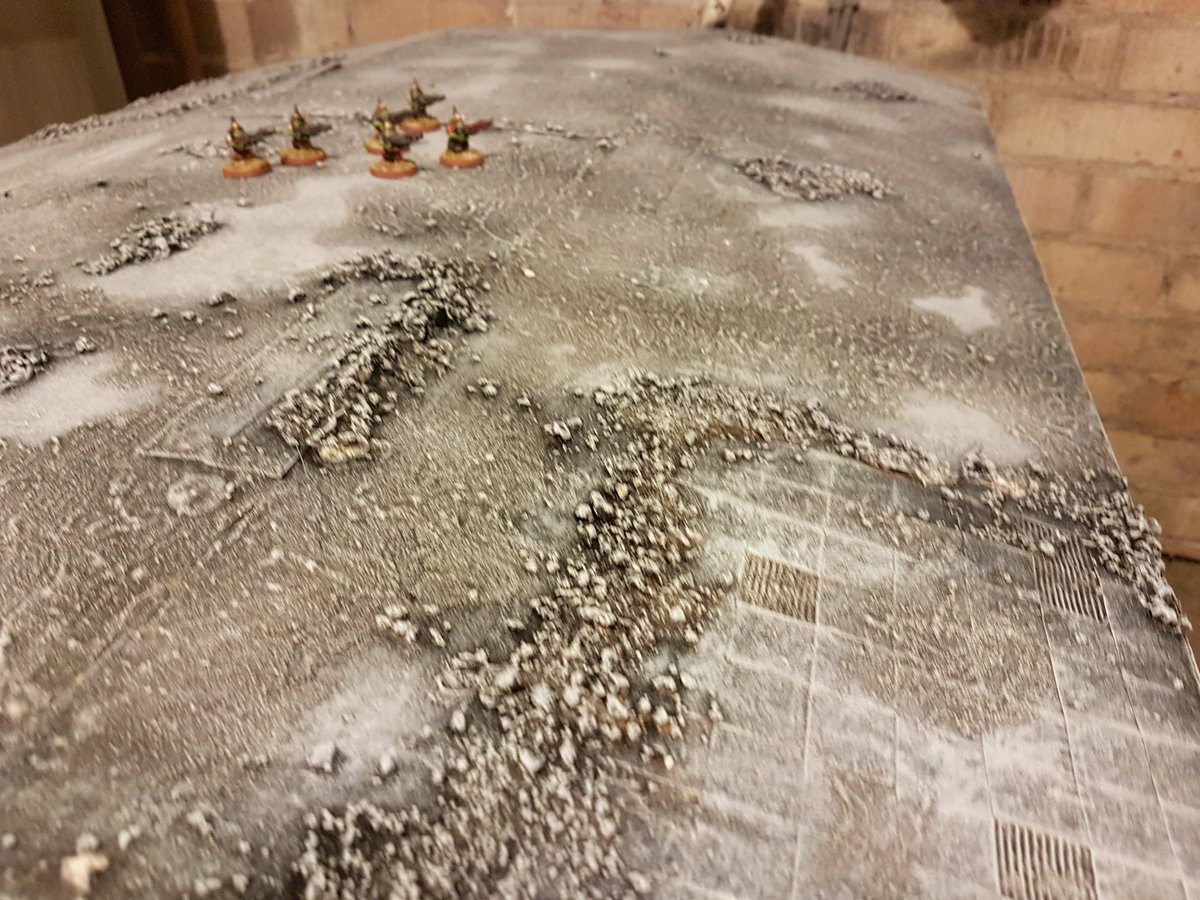
Why have I built these? Well, as COVID restrictions are lifting and the Great Plague of 2020-21 goes into remission… probably…. we’re planning our Great Summer Smackdown once again! Now Dan & I are both double jabbed and so are our other halves, we can start to plan some big games again… and believe me, we are!

If you’re interested in the rules for these Panzerjagers, they’re in the Apocalypse: Earth rulebook, but because we love you all (Pete, John, Subedai, IRO, Roger, Whittlesey and all of you) here they are again, updated to represent these models:

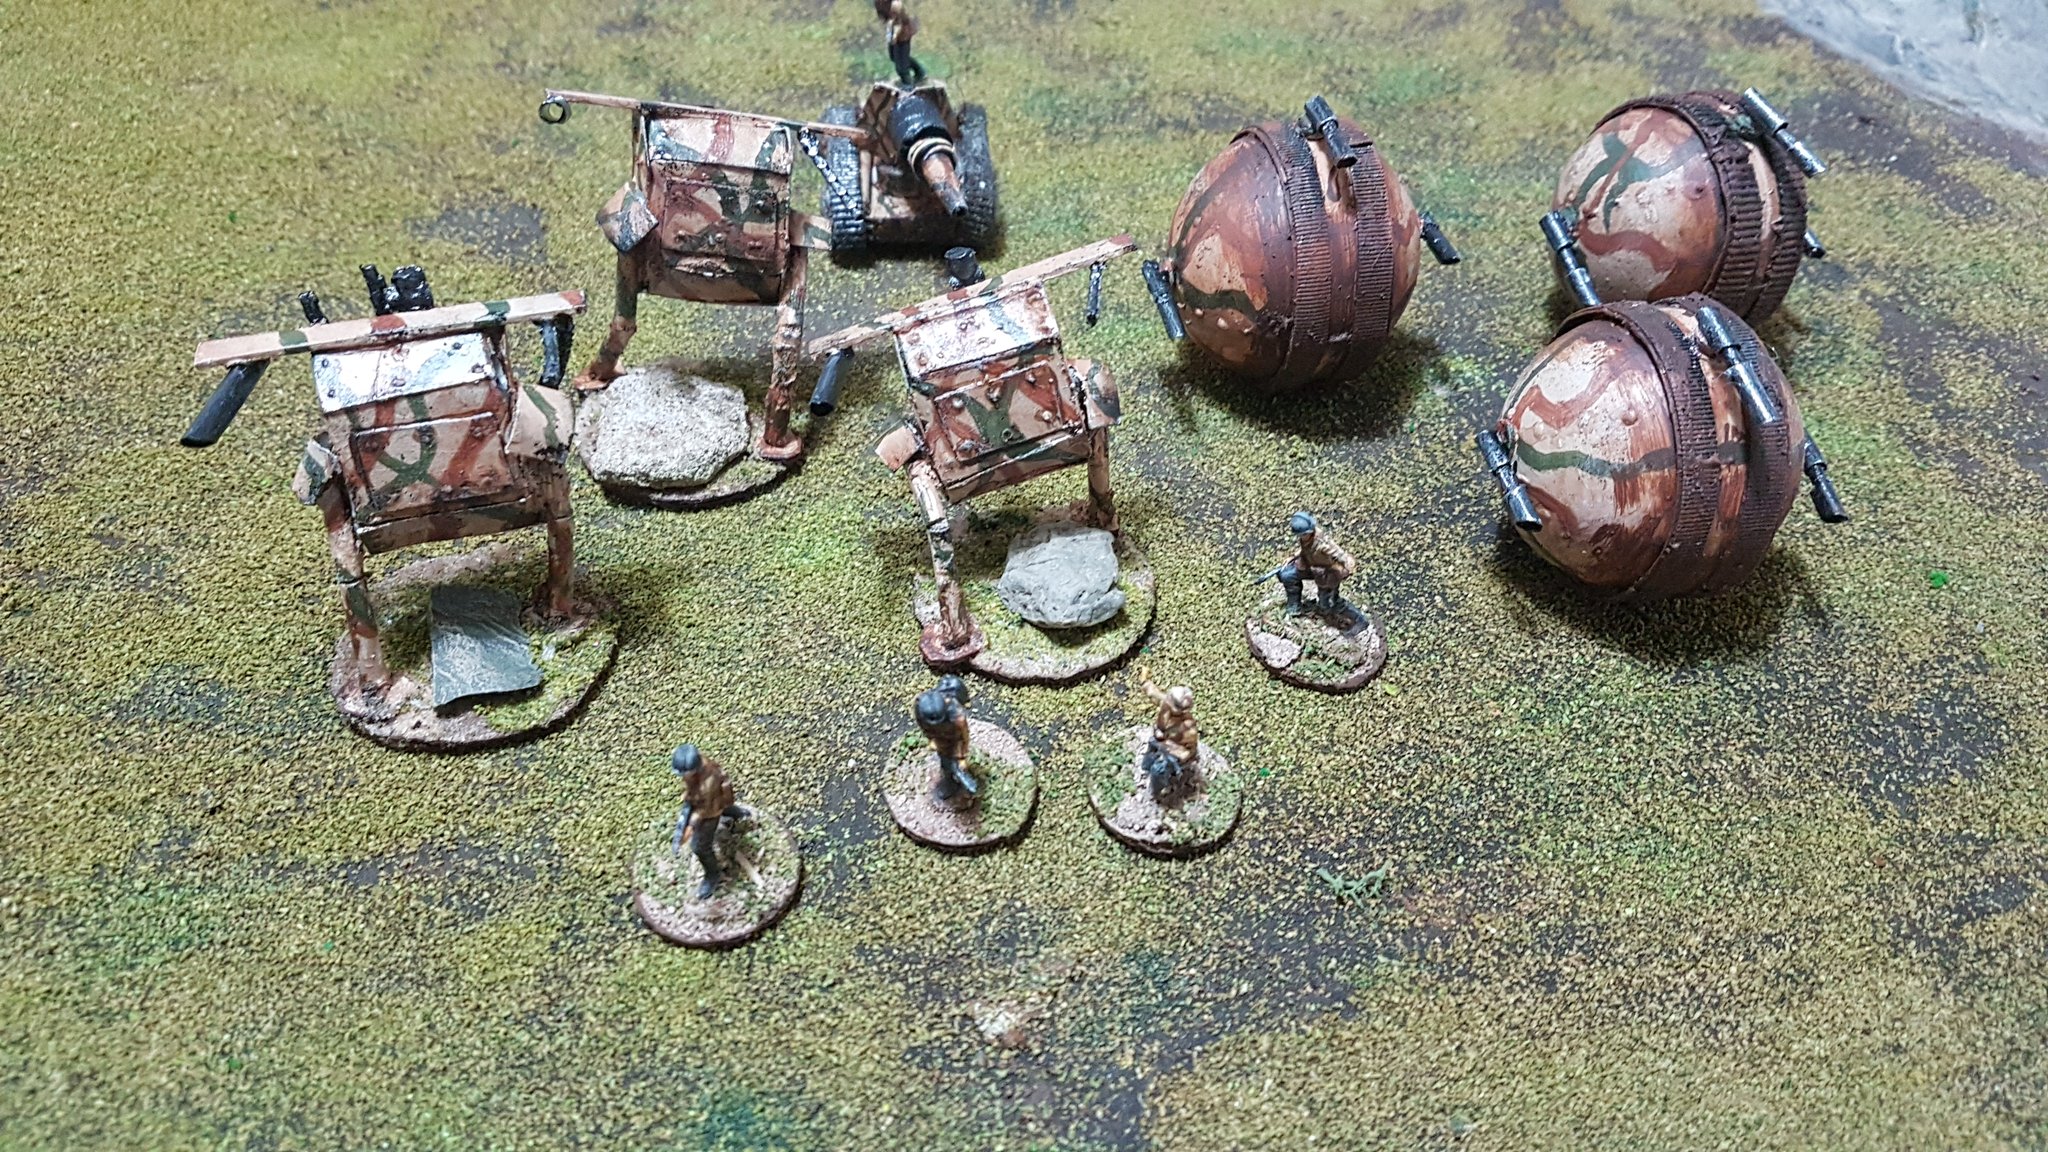
Panzerjager Squadron – 250pts

Independent unit

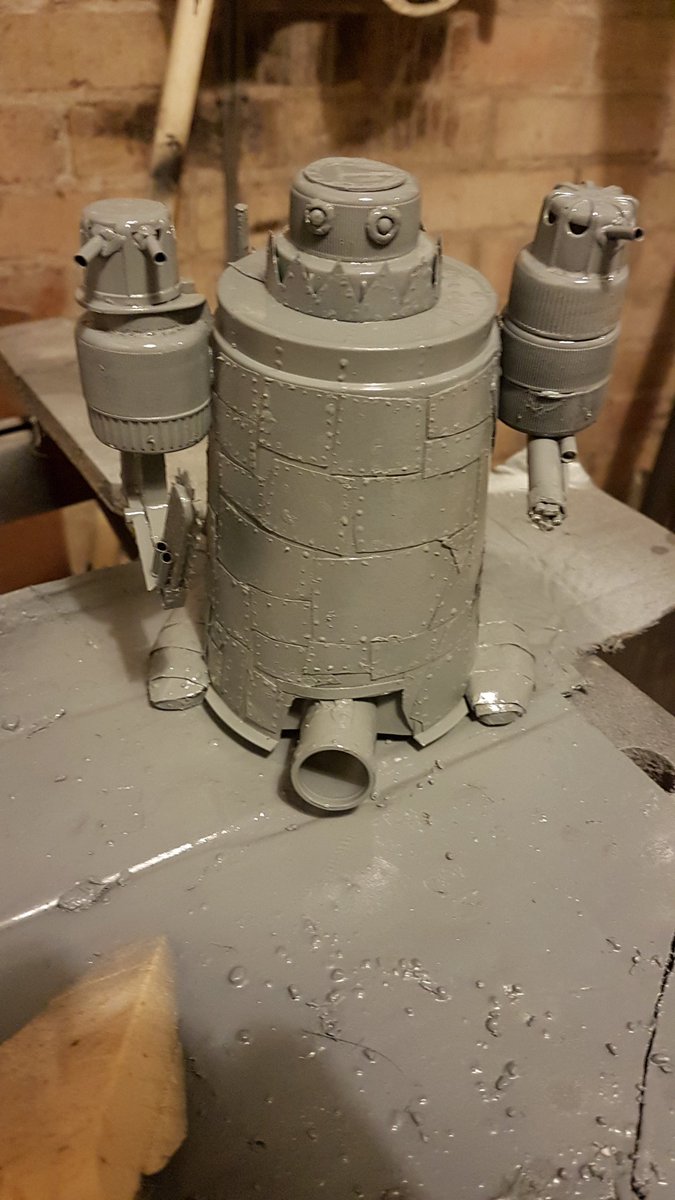
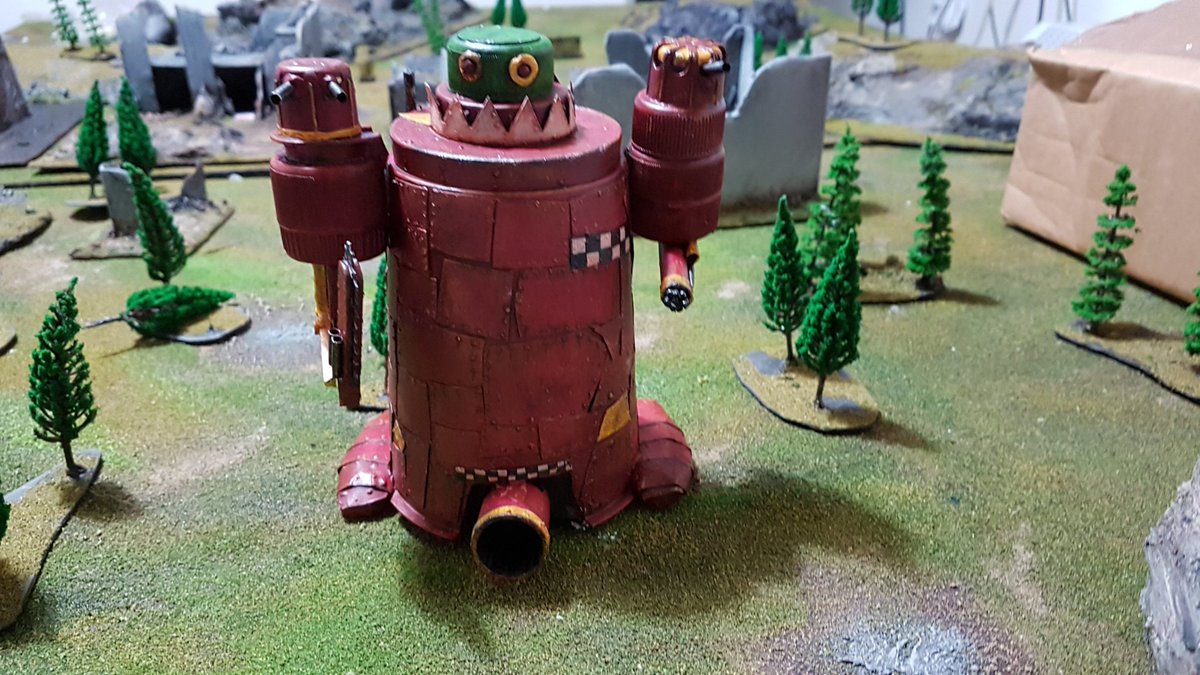
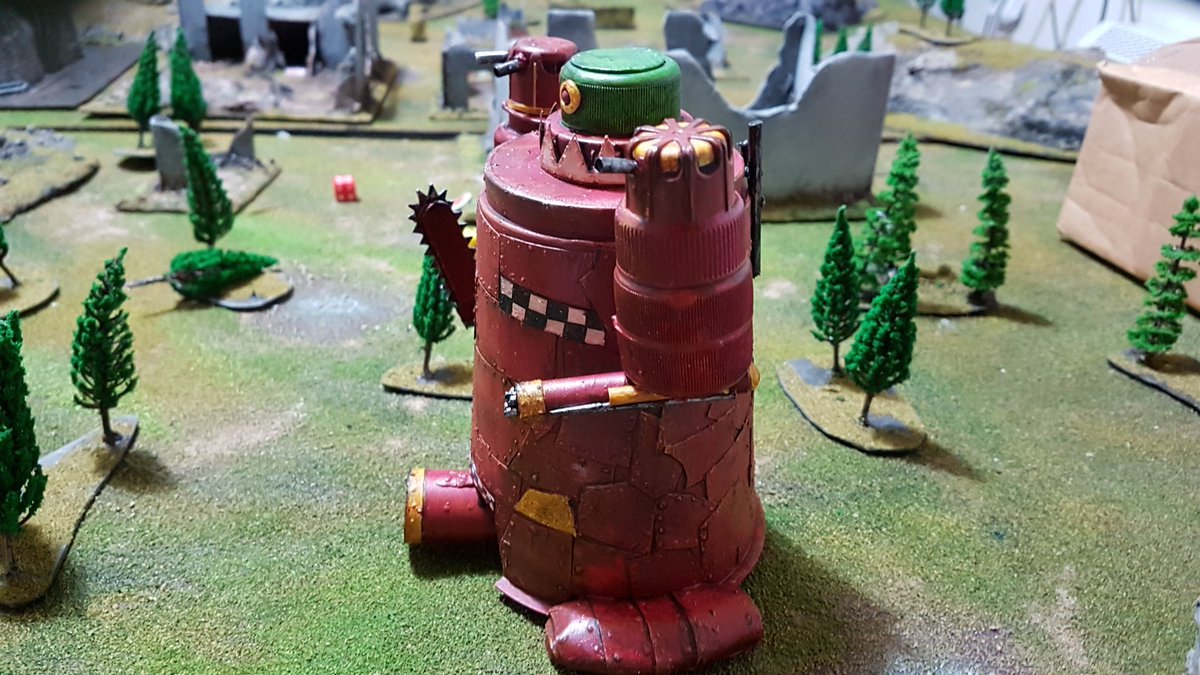
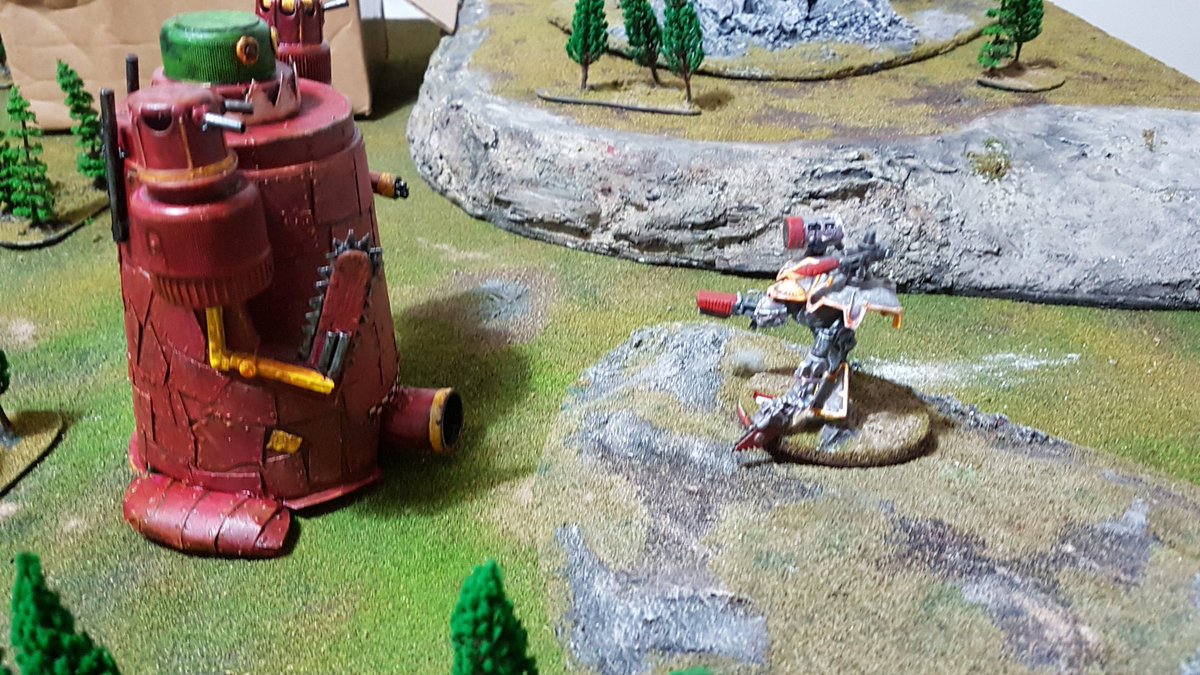
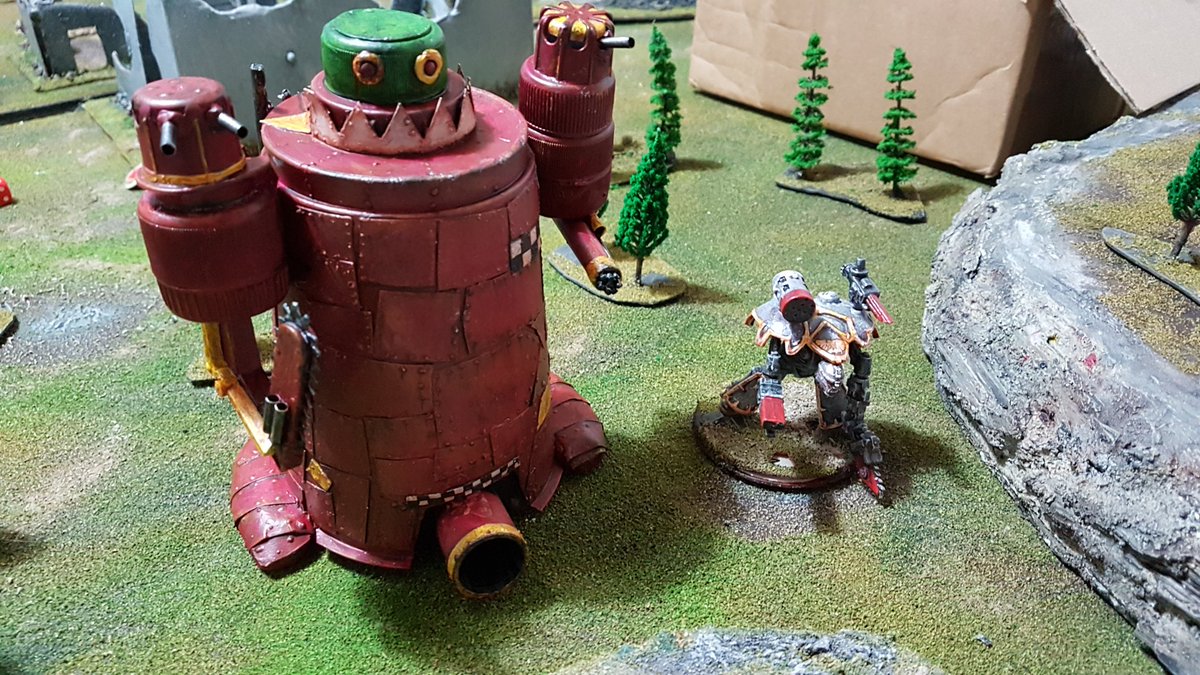
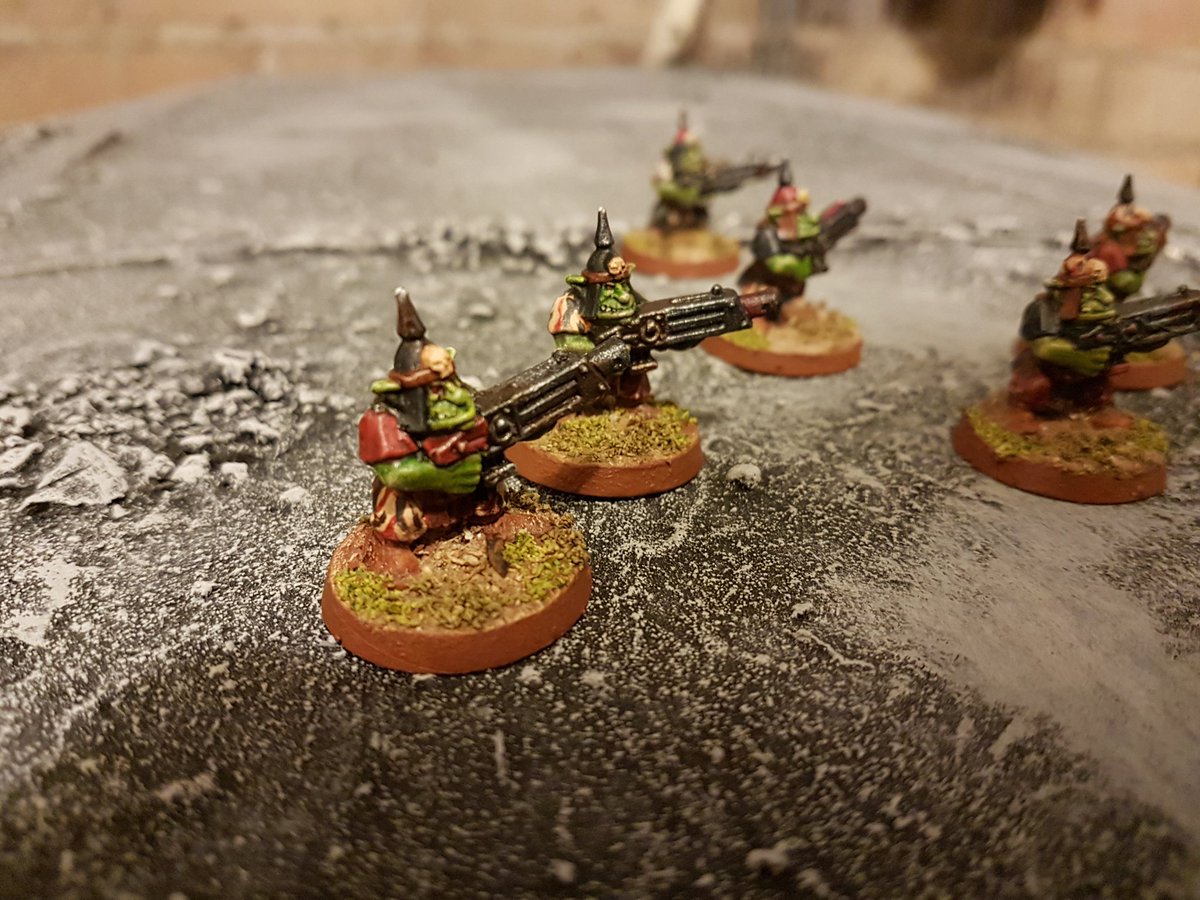
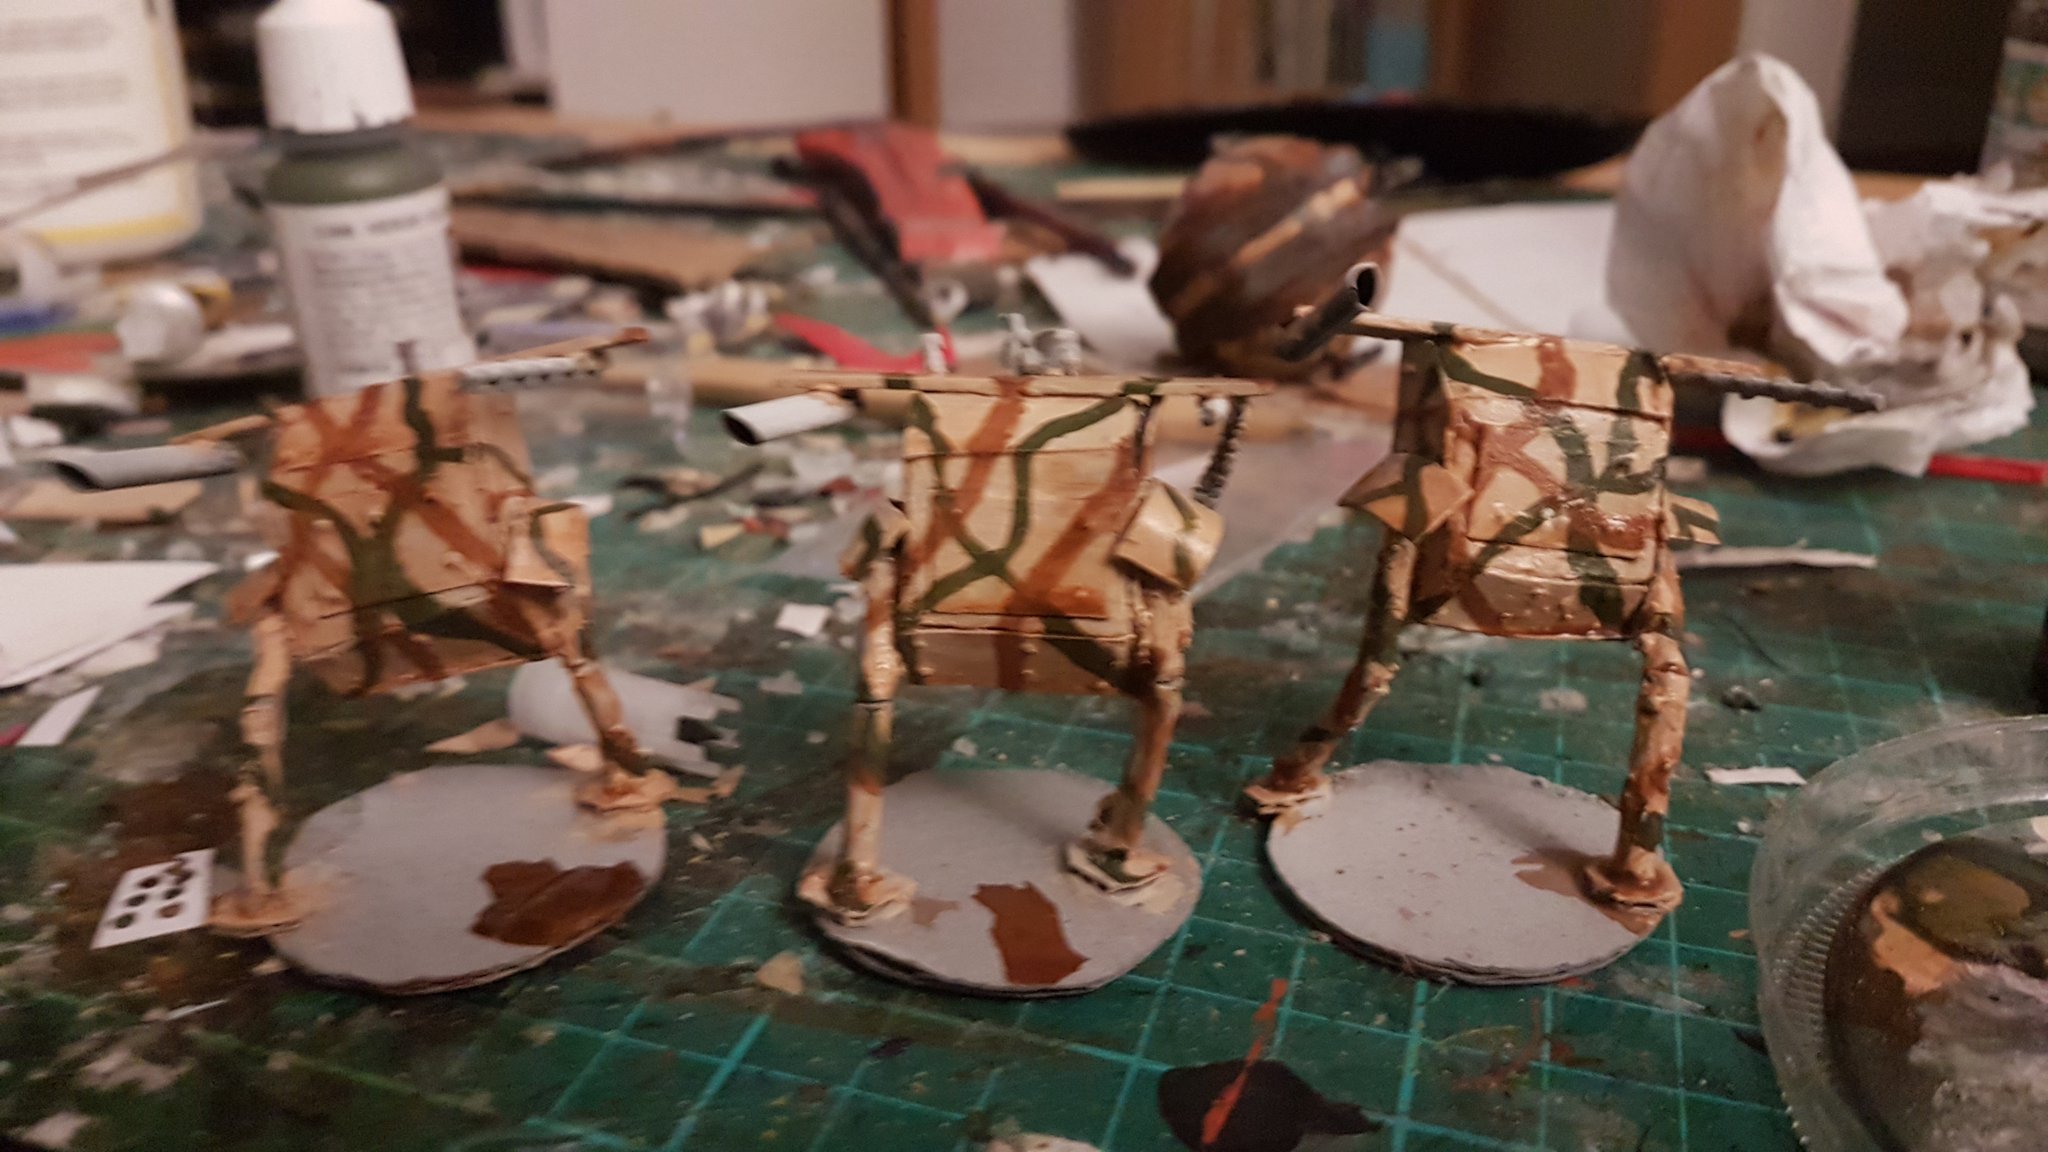
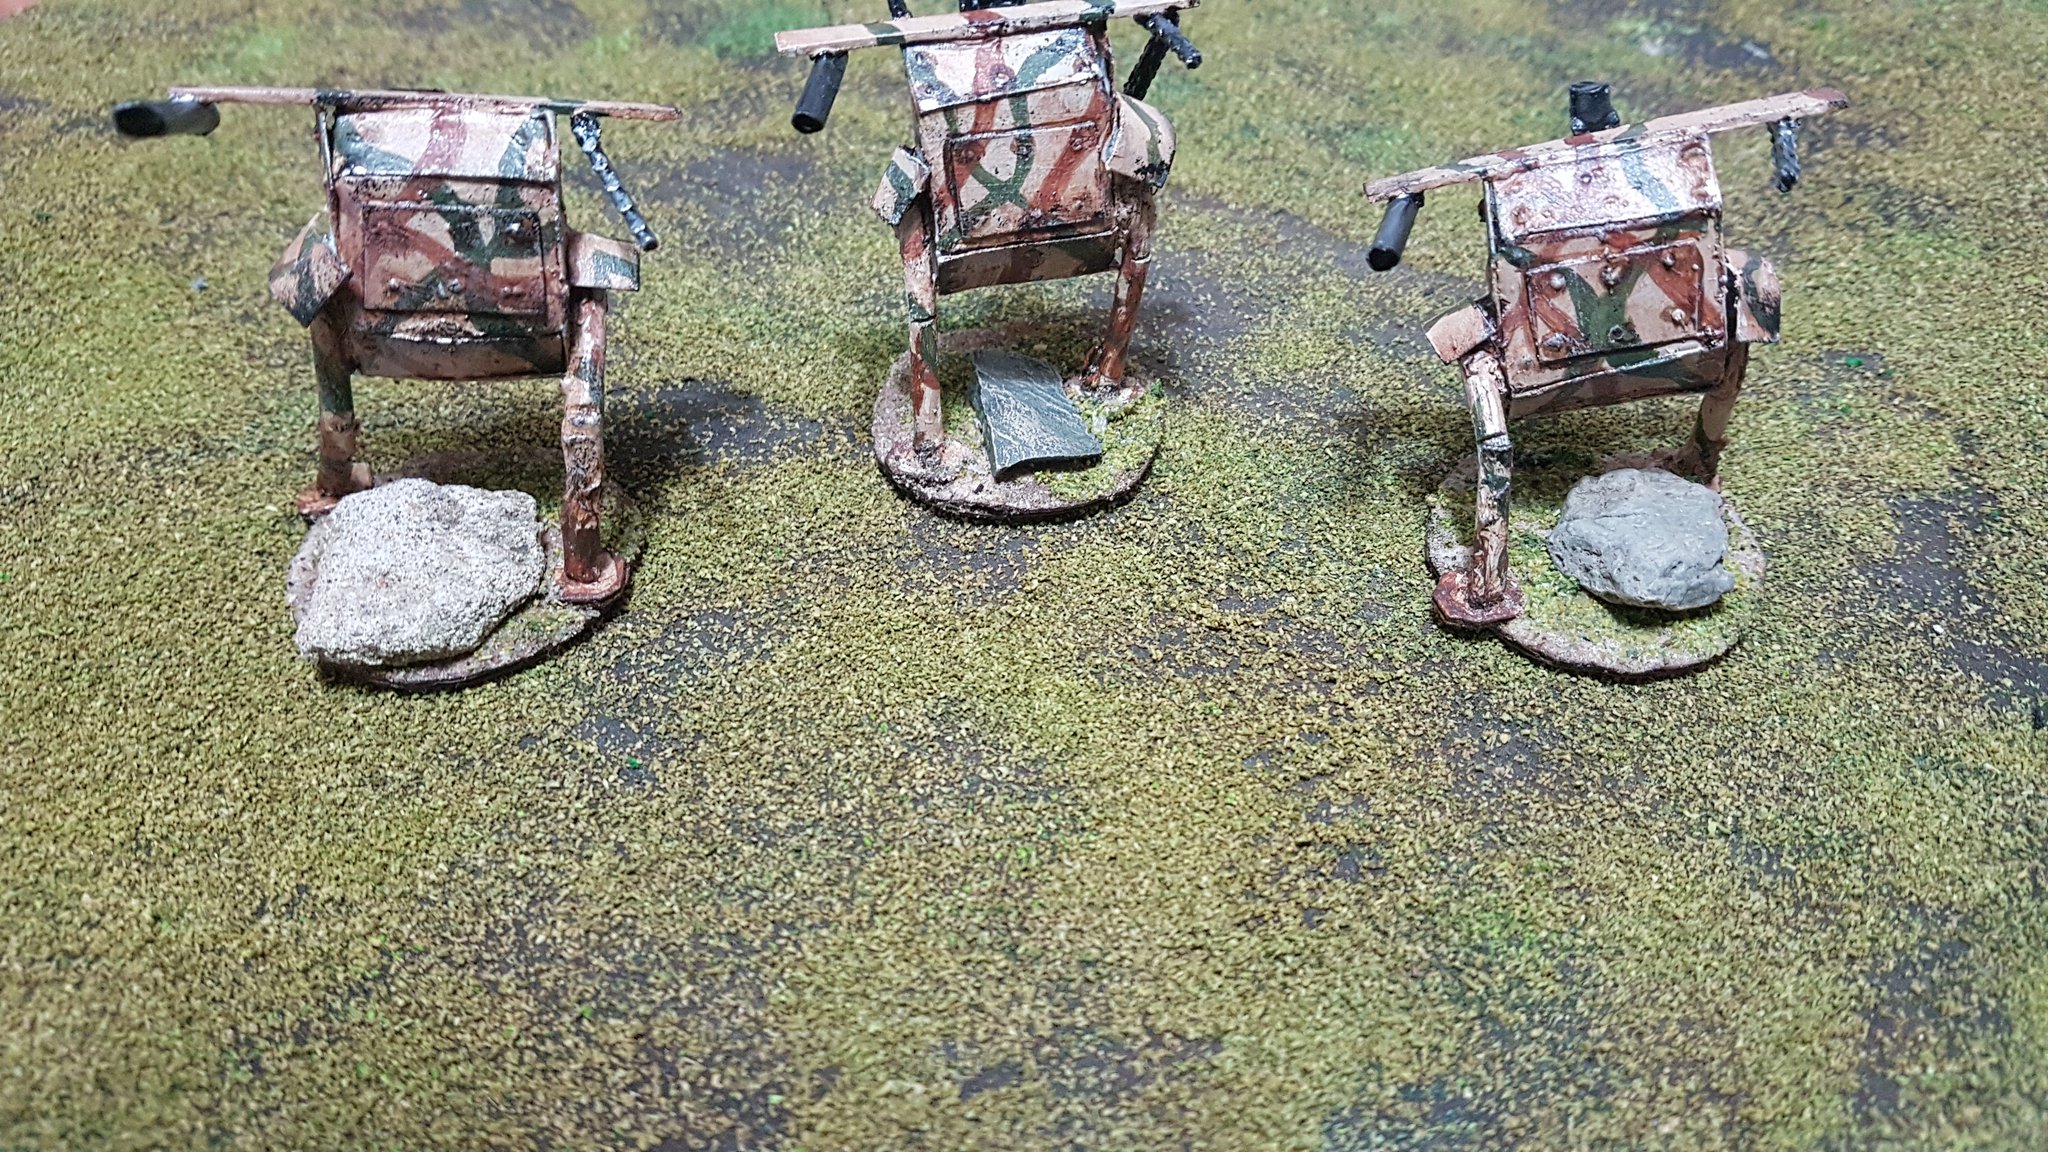
Leader – Panzerjager suit equipped with Laser Designator, SS-10 “Cobra” ATGM, Heavy Machine Gun

2 Troopers – Panzerjager suit equipped with SS-10 “Cobra” ATGM & Heavy Machine Gun

Special Rule – the Panzerjager suits each allow the wearer to mount heavy weapons without suffering any movement penalties. It protects it’s wearer with an armour value of 12.

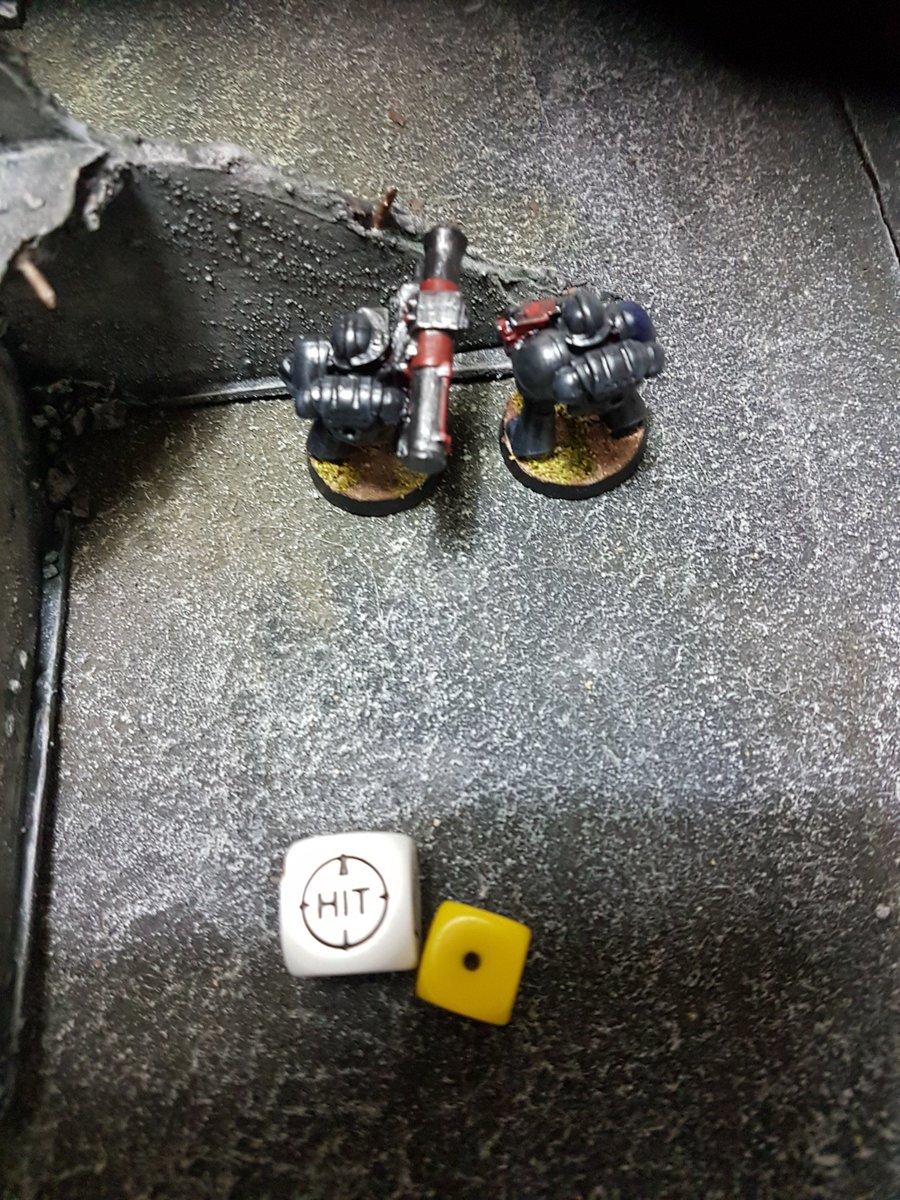
Heavy Machine Gun – range 100cm, ROF 8, Penetration 6+2D6

SS-10 “Cobra” ATGM – range 100cm, ROF 1, Penetration 15+2D6, +1 to hit on designated target

Laser Designator – the player chooses a target to be designated, all other unit members get +1 to hit with their Cobra ATGM launchers.

And if you fancy having a crack yourself, here’s the rulebook and fluff on Wargames Vault: Apocalypse: Earth

Stay safe and thrifty out there, and a BIG fight coming soon!

YET MOAR Hairy Japanese Bastards – Virum Nascii reinforcements!

The Totally-Not-Skaven return, and in strength! This project has been rumbling along for the last few (18 to be exact) months, gaining and losing momentum since summer 2018 when we bought – apparently – the last four boxes of these Miniknight Ratmen in existence!

We’ve covered the initial tranches of slaves and warriors, and the lads have seen combat in the Mortal Realms, as well as the world of Hyperia and wherever Age Of Fantasy is set, and have given pretty good accounts of themselves. We’ve got Plague Monks, Poison Wind Grenadiers and elites to add variety, and with the latest haul we’ve added a Seer, a Death Master and a unit each of Night Runners and Gutter Runners to provide skirmishing capabilities. Obviously we’ll have to rename them for Hyperian Wars, but they’ll do just fine for Age Of Fantasy, Age Of Sigmar and what the hell, we may even dig up good ol’ Warhammer Fantasy herself to throw down retro style!

Meanwhile, of course… pics!


Grey seer, converted to wield a staff rather than a blade – staff is a straightened out paper clip, and I bodged a lump of greenstuff to be some kind of armoured gauntlet.. I think the best you can say is you don’t really notice form two feet away!

Went for a pastel look – the blue grey areas were actually painted with Wilkinsons own brand Duck Egg Blue house paint! As usual, went with the strategy of start light and washing down. Actually tried zenithal highlighting – primed grey and dusted white. I get the theory, but I’m not sure I see a difference… I’ll keep trying!

Death Master! He got the sword I chopped off the Seer and replaced with a staff. 

Rat-Ninja!

They could almost be brothers.. 

Night Runner light skirmishers

Gutter Runner elite skirmishers

The new additions!

I really think Miniknight are onto a winner here, 20mm is a great scale for fantasy, enough to let detail on the models stand out, the models are dirt cheap and they look great racked up into regiments, you get more manoeuvre room on the table top -there are undead, orcs, goblins, dwarves from Caesar, Miniknight and Dark Alliance to check out and each of these races will have a place in the Hyperian Wars canon!

Still to come are conversions for the heavy weapons teams, and of course there’s some war machines on the horizon! We’ll be making a Doomwheels, and a Screaming Bell.. and basically everything over the next few (18?) months and everything will be rolling out on the tabletop in due course, so stay tuned!

Terrain Talk Pt. 13 – Lots Of Extraordinary Riveting: A Vrilfire Reactor for Hyperian Wars

Some of you may be familiar with Dakkadakka.com, one of the biggest hubs for wargaming (mainly GW, but by no means exclusively), as well as painting and modelling. Jim and I are regular visitors, and over the years have come upon many PLOGs to loot for ideas and inspiration (see here, for example).

And lo, it was on a recent trawl for ideas to pinch that we came upon the elite secret society (well, sort of) of Dakka terrain builders, the League Of Extraordinary Riveters – so named for being the detail obsessed, practically OCD modellers who will go to the extent of modelling every rivet onto their pieces.

Frankly, this rather appealed! And so when this month’s terrain competition was announced, with “food” as it’s theme, we thought, let’s have a go.

Now, every year I get a Cadbury’s Creme Egg easter egg. And every year it’s awesome, even though it does nudge me a step closer to type 2 diabetes. But every year, after I’ve gorged myself on sugar and then gone through the inevitable grinding comedown, I look at the packaging and think, “That could be…. SOMETHING”

Well, this year? It’s going to be SOMETHING.


It begins…

Planning (PLANNING?!?) stage….

Enter a caption

Detailing and tiling with cardboard

Boiler plate detailed with PVA blobs for rivets

More tiling, gates added – made from cardboard, three layers, woodwork patterns carved in to the door and rivets added. Cooling towers from drinking straws.

Pipework made from sprues sawn up with new toy – a razor saw!

Entire piece sprayed black and then texture paste added on top – a mix of PVA, filler, sand and water.

Base made from a handily sized hardboard square I happened to have left ovr, edges bevelled and then texture paste applied there too.

And done! Prime black, drybrush up using our Lukes APS ruins palette.. metallics done with gun metal washed with black and brown ink, skin wash added in places for a rusty vibe. Honourable mention for semicircular flywheel casings – they were peanut butter jar lids cut in half with the razor saw!

Ground primed black and drybrushed up through dark to light browns, three tone flock added

1/72 Virum Nascii ratmen shown for scale

Vallejo Skin Wash used to represent rust

Added some flock and clump foliage to represent wear and weathering

Not too shabby overall!

So no idea how we’ve placed in the end, but it’s been a good fun ride!

So until next time, stay thrifty and we’ll see you soon!

Another Epic Scratchbuild! DIY Great Gargant

Yeah, so the other day we were meant to be working on our entry for the DakkaDakka League Of Extraordinary Riveters terrain competition… and then something went wrong..

(by the way – if you’re reading this, Wyloch, then this is for YOU! 😉 )

Must.. glue.. things…

Must.. glue..more.. things.. yoghurt pot, bottle caps, glue lid, cardboard

Armour plating complete

“Eyes” done with green stuff, rivets done with fast drying PVA applied with a cocktail stick

Chainsword and gatling cannon added

More rivets….

Feet! Actually carved from foamboard and then wrapped in cardboard… then more rivets added

Primed! Now it’s looking like a model…

Attempt at zenithal highlighting… yeah….

And prewash with Vallejo black ink – didn’t quite go to plan…

…..aaaand who wants to see it in red?

Red basecoat, smokey ink pin was – white undercoat for the yellow areas, which then got a thin wash of Vallejo Skin Wash.. weathering was sponge chipping, first black and then boltgun metal

Side view

Pipework on the rear, courtesy of some sprue offcuts 

Chainsaw arm reinforced with more sprue offcuts

Hmm… what could make a Warlord princeps think “oh, sh*t” 

Yeah, I’m going to have to go and build my Imperator after all

Hmm… something of a scale issue…

But there again, weren’t gargants and titans always undersized? I’m sure we’ll figure something out..

We’ve really got the bug for scratchbuilding Epic stuff now, so stay tuned for more! Till next time, keep hoarding that recycling….

Balls! New tanks for the League of European Nations….

So the last time we visited 1950s Germany (1956 to be precise), the villainous Holy Soviet Empire had overrun the crucial Skalk Point plasma reactor facility – and with Buffalo 2-7 having suffered close to 100% casualties (not for the first time in their careers), it’s time for the League of European Nations to step up and take care of business!

And to do this, they’re going to need every bit of help they can get – so far, I’ve got an infantry platoon and a support laser painted up, and that’s not going to be enough to unseat Task Force Polikarpov!

So first out of the blocks, an idea I’ve been kicking around for a while – the infamous Kugelpanzer, or ball tank. These things seem to be staple of retro sci-fi, without really having a defined role, so I figured they could work as an armoured recon troop- with a bit of a twist! These things would be packing laser cannons- three each. These will be capable of rapid fire against infantry and light vehicles, but by combining their fire together they will be able to fire a single high intensity laser blast capable of obliterating even a Soviet Colossus or IS-6 Rampager!

It’s actually a bit of a challenge “feeling out” the character of this army – sandwiched between the lumbering juggernaut of the Holy Soviet Army and the elite, hi tech but short on numbers feel of the Atlantic Alliance, it’s a bit of a challenge to find where the European League should sit. So we’ve gone for a slightly ragtag, heterogenous feel – bizarre clunky specialised units that are very good at one thing, but suck at everything else. Kind of like a 1950’s Eldar to the AA’s Space Marines or HSE Guard, if you’ll allow the metaphor.

Anyway, enough waffle – on to the build!

We begin with (drumroll please)…. ping pong balls! A bag of 20 off eBay for a couple of quid. I googled “ping pong ball diameter” – seriously – and discovered that international regulations – seriously – specify 40mm. Thus reassured, I cut out 40mm x 15mm strips of thin card which I aligned as centrally as possible. These would serve as mounts for the tracks, which I cut as 5mm wide strips from IDE cables (a trick learned from master scratchbuilder Zrunelord)

You might notice the crosses sketched on the balls – this was my attempt to measure out a centre point and give myself a line to place rivets along (done with tacky glue, a fast-acting mix of PVA and isopropyl alcohol, applied with a cocktail stick)

Tracks and rivets added

After that, all that remained were the guns! 3 laser cannons per tank, one per side and a centrally mounted top one. I made these by chopping up a 1cm length of cocktail straw and then supergluing a 5mm length of drinking straw to each end, like so:

Laser cannons ready!

Hole punched thick card superglued to the hull as spacers/ weapon mount points

All done and ready for priming!

A coat of white primer and a base coat of Crafter’s Choice Fawn later, I added lines of brown and Vallejo Russian Green (irony!) to create the WW2 “Dunkelgelb” style camouflage pattern. The whole thing then gt a thinned wash of brown ink, an unthinned in wash of Vallejo Smokey Ink in the crevices, before a final drybrush with bine craft paint to catch the rivets. I applied sponge weathering using both black and gun metal, and then knocked up a texture paste from sand, PVA and dark brown paint – this got smeared around the tracks before being drybrushed with a lighter brown and blended around the tracks (in truth I think I got a bit carried away here, but oh well – northern Europe can get pretty muddy..)

Anyhow – pics!

The Kugelpanzer troop lead League infantry through a ruined urban landscape

Looking forward to getting these on the table soon – can they beat the fate of all painted models, or will they cover themselves with glory taking down Stompy Uncle Joe? Stay tuned, stay thrifty, see you soon!

Cheaphammer 40k FINALE! – the 2nd Ed Revival Project : Battle For The Bridge

And lo, it has come to pass – ALL DA LADZ against Dan’s thin red (well, black) line of Space Marines in the climactic game from the 1993 2nd Ed box set Battle For Armageddon mini campaign.

On the Marine side – two tactical squads of Space Marines, each comprising a Sergeant with bolt pistol and chainsword, a Marine with a missile launcher, a Marine with flamer, and 7 Marines with bolters. For the Orks, it was the Dread, twenty Boyz armed with bolt pistols, axes and stikkbomz and no fewer than FORTY Gretchin, all armed with autoguns – quite the horde!

Forces were organised as follows:

Marines (all Space Marines have Mk7 power armour, bolt pistol, frag and krak grenades):

Squad Raphael (red shoulder pads):

Sergeant Raphael – bolt pistol, chainsword

3 Space Marines – boltgun

1 Space Marine – flamer

Squad Mephisto (blue shoulder pads):

Brother Mephisto – bolt pistol, chainsword

3 Space Marines – boltgun

1 Space Marine – Missile launcher (targeter, frag and krak grenades)

Squad Lazarus (grey shoulder pads):

Sergeant Lazarus – bolt pistol, chainsword

3 Space Marines – boltgun

1 Space Marine – flamer

Squad Cleon (cream shoulder pads):

Brother Cleon – boltgun

3 Space Marines – boltgun

1 Space Marine – Missile launcher (targeter, frag and krak grenades)

MarinesDone

Orks (All Orks and Gretchin wear flak armour):

Da Krusher – Ork Dreadnought armed with two power klaws, heavy bolter and lascannon.

Grugnat’s Mob – ten Orks armed with bolt pistols, axes and frag stikkbomz.

Snikbog’s Mob – ten Orks armed with bolt pistols, axes and frag stikkbomz.

Grit’s Mob – ten Gretchin armed with autoguns.

Grot’s Mob – ten Gretchin armed with autoguns.

Scumbo’s Mob – ten Gretchin armed with autoguns.

Fergit’s Mob – ten Gretchin armed with autoguns.

OrkzOnParade

The Marines got points for wiping out as many Greenskin mobs as possible, while the Orks got a 5 point bonus for getting a mob of six models or the Dread into the Marine deployment zone. Game length was four turns.

Turn 1

To everyone’s surprise, the Orks won the first turn and barrelled forward, Gretchin screening the boyz who were hugging the available cover until they could get within bolt pistol range.

Gretchin fire patters ineffectively off Marine power armour..

..meanwhile, Da Krusher’s lascannon stabs out and downs a marine from Squad Lazarus

Marines hunker down and fire wherever possible, bolters and frag missiles downing an Ork and 7 Grots

And with a Leadership of only 5, it should be no surprise that Scumbo’s Mob break and run for it

Turn 2

This time probability reasserted itself and the Marines scored first turn.

Squads Lazarus and Raphael venture out into the open, hoping to close the range and bring their flamers into play

Krak missile from Squad Mephisto smashes into Da Krusha, sending it out of control – it promptly barrels into the nearest unit, the Gretchin of Grot’s Mob!

Marine fire take its toll on the Greenskin horde…

But humie isn’t having it all his own way! Da Boyz close the range to the exposed Marine combat squads, and three of humanity’s finest fall to bolt pistol fire.

Turn 3

Once again, the Marines won the first turn and the missile launcher teams desperately pumped bolter fire and frag missiles into the oncoming greenskins, while the flamer teams attempted to manouevre in to use their devastating short range weapons to better effect..

Marines pump fire into the oncoming horde, but will it be enough?

Seeing Da Krusha out of control, missile launcher teams focus on thinning out the greenskins with frag missiles.. this proves to be a mistake, as the pilot promptly has a change of heart, wheels around and barrels into the Marine lines, vapourising a brother with its’ lascannon.

“It’s too much!” Gretchin take shelter in a ruin after losing seven of their squad to Marine fire

Turn 4

First turn passed back to the Orks and the boyz burst from behind the screen of Grots to engage the Marines at point blank range!

“WAAAAARRRGH!”  Boyz charge forward, gunning down Squad Lazarus in a hail of bolt pistol fire

It gets up close and personal in the games’ closing moments..

Gretchin blaze away with their autoguns as da boyz get stuck in! Meanwhile, Da Krusha savages Squad Mephisto


The weight of fire batters through the Marine power armour..


Squad Mephisto marines fall to assault saw and power klaw!


Greenskins rampage across the battlefield, overwhelming the remaining Marines!

At the end of the turn, we totted up the points – Orks 4, Marines 1 – a solid win for the Greenskins!

Dan owned up to a lack of concentrating fire on single mobs, as he caused a solid amount of casualties but not actually wiping out or seriously damaging complete units. I did get pretty lucky with Da Krusha’s lunatic rampage not just taking down three Marines from Squad Mephisto but also taking him squarely into the Marine deployment zone! However if Dan’s flamer teams could have gotten in range, or if he’d finished off Da Krusha with a couple of extra krak missiles, things could easily have gone the other way..

So if you’re keeping score, that’s 2-1 to the Orks, so a Greenskin victory in this mini campaign! Props to Dan for a brilliant job on his Marines (whatever he may claim to the contrary) and being a gentlemanly and sporting (if perennially unlucky) opponent.

This project has been a blast, but it doesn’t have to end here – we’re toying with adding a few bits to make these forces 8th ed legal, and just maybe to take them on a pilgrimage to Warhammer World itself, for a game on the hallowed tables themselves! A great way touch base with the roots of what got us into this hobby in the first place.

Till next time, stay thrifty out there, yo 😉

CheapHammer40K – The 2nd Ed Revival Project: Game 2 – High Ground

The dust of broken glass ground underfoot, and the smoke of a million corpse-fires fouled the air. Boss Bludguzzla WarBastard IV took to his feet and breathed deeply of the Armageddon stench. Beautiful.

He belched, cocked a leg and let go an insouciant, musical fart. “I luvz da smell of roastin’ humiez in da morning”.

Turning to the motley assortment of Orks gathered in the shell crater before him, he waved a hand toward the biggest ruin on the horizon.

“Dat’s where they are, ladz! Sneaky gitz holed up in dat temple wiv a missile launcher. We’s got to splat dem so we can bring da Dread around and get da boyz ready to kick some proper humie arse. Cumlicka!” 

One of the larger Orks cocked an ear. 

“You takes your ladz up da front. Keep shootin’, keep their heads down. Ratbollock!”

A second oversized Ork shuffled to attention,

“You ladz folla mine, we’s going to get round da side of ’em, chuck da stikkbomz, and go feth ’em up, up close and personal like”

WarBastard jammed a magazine into his bolt pistol.

“Dat concludes da breefin’. Let’s go feth it up! WAAAAAAAAAAARGH!!!!!!!”

“WAAAAAAAAAAARGGGGHHH” rose from more throats than an Ork could count (somewhere between 8 and 20) – and the Boyz rolled to war once again…

Welcome to Mission 2 from the 2nd Edition Scenario Booklet – High Ground! After a close fought first round (no spoilers here), and some frenzied painting on my part after a a couple of lucky eBay wins fleshed out my Ork forces to full strength, Dan and I warmed up the shed and got busy deploying Ork and Marine alike for the next round.

The two sides deploy

View from the Marine position in the ruined Shrine Of The Emperor Triumphant – frag missiles at the ready, it’s a target rich environment!

Da Boyz cluster in the ruins, making use of what cover they can find

Turn 1 kicked off with the Marines gaining the initiative – no point in breaking cover yet, and no one in range, so they elected to hunker down and blast a frag missile into the densely packed boyz mobs facing them..

Lacking the artillery dice from the early 90s, we agreed that “1” would equal a misfire, so…..

……yeah. Misfire, exploding both launcher and Marine. Cue some innovative swearing from Dan.

The Orks dash forward, using the ruins to shield them from Marine fire

Well, partially.

Orks charge toward Marine lines – a few fall, but will it be enough?

“Dere day are ladz!” It’s not all one sided – a Marine falls to Ork bolt pistol fire

“Squad Broken” – 25% losses in one turn, the Marines fail their morale check!

But Marines don’t run – although shaken, they stay in the fight, and return the favour, breaking an Ork mob with bolter fire

While Boss Cumlicka and his boyz died to an Ork taking the Marines on in place, Bludguzzla and Ratbollock led their boyz in a kunnin’ flanking manouvre, hurling frag stikkbomz onto the hated humiez

Frontal assault is always a bad idea

“FIRE IN DA HOLE!” Stikkbomz take down another Marine

Sergeant Taddeus leads his remaining Marine out to counterattack the Ork assault with bolter and chainsword!

Taddeus and his brother stand against many times their own number of boyz (by this point it was already past turn 4 and an Ork victory, but we were enjoying ourselves too much!)


Bellowing his war cry, Sgt. Taddeus barrels into the Ork horde..

And falls a hero, dead Orks on every side!

And there we are, and Ork victory, but what a game! Right from the off the Marines were on the back foot, their most potent weapon blowing itself up – but what says 40k more than the last stand of Marine Sergeant Taddeus, surrounded by Ork corpses? Brilliant fun, despite 40ks inherent limitations, very cinematic – the game really wrote it’s own story, and isn’t that exactly why we play these things?

Next up, a truly epic battle as 20 marines face a dreadnought, 20 Orks and 40 Gretchin as our campaign reaches its conclusion! Stay tuned, stay thrifty, we’ll see you soon 😉

CheapHammer 40k: The 2nd Ed Revival Project Pt. 4 – Da Boyz Are Back!

Bloody hell, it’s still January. All the fun of winter without Christmas to look forward to.. still, could be worse. I could be PM.

Anyway, having spent the run up to Christmas listening to Dan whinge about having to edge highlight a whole 20 Space Marines, I feel inclined to redress the balance a bit – 30 Grots, you idle bastard! For one game!!

And for our next one, I have to get 15 Boyz ready!

#FirstWorldProblems – I know… 😉

Our accidental eBay haul was somewhat lacking in Boyz – there were two, with three arms between them – so I’ve had to dig about on eBay to stock up and managed to pick up a couple of good deals.. unfortunately one is still en route from Poland, ten days late so far… Hmmm. Watch this space.

Anyway, using what I’d learned from the Grots, I set to business:

Home made texture paste on the bases, then primed white. Forgot to prewash this mob, but it didn’t seem to matter too much. Mixed a fair approximation of the old GW Bilious Green – go bright and wash down, that works for me!

Decided to rough out a prototype colour scheme with this guy – basically Evil Sunz-esque, red with camo trousers. I did the first mob with a scheme based on Crye Multicam, the second mob with a scheme based on the old 90’s British Army DPM camo. Next mob will be using US Army “mint choc chip” 90s desert camo.

For the skin tones, I washed the DIY Bilious Green mix with Army Painter Green Tone, then drybrushed the original colour and then pure yellow over the top. Red and brown and camo areas washed with thinned Vallejo Smokey Ink.

Metallic areas undercoated black and then painted with Vallejo Mithril Silver before washing heavily with mixed black and brown Vallejo inks. Leftover silver was used for sponge chipping. Thinned down tan and then bone craft paint for highlighting the teeth.

Final touches included an all over bone drybrush – very light – with bone, followed by basing. Painted brown, drybrushed with two layers of highlights, and then flock added before varnishing – and here are the results!

These ladz will be rolling out against the marines for Game 2 of our Armageddon mini- campaign – see you soon for that one!

CheapHammer 40k- the 2nd Ed Revival Project! Pt. 3 – Wotta Lotta Grots

The plot thickens! Just as Dan’s Marines have got themselves fly new Deathwatch paintjobs, I’ve not been idle with my share of our Ebay booty – first out of the blocks, the Grots! Now, as it turns out there are 36 of these little buggers and to do the mini campaign properly I’m going to need 40, so I may be taking to eBay again pretty soon.. oh, the irony! This is how wargamers end up with houses full of tiny plastic figures… but enough of that for now.

I spread some home made texture paste (filler powder, sand, PVA and water) on the base and hit the whole thing with cheap pound shop white primer, before giving all the figures a prewash with thinned Vallejo brown ink.

I’ve got two mobs of ten painted up so far, with a pretty straightforward three colour scheme – dark grey, bone and red. To differentiate, Furst Mob has grey and red blocked out with a camo scheme (of grey and red) over the bone areas, while Secund Mob has the bone and grey blocked in and a bone and grey camo  scheme layered over the red. Thurd Mob, when I get round to them, will have bone and red camo layered over the grey and blocked in red and bone. and Uvver Mob will either have a whole load of camo or none!

I used Vallejo German Grey, a cheap acrylic red and a craft paint bone. Black ink wash, thinned, over the grey and thinned brown ink over the red and bone.

For skin tones I went with a thinned light green, washed with Army Painter Green Tone and then highlighted up with green mixed with yellow, and a touch of bone for the teeth and a dash of red for the eyes. After that, I added a unifying light drybrush of bone, and then on to the metallics – block in black and then boltgun metal highlighted with silver, and then washed with brown ink to give a rusty metal vibe.

Then, basing! I used the same brown craft paint I used for the leather part, then drybrushed with bone, before drizzling flock and Garage Floor TM dust, and then a final edge of brown to touch the whole thing up.. and then, varnish and done!

Grots frontally engage the Deathwatch!

Furst Mob


Note the red autogun – he’s the mob leader

Secund Mob

More Secund Mob!


Secund Mob WIP

Terrain Talk Pt. 8- Cheap Scratchbuilt Urban Warfare Skirmish Board

So the dust has settled after last month’s mega-battle, and after gorging on our biggest game yet, we’ve decided to turn our attention to something a little lower key and skirmish-y.

Now, there’s a strong appeal to these types of games – low model count means easy buy in, short set up and pack down means it’s easy to get in a quick game even on when time and space are a premium, and it’s a great way to learn a ruleset without jumping in the deep end with a full combined arms force!

Clearly GW agree with us, having just released the new version of Kill Team, but we’re planning on starting with a few more free-to-download sets, not to mention our own Black Ops system (intended to be a more detailed small scale RPG/ skirmish variant on the basic Apocalypse: Earth game engine). An accidental alcohol-related eBay purchase means we’ve got ourselves a crowd of 2nd ed 40k Grots and Marines, so we figured time to make them somewhere to have a scrap!

We did actually put together a folding urban warfare table last year, built from the back of a set of shelves – roughly 3’x3′ folding, made of some sort of hardboard/ cardboard laminate – but we’ve learned a lot since then, and now it looks a bit… crap, to be honest. So we decided – time to pimp, yo.

Began with single corrugated cardboard to act as paving slabs and such – for the tile textures in the corner, I scored 20mm squares into the card, then tore off the edges to make some broken tiles. I used PVA to glue them, but in retrospect acrylic filler (caulk) would probably have been a better bet.

Began adding texture – the grey stuff is home made texture paint, made from water, black paint, filler powder, sand and PVA glueand stippled on with an old brush. The white stuff is cat litter (unused, I should add!) held on with splodges of acrylic caulk intended to look like rubble piles..

Close up of tilework and rubble

The board textured and ready for priming black

After getting the stonework and texture paste on, I made sure to seal thoroughly with a spray of diluted PVA (empty Windolene bottle, ten parts water to 1 part PVA). In fact, I actually hit this three times at roughly 4- 6 hour intervals over the day – worth it in terms of time investment to make sure the thing doesn’t end up shedding grit and cat litter all over the floor every time you get it out!

Two £1 cans of matt black car spray paint later – voila, primed!

With priming complete, the next step was painting. I used a recipe that has served me well, nicked wholeheartedly from Lukes APS. I used house paint tester pots for economy and ruggedness – hilariously, Duncan recommends using about £20 worth of Citadel model paints for this…. don’t, just don’t! – and put simply:

Overbrush grey blue

Drybrush red (lightly, and only in selected places)

Drybrush with Wilko’s City Break grey

Lighter drybrush with same brand Granite Dust

Grots patrol an urban wasteland… (more on them in another post)

Next up, I made up some very thin washes based on brown, green, black and skin/ flesh wash colours heavily watered down and daubed about the board. This gives it a rather cinematic feel which I found I liked.

Not sure how realistic this is, but it seems to work!


After a looking at it a few times, I decided I’d cocked up a bit with the tilework – 20mm squares just looked wrong with 1/72 – so I chopped them up into 10mm and painted a checkerboard pattern using cream and dark grey, lining the edges with thinned down Vallejo smokey ink

And then I realised how long it had taken, and settled for cream alone on the other part!

For the muds, I went with a burnt umber basecoat and gradually drybrushed up a couple of lighter browns, taking care to really work the brush into the texture to blend with the concrete.

Overall, this was a fun little build and I think t actually came out looking pretty good. It’ll suit Black Ops, and 28mm stuff like Kill Team and Necromunda. Plus, it folds away!

Next step is to scale up these techniques for the main 6’x4′ board, and a squared off 2’x2′ for Deadzone – thanks to Mantic for making the core rule book freely available as a download – and actually, none of these steps are particularly difficult, just require a bit of patience, planning and imagination. Youtube, and particularly The Terrain Tutor and Lukes APS are your friends here – good luck, stay thrifty and we’ll see you soon!