It can’t have escaped anyone’s notice that our pet game “Apocalypse: Earth” has been conspicuous by it’s absence so far this year. There’s a fairly straightforward reason for that – the setting is based around a rampaging Soviet Empire under a genocidal lunatic trying to enslave the world and this year that hasn’t really been escapist fantasy, it’s just been.. well, the news. And as such, neither Dan or myself have really felt in the mood for it.
But after spending a month last yearpainting a wholeload of zombies for a specially themed Halloween game, we both rather fancied the idea of breaking out the Atlantic Alliance to fight out a scenario based on the Battle of Yonkers from the brilliant novel (and passable film) World War Z.. if you haven’t read the book – well, you definitely should… if you haven’t seen the film – well, it’ll be on telly again before long, there’s no rush!
Basically the Battle Of Yonkers saw the US military making a concerted stand at the town of Yonkers, NY against a crowd of zombies numbering in the millions. There’s some fascinating descriptions of the effects of MLRS and artillery against the undead, as well as the Land Warrior system (which correct me if I’m wrong, never did make it into service in real life) and the famed “Silver Bullet” tungsten / depleted uranium armour piercing shells.. if you haven’t read it, I won’t spoil it but let’s just say it doesn’t go too well for humanity… the US Army being a finely honed instrument of warfare honed for a completely different war than it found itself fighting.
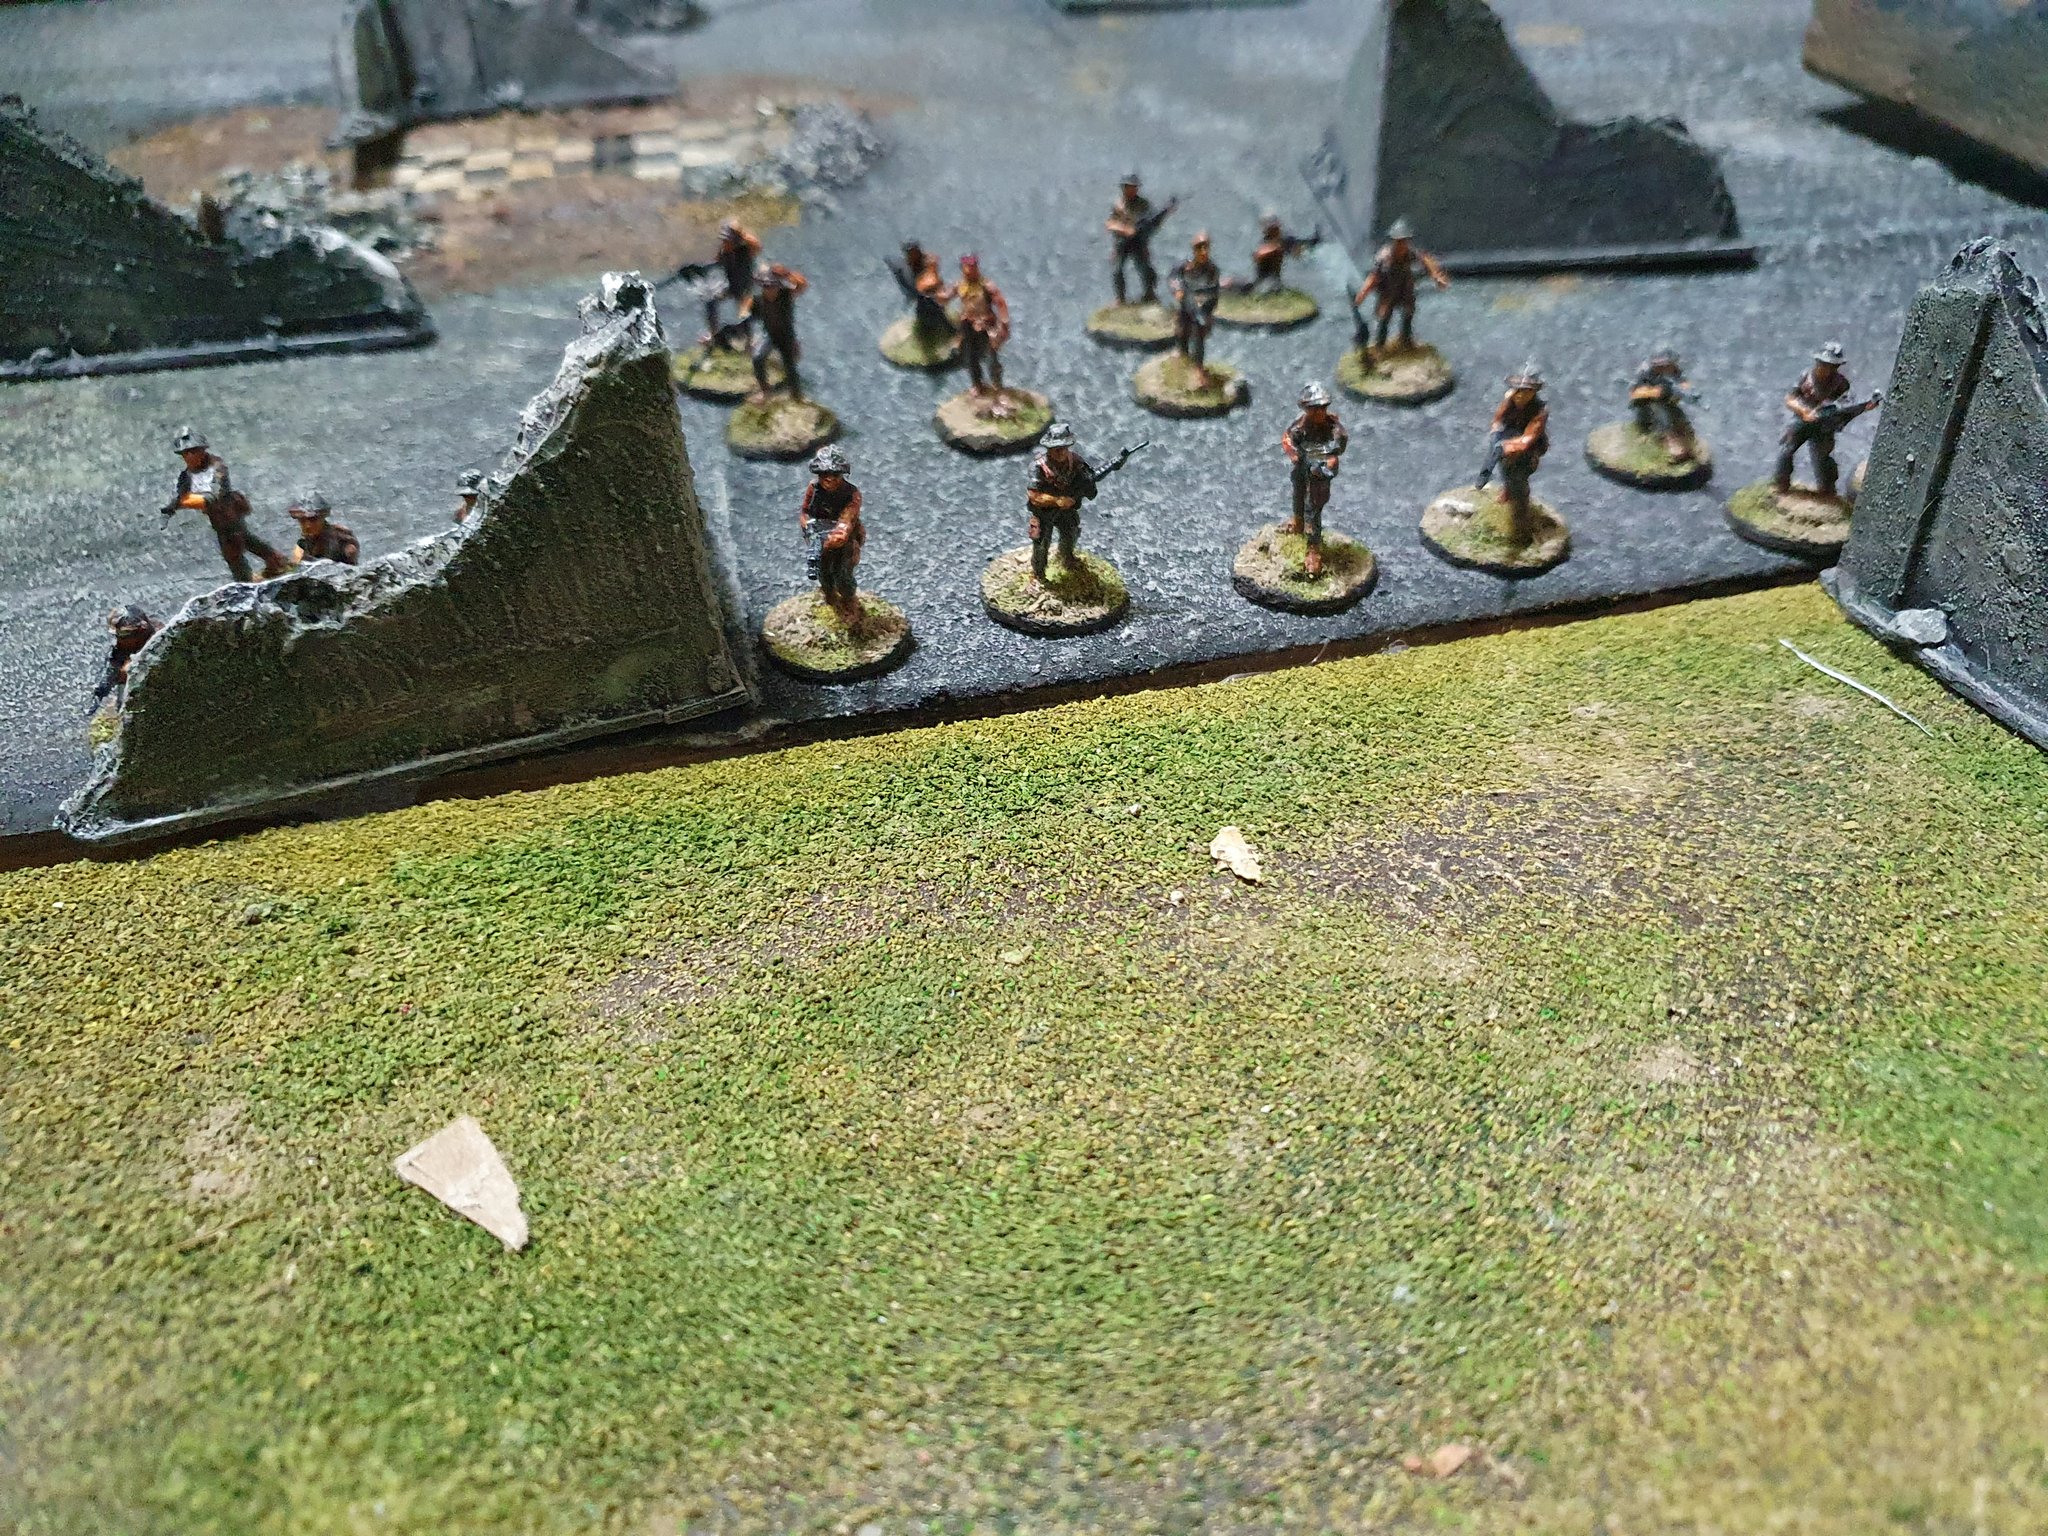
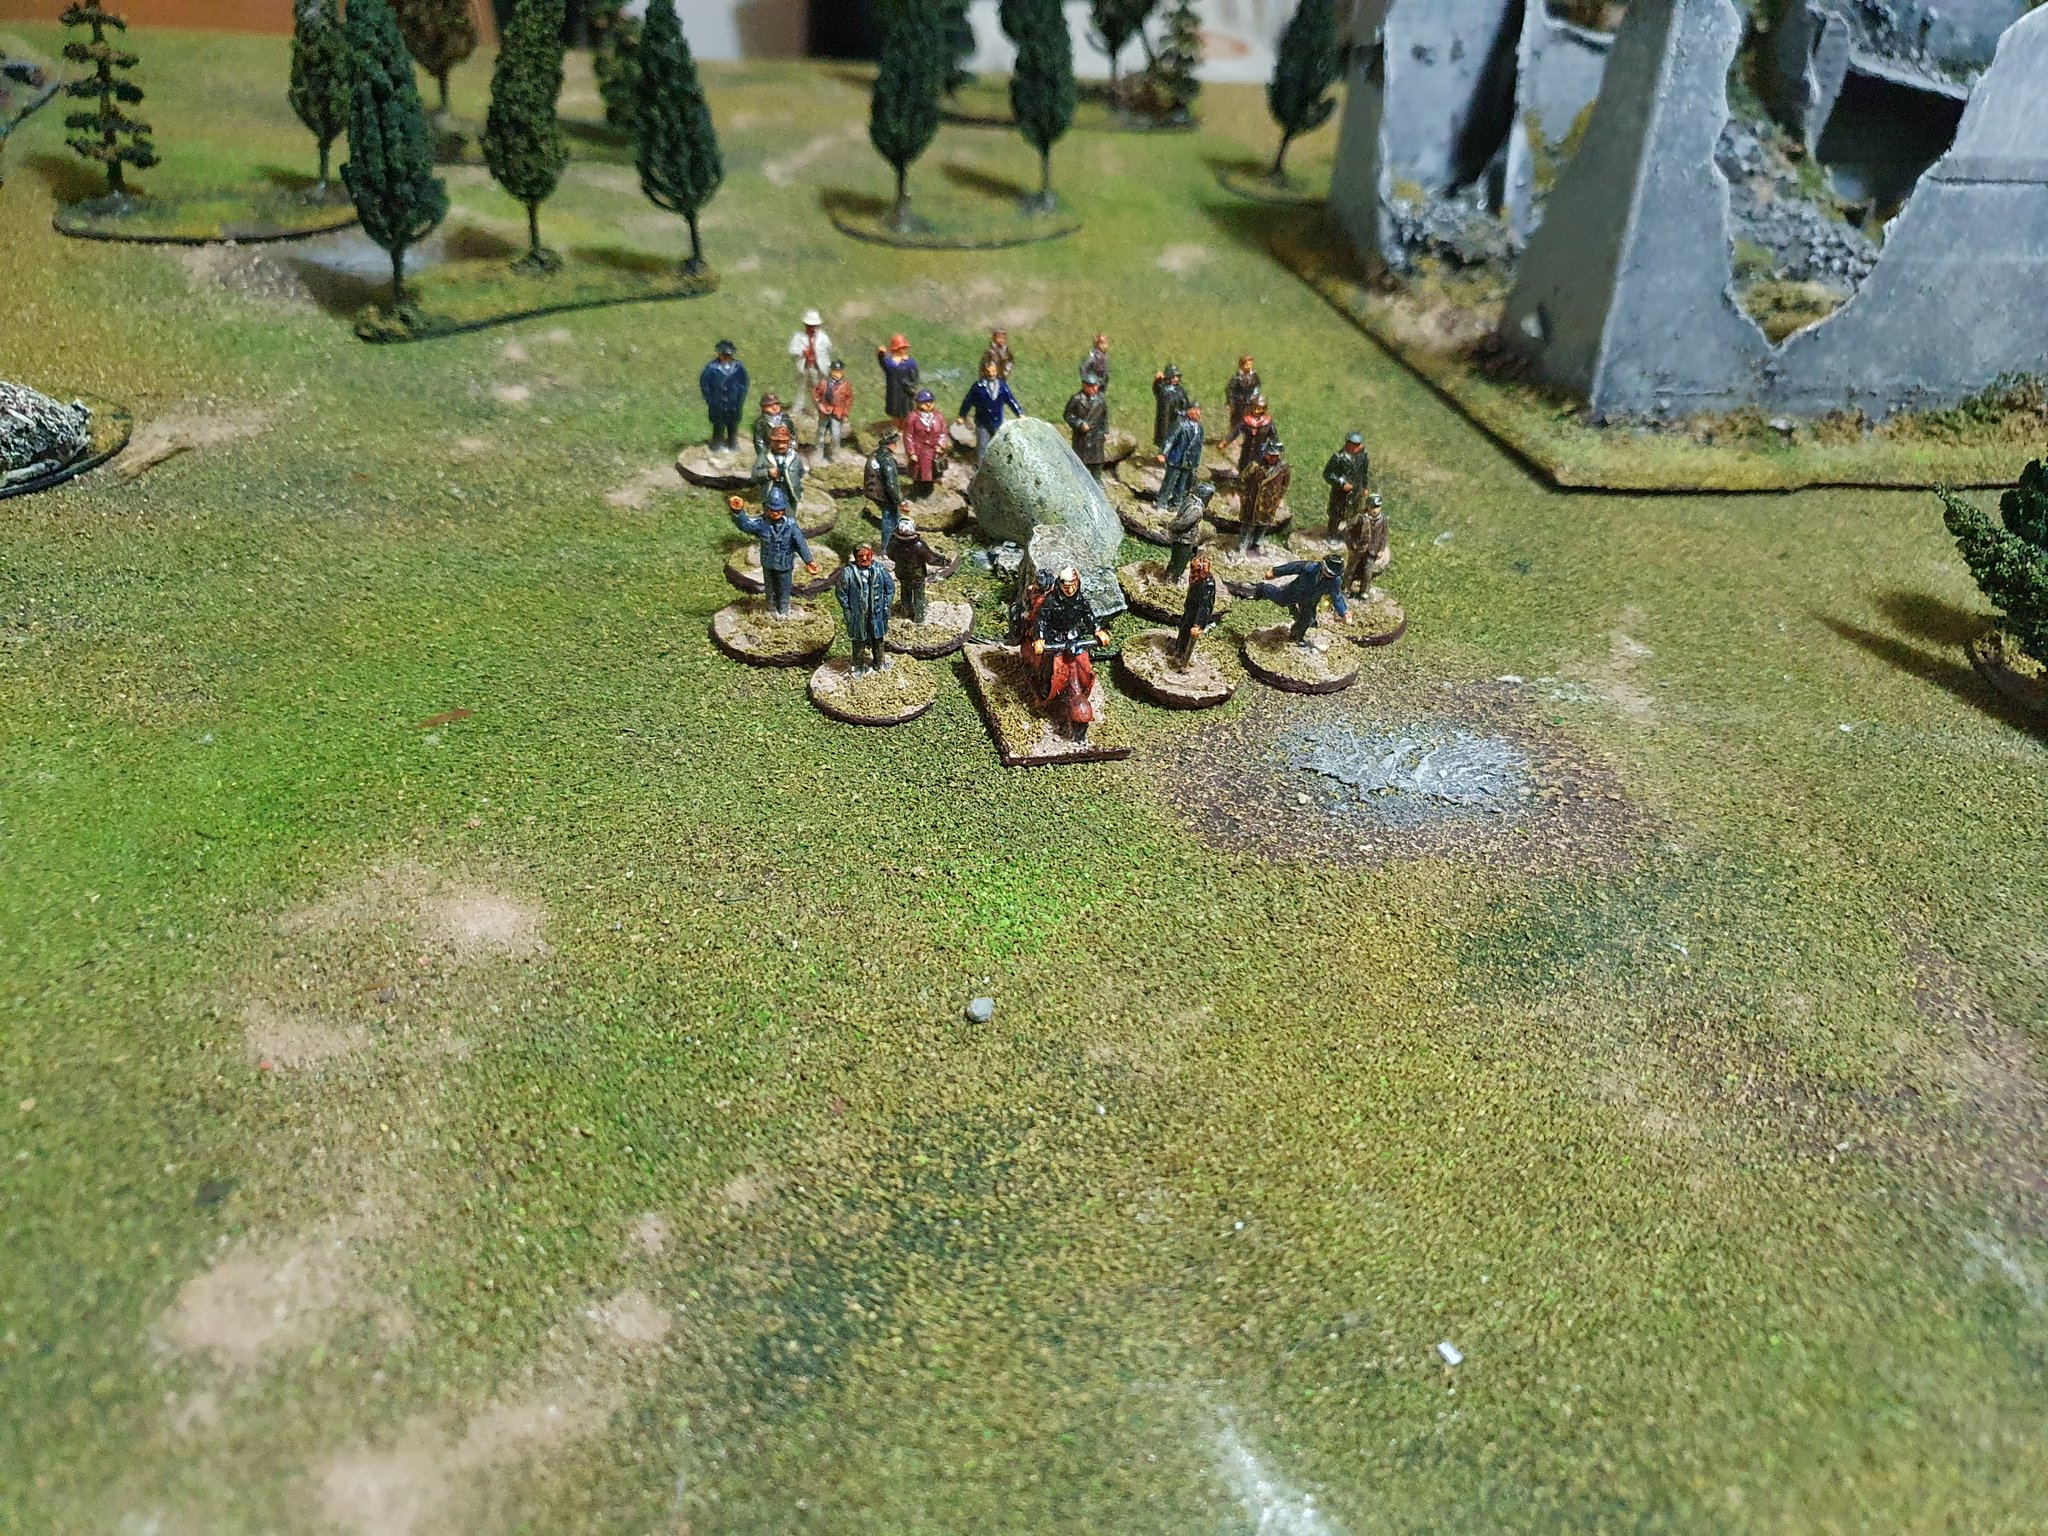
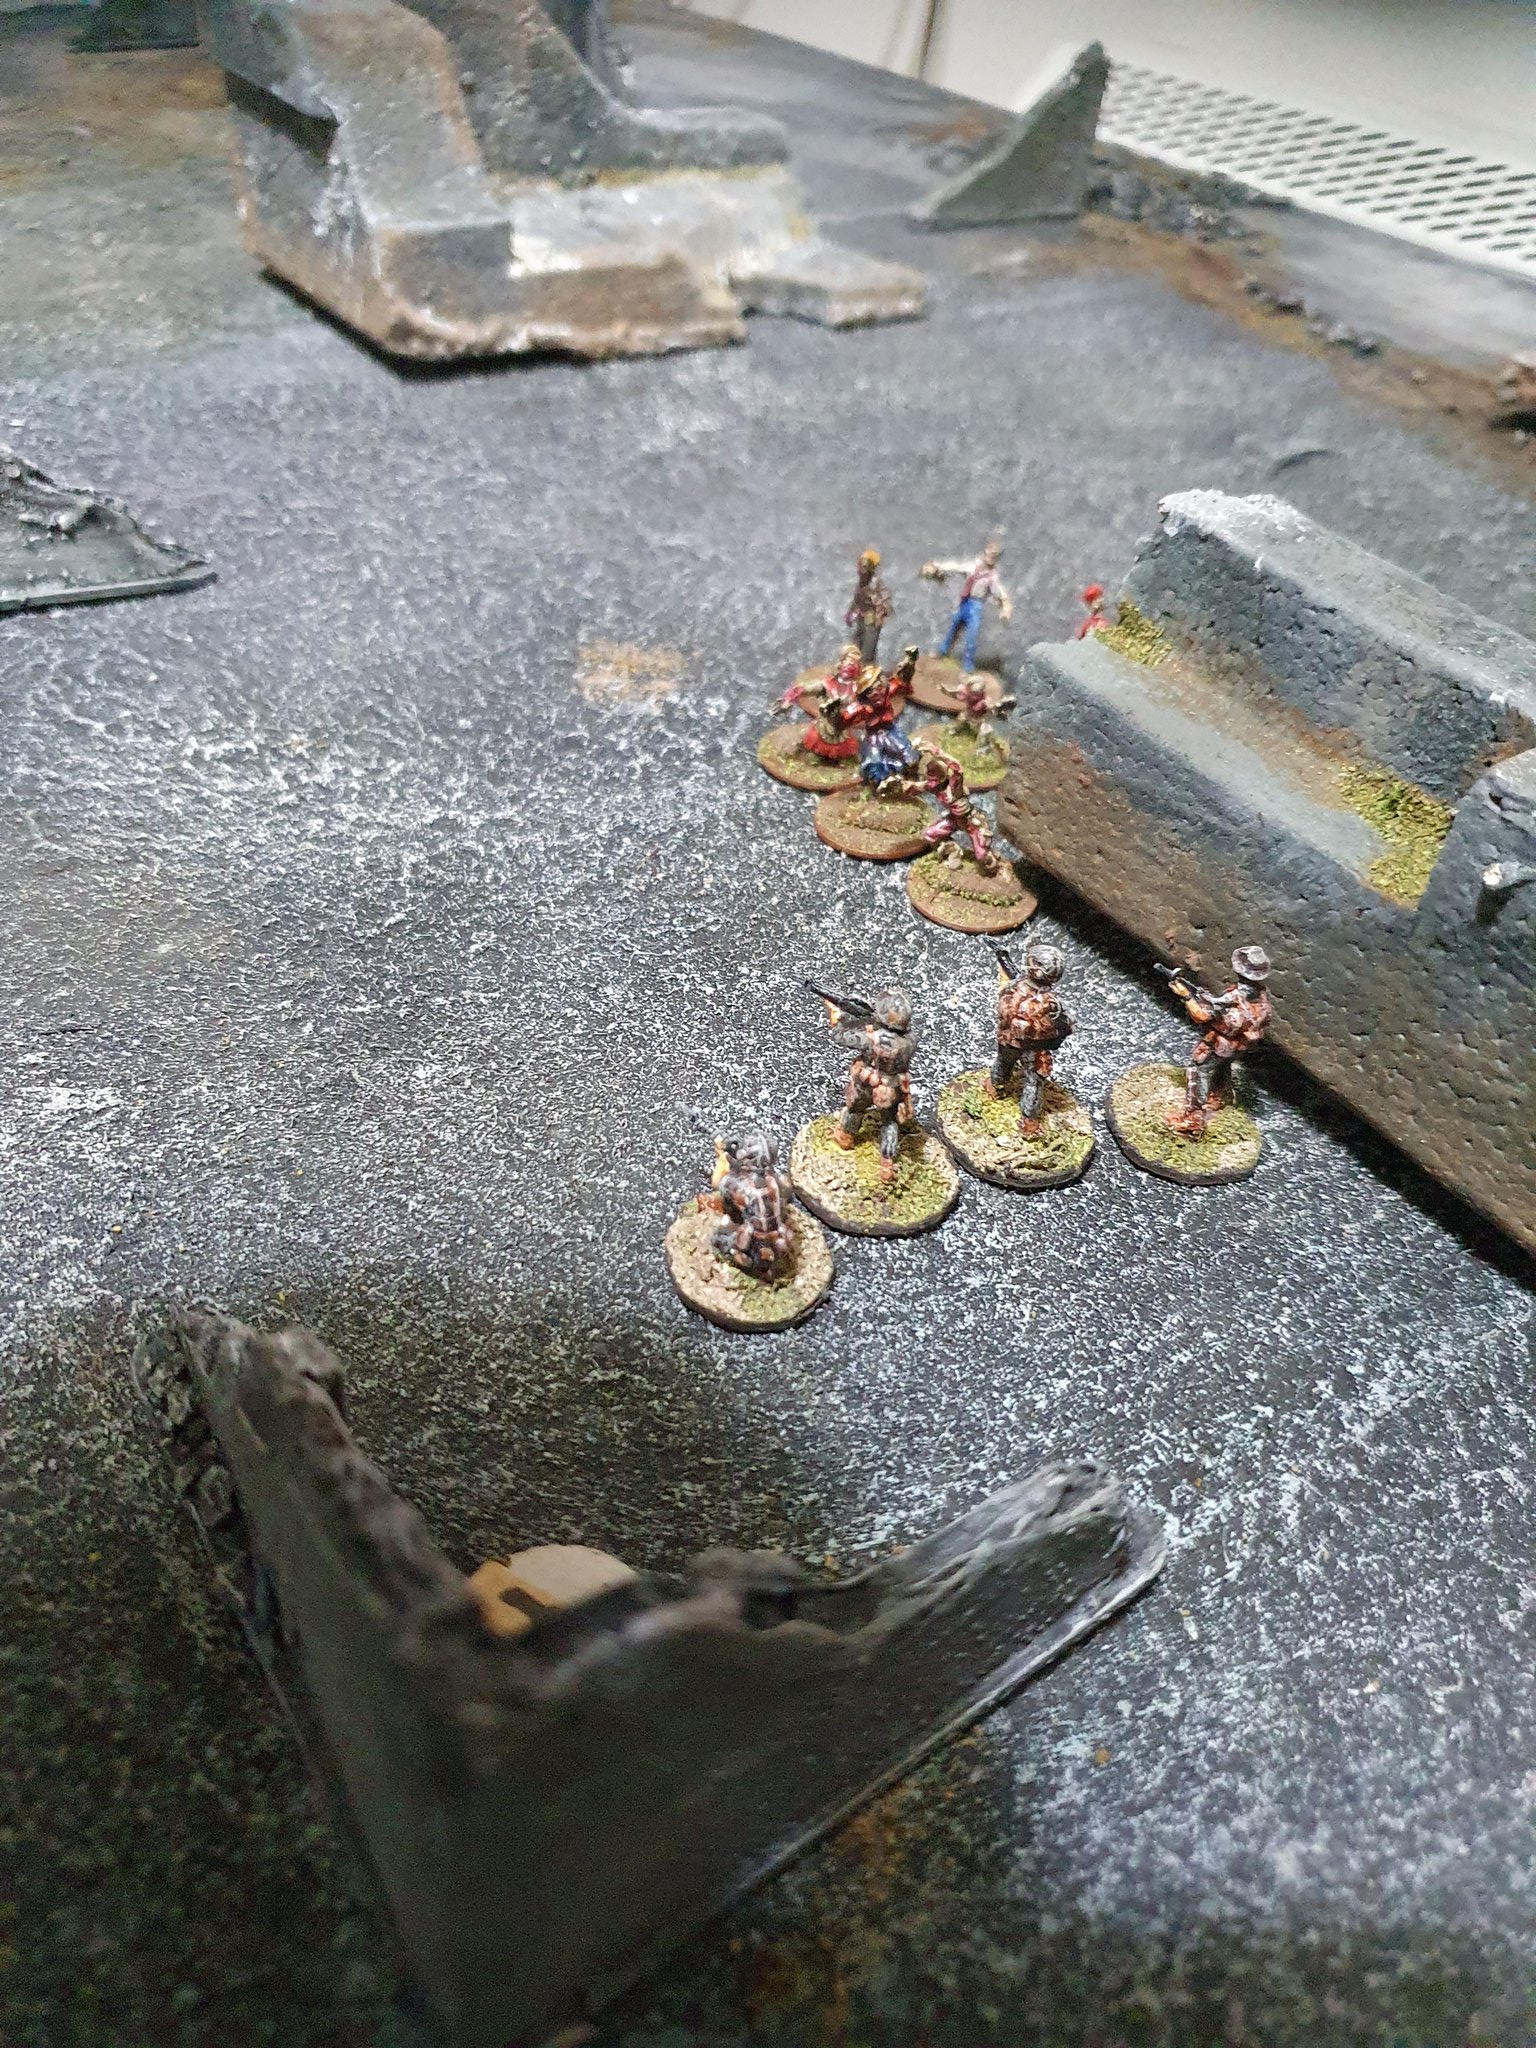
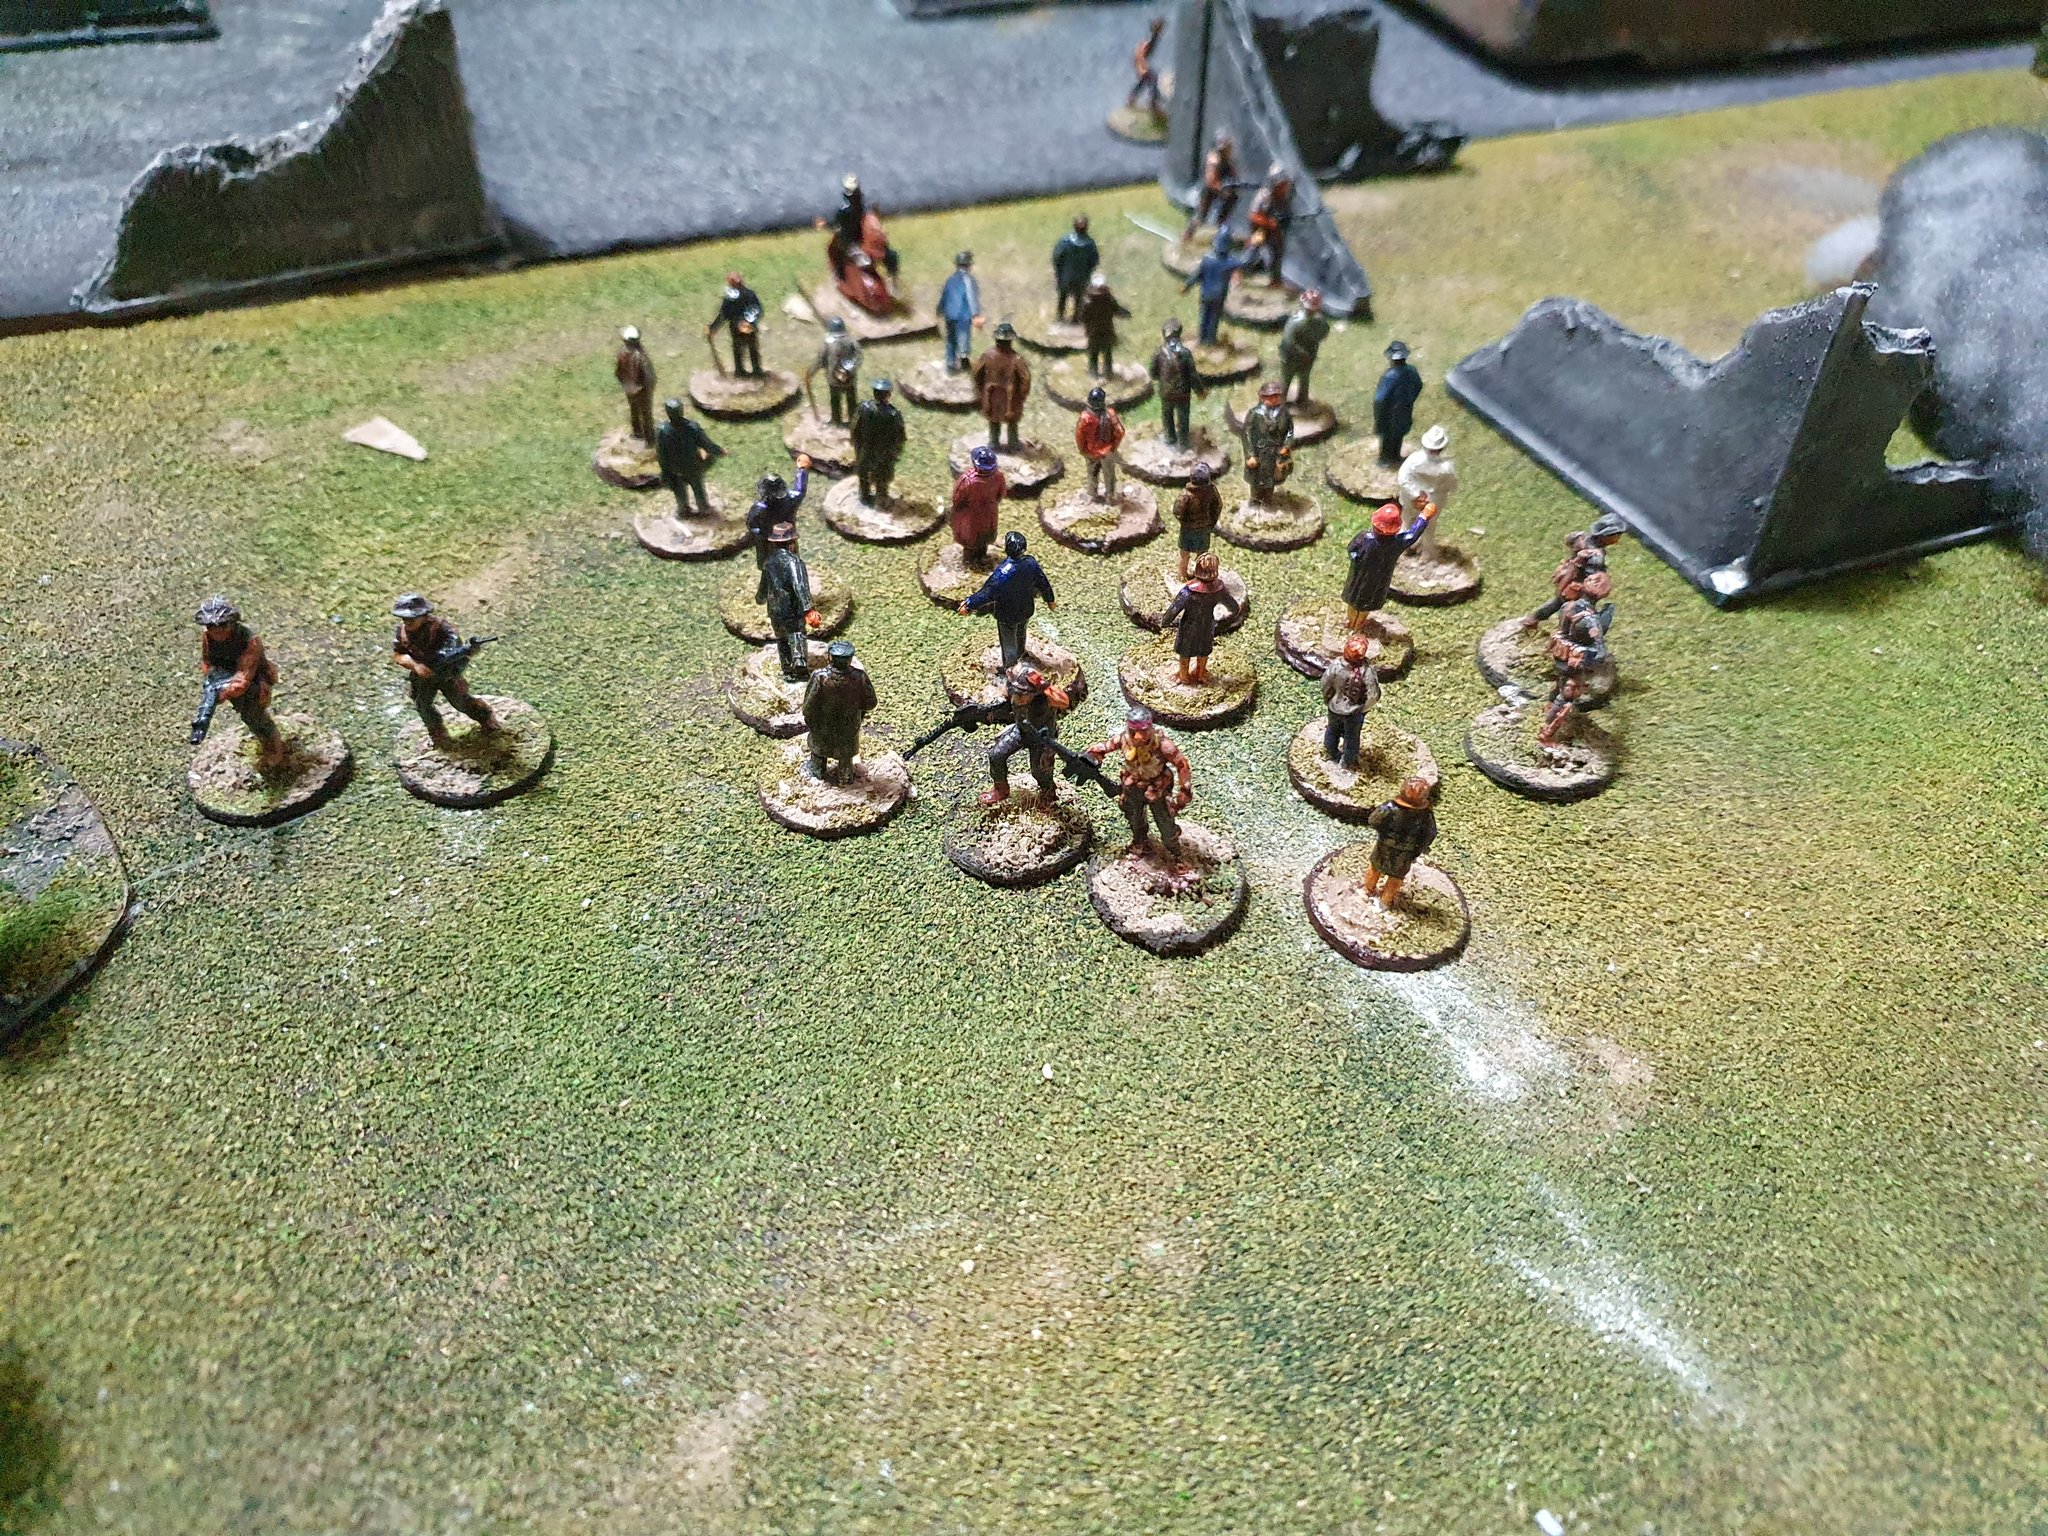
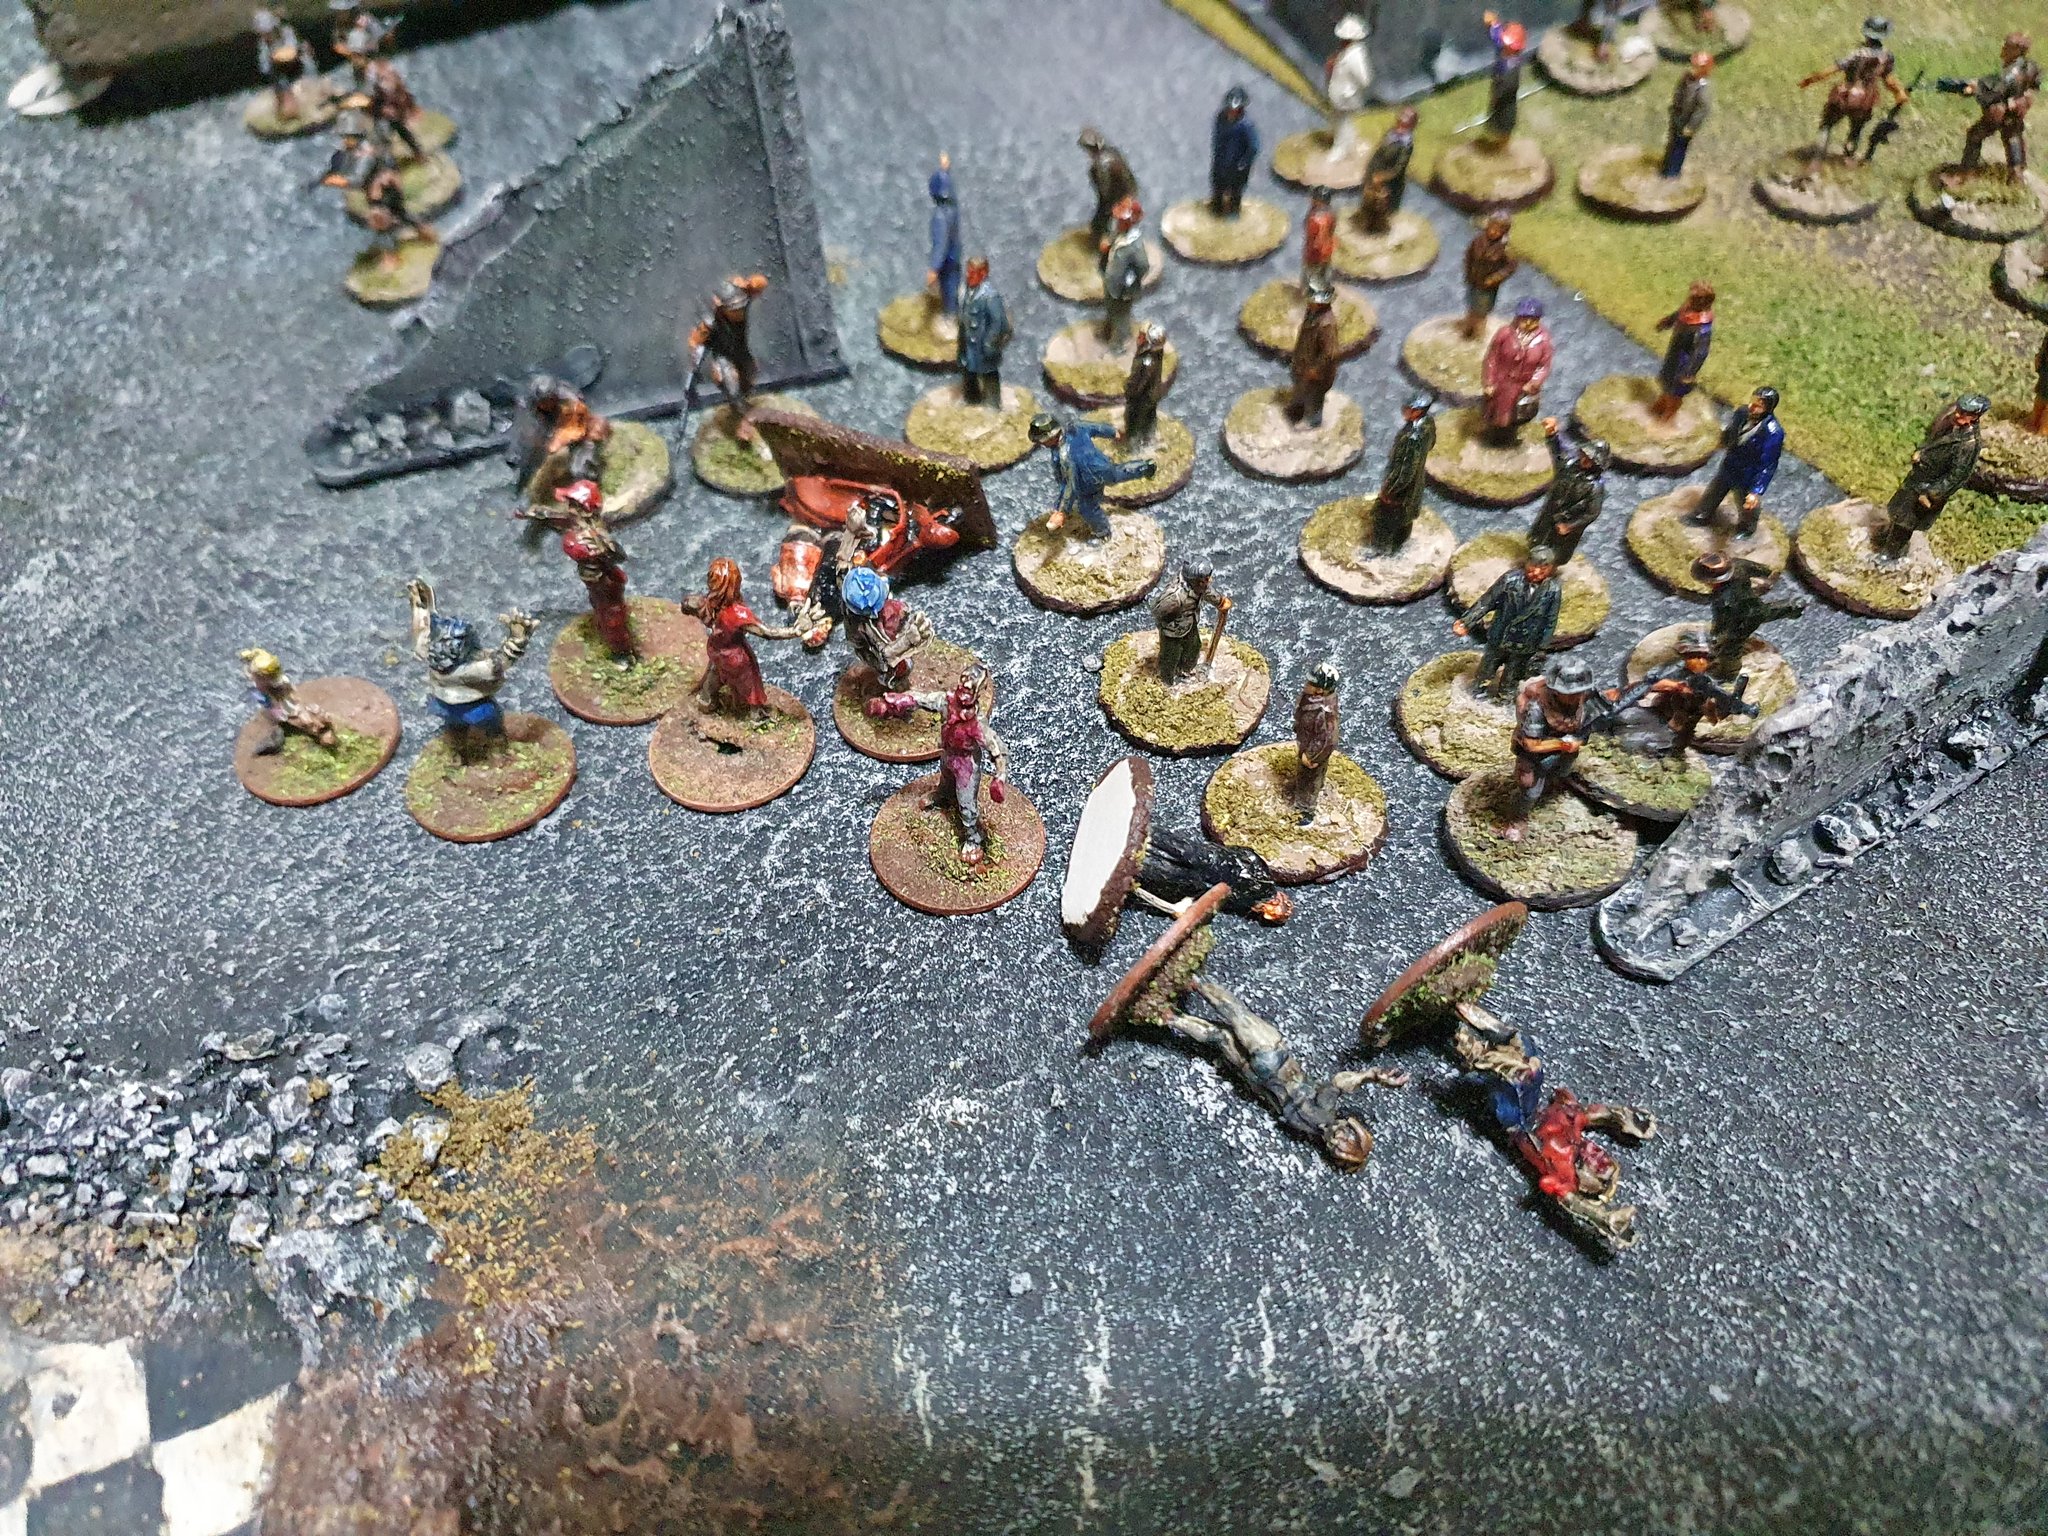
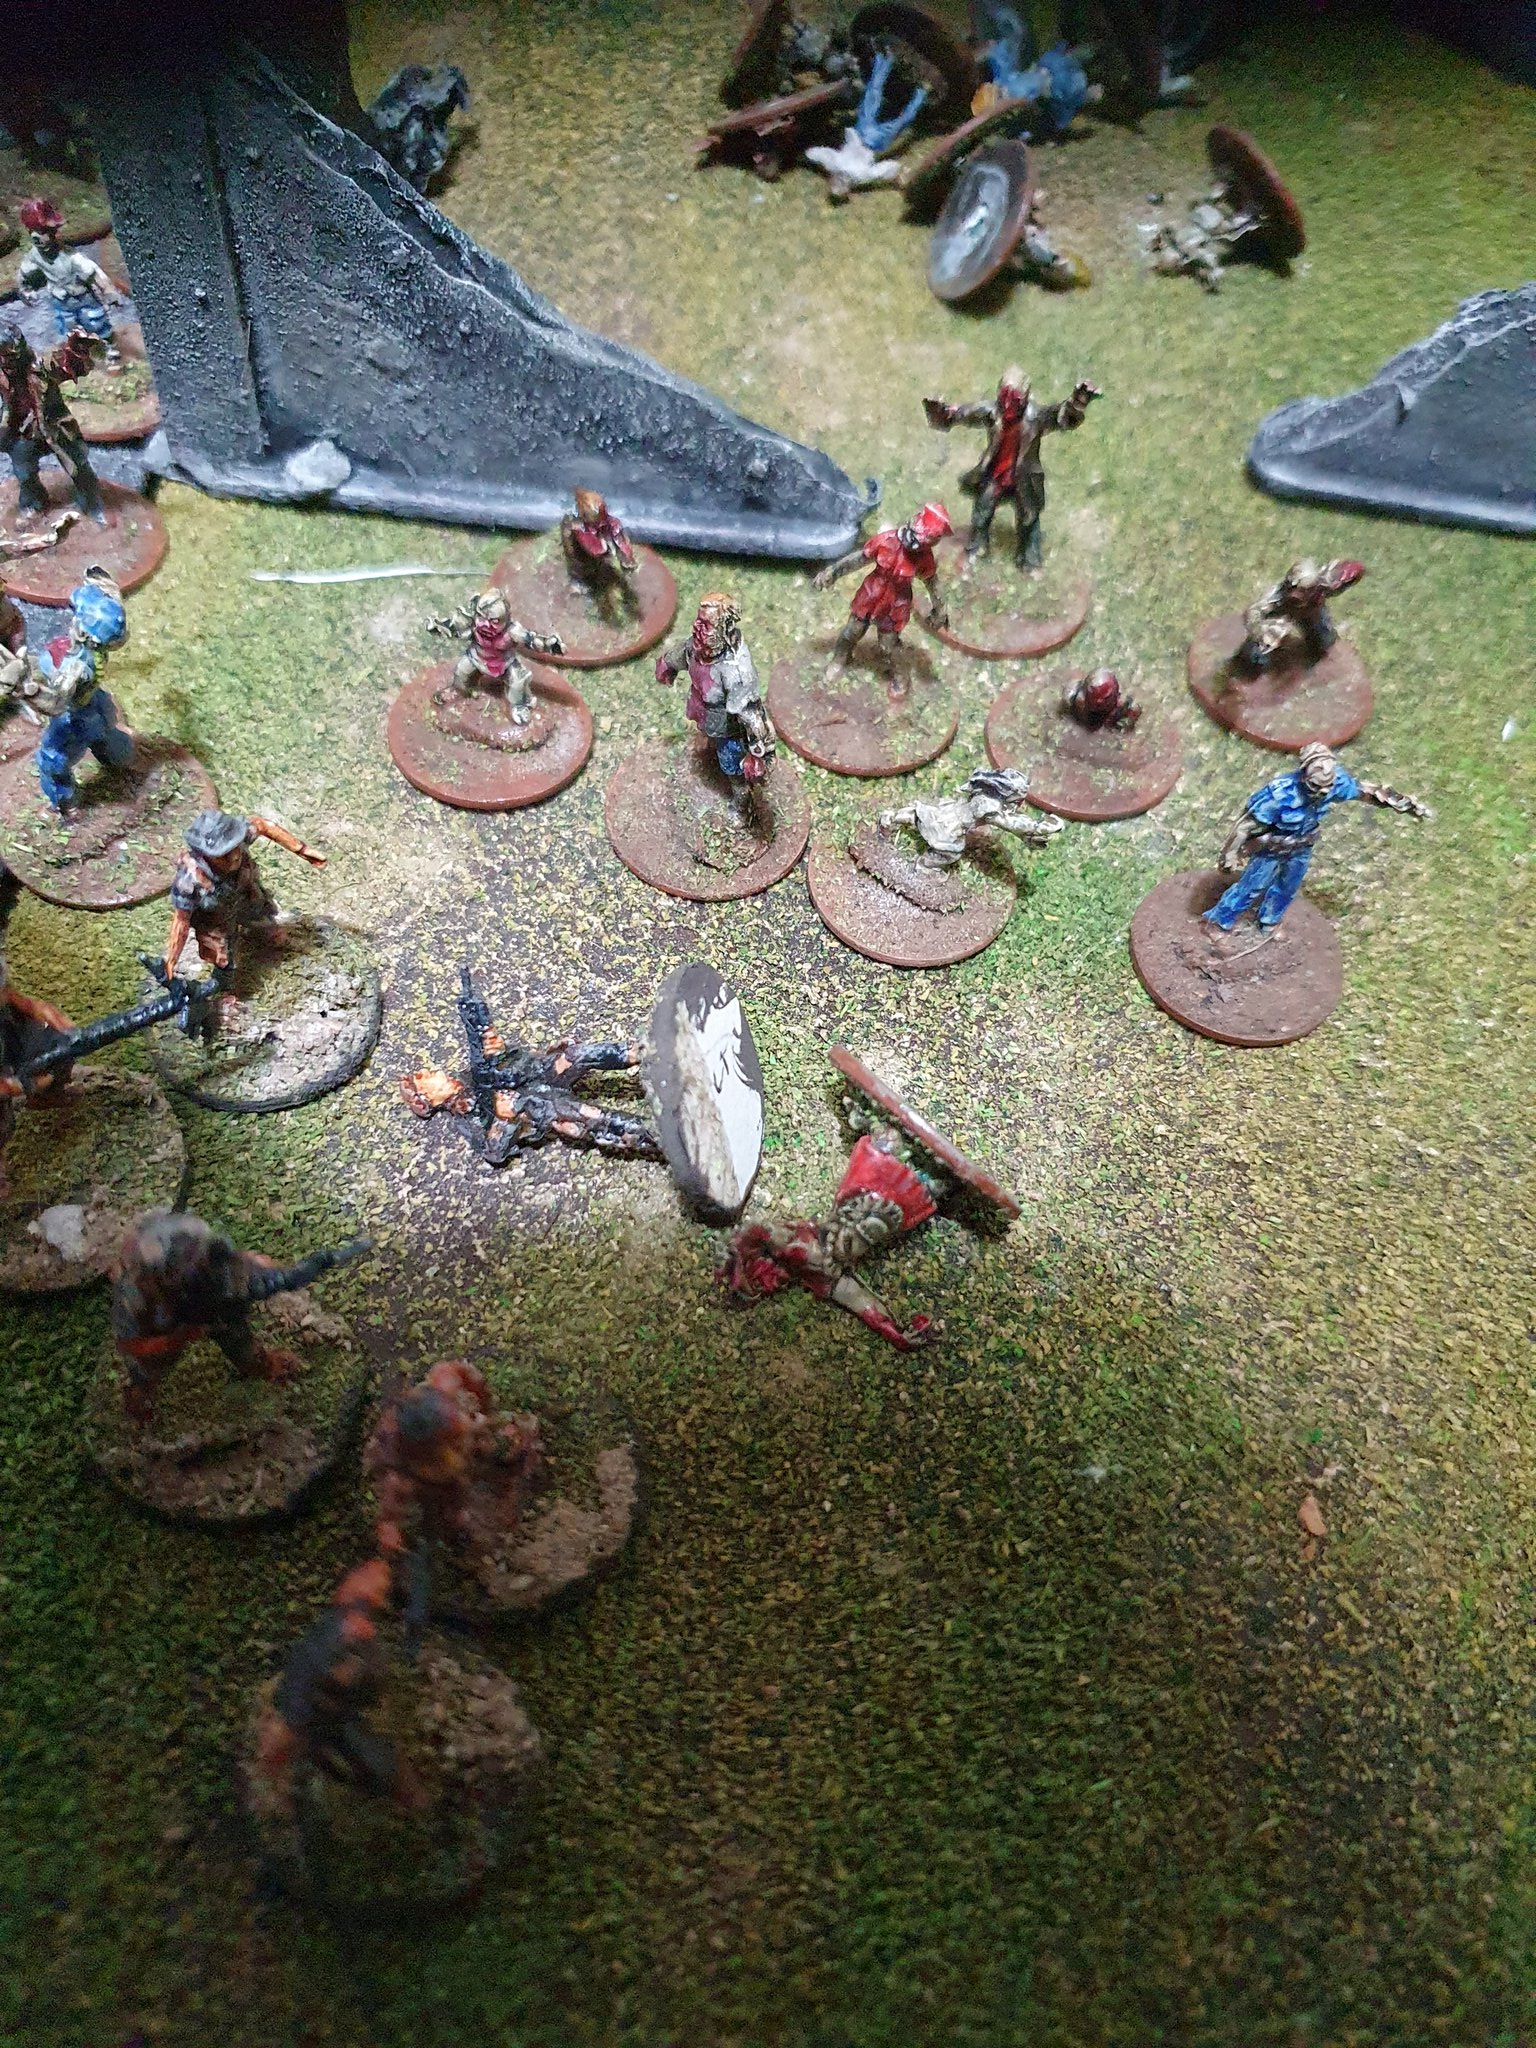
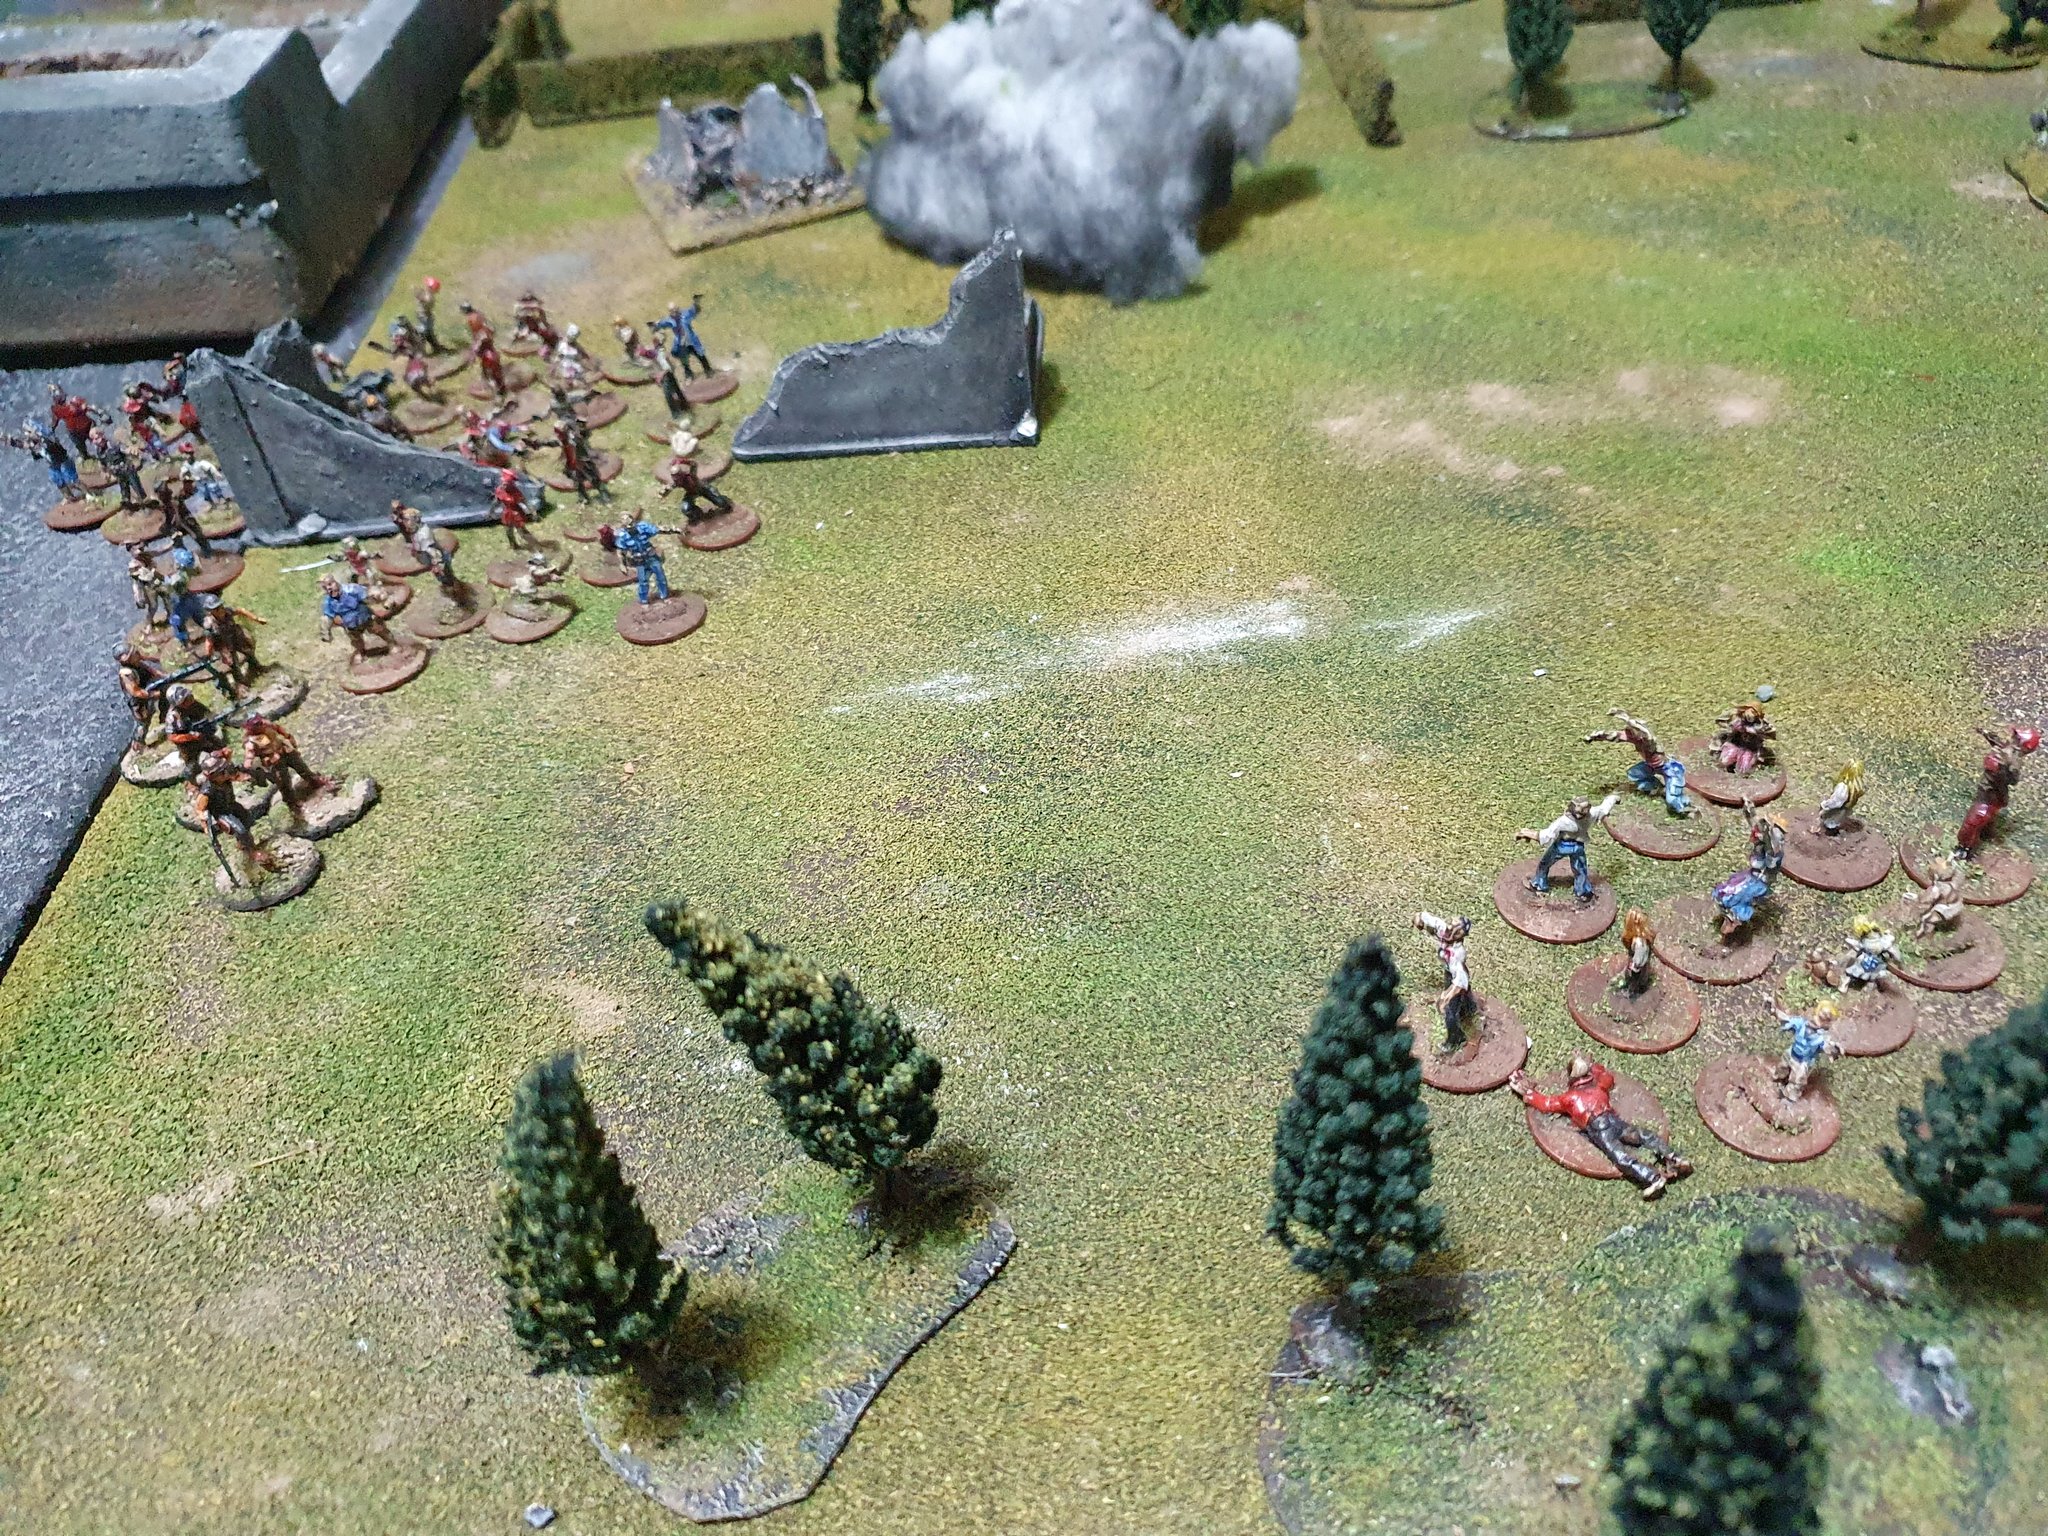
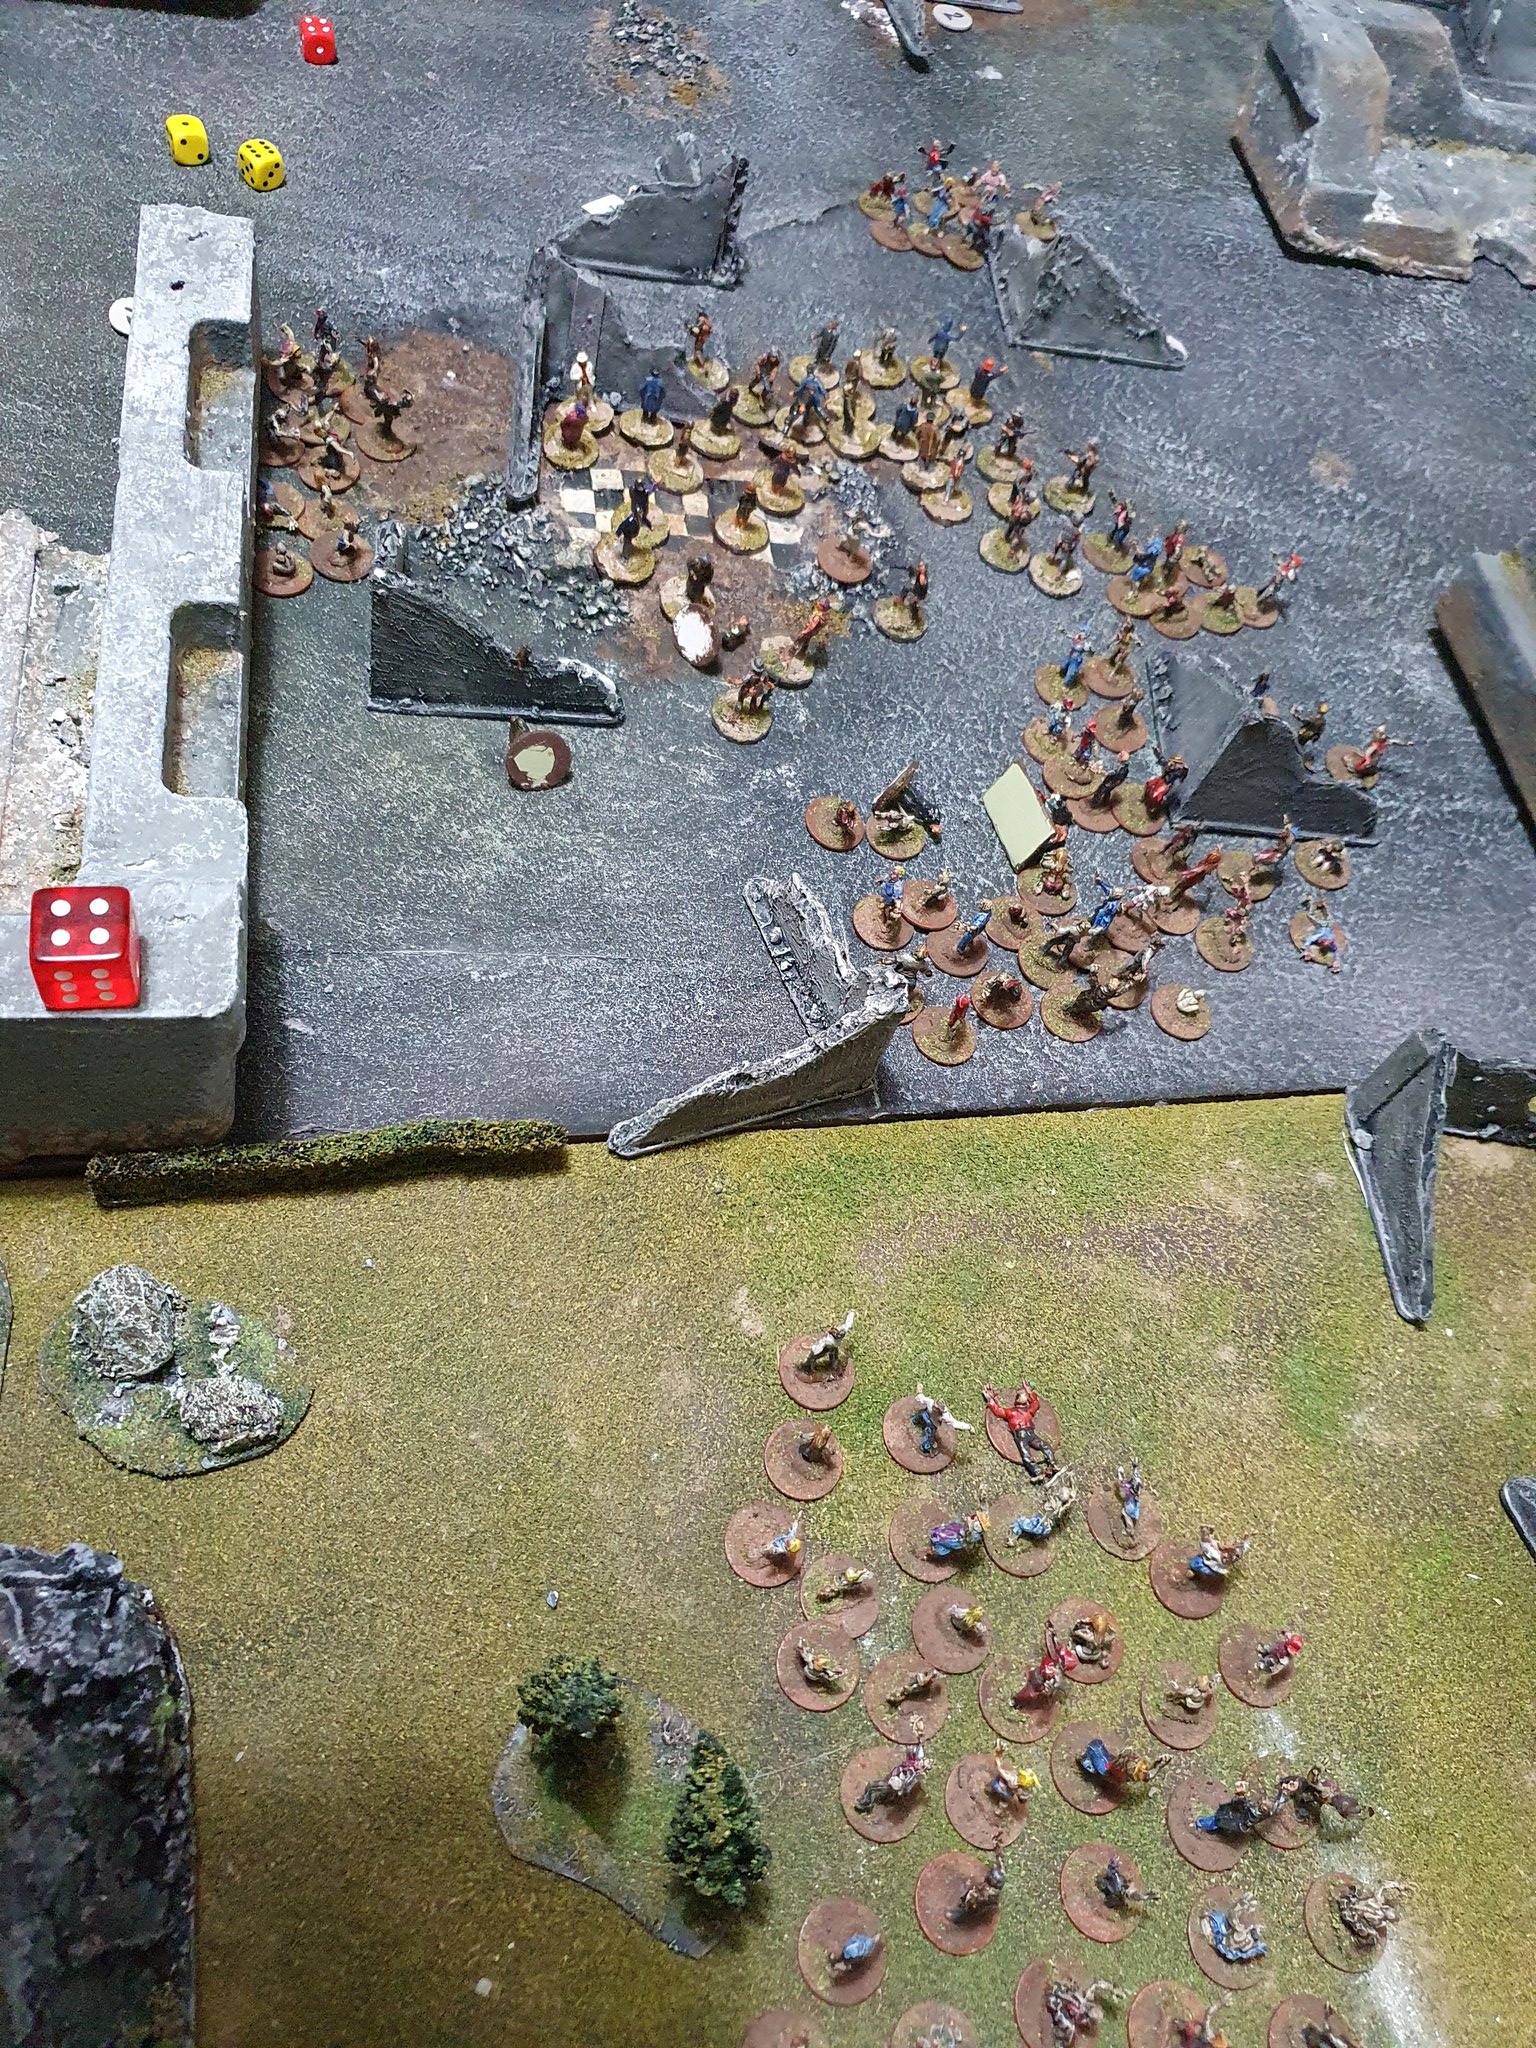
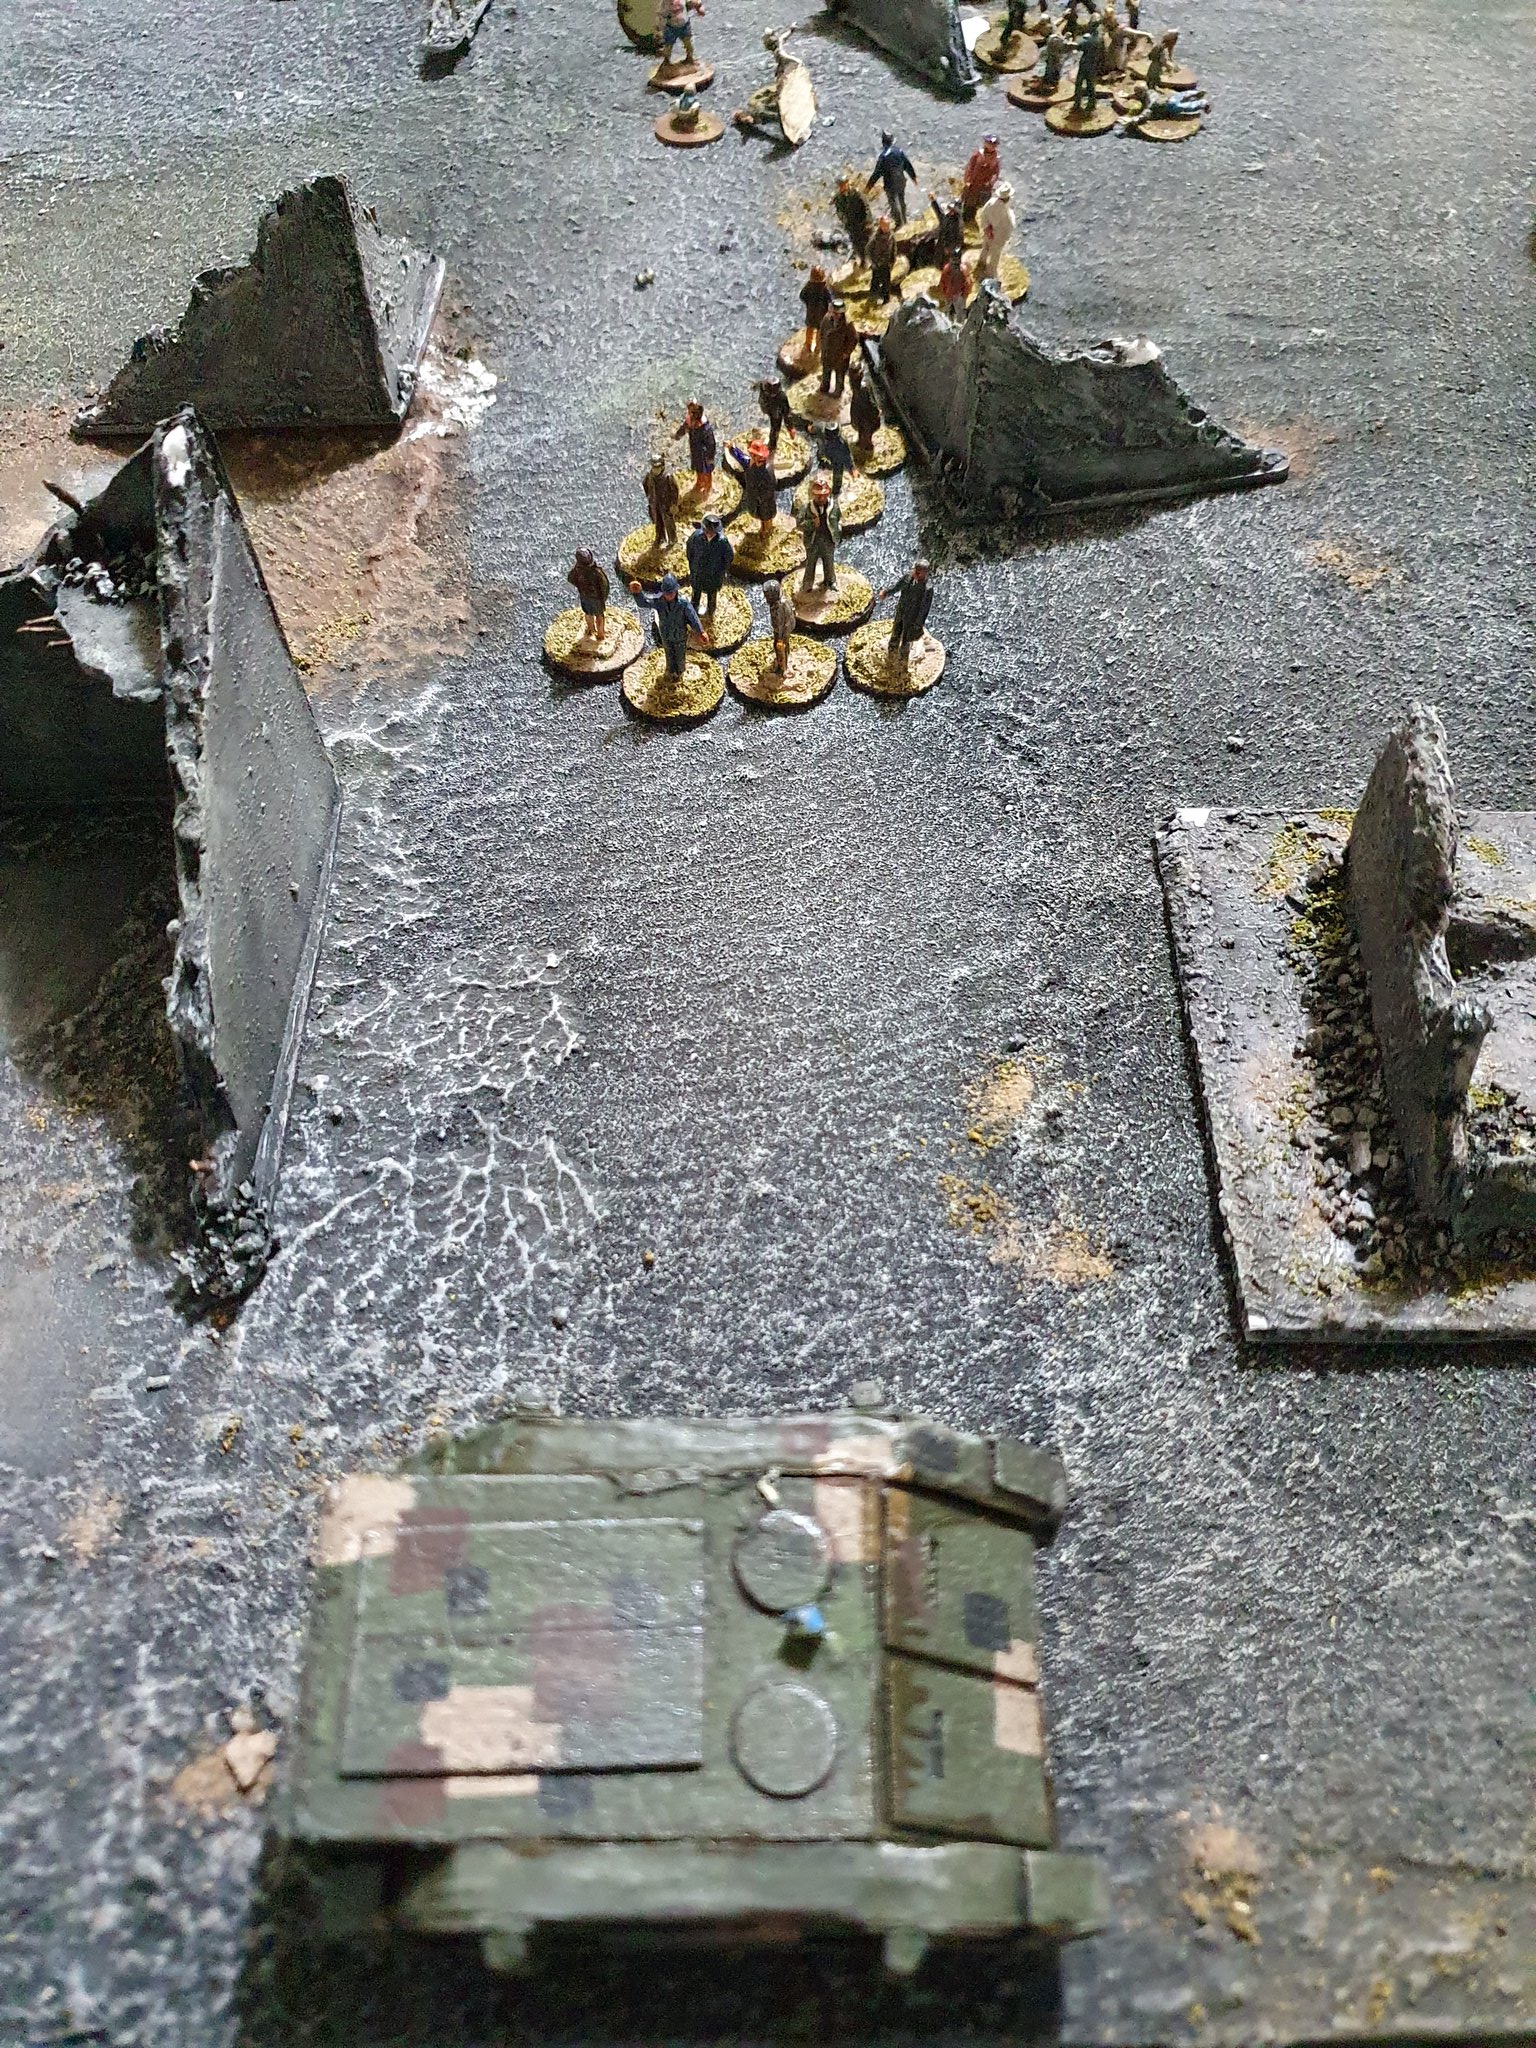
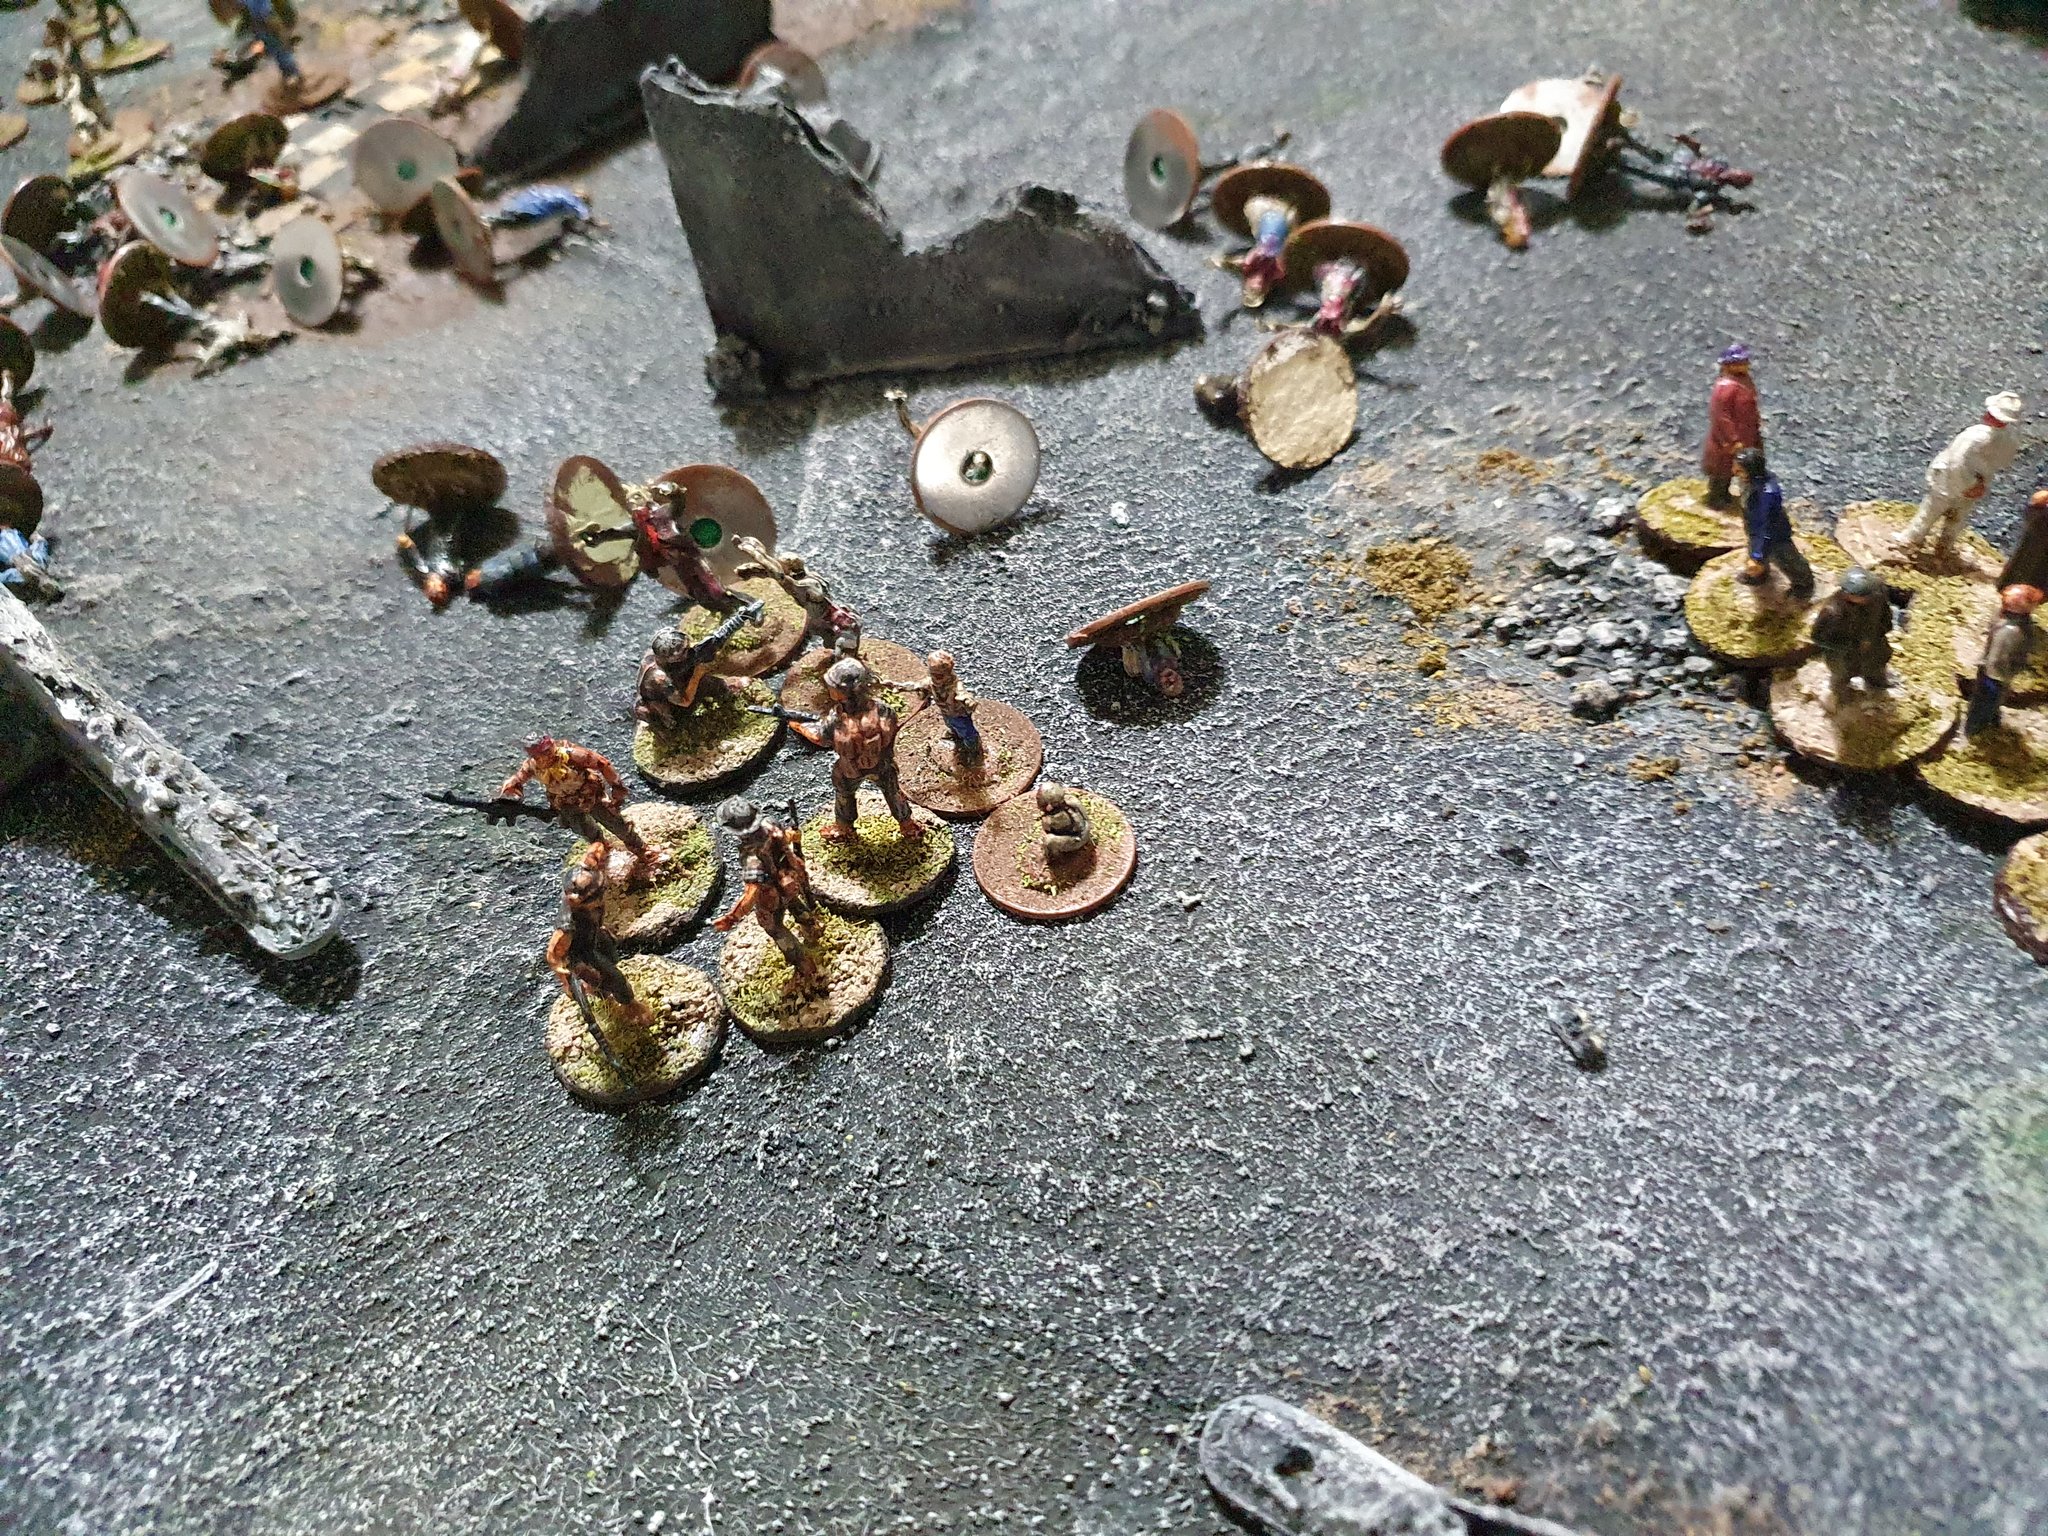
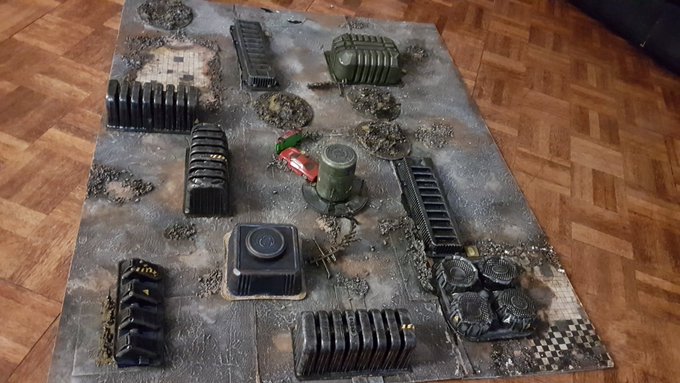
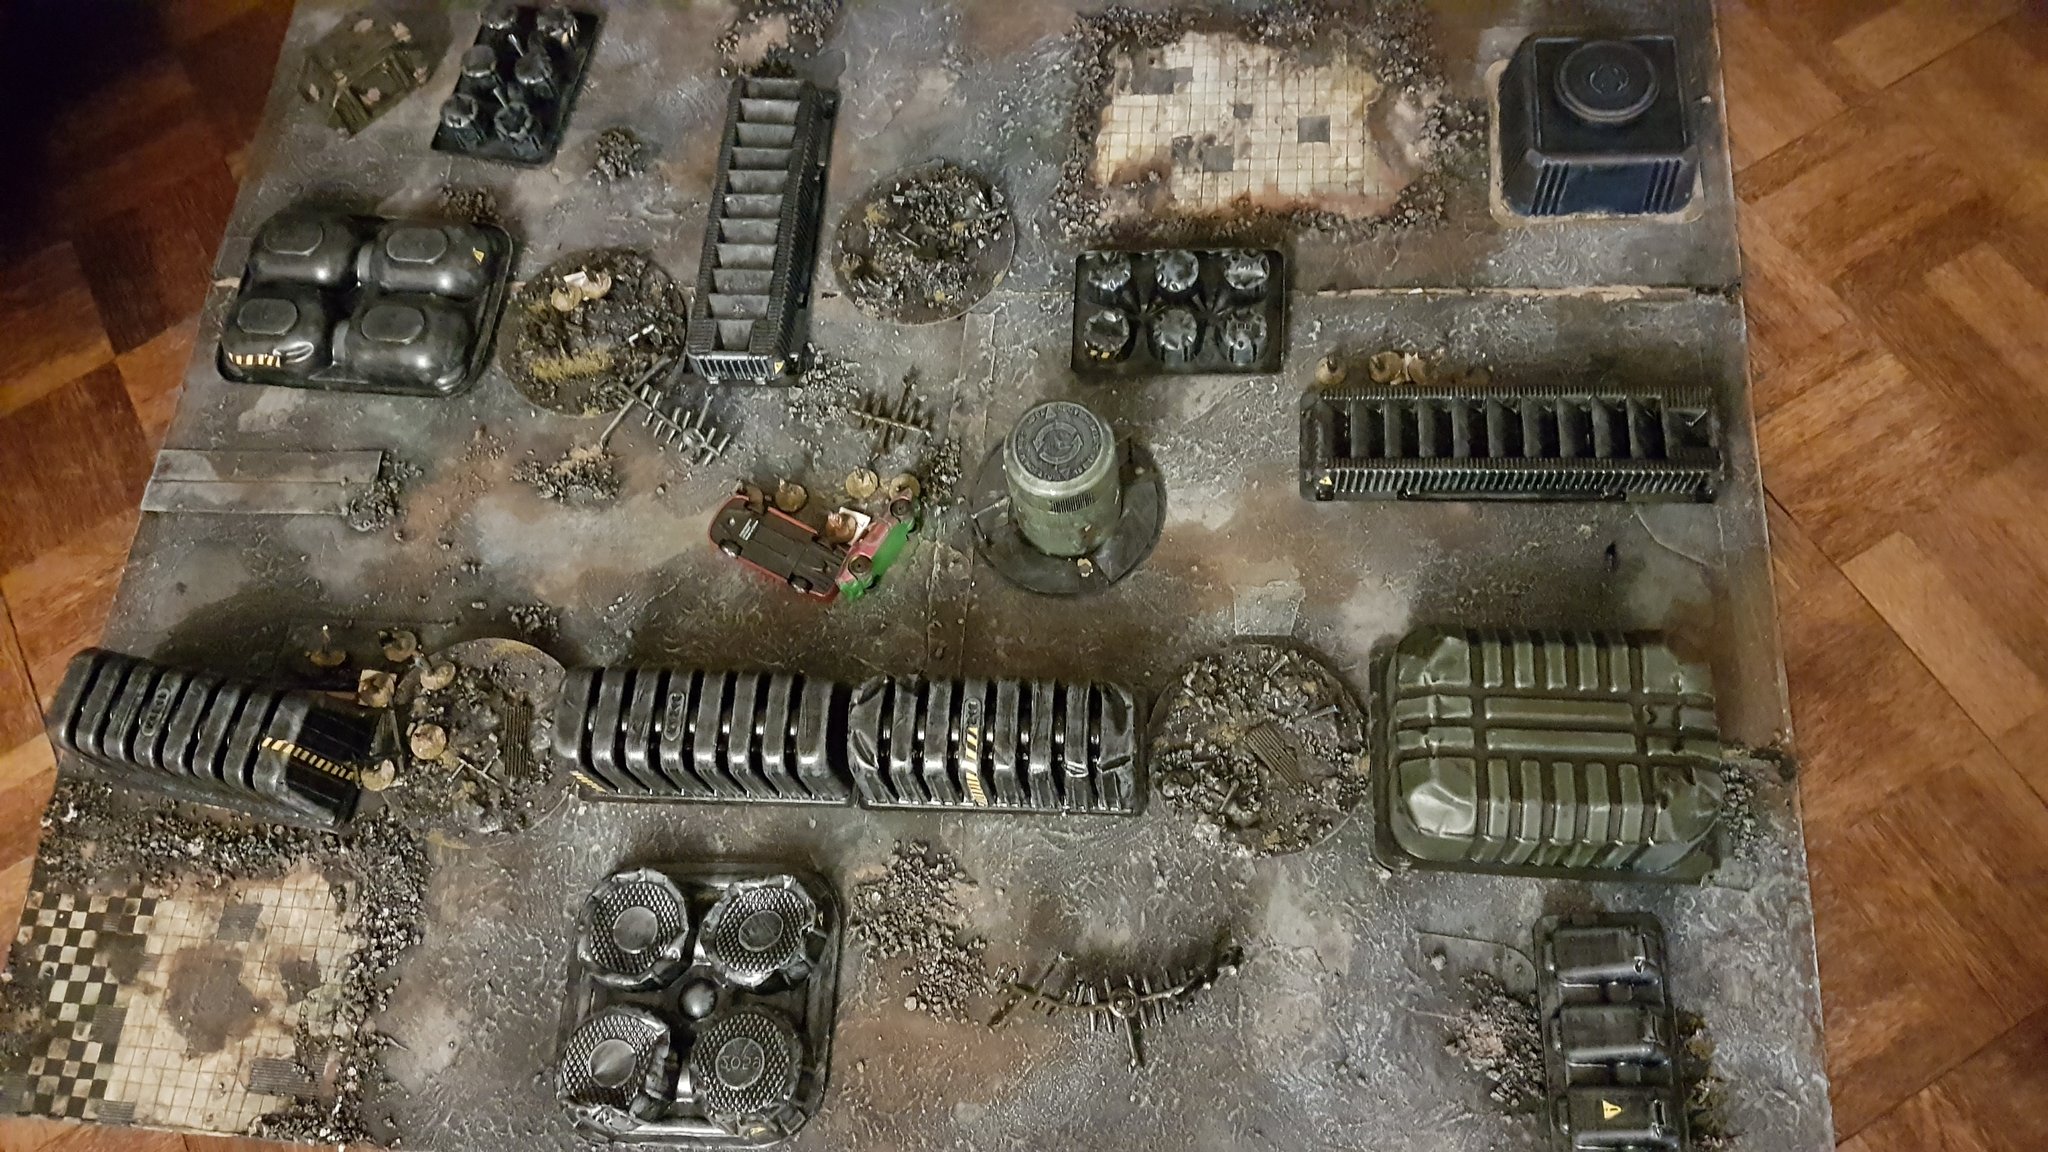
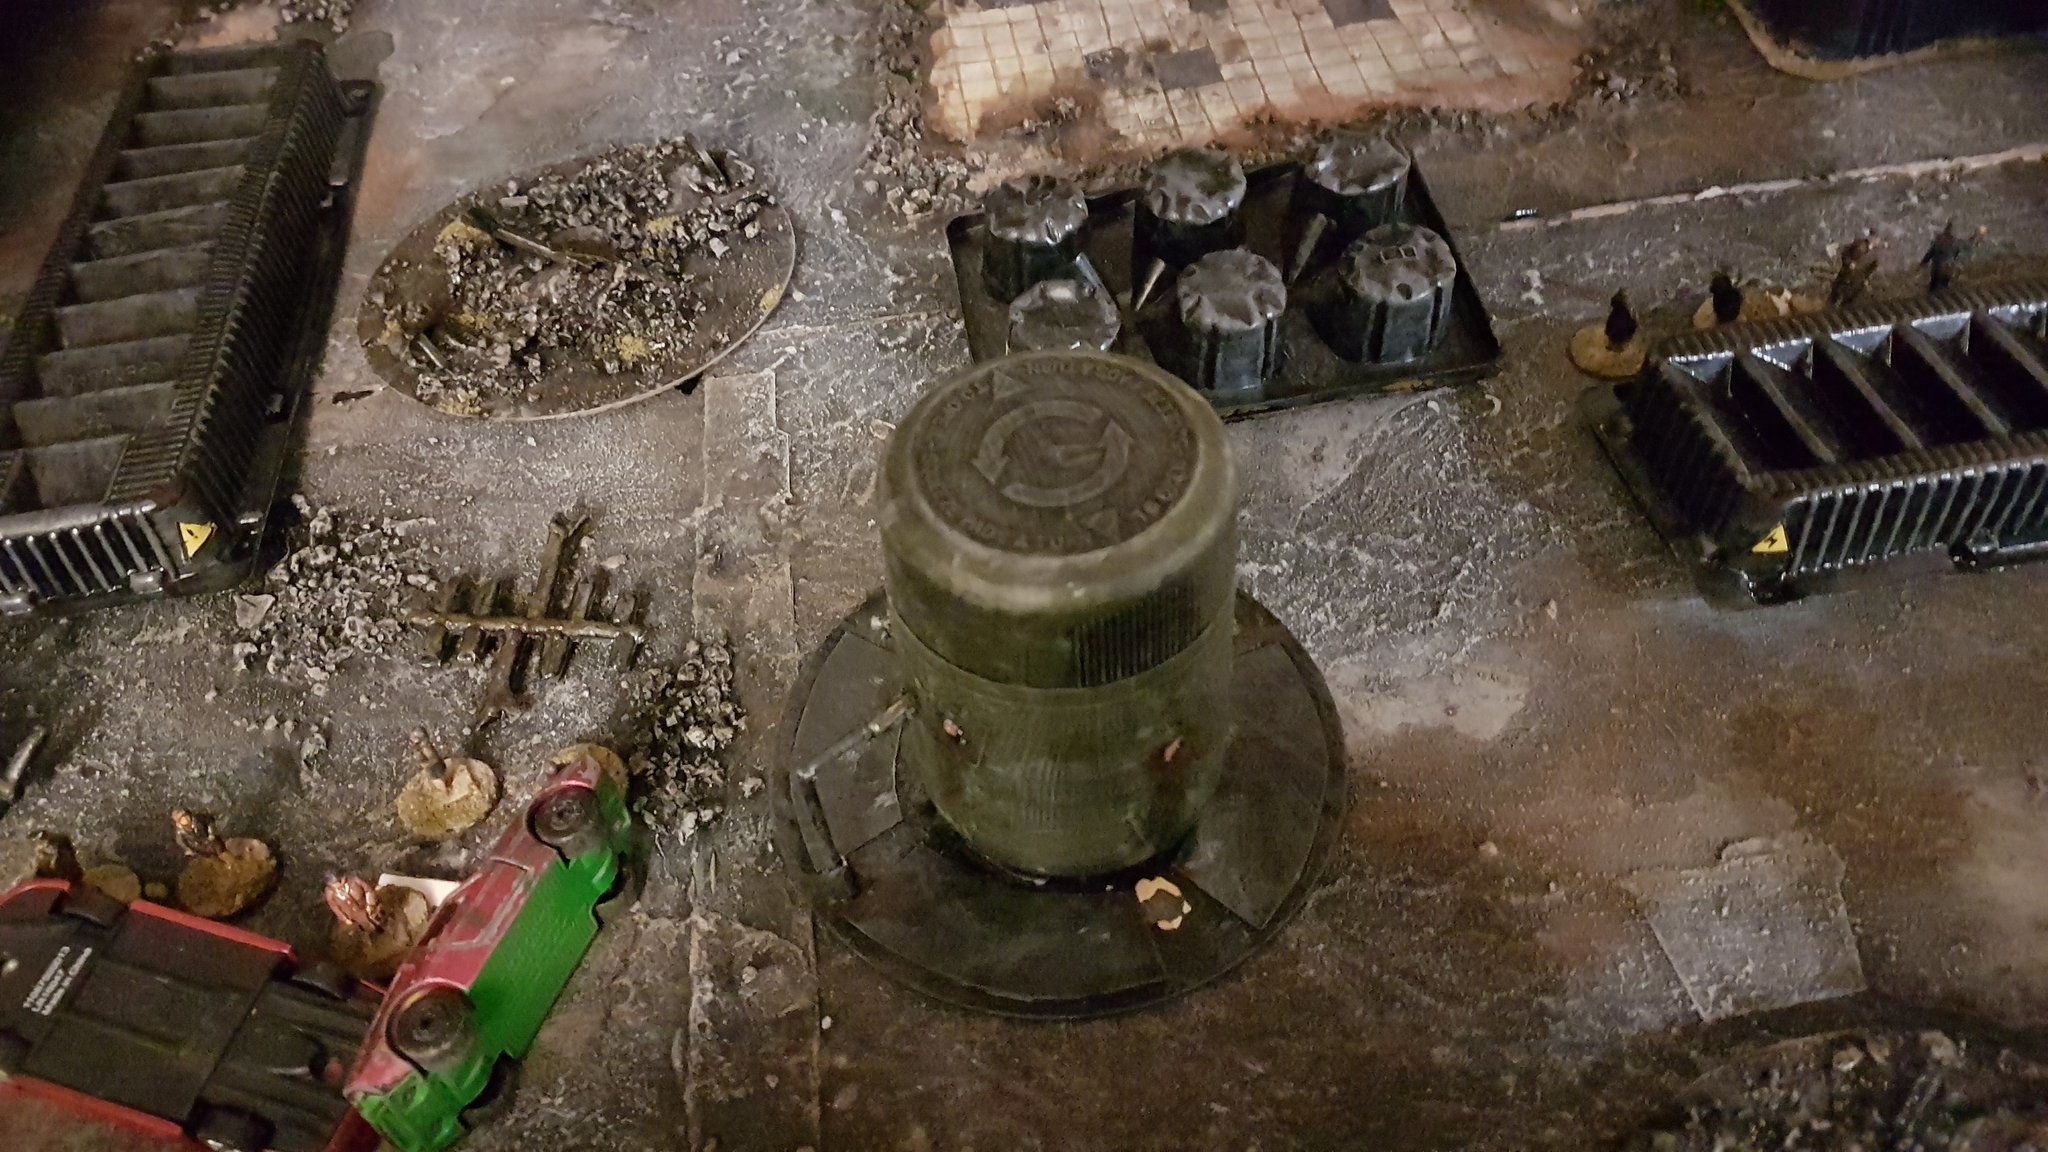
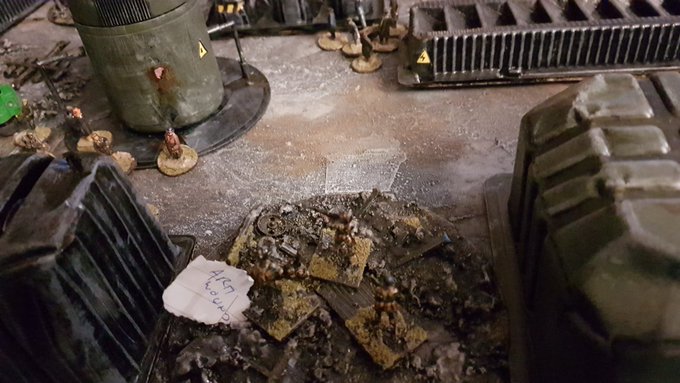
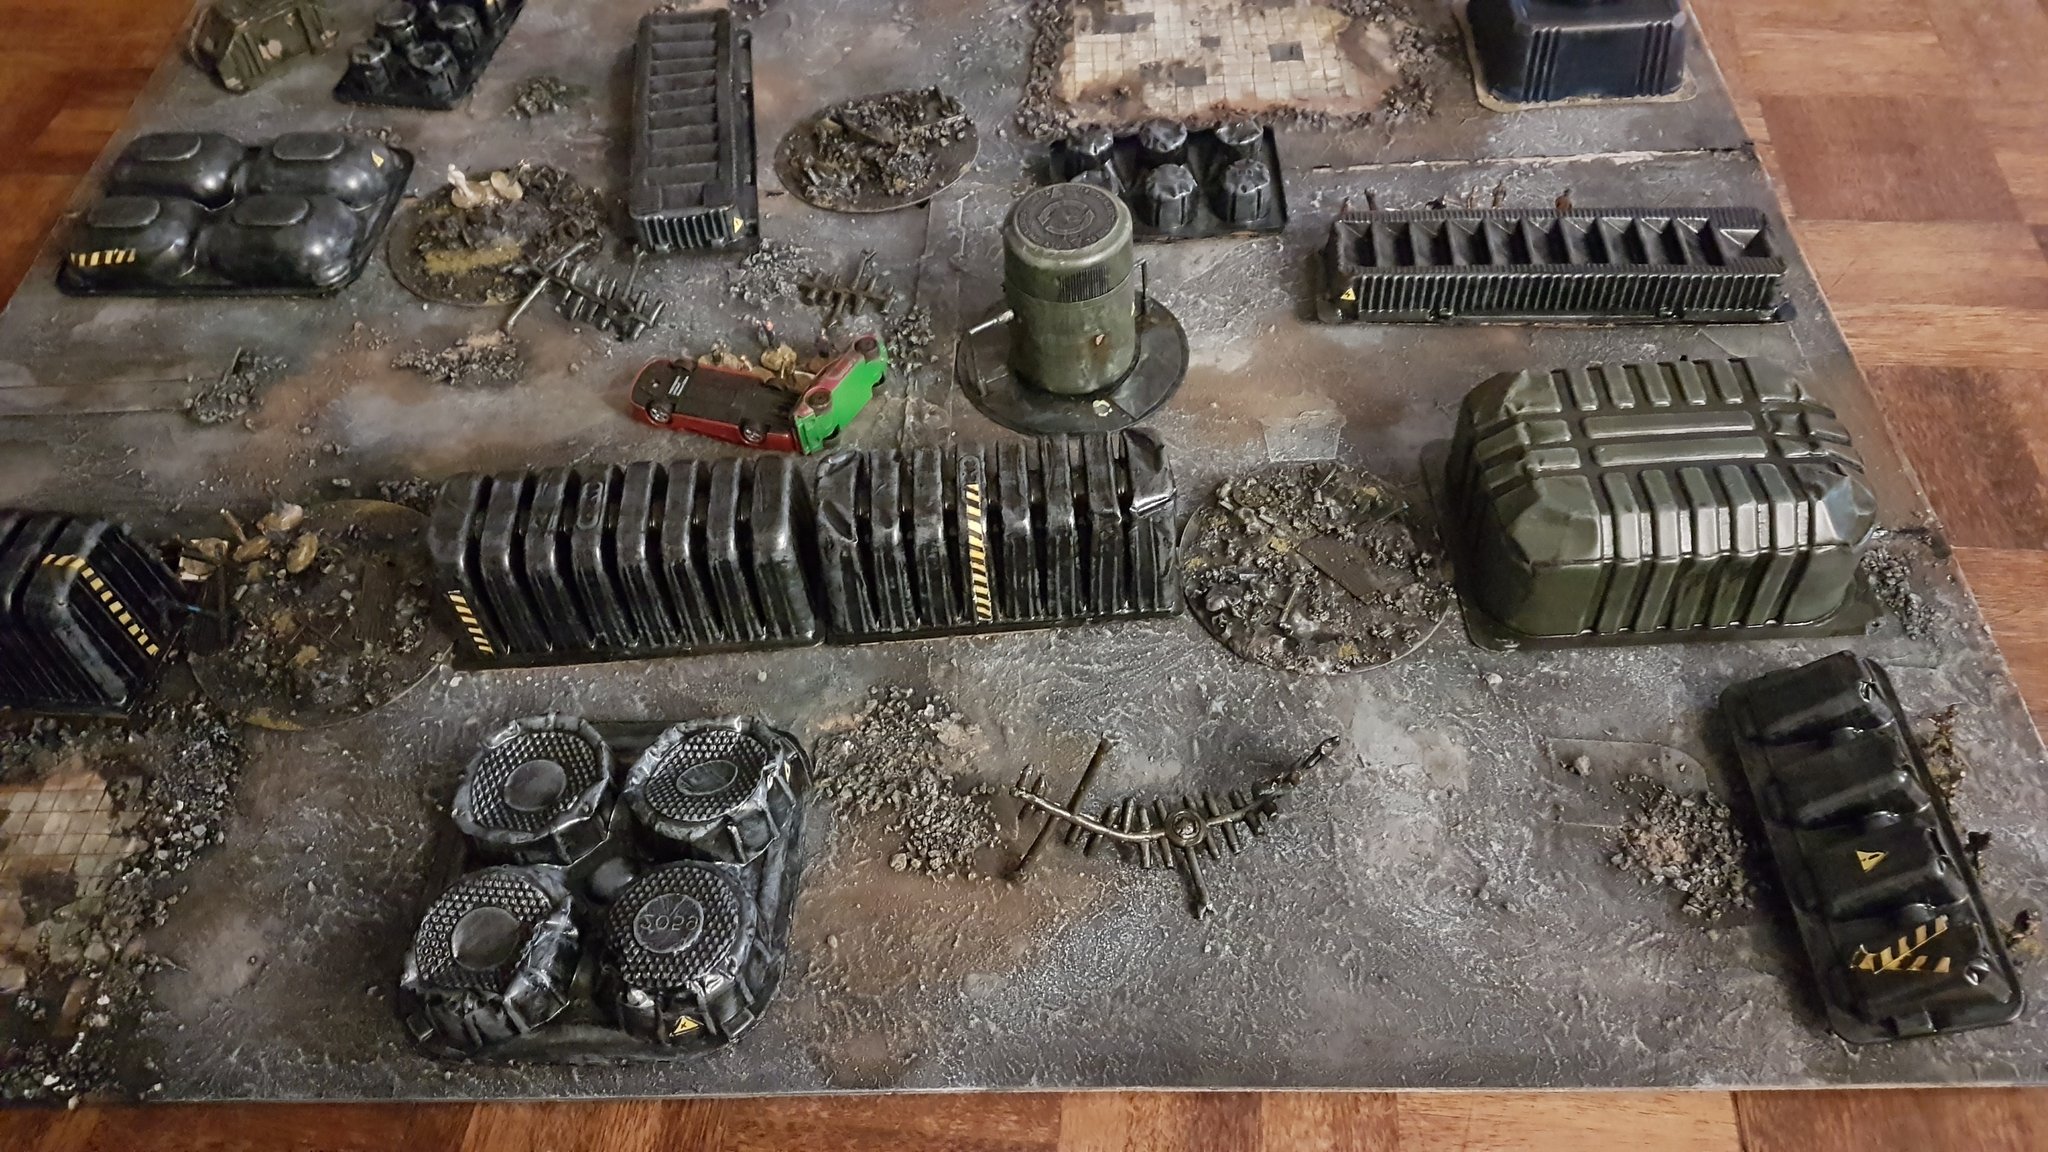
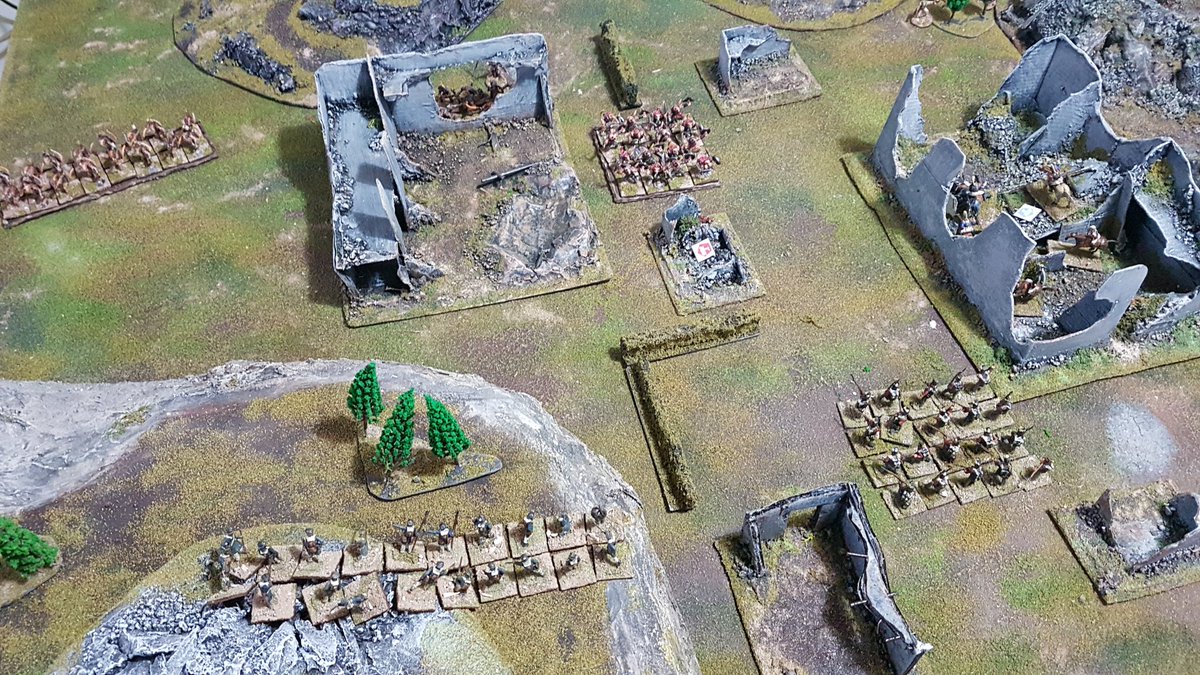
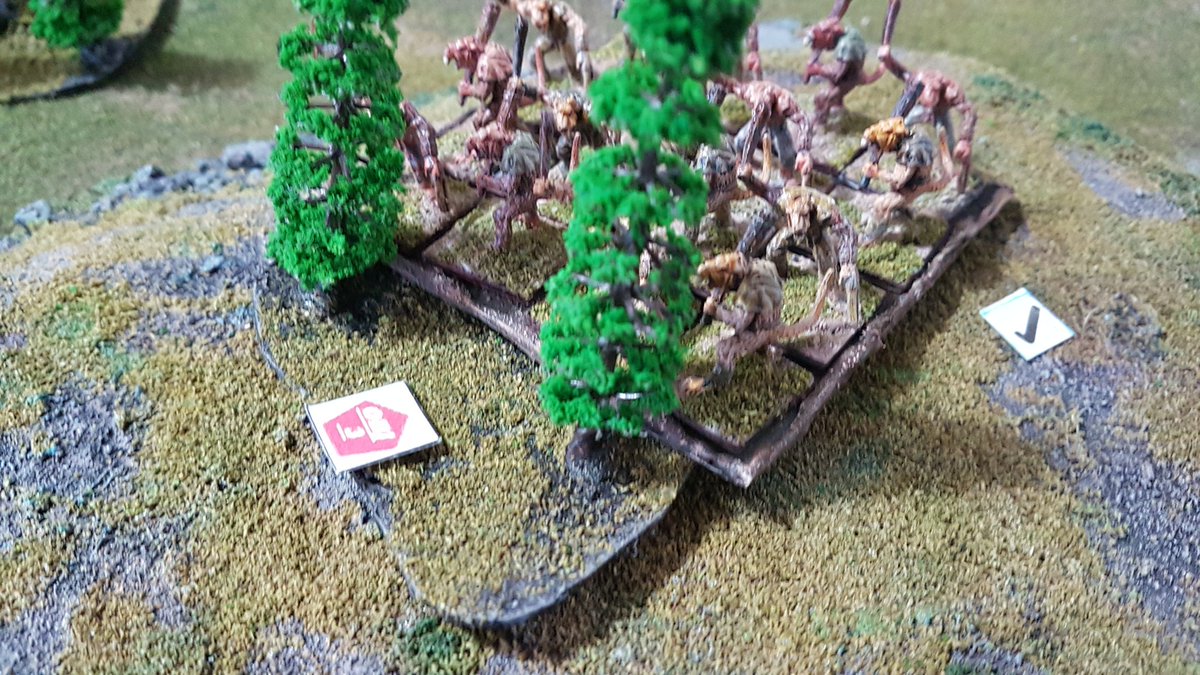
With this in mind we set up a half urban, half rural board with a bunch of woods on the rural side and ruins on the urban side to represent Yonkers city limits, and put our big group of trusty Airfix civilians (who seem to be forever getting caught up in this sort of thing) in the middle, and with a randomly rolled up mob of zombies either side, homing in menacingly…
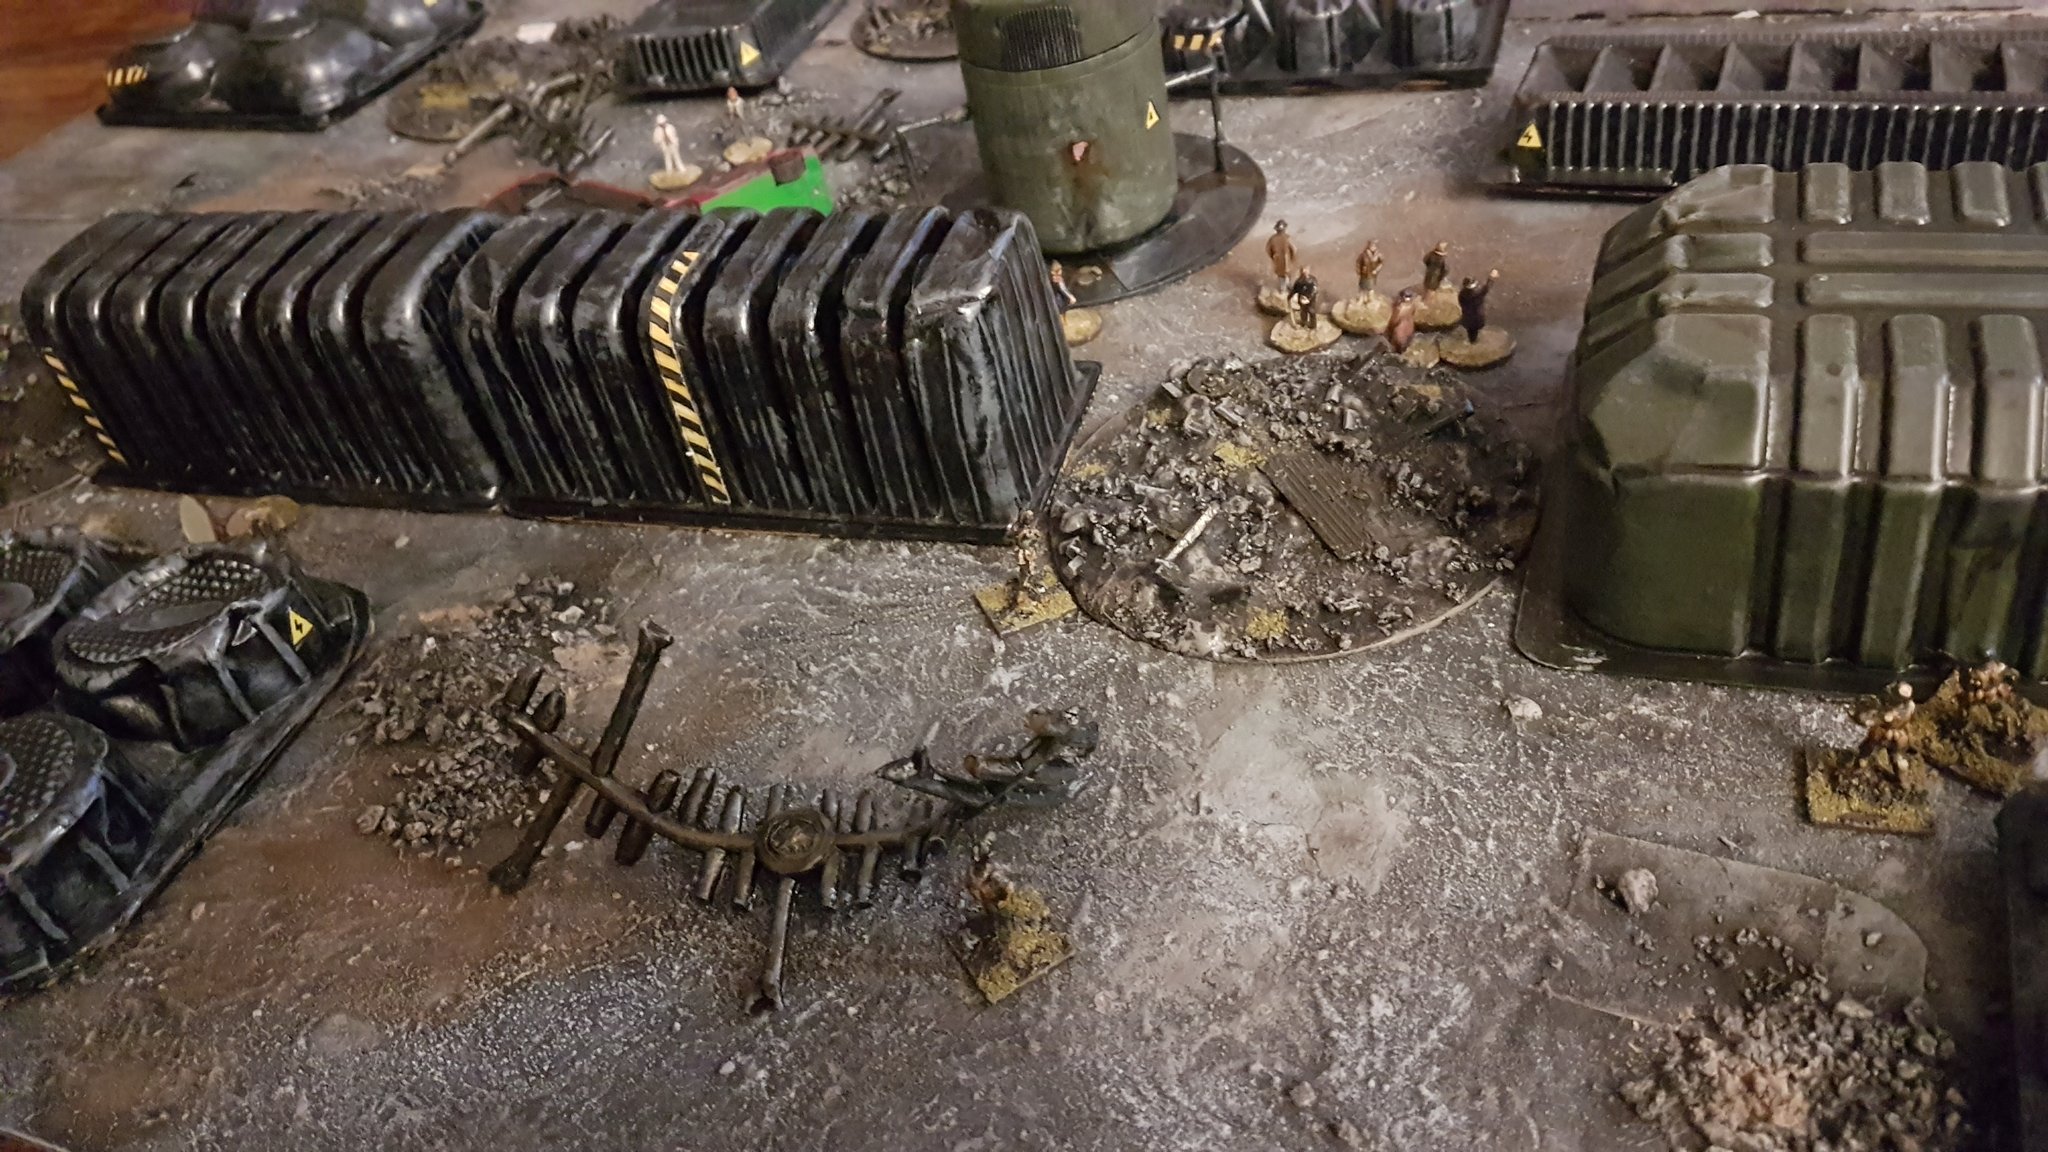
Civilians approach Atlantic Alliance lines with shambling hordes closing in from both sides…
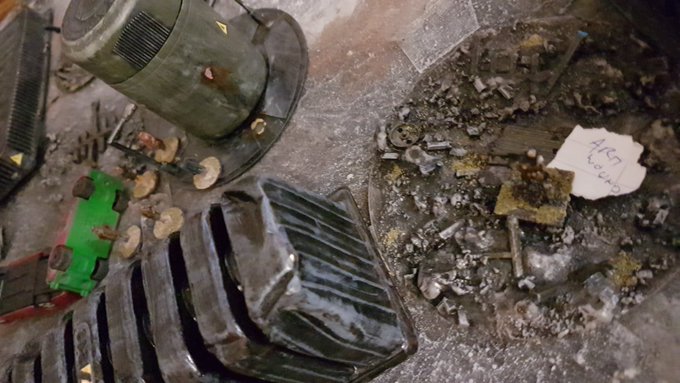
We were winging the rules as we went, but the basic idea was that each zombie mob would get reinforced by (Turn Number)xD6 zombies each turn.. and behind the Alliance lines were four spawning points that would spawn (Turn Number-1)x D6 zombies each turn.. trust me, it was simpler than it sounded! At the far side of the table was a waiting APC to shuttle out the survivors.
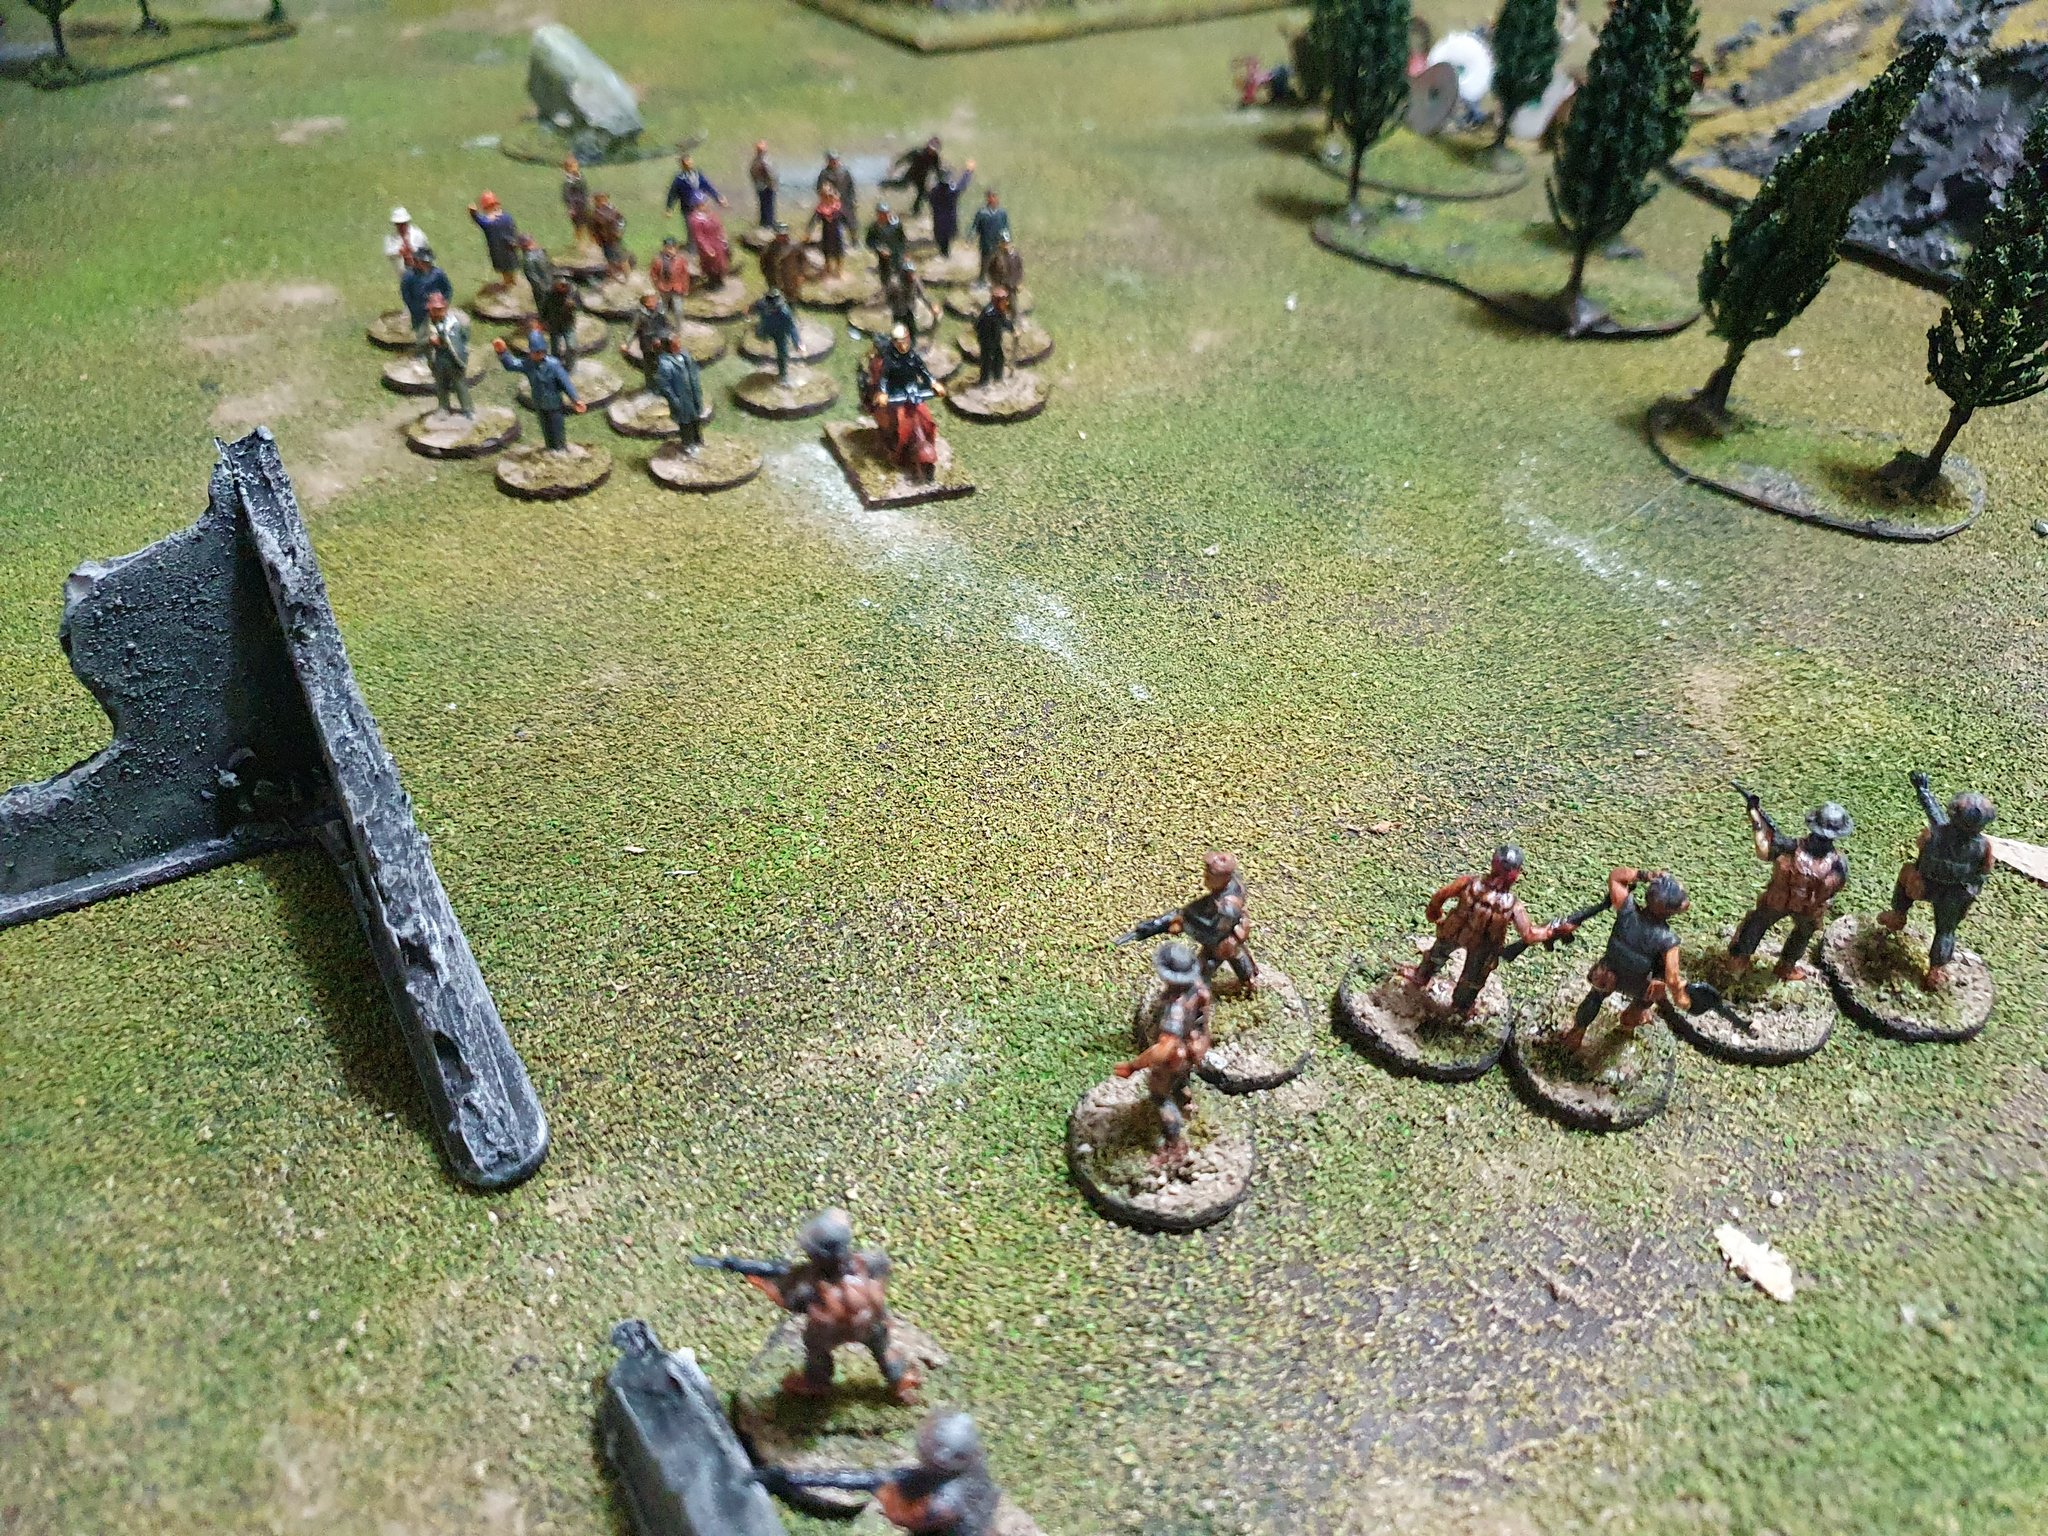
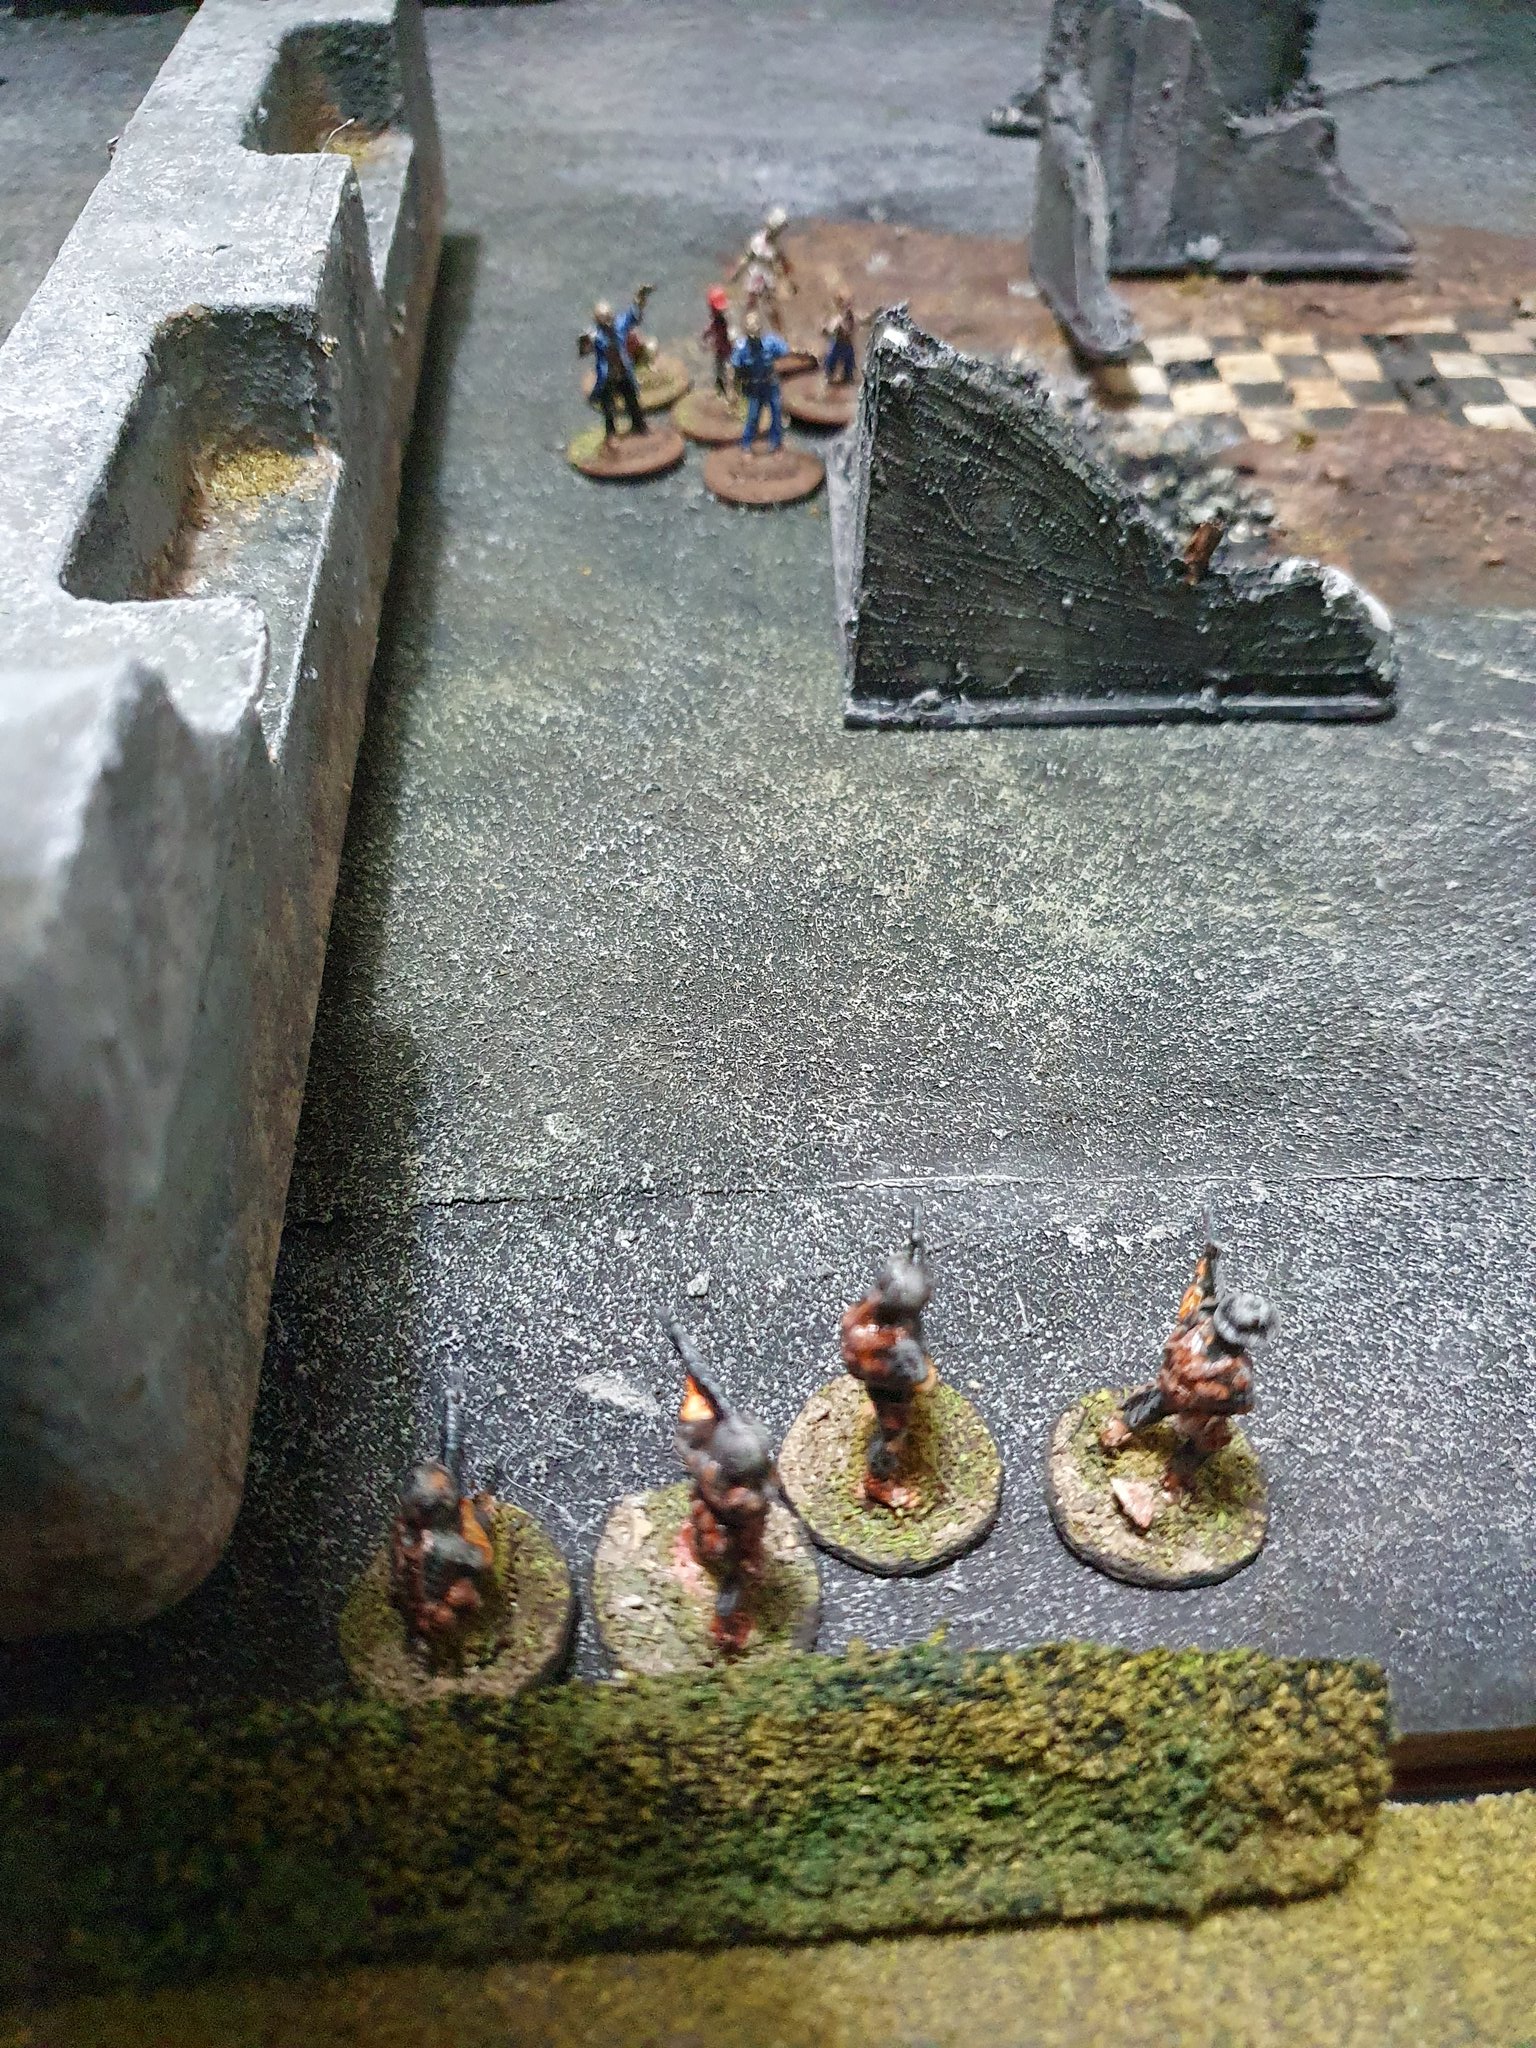
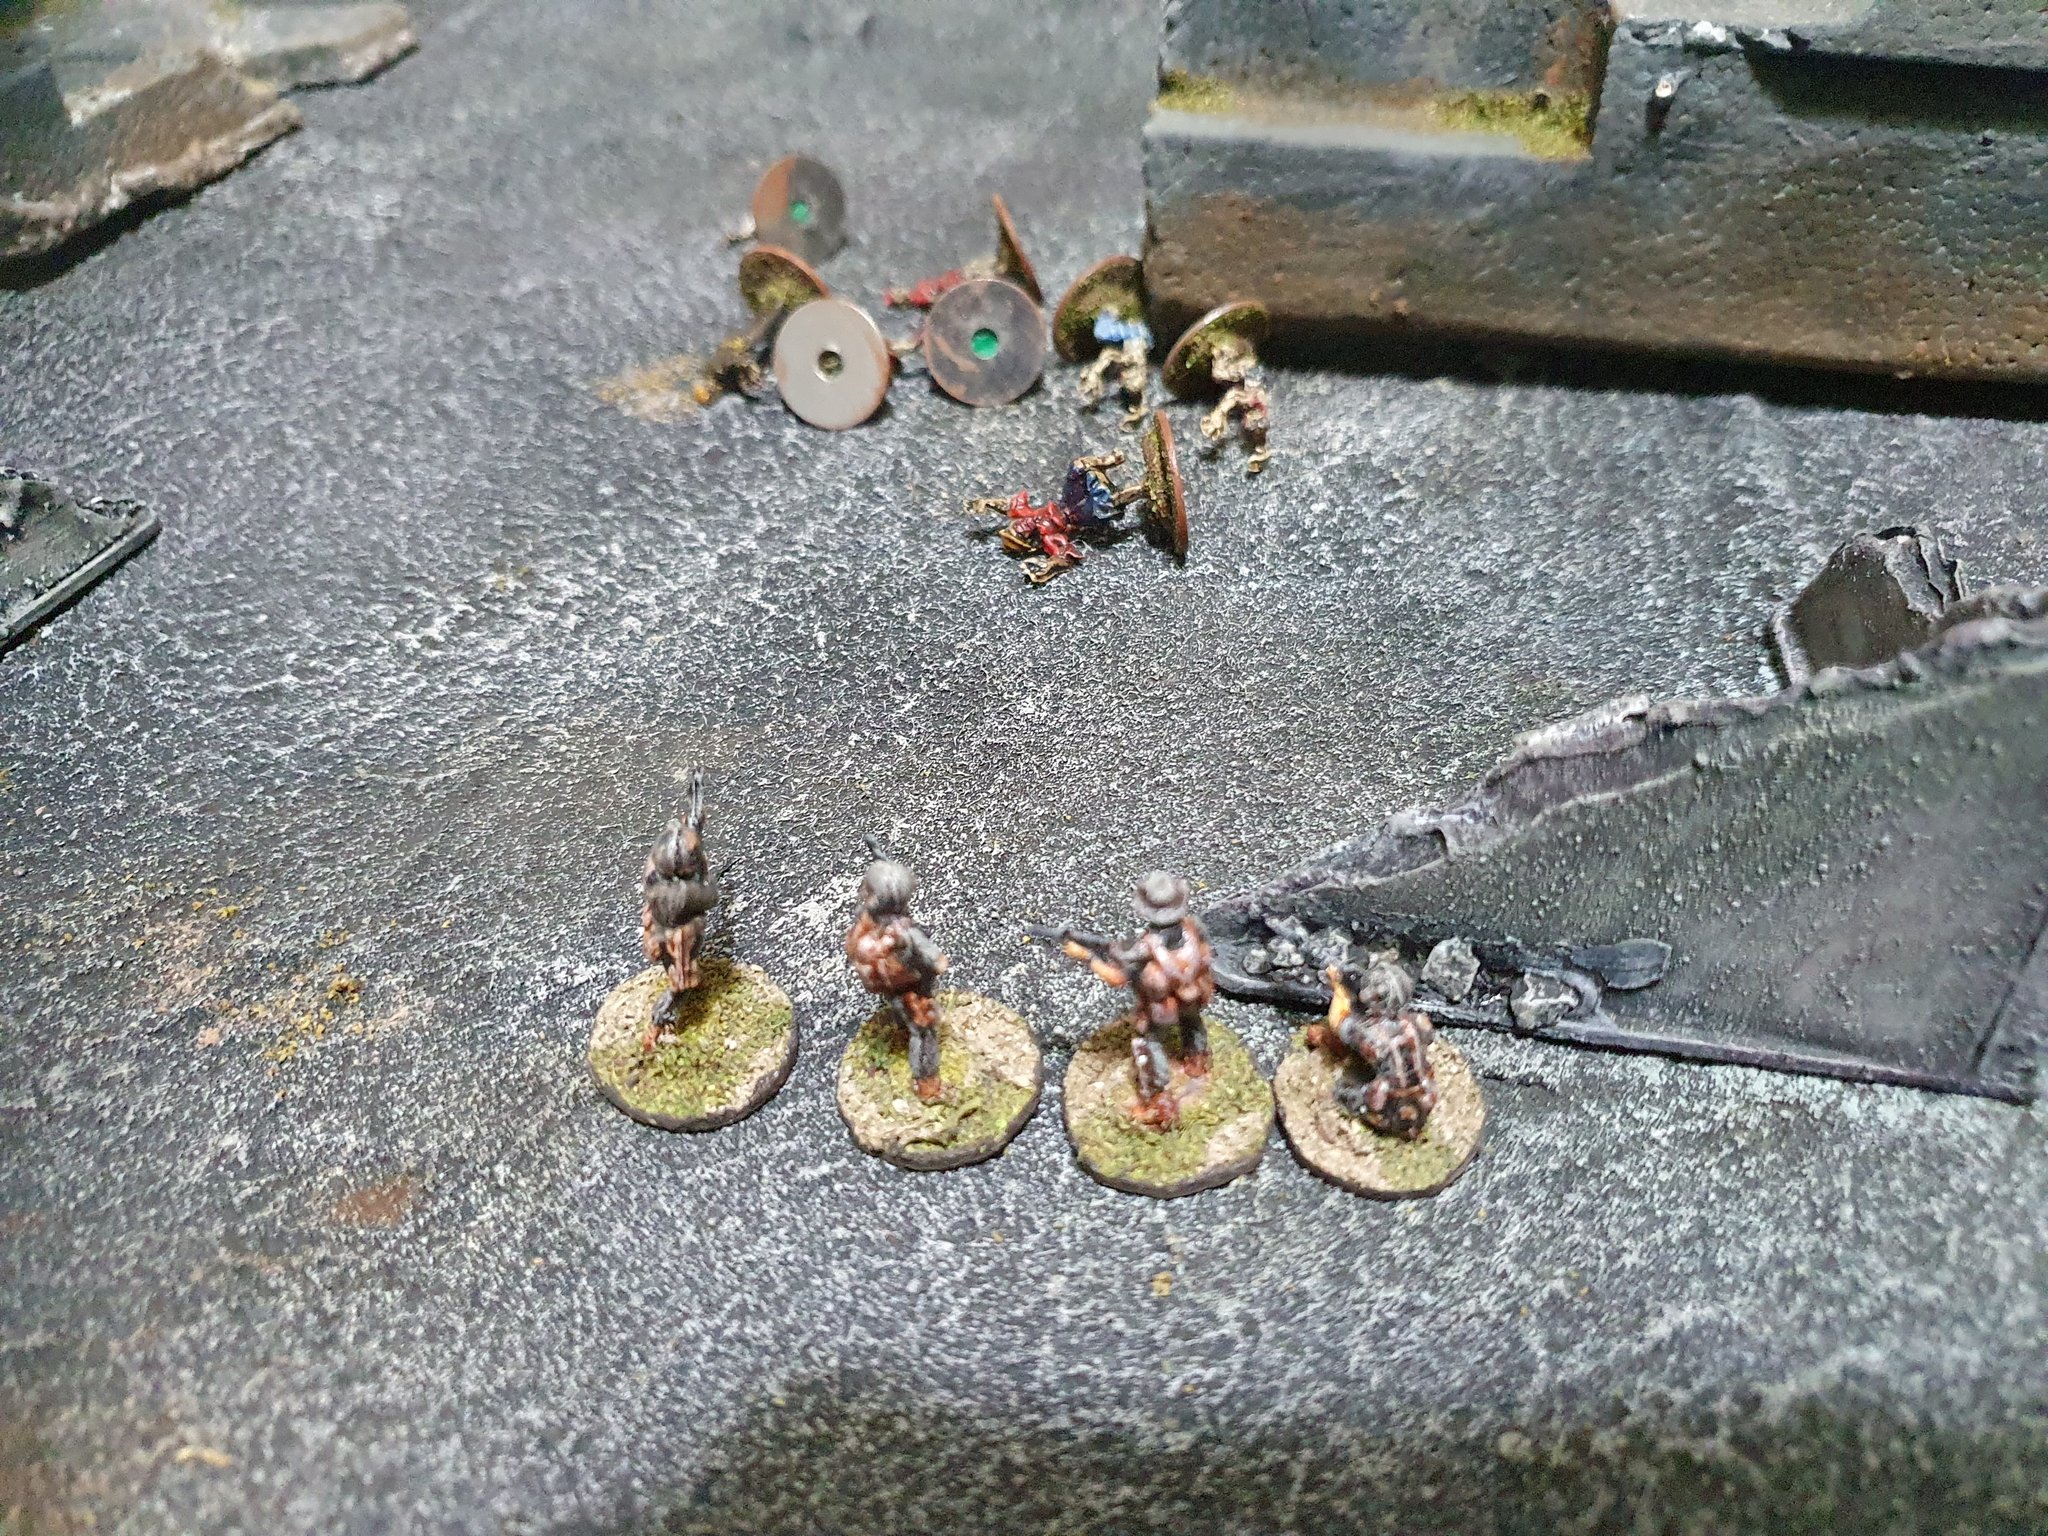
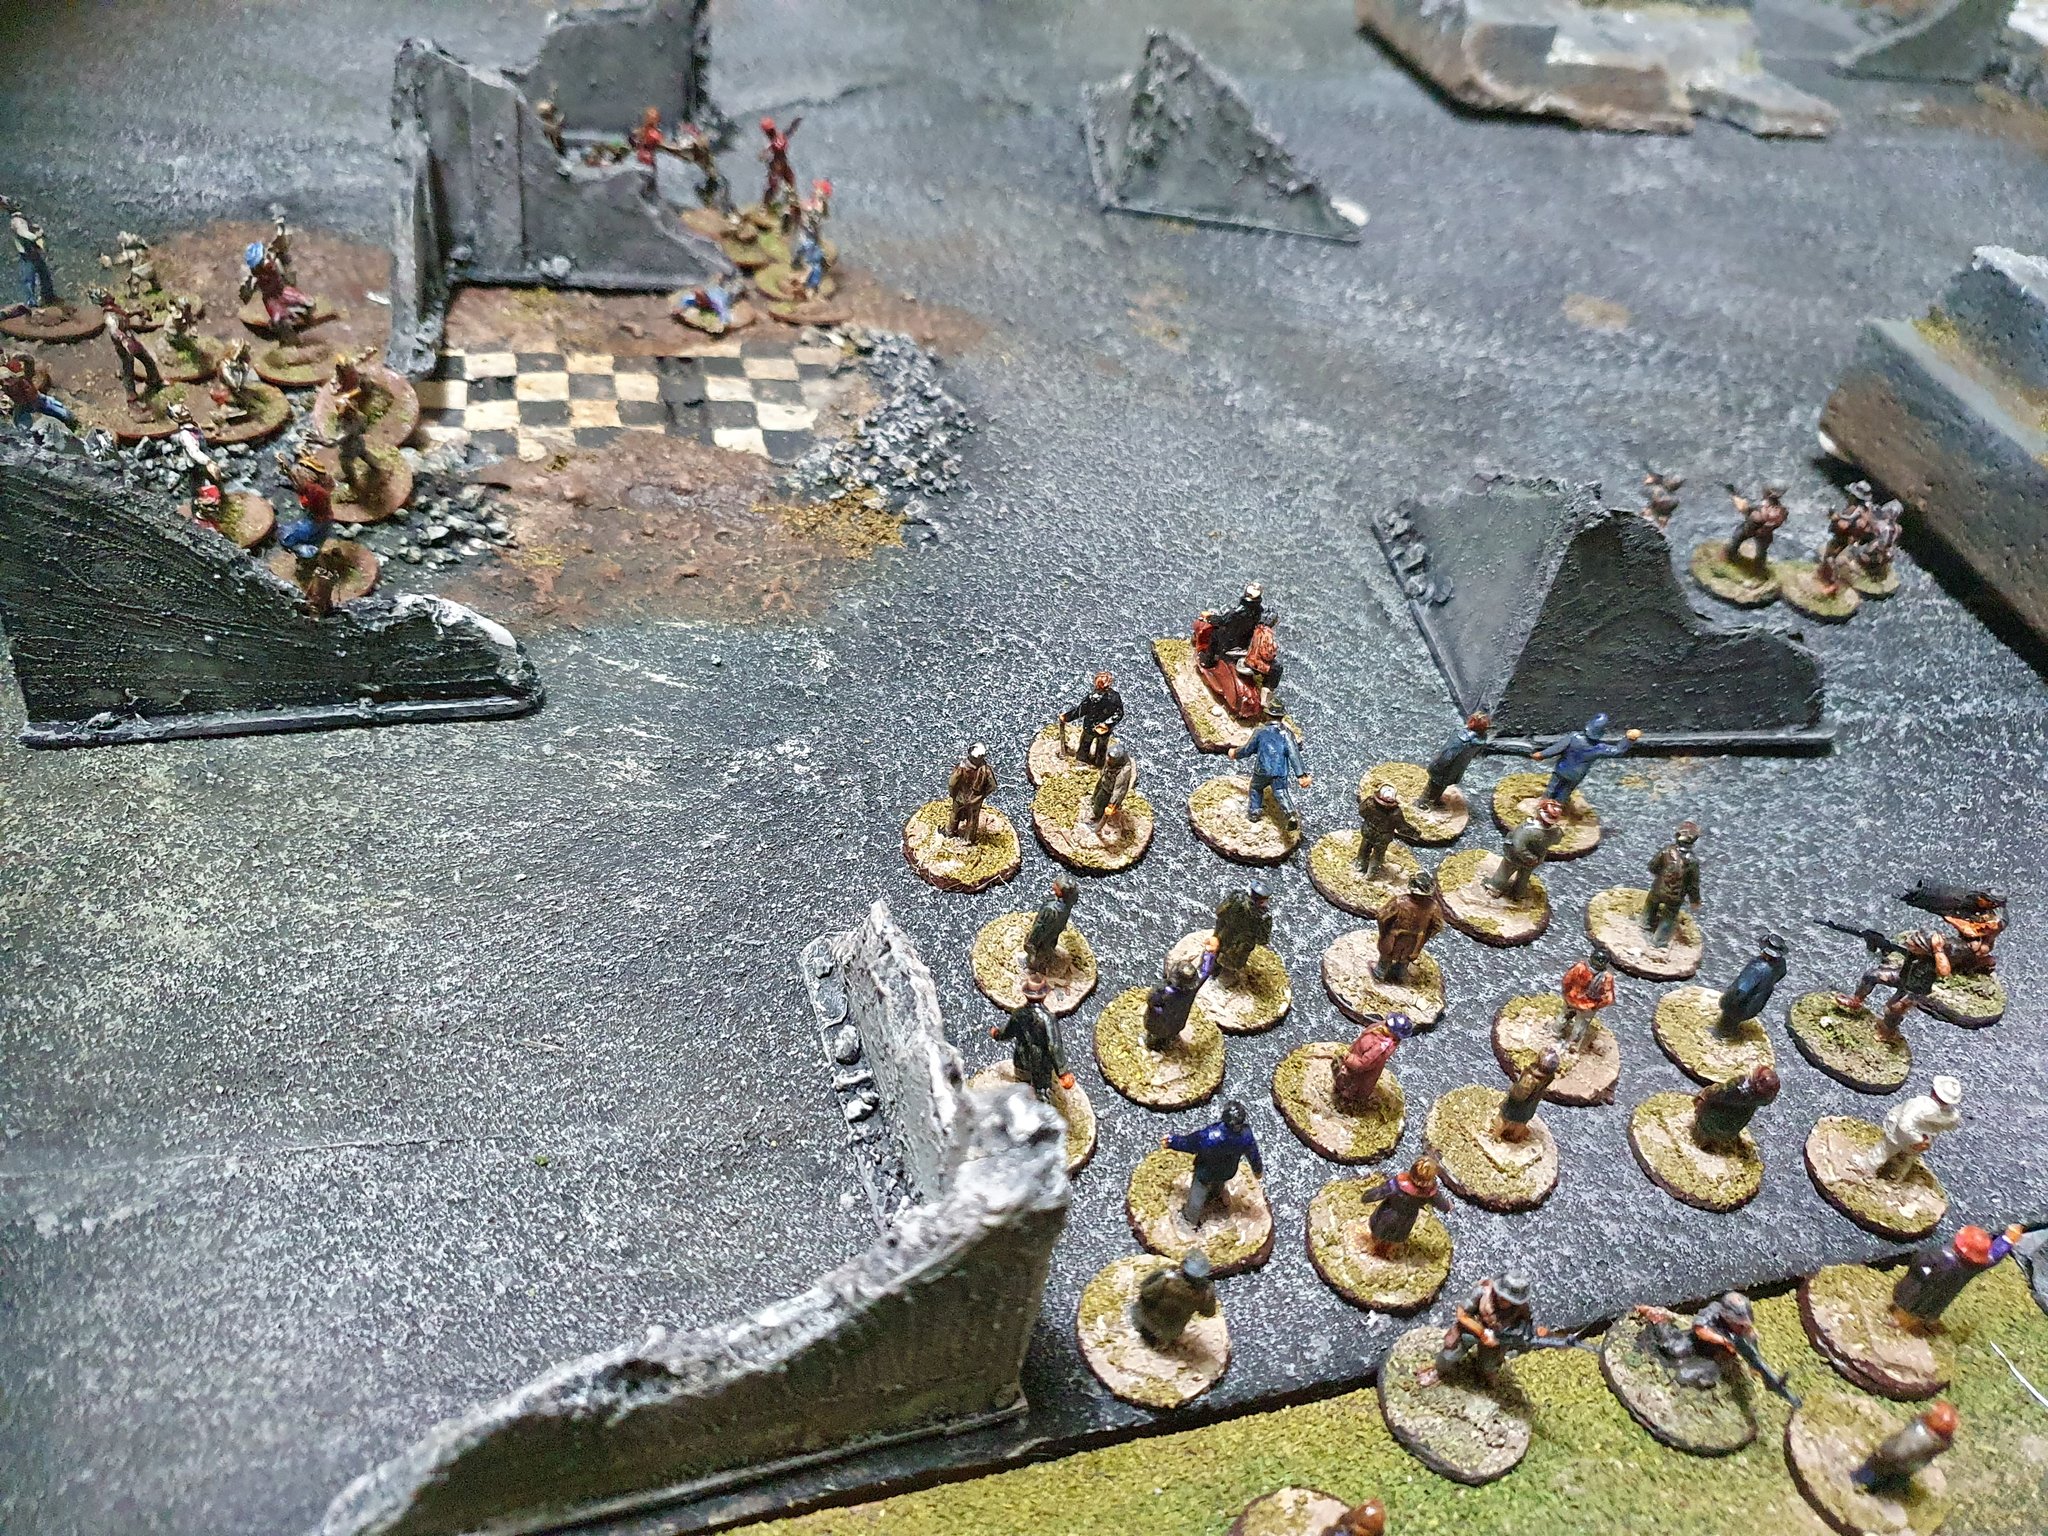
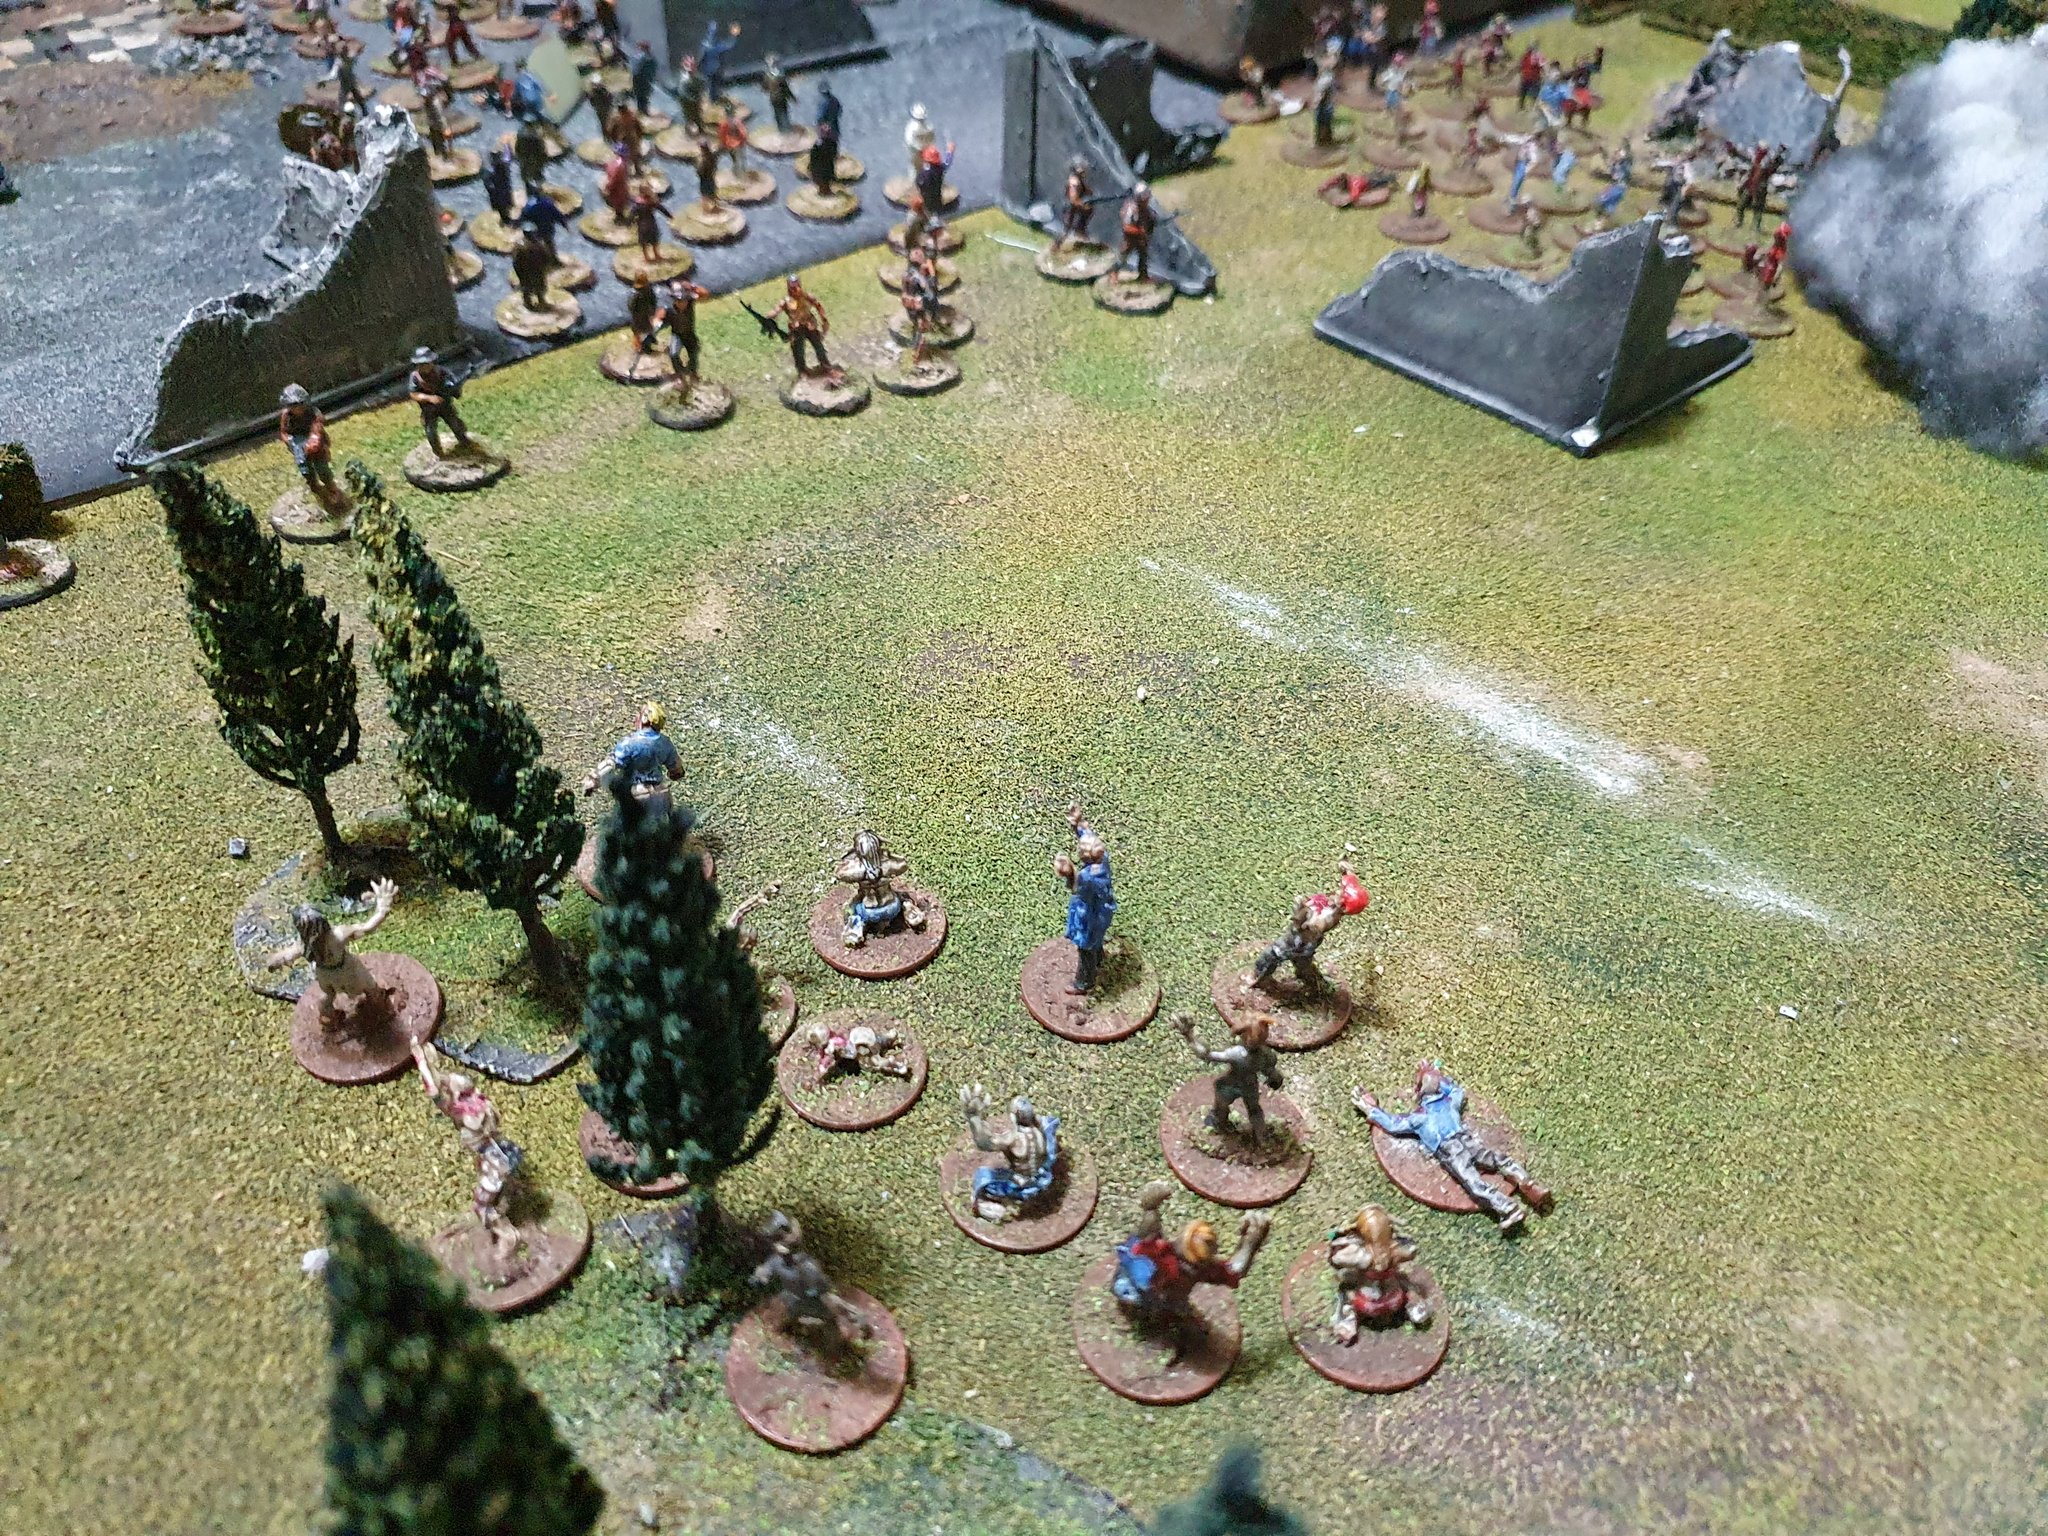
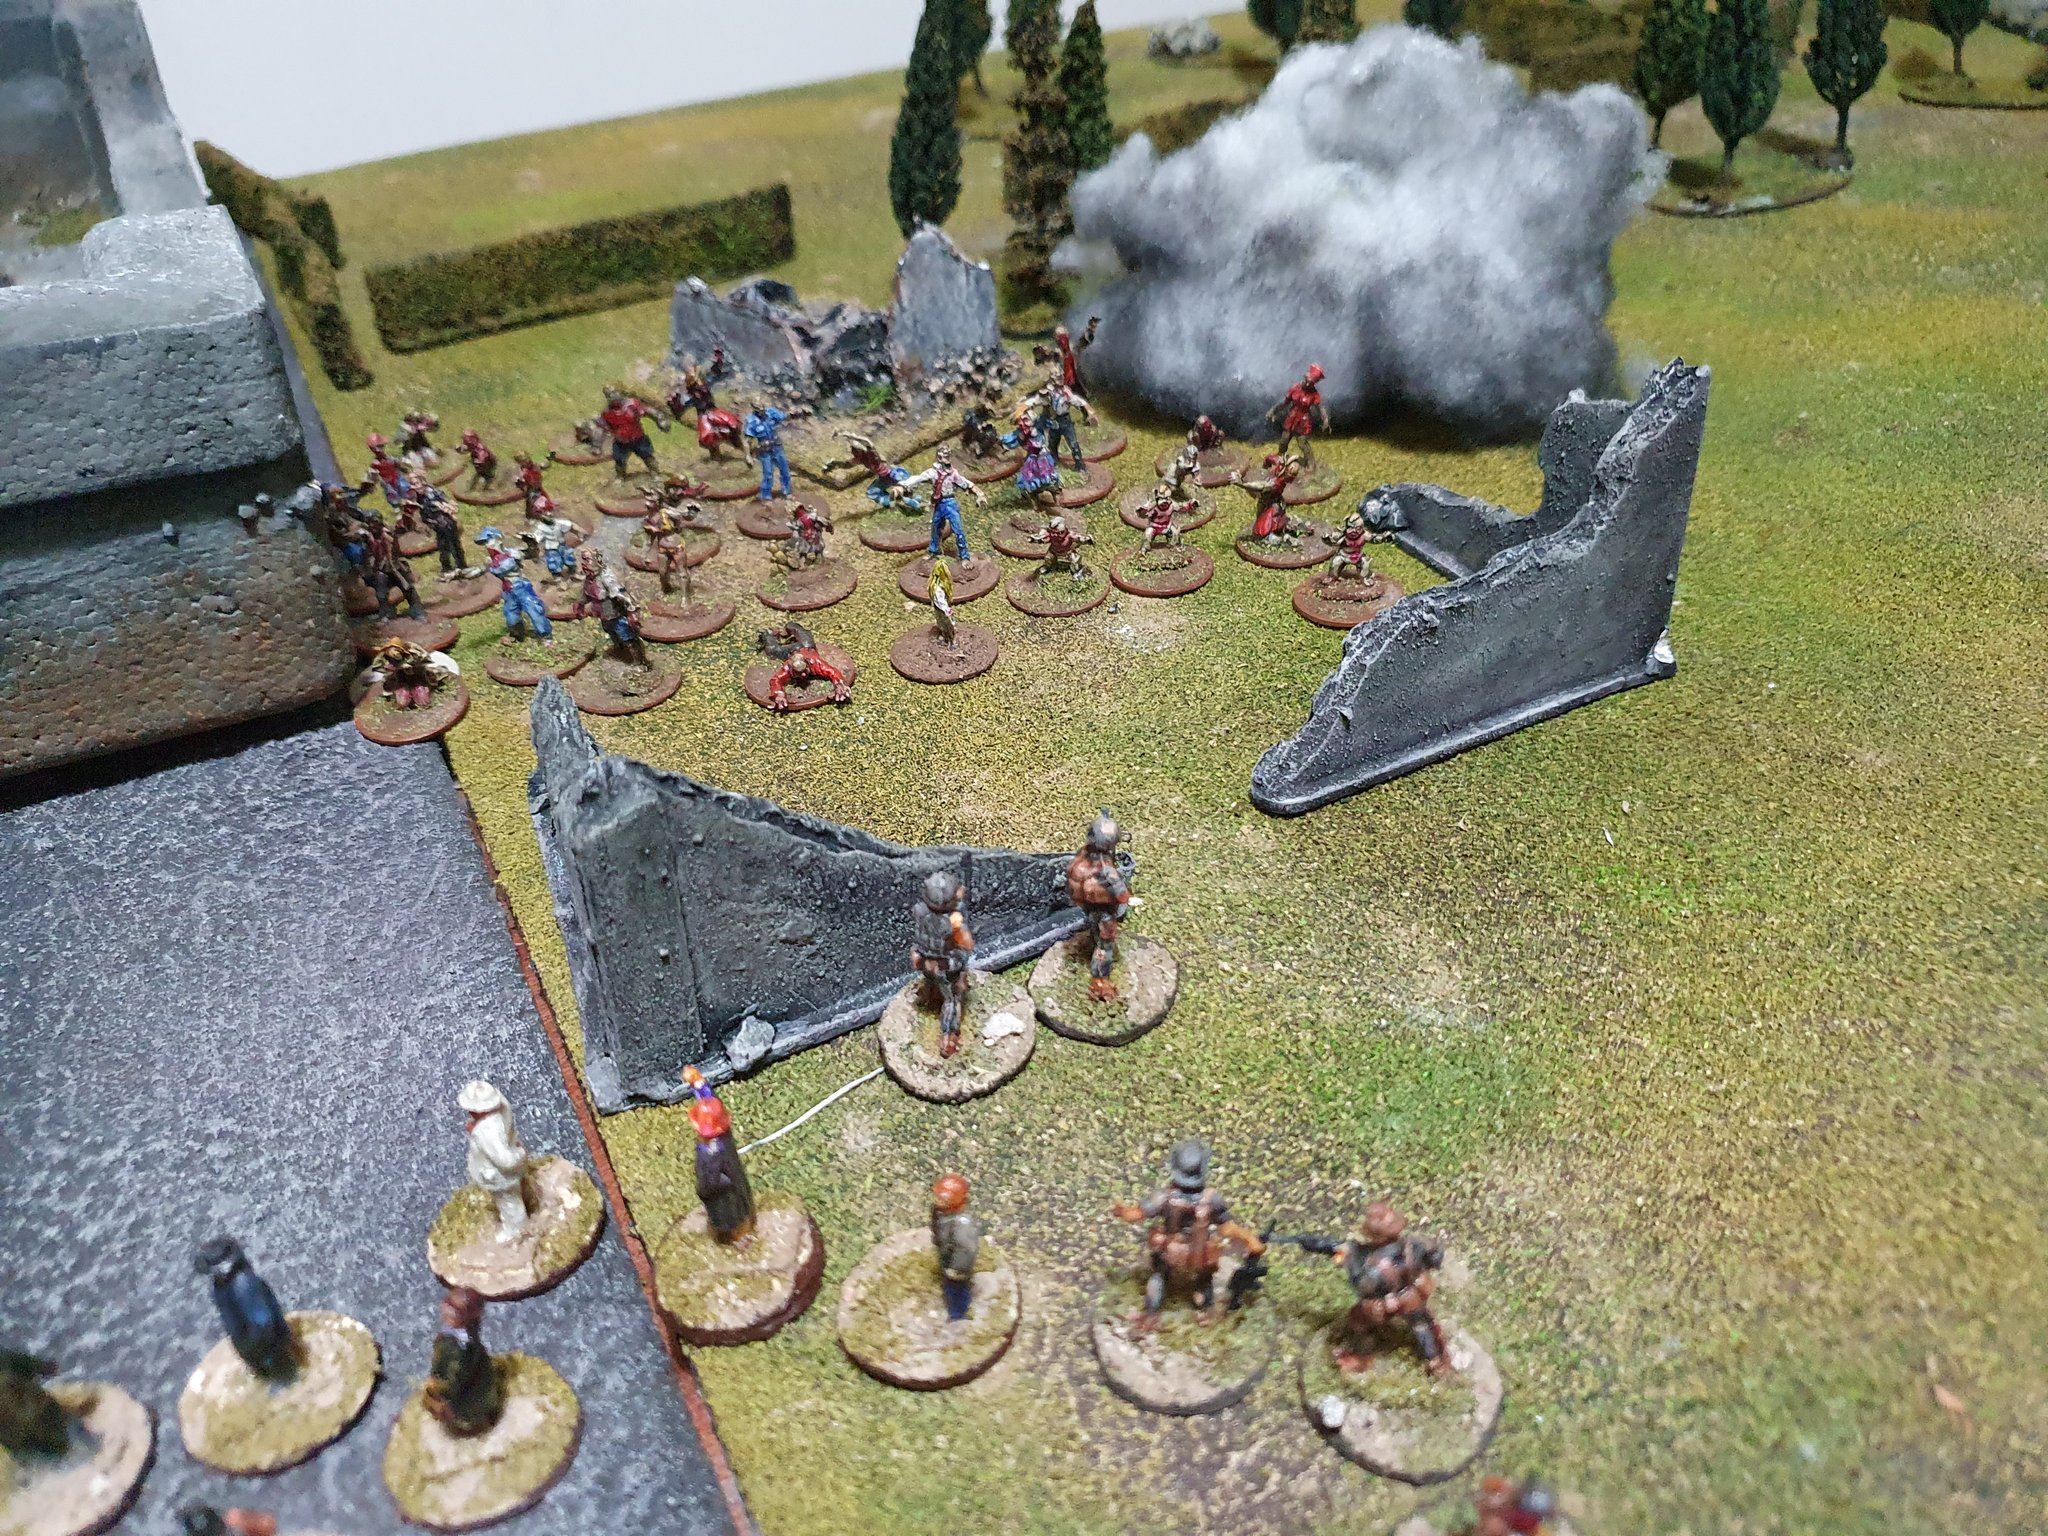
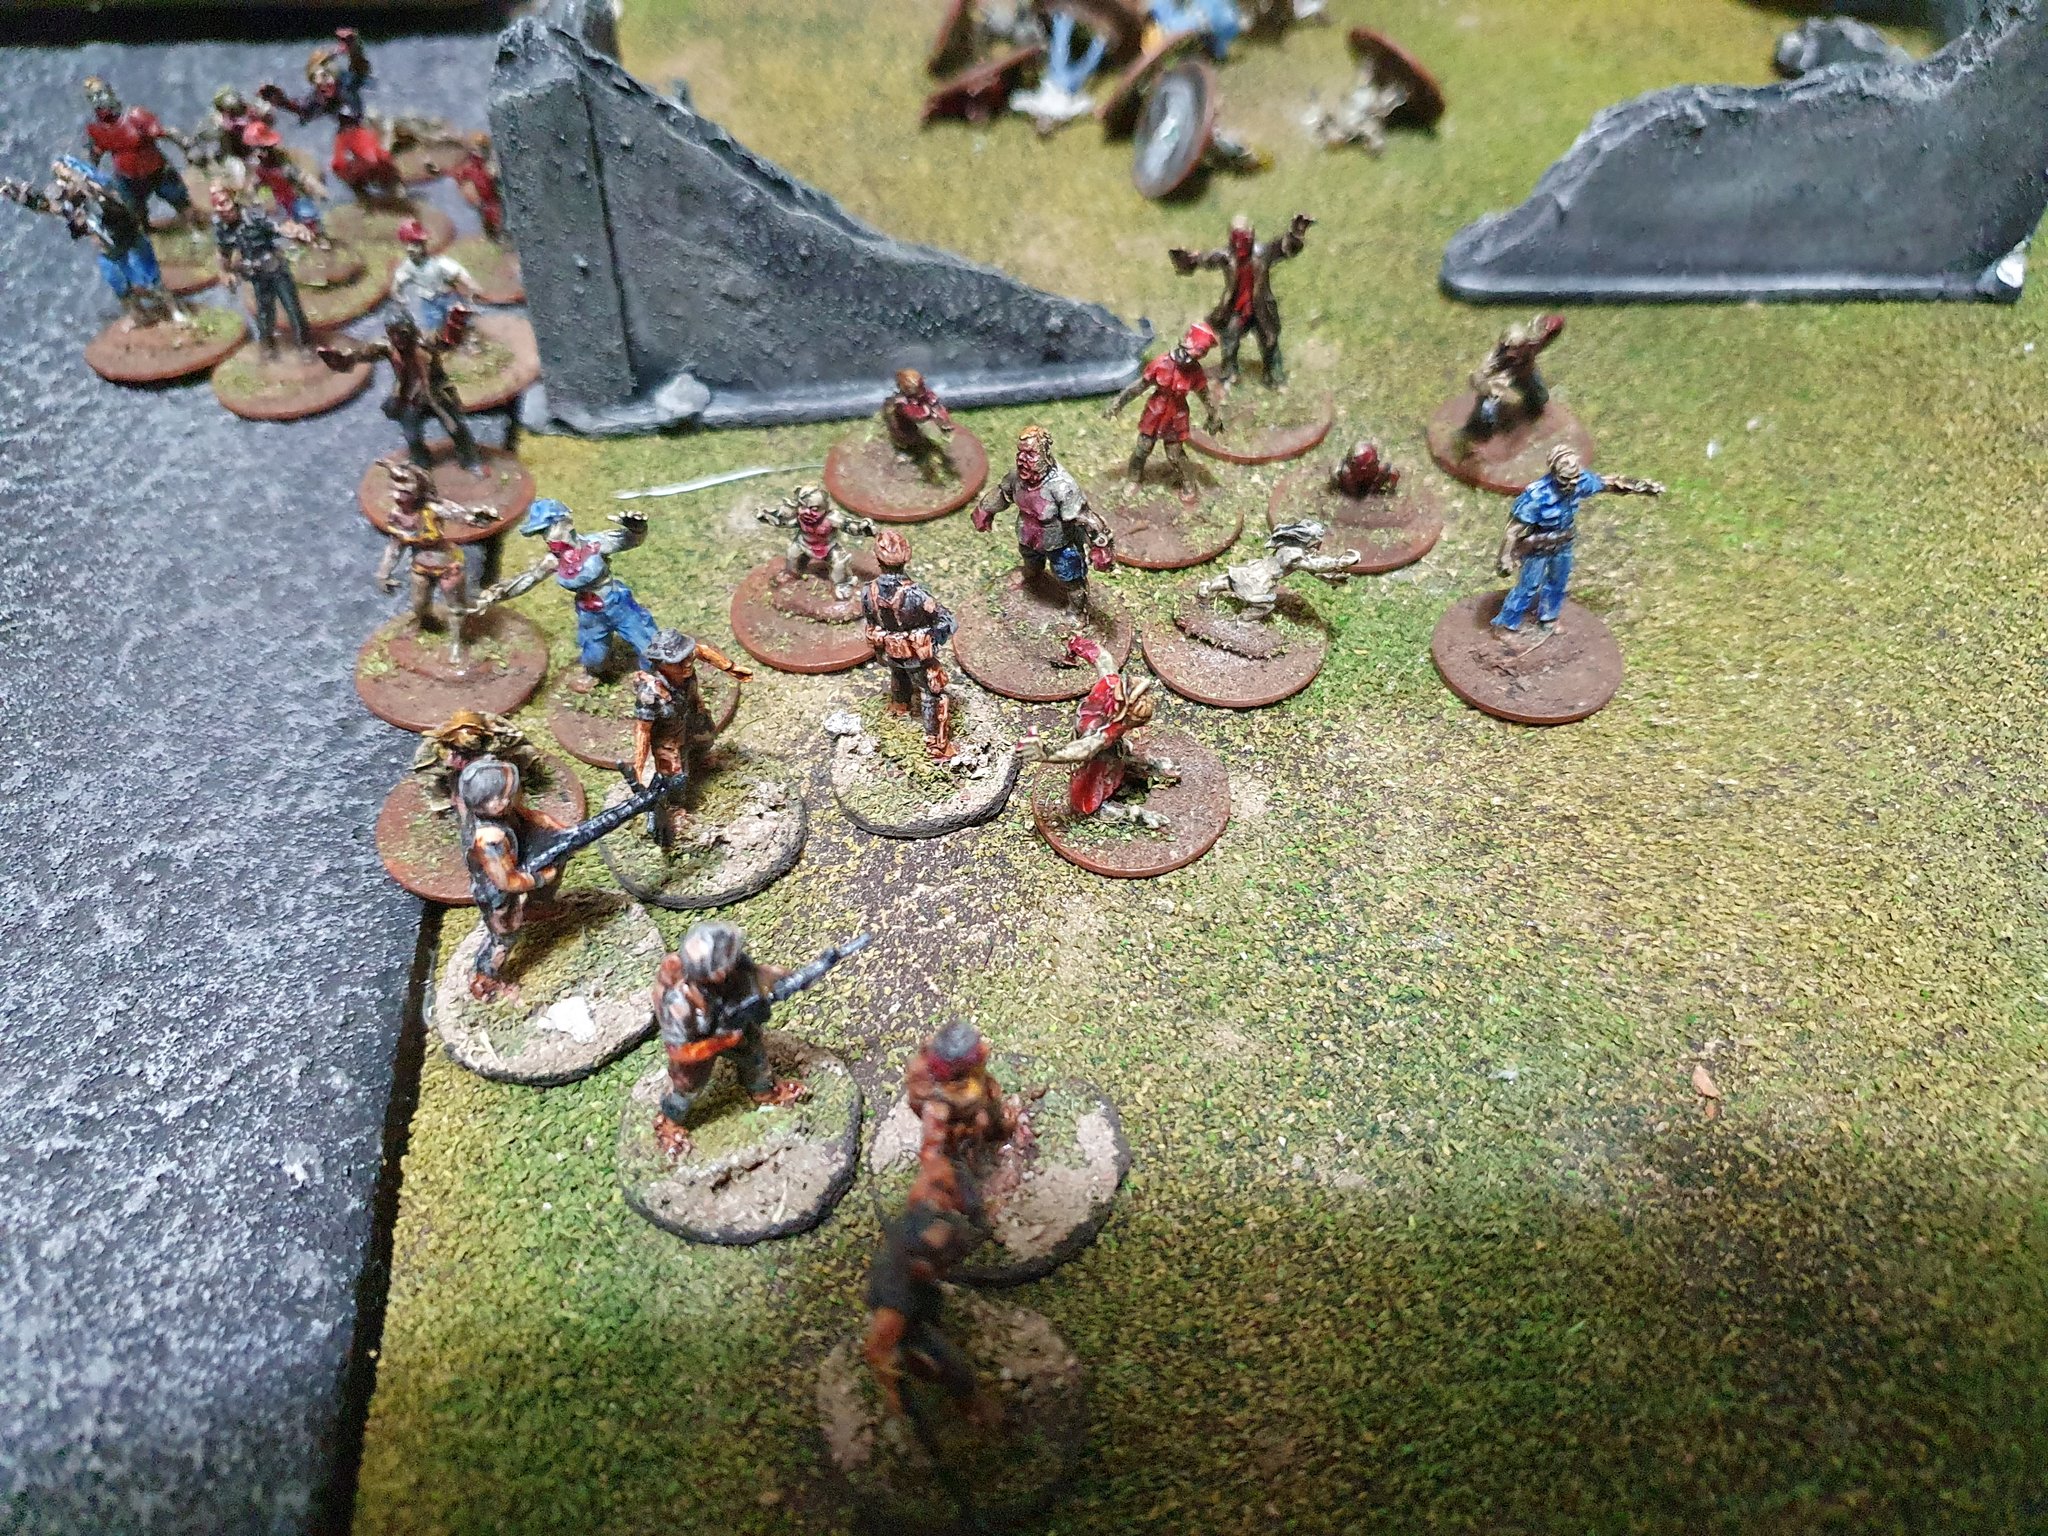
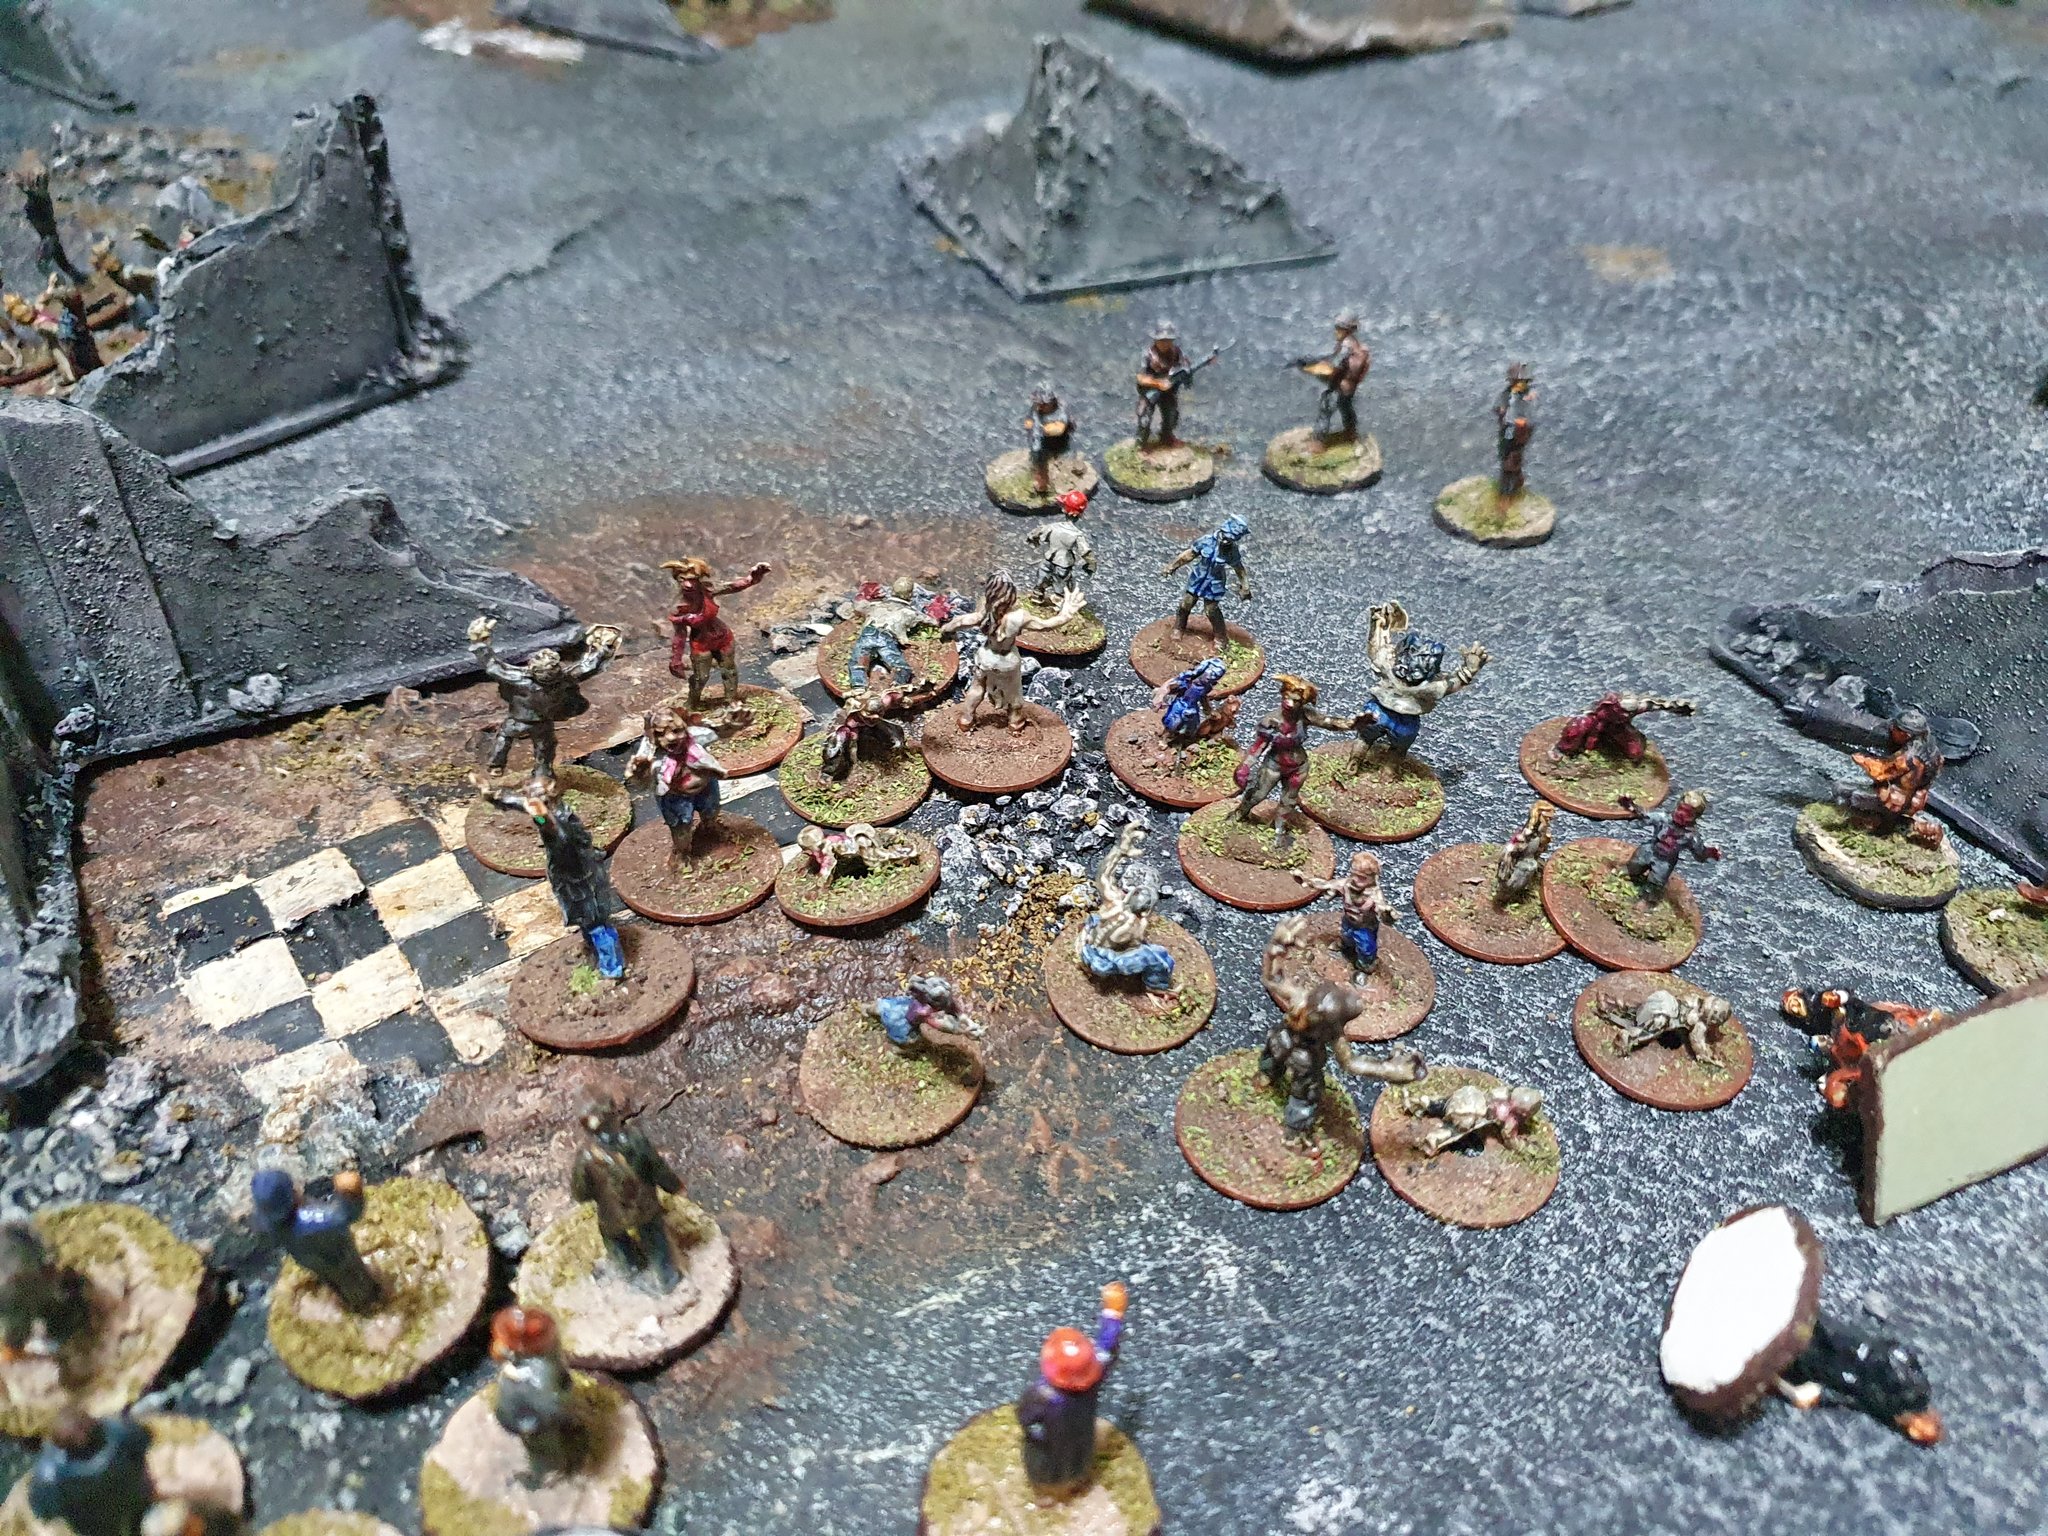
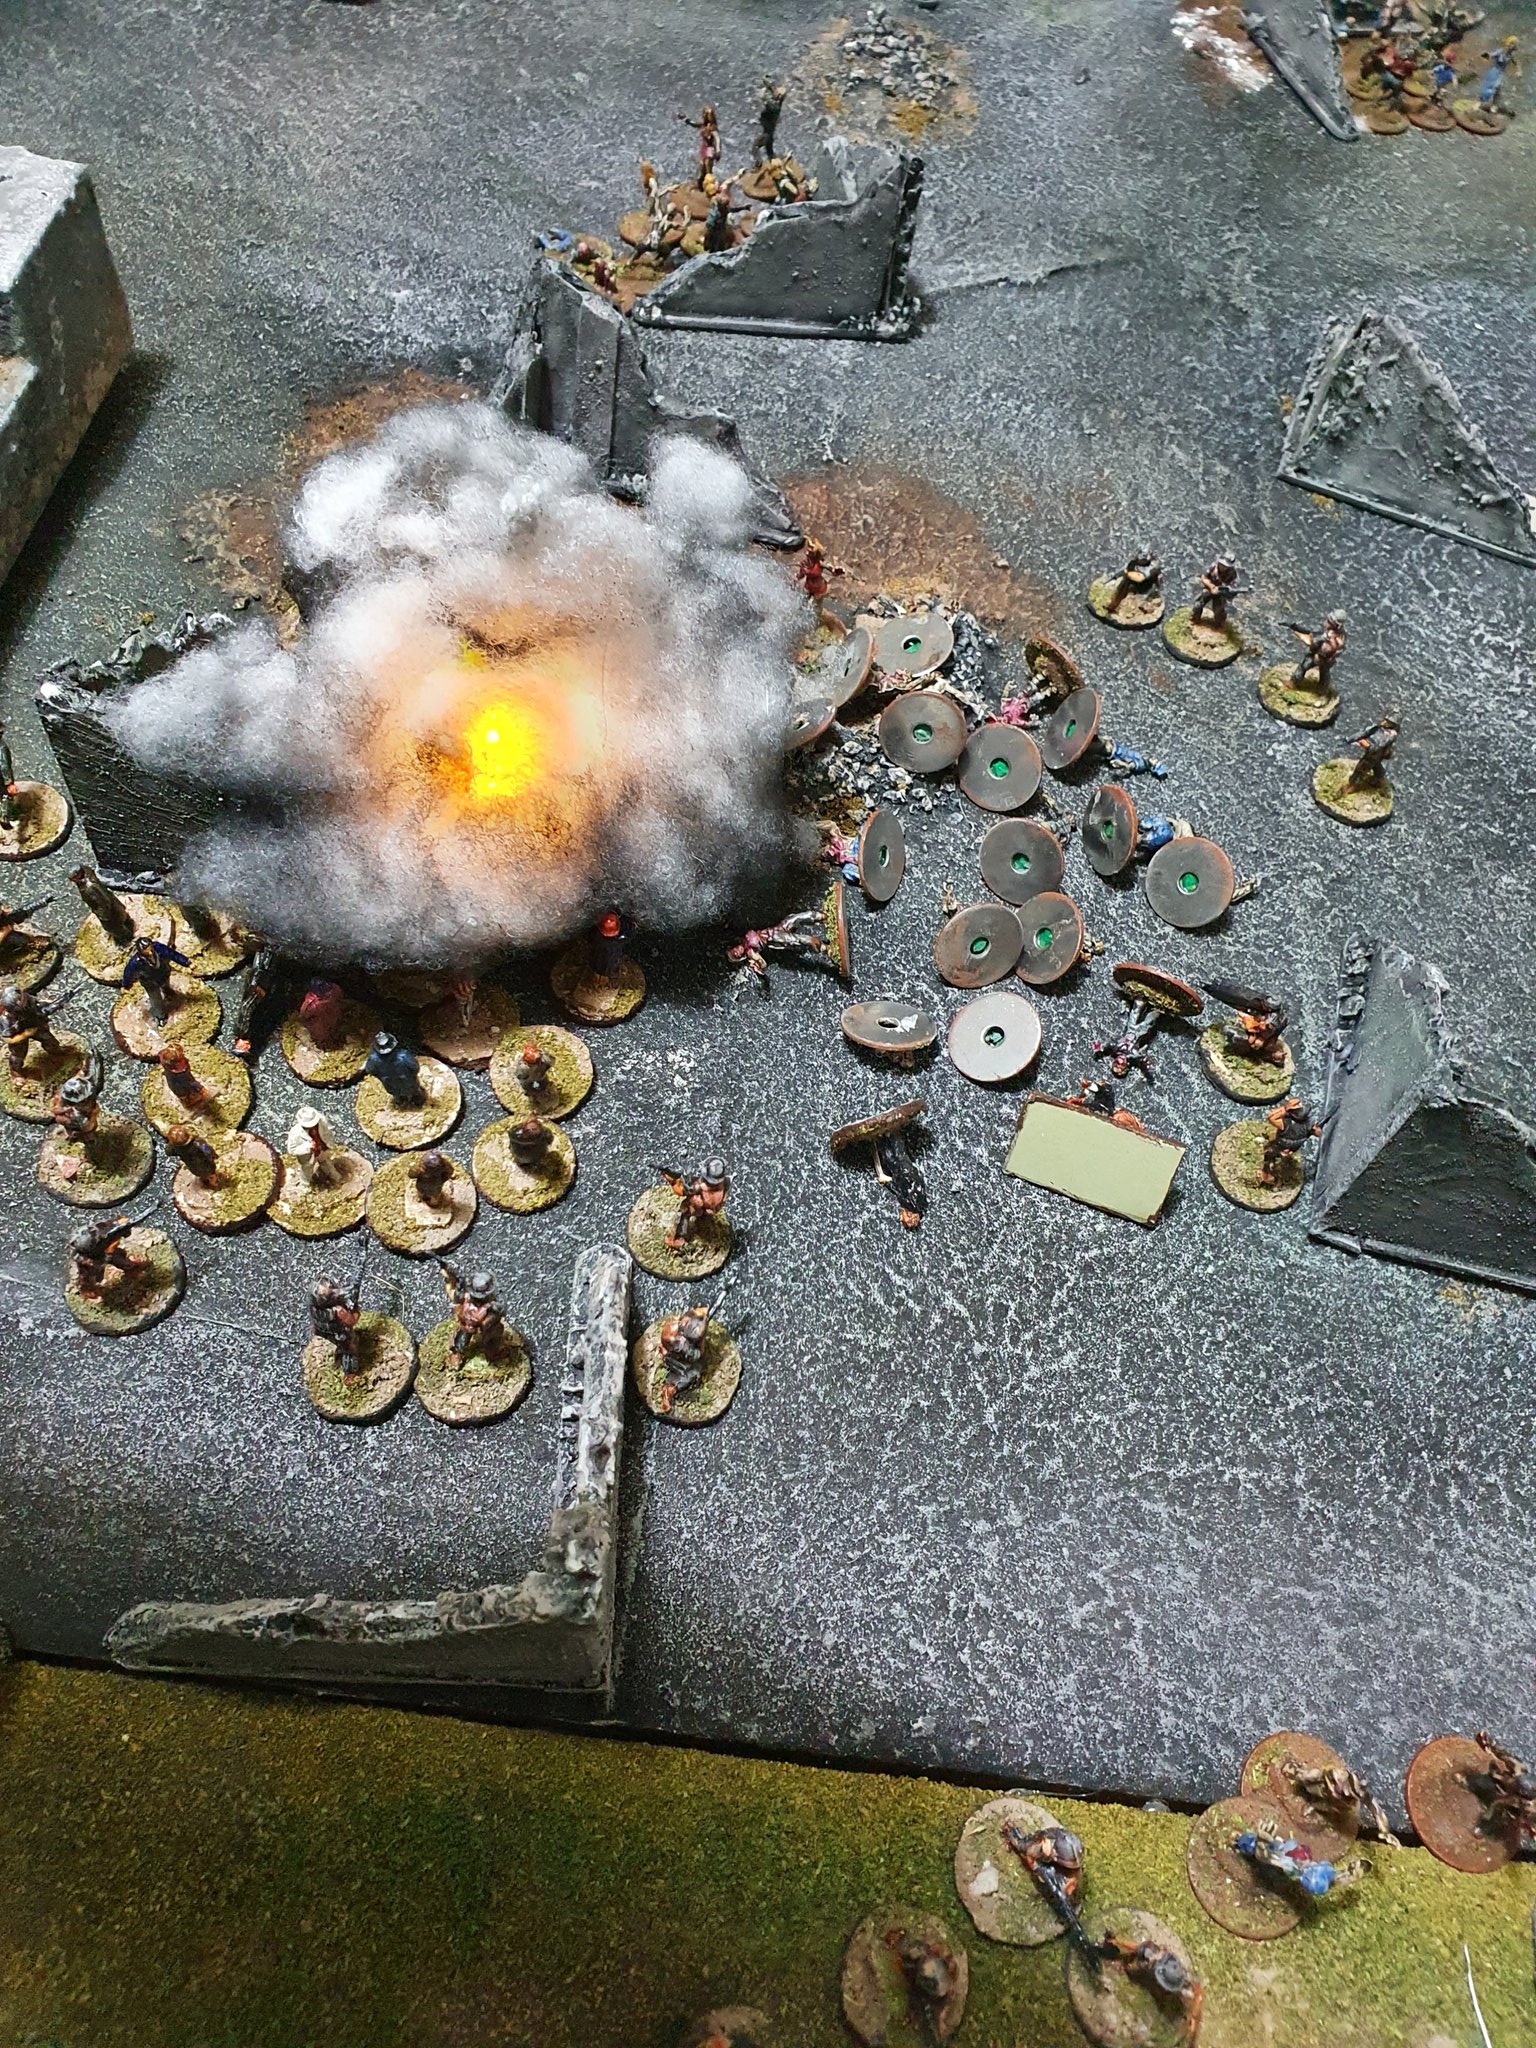
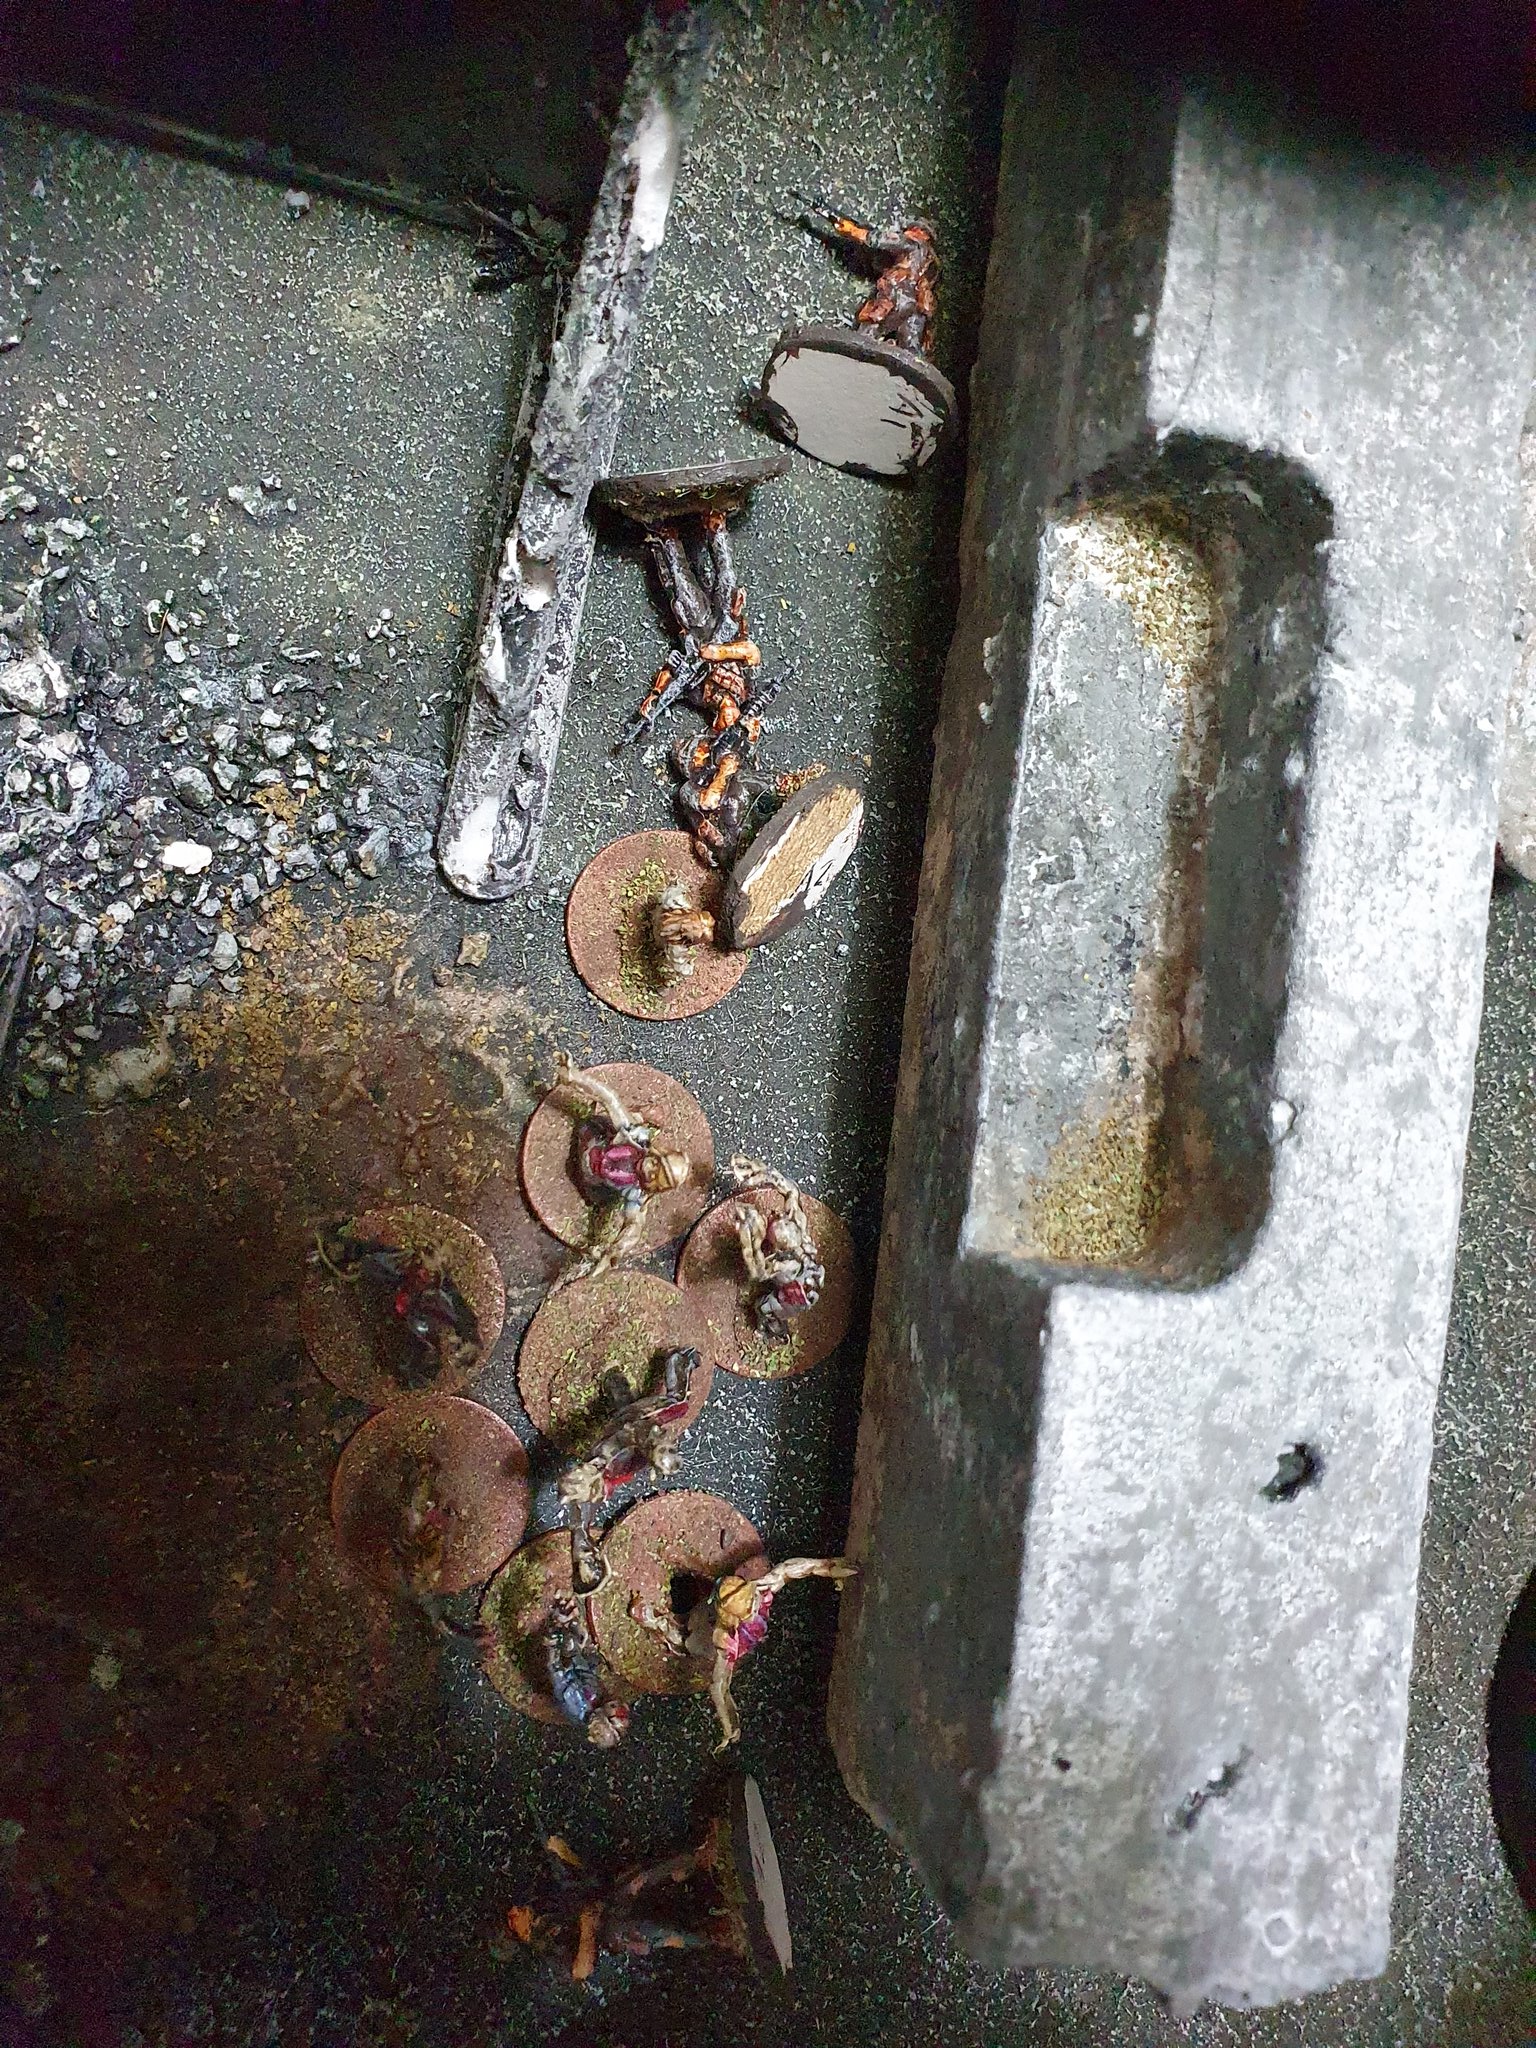
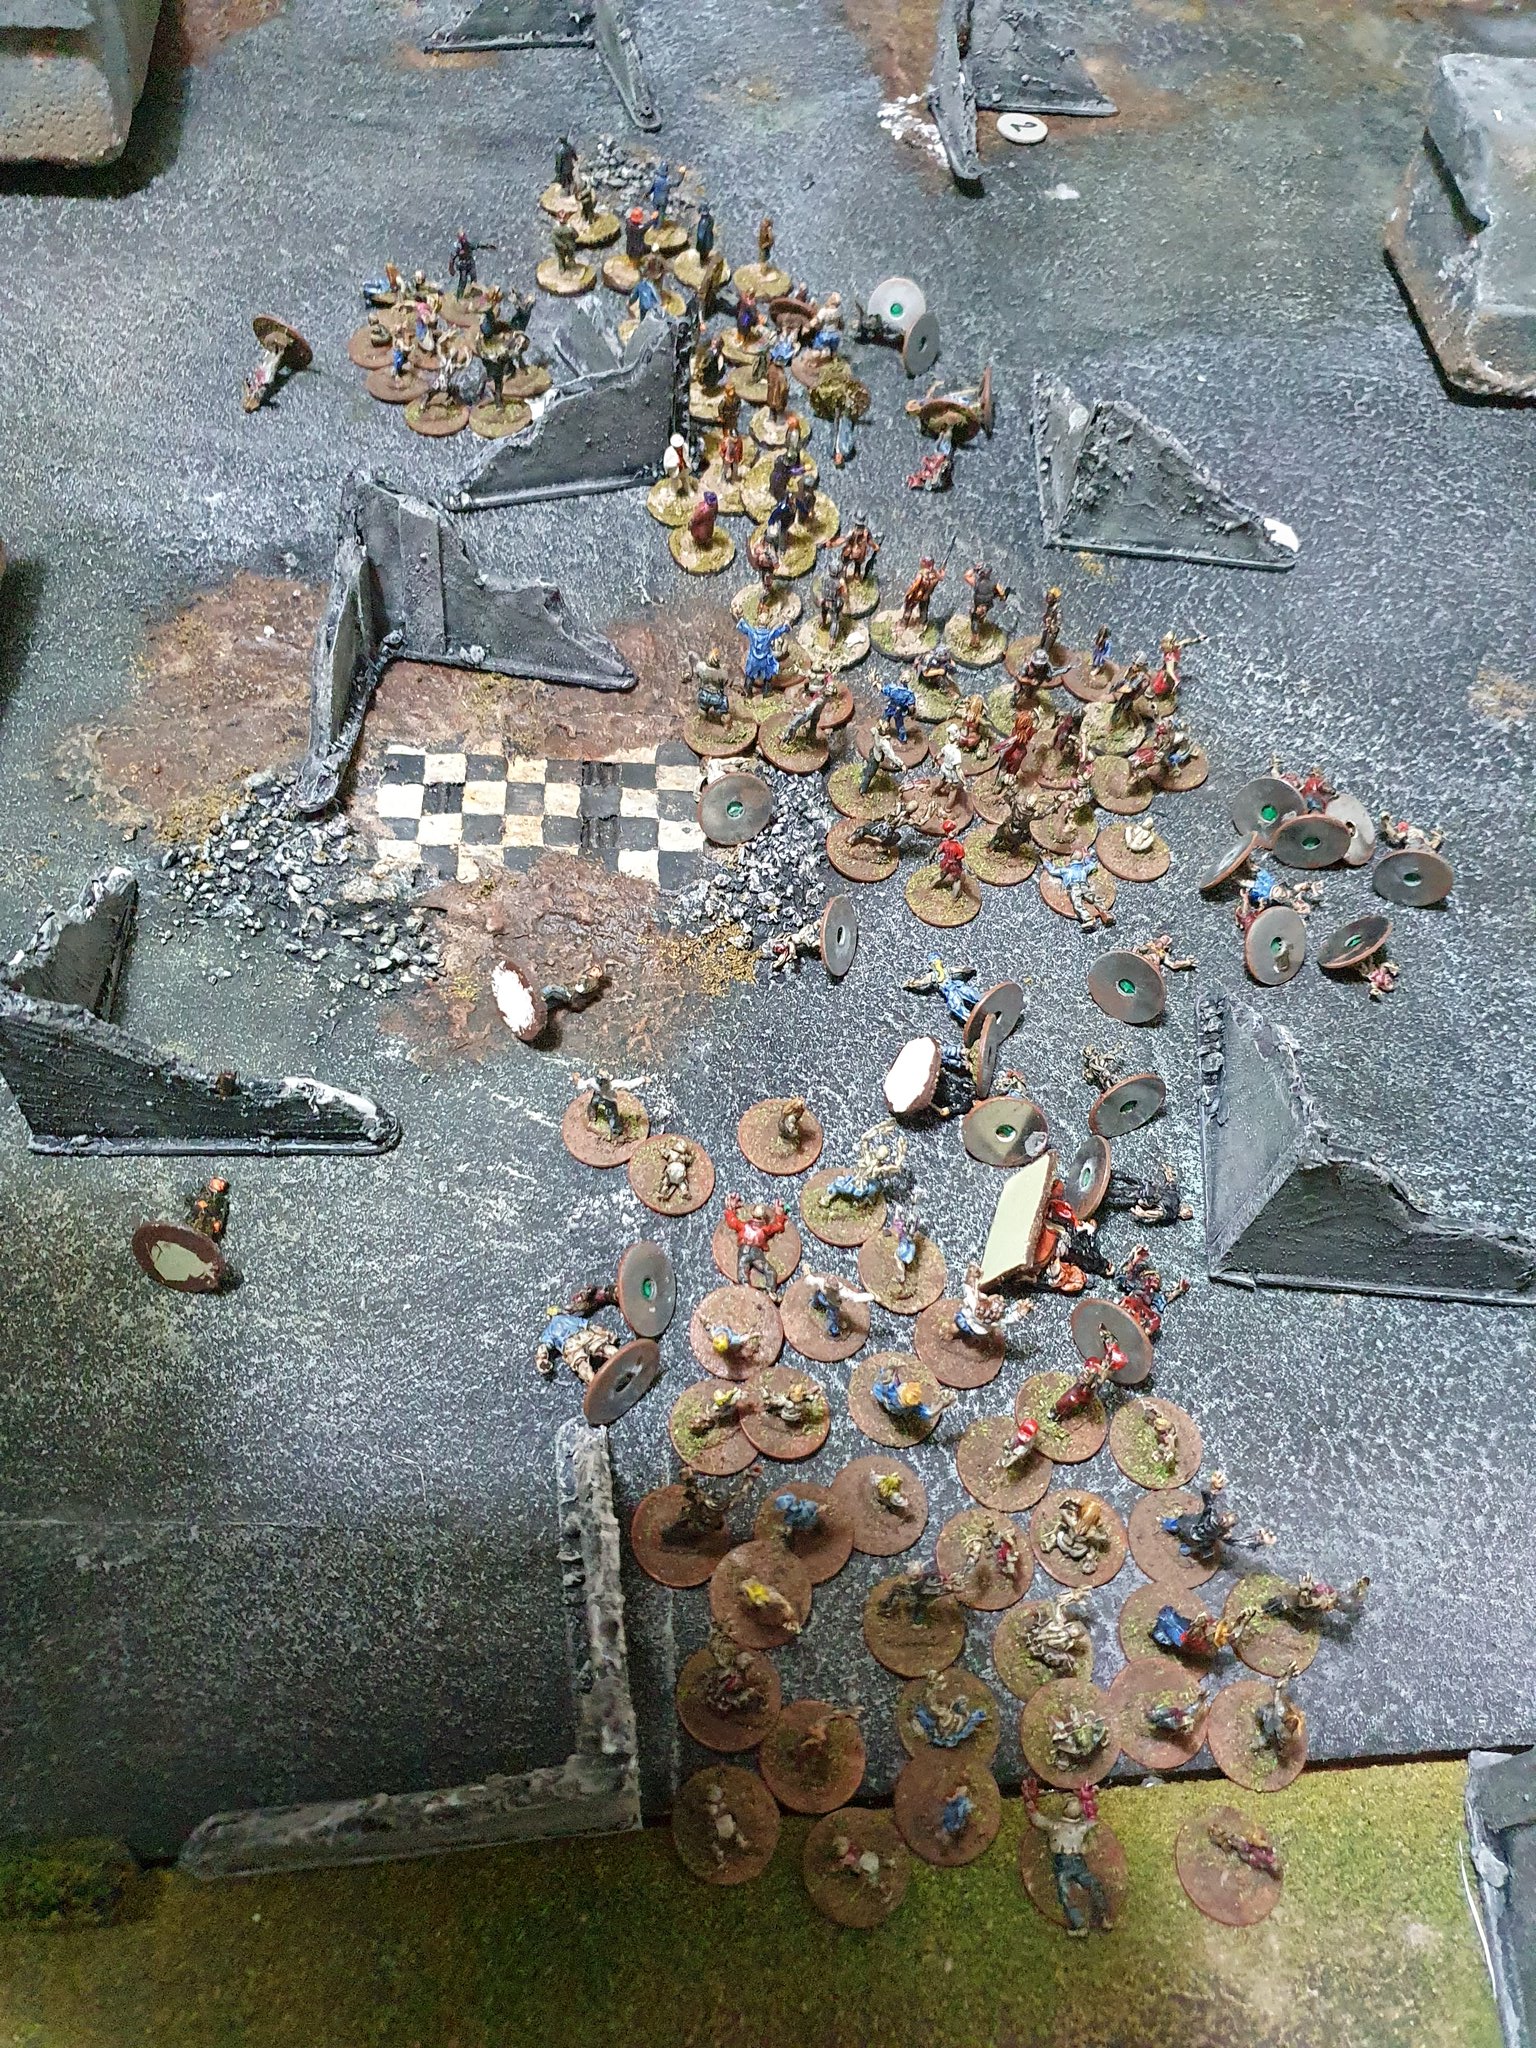
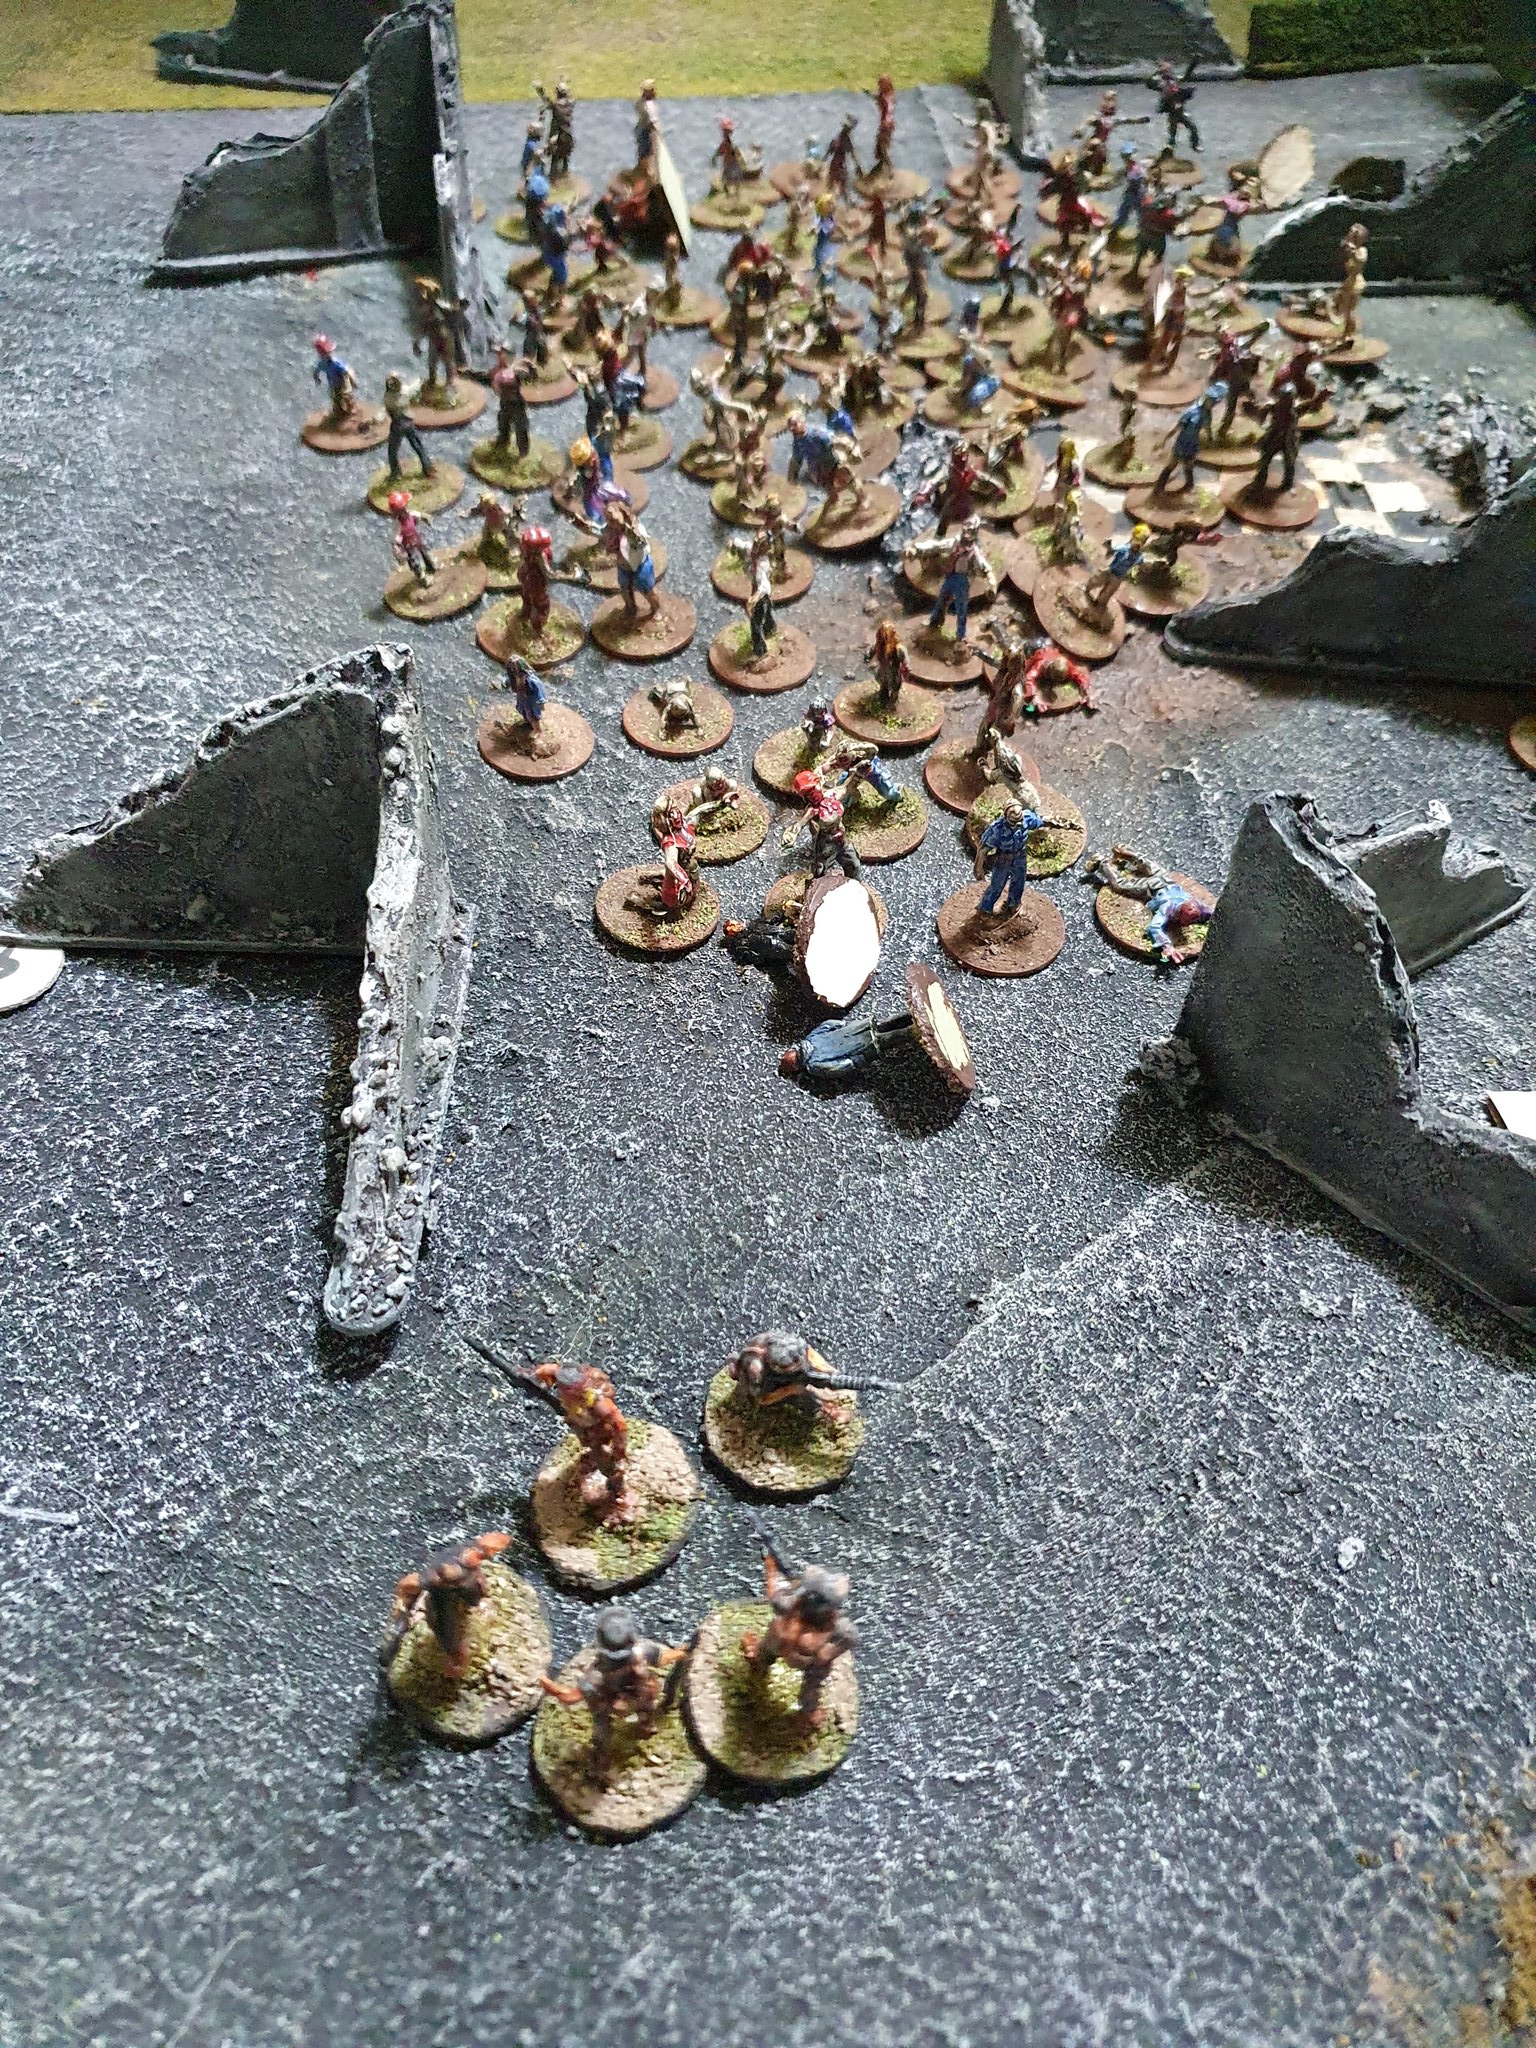
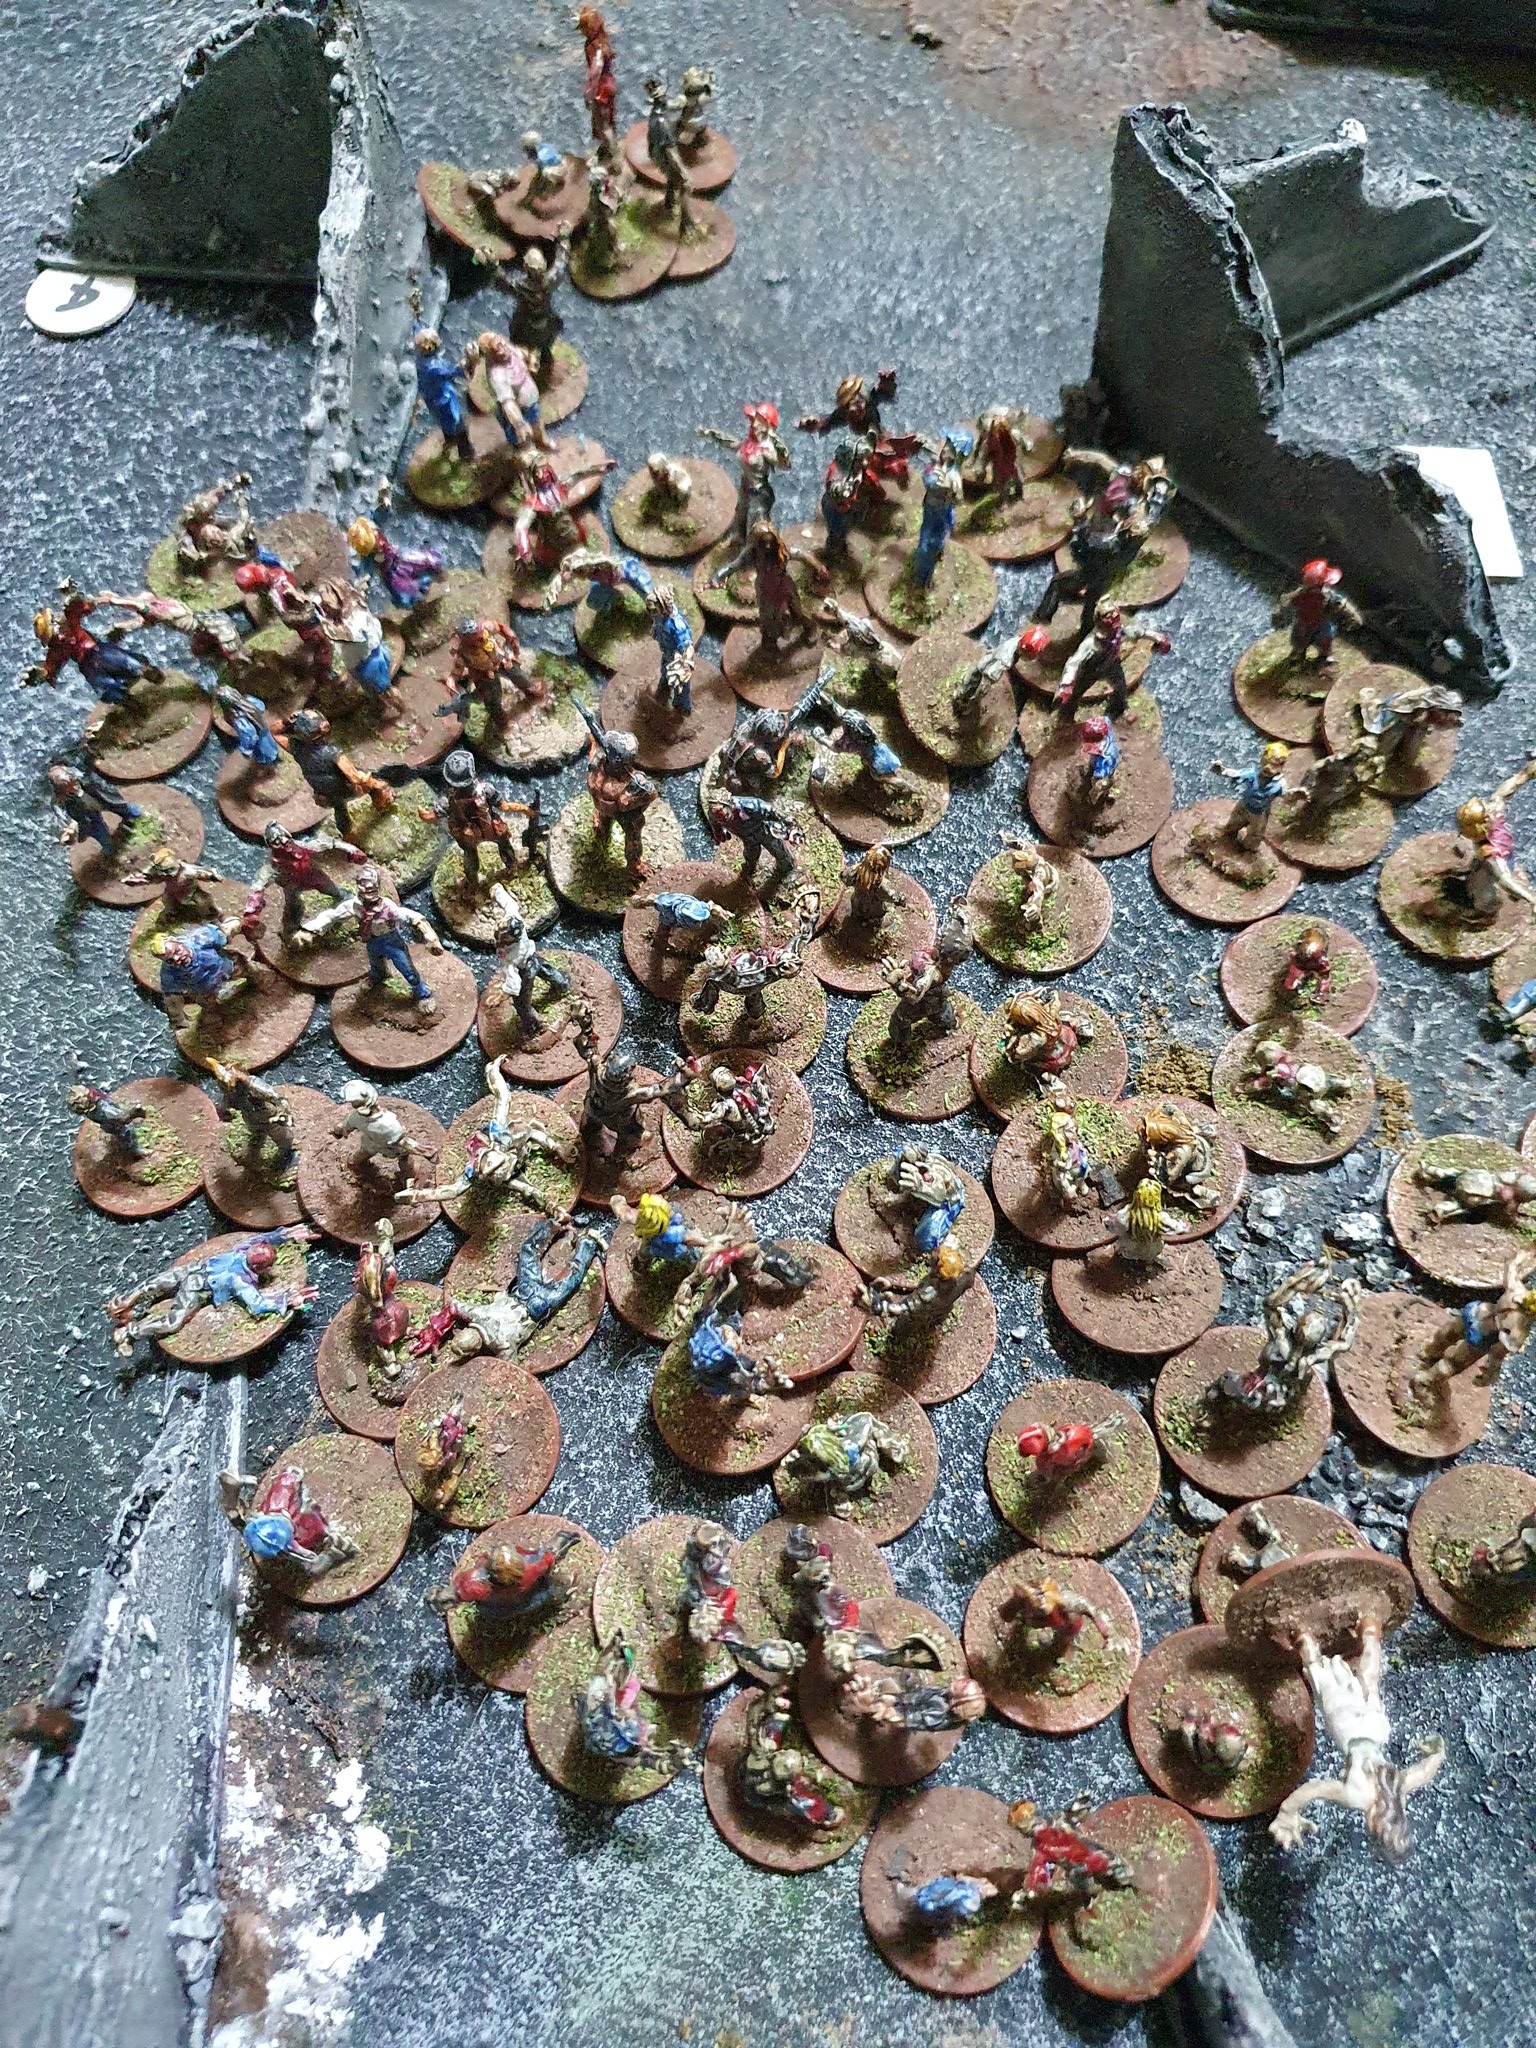
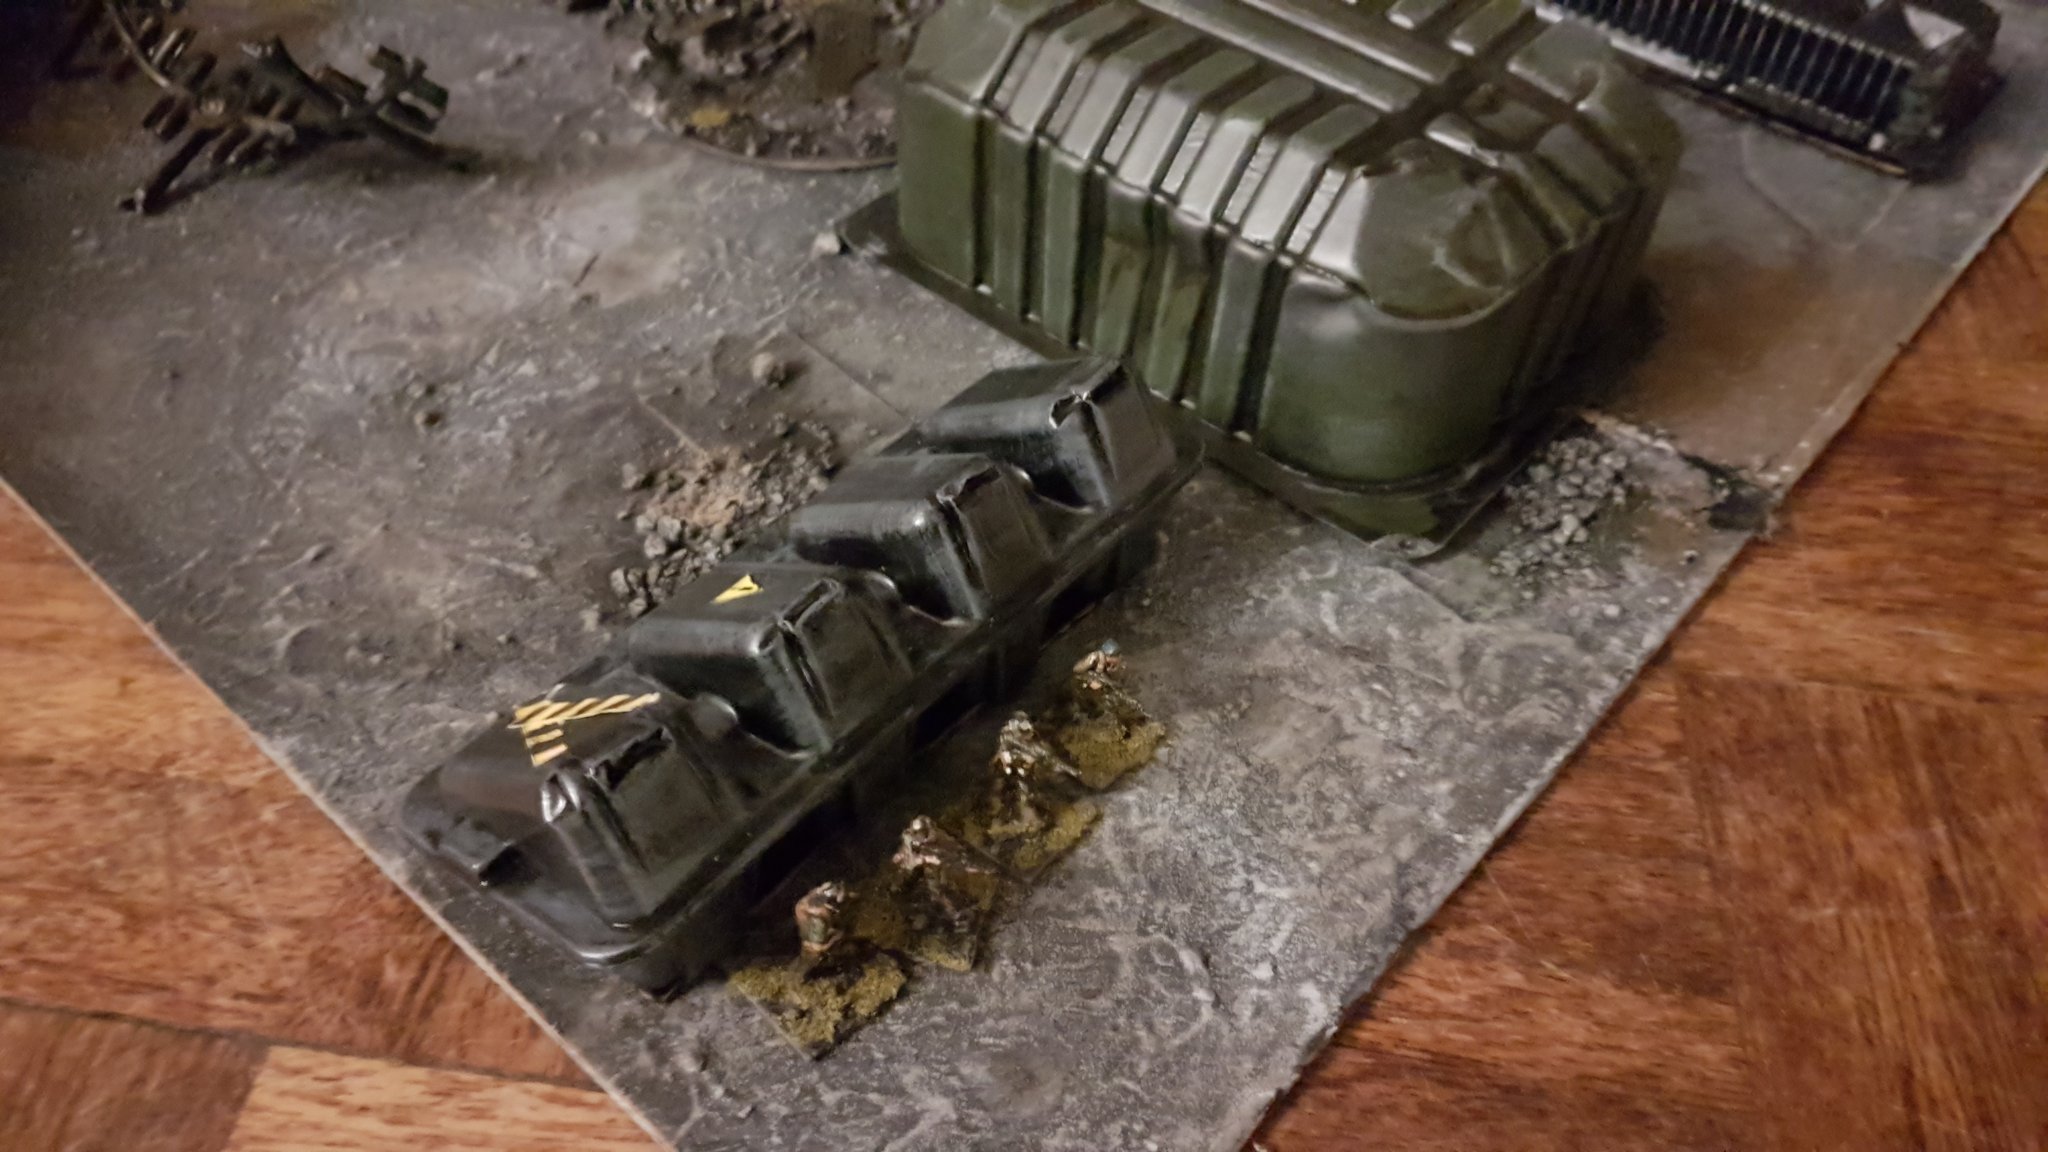
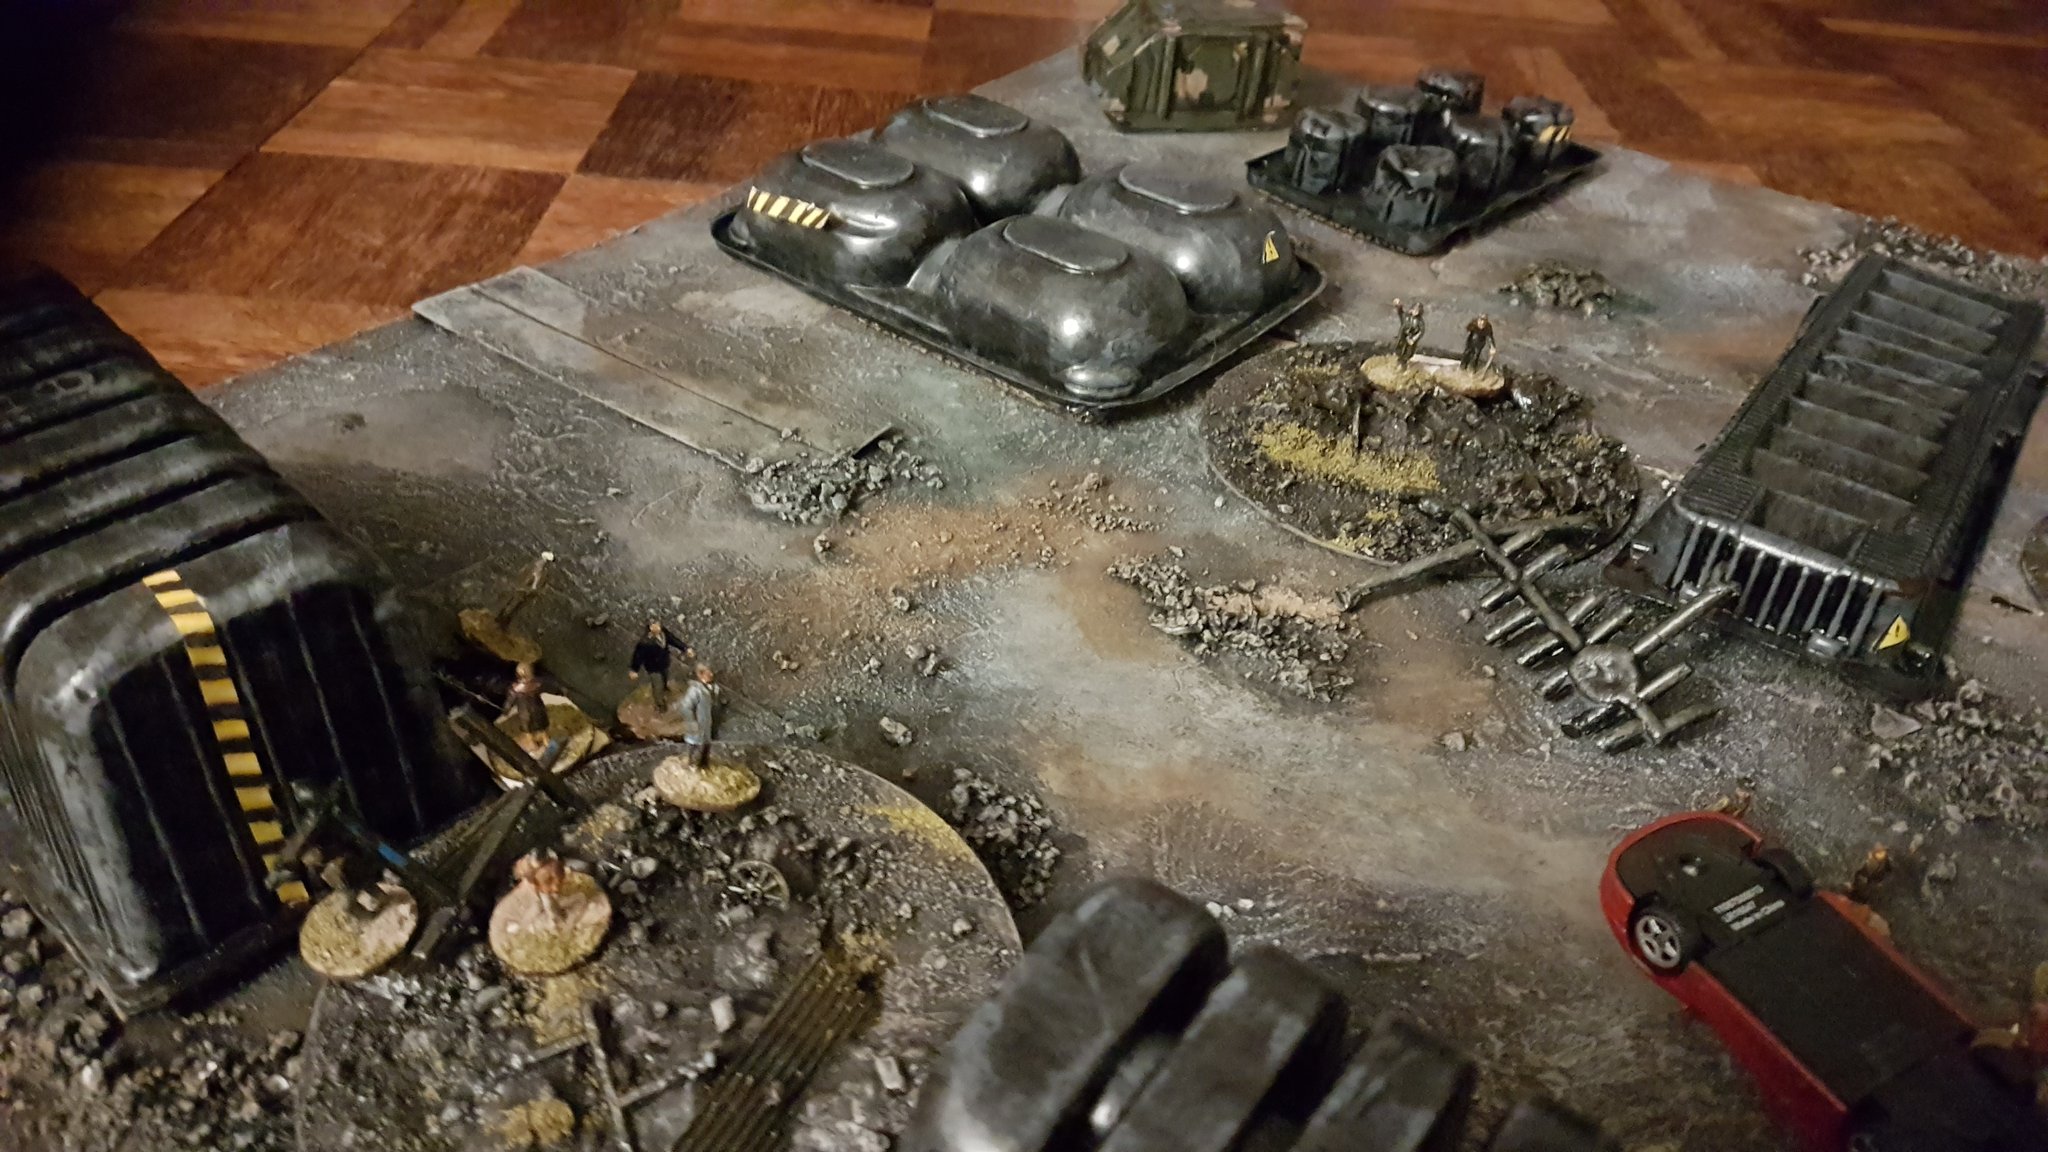
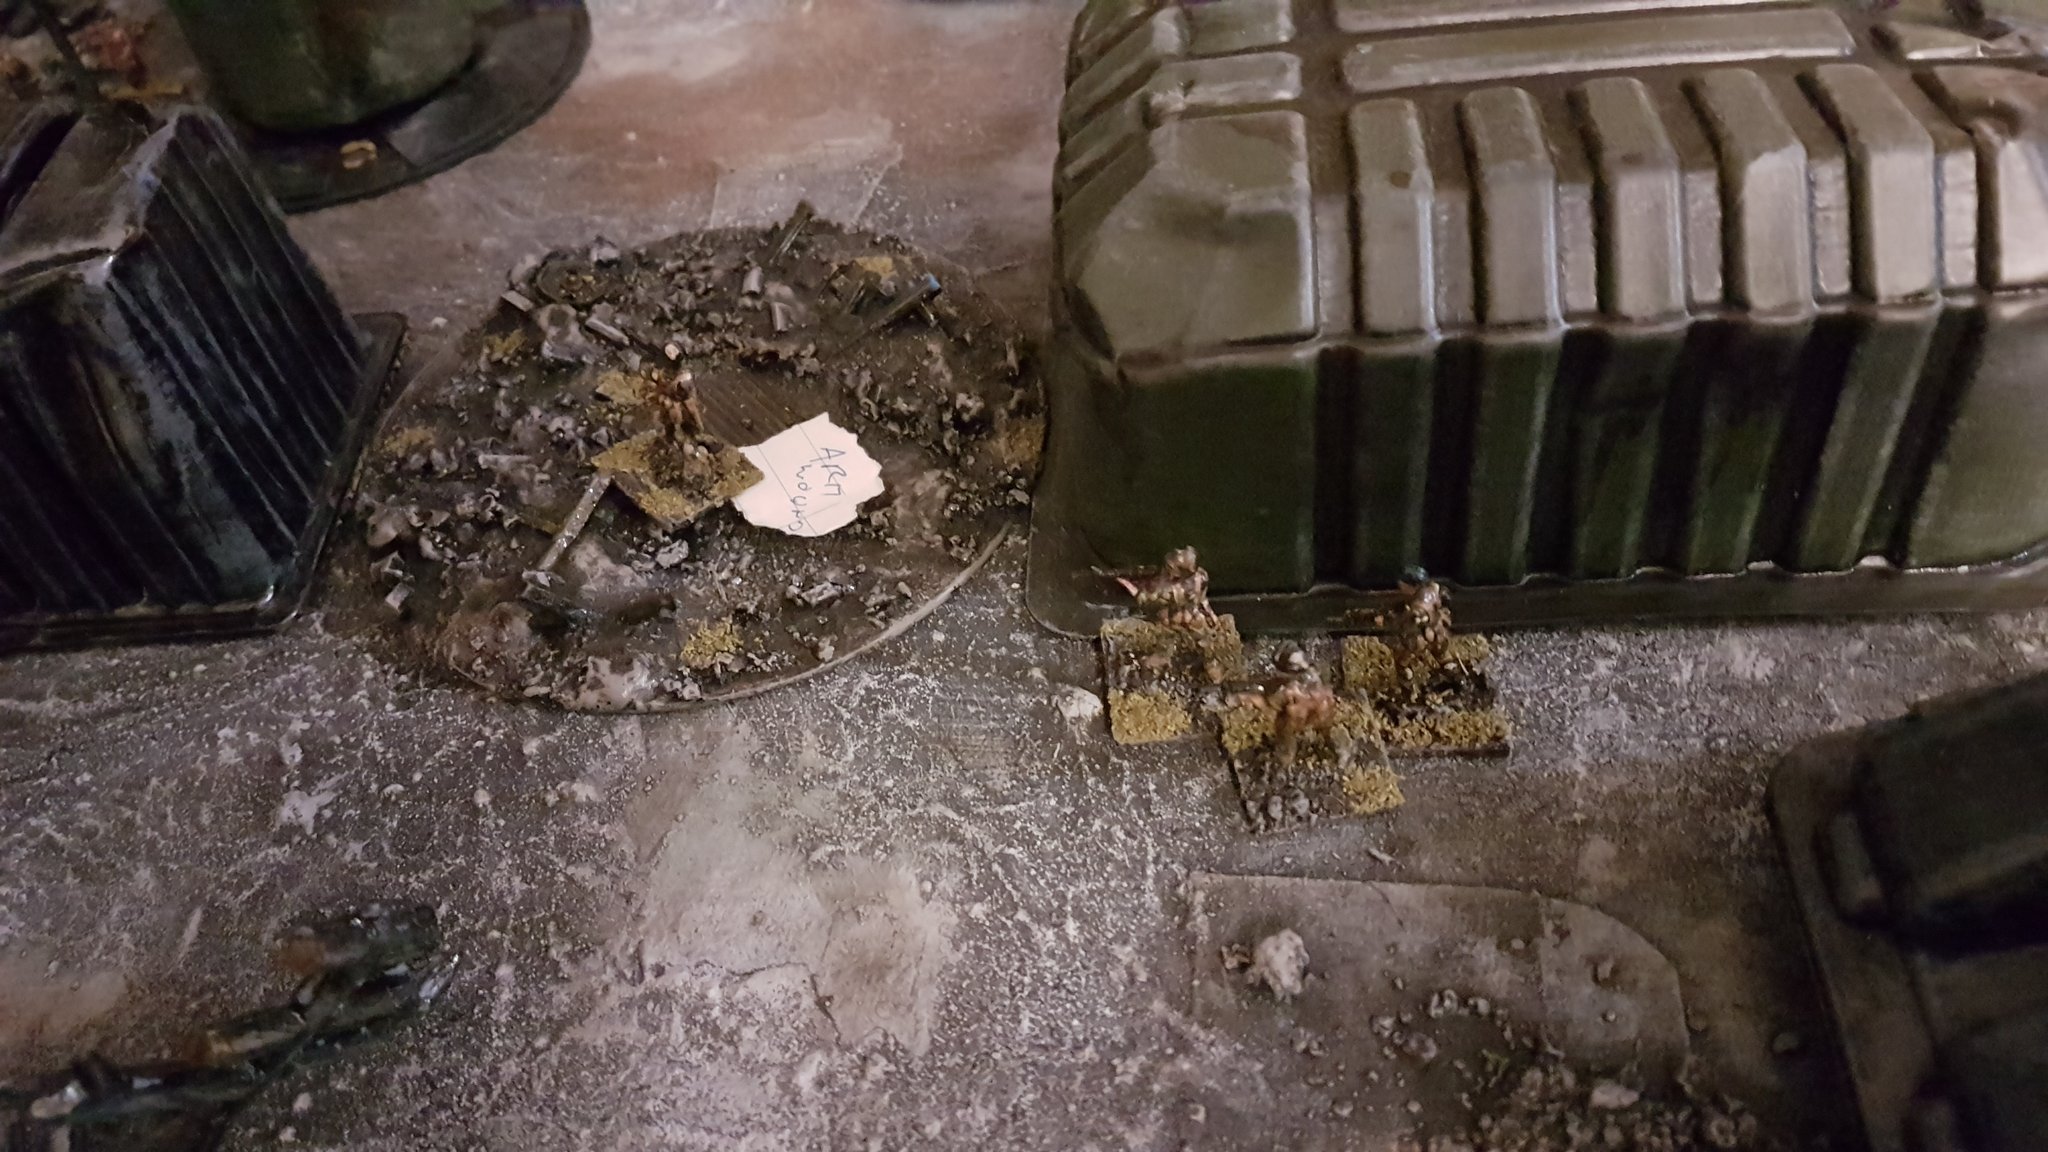
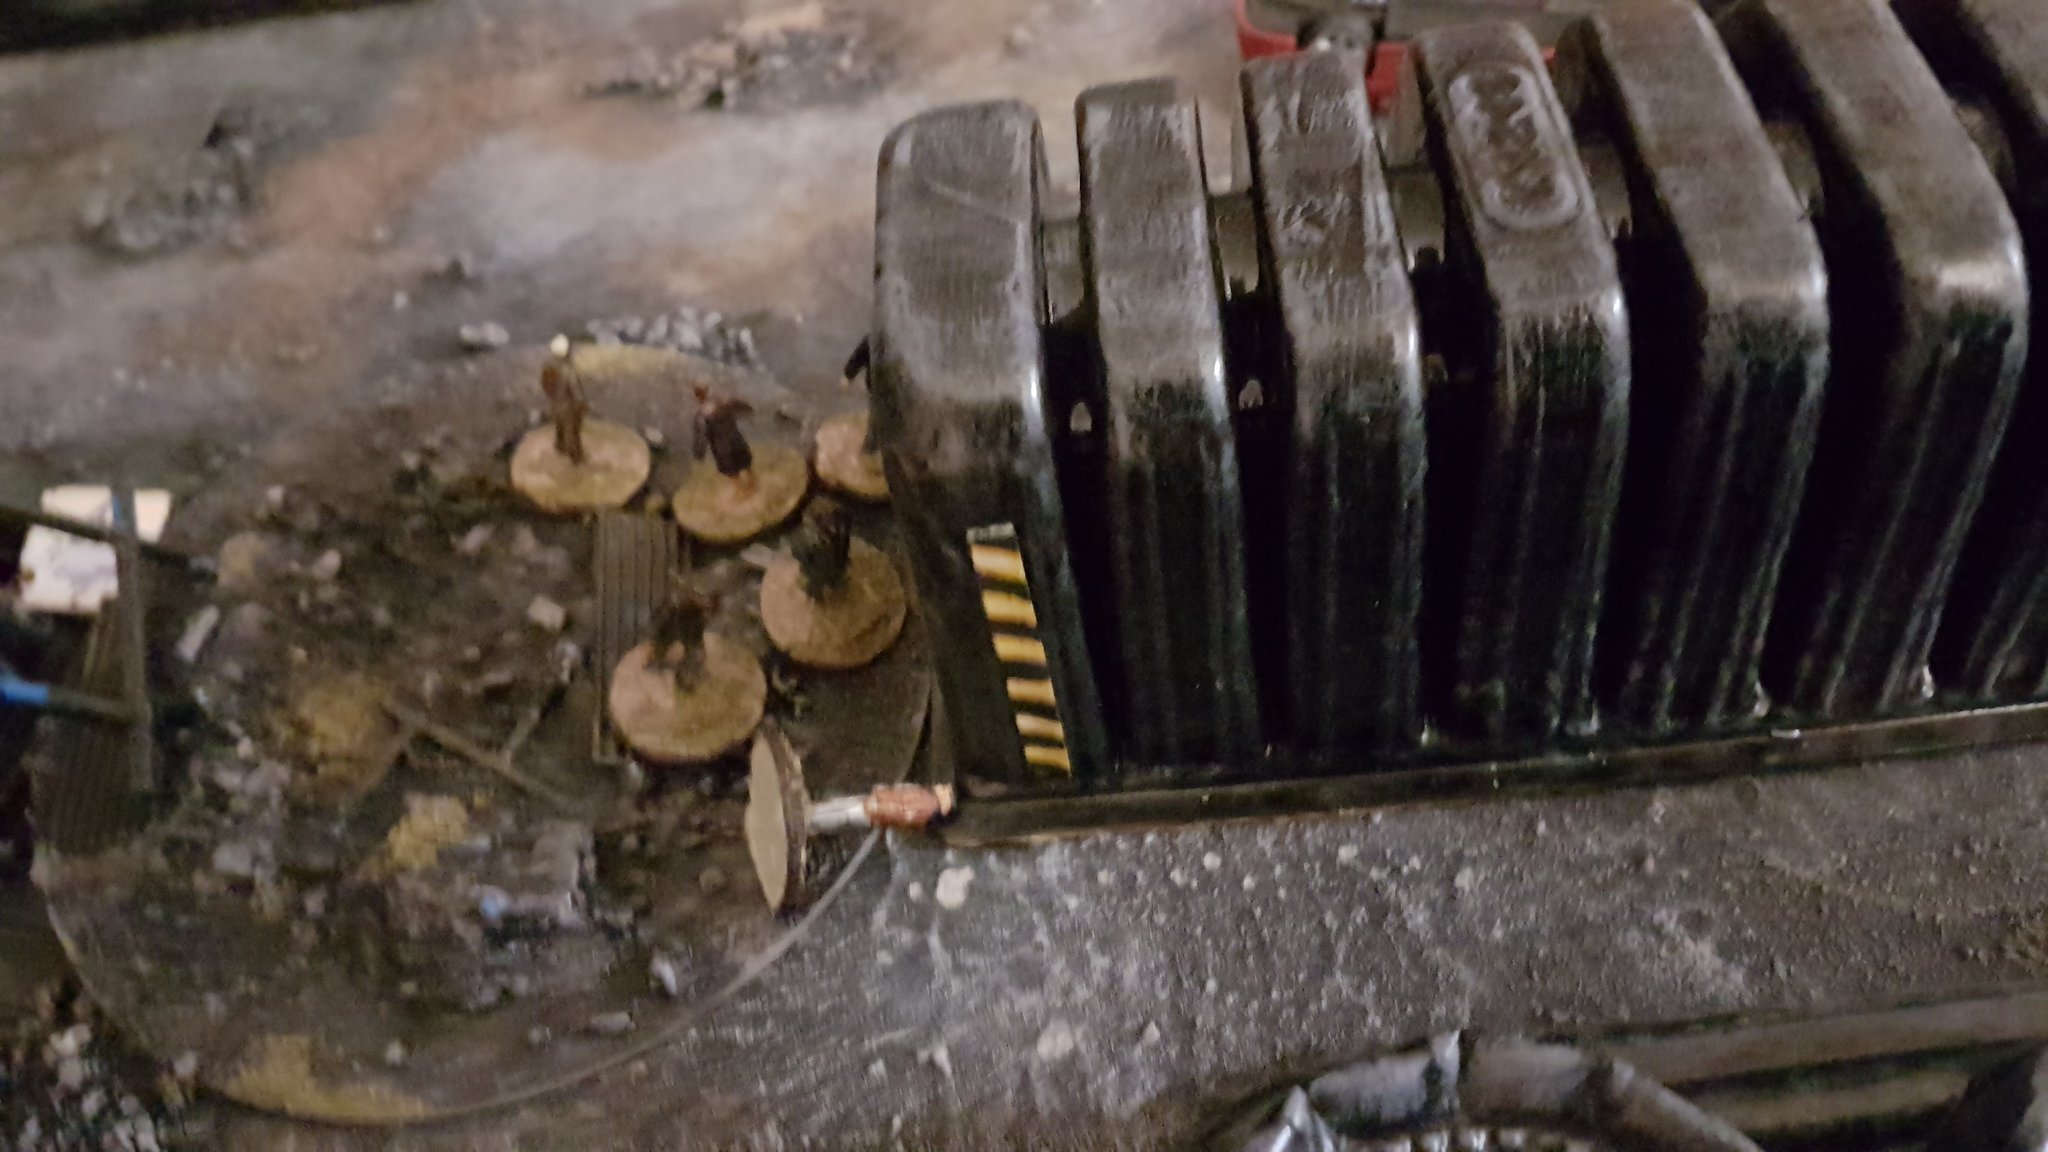
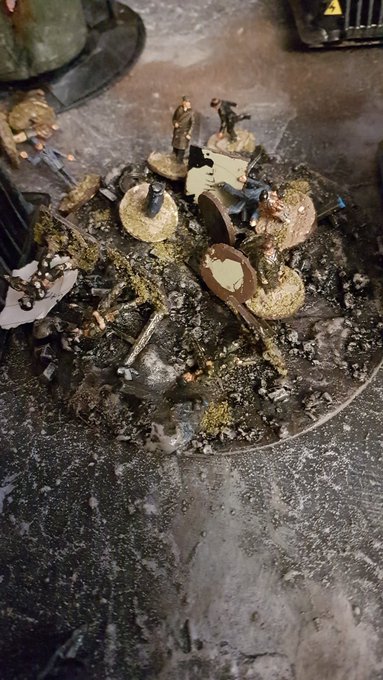
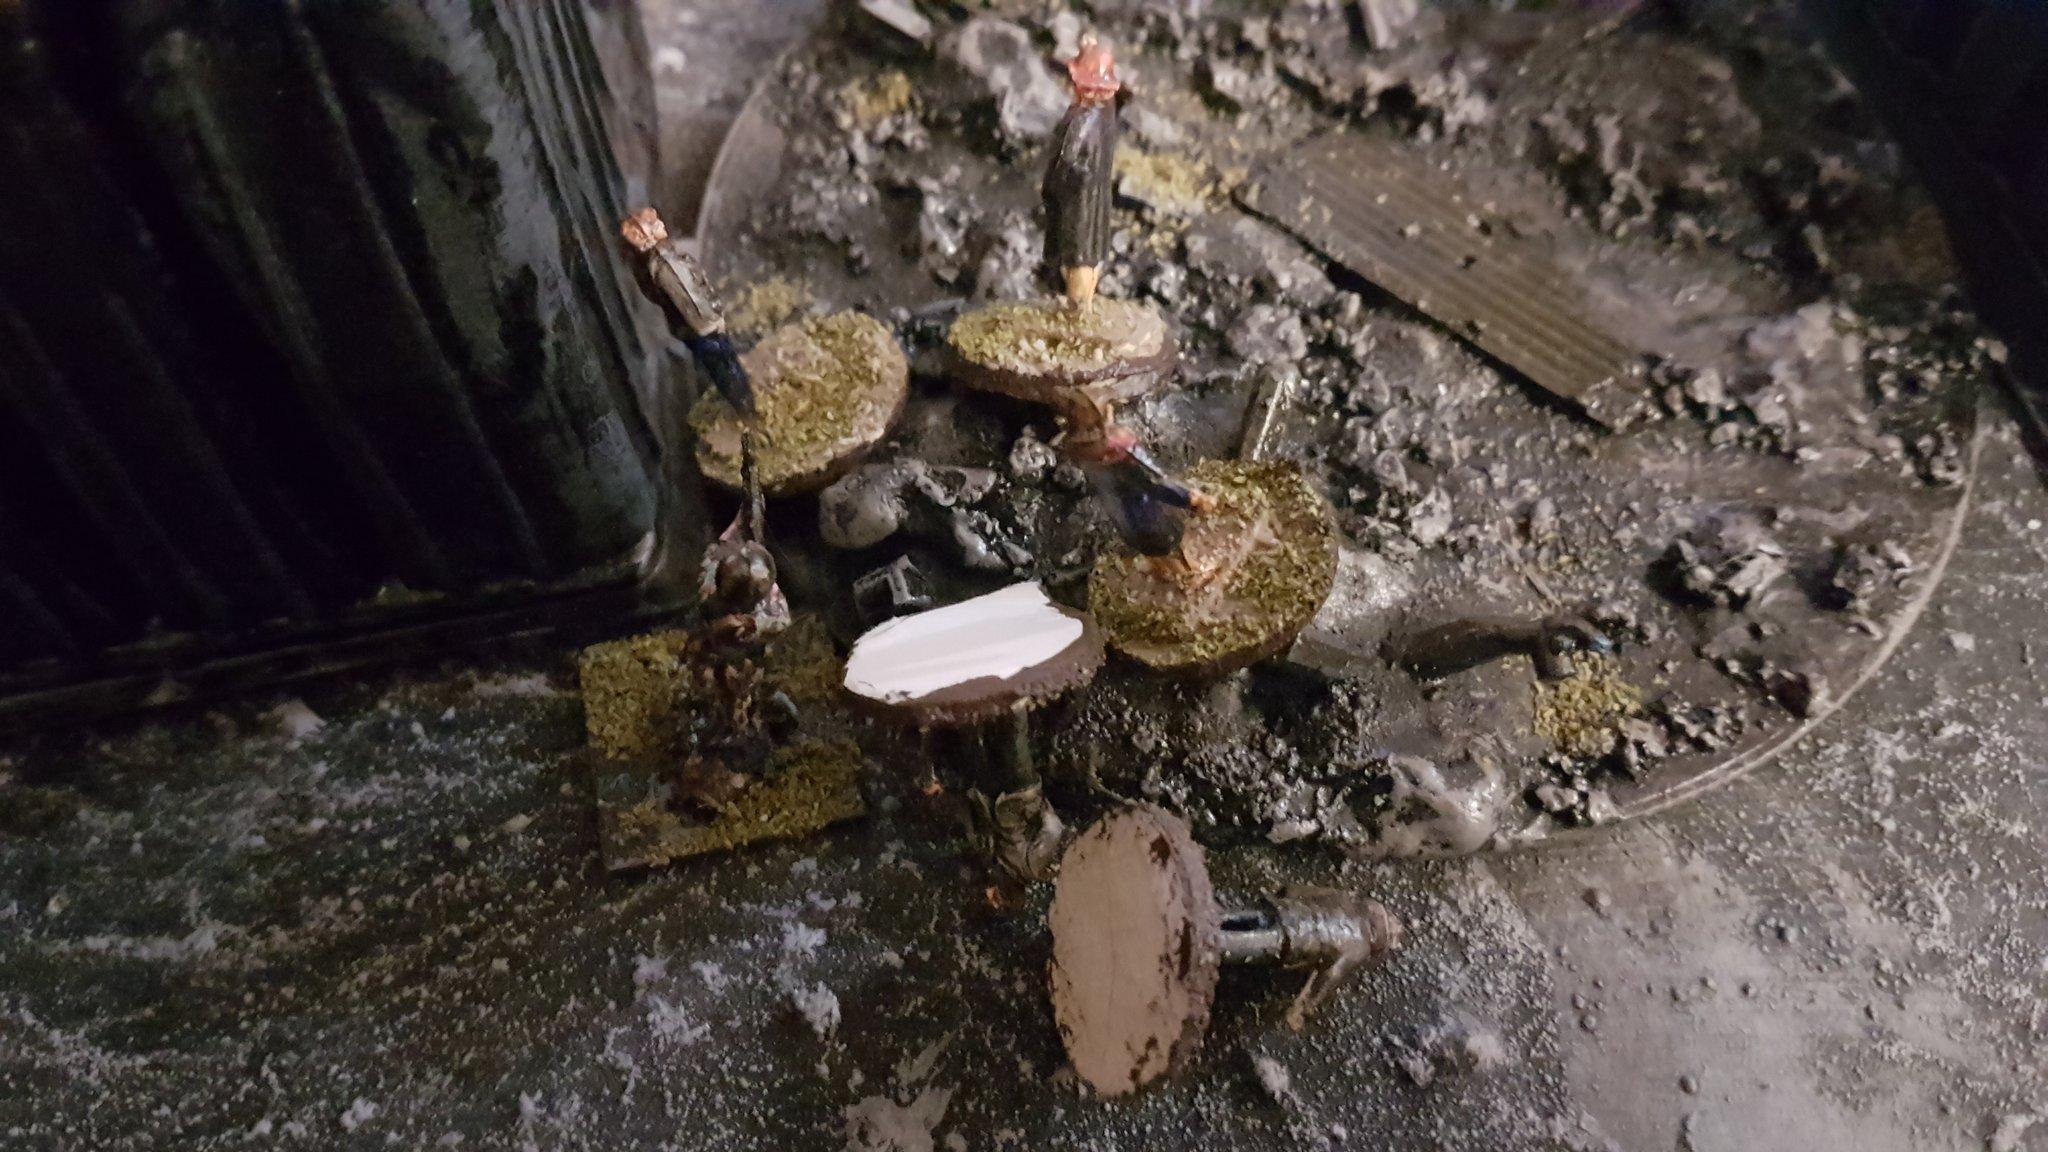
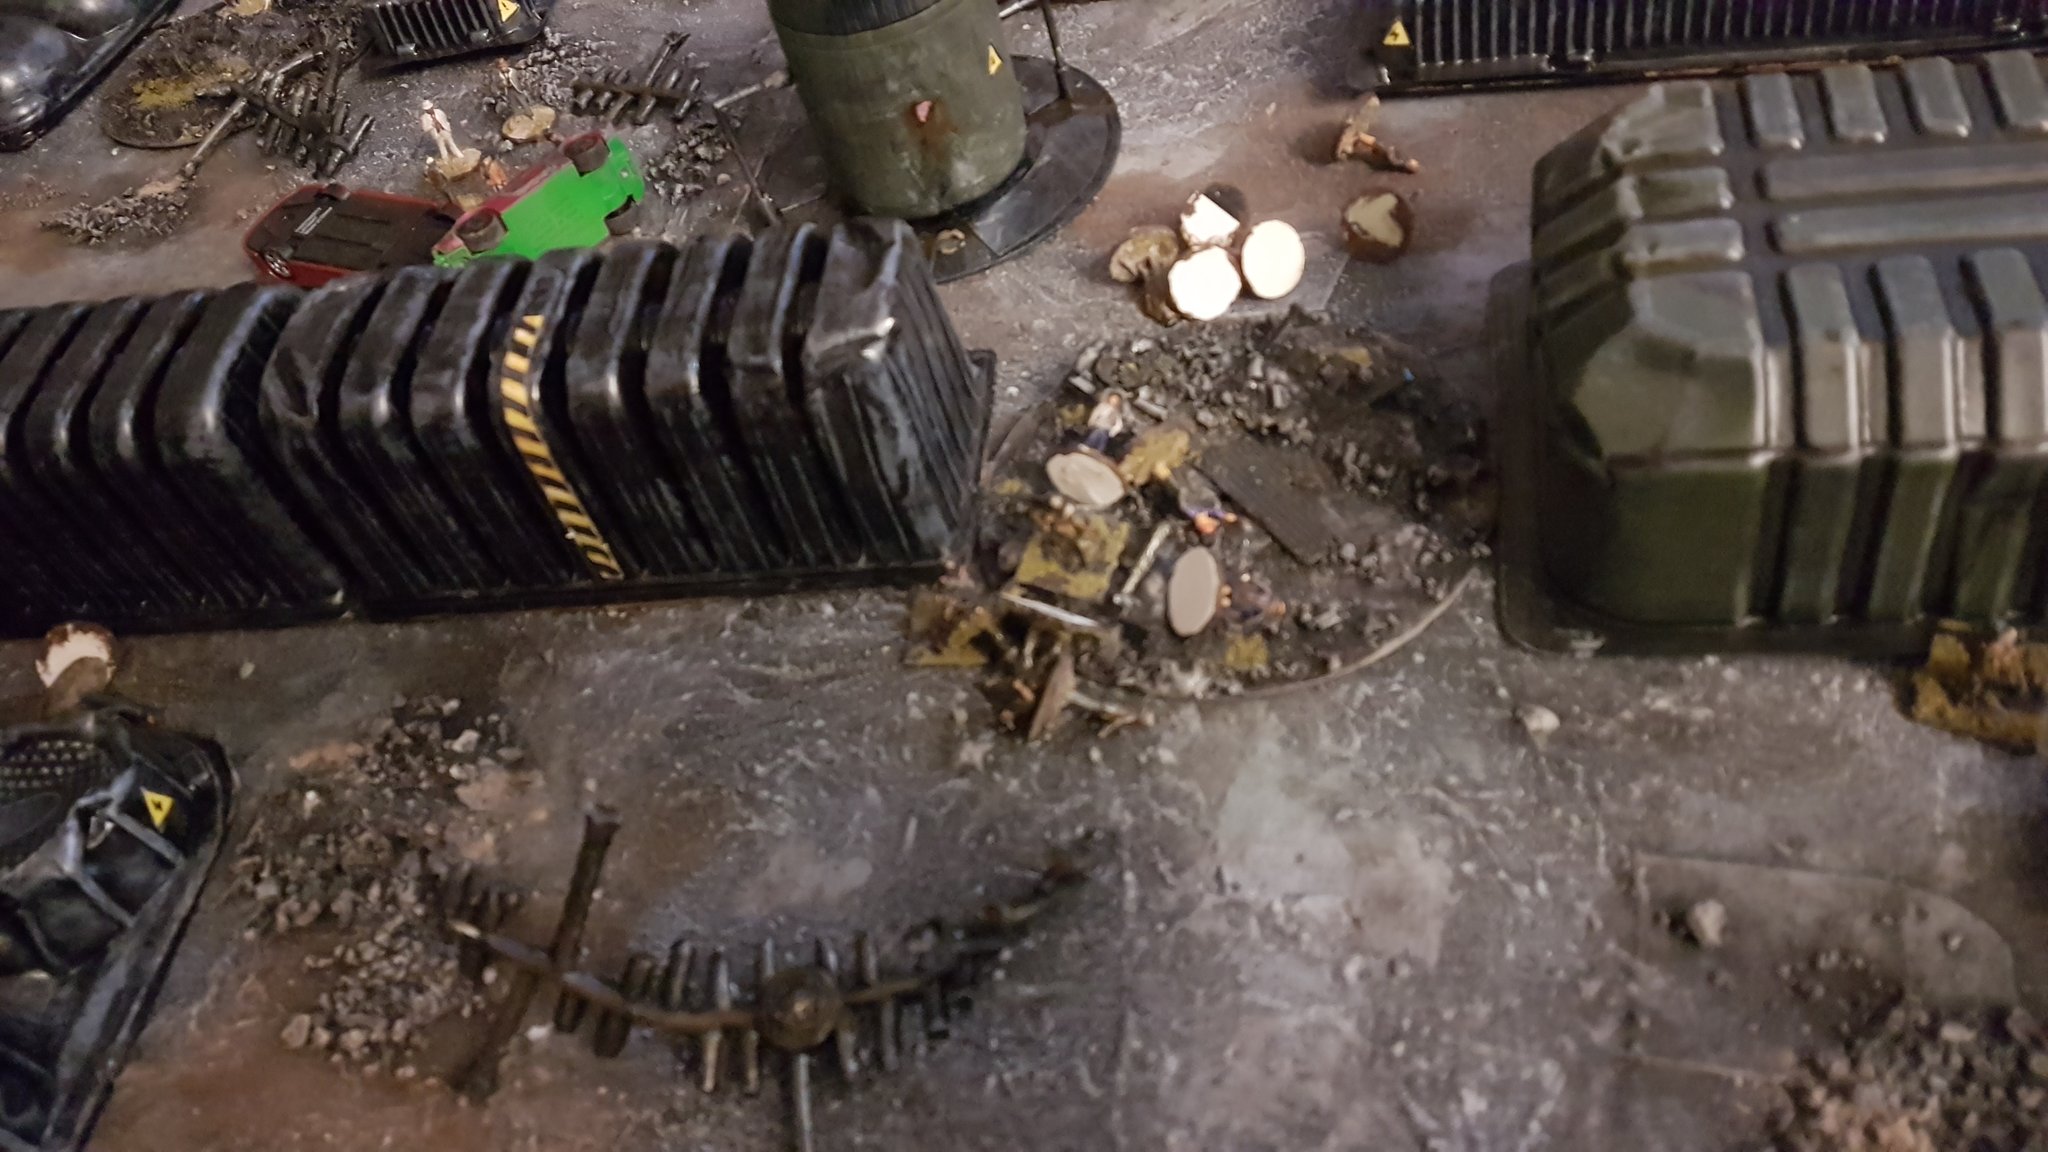
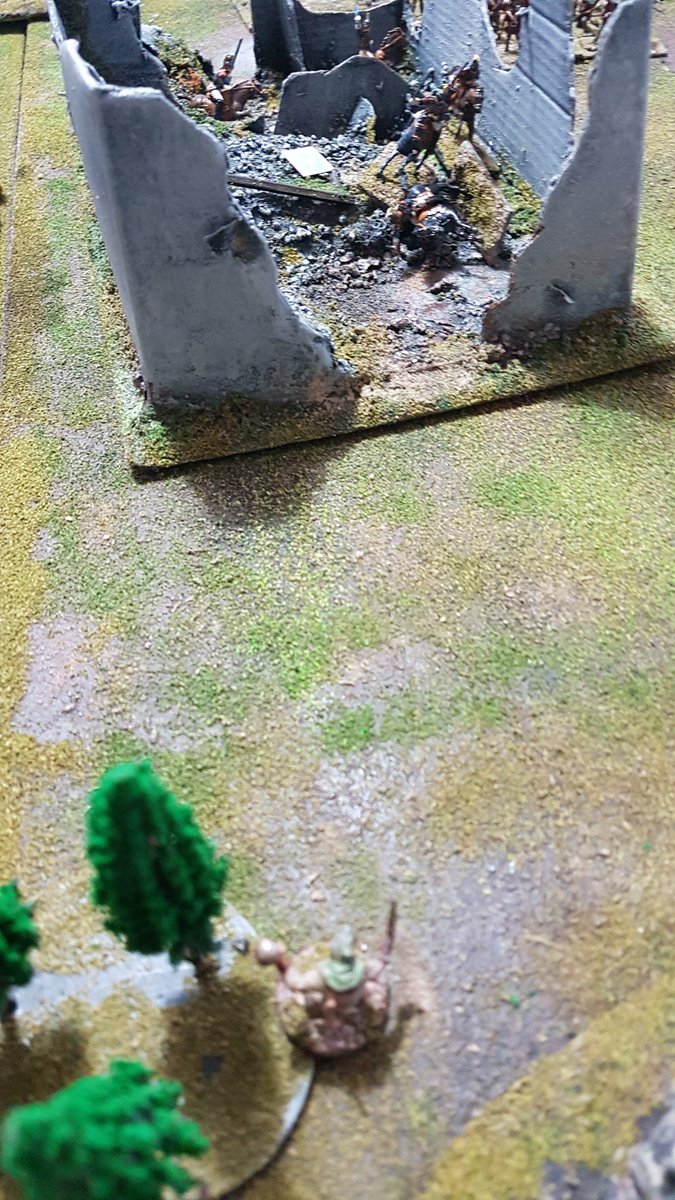
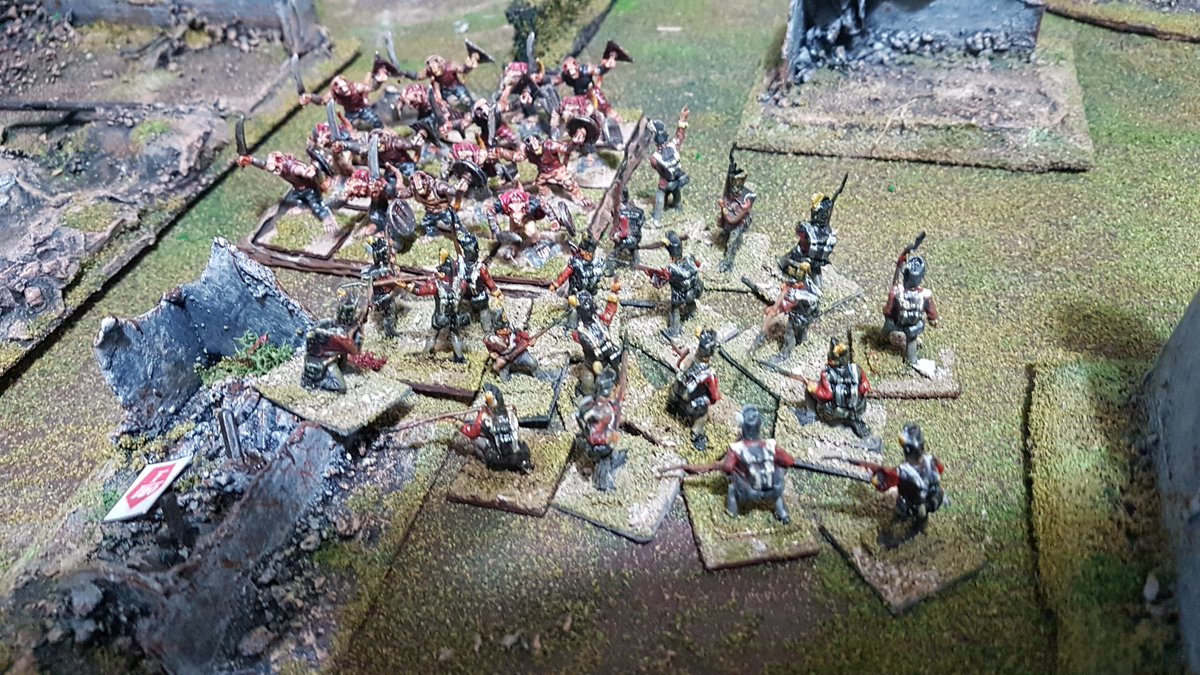
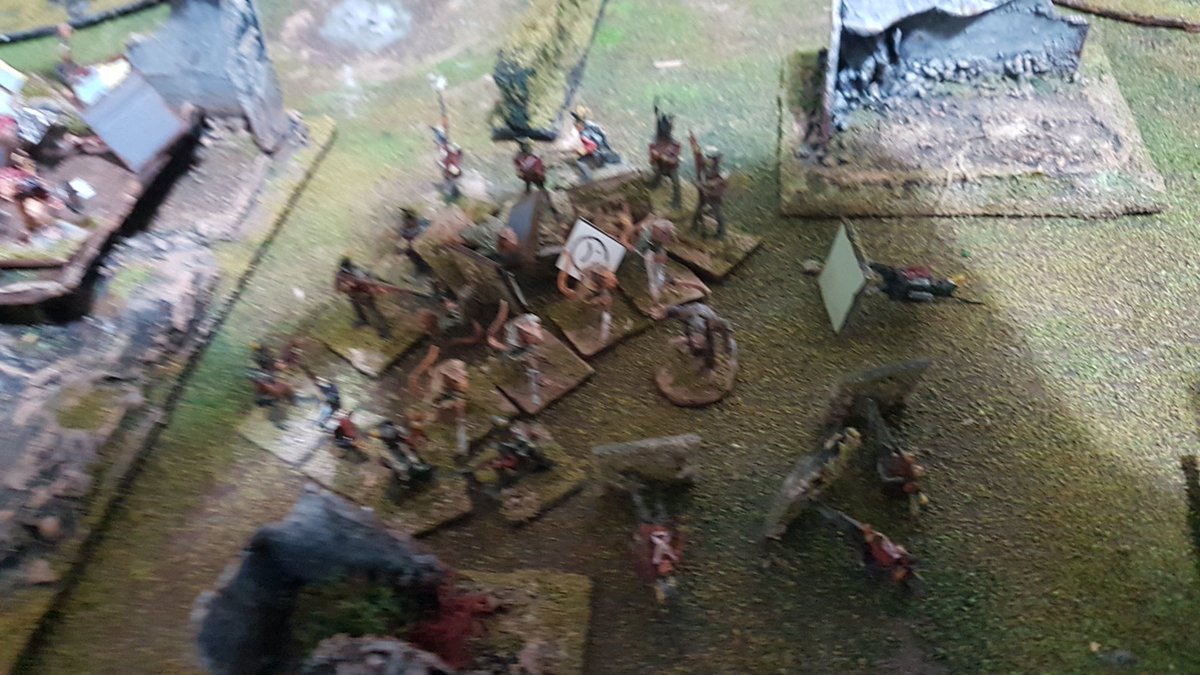
Buffalo 2-7’s infantry component take up station on the city limitsA crowd of civilians rush toward them, hoping for sanctuary from the undead..Lt. Grant leads his men forward to link up and clear out the zombie mobs approaching from the flanksBehind you! Bravo Squad wheel around to discover zombies shambling towards them.. Keeping the rear areas secure would prove to be a major tactical problem for the Alliance in this battleOn the other side of the street, Alfa Squad are dealing with their own problems..Grant ushers the civilians under his wingAllied rifle squads sweep the rear areas clean of undeadAllied troops gun down approaching zombies, holding them off to allow the civilians to escape inside the city limitsOut of the frying pan…It’s a trap! Zombies boil from their spawning points, getting up close and personal with the civilians and soldiers..Undead to the left of them, undead to the right of them… it’s getting sticky for the Allied troops!And still they come!Beset by crowds of zombies from all sides, the undead get in amongst the living…Lt. Grant falls! We ruled a 50/50 chance of a living model being reanimated as a zombie.. which he duly was!With Platoon Sgt McAuliffe now in command, the troops blaze away at the encroaching hores of zombies but the sheer numbers are just too much…Another zombie mob appears, interposing itself between the civilians and their escape route – Alfa Squad rush to take them down!In desperation, Alfa Squad cut loose the frag grenades despite danger proximity to the civilians – they cut a swathe through the zombies, but at the cost of two civvies!HUGE numbers of zombies now on the table, homing in on Allied forces from all sides and blocking escape routes!Alfa Squad are surprised and eaten!It’s looking grim…“RUN! DON’T LOOK BACK!” McAuliffe screams as his surviving men turn to face the oncoming horde, desperate to hold just a little longer…Last stand… Mac & the boys knuckle up to sell their lives dearly“It’s been an honour, gentlemen…” Mac & the remnants of 2-7 lock & load, ready for the final actThe boys give it their all but vanish under a horde of flesh-eating ghouls.. the last civilian catches Mac’s eye as he boards the APC, just to see the sergeant mouth the words “Remember us…”
Well that was a belter! Took a little time to get going but the gradual ramping up of zombie numbers turned what initially looked like a walk in the park for the Alliance into a lethal and cinematic last stand where once again, Buffalo 2-7 died gloriously to a man in defence of freedom! Great fun and hiding out in the gaming shed kept us safe from the attentions of wandering trick or treaters.. bah humbug! X-D
So, what next? What zombie-themed scenario could we investigate for Halloween next year? There’s almost a year to figure something out… drop us a comment and we’ll see you soon!
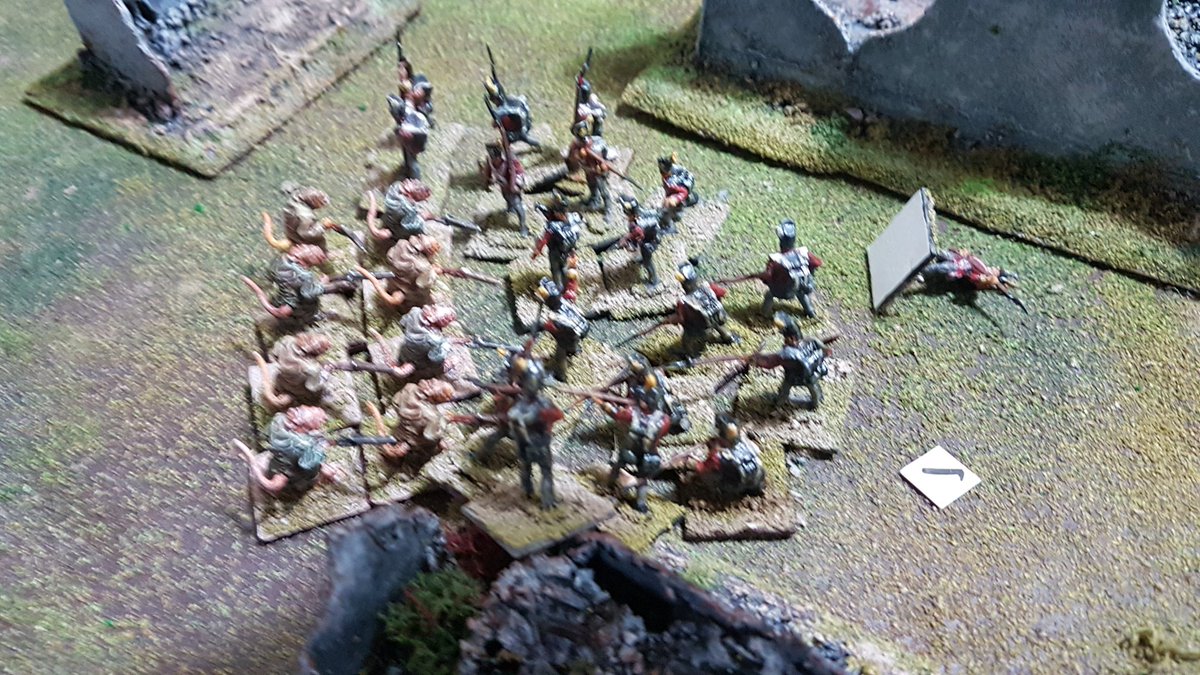
It’s customary in many a fantasy trope to regard humanity as besieged on all sides by innumerable hordes of vile creatures, united as one in their desire for destruction – but on the world of Hyperia, this ain’t necessarily so! As it turns out, be they human, elf, dwarf, or Baddie (TM) – pretty much everyone hates everyone else in roughly equal measure.
As some of you may be aware, we did a fair few HW games in 2019 and the ratmen kicked some ass and took some names… but then The Great Plague struck and gaming (and thus rule development) all went down the pan. Now, mercifully, we’ve just got potential WW3 to worry about, and until someone invents a facemask that can stop a Satan II ICBM warhead… well, we might as well stop worrying, crack open a bottle and play soldiers.
Dan brought everything he’d got finished, including a commander I hadn’t seen before (!), and because our Virum Nascii horde vastly outnumbers… everything, really, I decided to stick to the basics – warriors, slaves, archers, Plague Priests, Stormtroopers and Warlord. All the special weapons stuff would stay home for now. This was a rough estimate in points values, but also so I could beat him without fear of emotional blackmail – the Orca are tough – thick, but tough – and hit hard in big blocks but have little missile weaponry and no magic (yet).
Rules, for those interested:
Orcs:
Orc Warrior:
Speed
Shooting Skill
CCR
Initiative
Armour
Hit Point
Morale
Notes
12
6
4
2
9
2
Regular
Default: Advance (Assault)
Weapon
Rate Of Fire
Close Range
Penetration
Damage
Hand Weapons
1
Melee
8+D6
1
Orc Archer
Speed
Shooting Skill
CCR
Initiative
Armour
Hit Point
Morale
Notes
12
5
3
2
9
2
Regular
Default: Advance (Assault)
Weapon
Rate Of Fire
Close Range
Penetration
Damage
Bow
1
60cm
7+D6
1
Savage Orc
Speed
Shooting Skill
CCR
Initiative
Armour
Hit Point
Morale
Notes
12
6
4
2
8
2
Elite
Default: Advance (Assault)
Weapon
Rate Of Fire
Close Range
Penetration
Damage
Hand Weapons
1
Melee
8+D6
1
Orc General
Speed
Shooting Skill
CCR
Initiative
Armour
Hit Point
Morale
Notes
12
5
6
3
12
4
Elite
Default: Advance (Assault)
Weapon
Rate Of Fire
Close Range
Penetration
Damage
Hand Weapons
1
Melee
8+D6
2
Orc Shaman
Speed
Shooting Skill
CCR
Initiative
Armour
Hit Point
Morale
Notes
12
5
5
3
10
3
Elite
Default: Advance (Assault)
Weapon
Rate Of Fire
Close Range
Penetration
Damage
Hand Weapons
1
Melee
8+D6
2
Filth (4+): Target friendly unit within 12” gets Poison in melee next time it fights.
Cracks (4+): Target enemy unit within 12” takes 2 automatic hits with AP(2).
Sickness (5+): Target enemy unit within 18” gets -1 to hit next time it shoots.
Lightning (5+): Target enemy unit within 12” takes 1 hit with AP(4) and Deadly(3).
Frenzy (6+): Target friendly unit within 12” may immediately move by up to 6”.
Pestilence (6+): Target enemy unit within 6” takes 1 automatic hit per model.
Virum Nascii
Warrior
Speed
Shooting Skill
CCR
Initiative
Armour
Hit Point
Morale
Notes
18
6
3
3
6
1
Poor
Default – Hold
Slaves
Speed
Shooting Skill
CCR
Initiative
Armour
Hit Point
Morale
Notes
18
7
2
3
6
1
Untrained
Default – Panic
Weapon
Rate Of Fire
Close Range
Penetration
Damage
Bow
1
50cm
6+D6
1
Weapon
Rate Of Fire
Close Range
Penetration
Damage
Hand Weapons
1
Melee
6+D6
1
Poison Grenadiers
Speed
Shooting Skill
CCR
Initiative
Armour
Hit Point
Morale
Notes
18
6
3
3
6
1
Regular
Default: Advance (ranged)
Weapon
Rate Of Fire
Close Range
Penetration
Damage
Poison Grenade
1
12+D6
8+D6
3 (Blast 3cm)
Stormtroopers
Speed
Shooting Skill
CCR
Initiative
Armour
Hit Point
Morale
Notes
18
6
4
3
6
1
Regular
Default: Advance (Assault)
Weapon
Rate Of Fire
Close Range
Penetration
Damage
Hand Weapons
1
Melee
8+D6
1
Assassins
Speed
Shooting Skill
CCR
Initiative
Armour
Hit Point
Morale
Notes
20
6
3
4
6
1
Regular
Default: Advance (Assault)
Weapon
Rate Of Fire
Close Range
Penetration
Damage
Hand Weapons
1
Melee
8+D6
1
Warlord
Speed
Shooting Skill
CCR
Initiative
Armour
Hit Point
Morale
Notes
18
5
4
4
9
2
Veteran
Hero
Weapon
Rate Of Fire
Close Range
Penetration
Damage
Hand Weapons
3
Melee
7+D6
1
Plague Priests
Speed
Shooting Skill
CCR
Initiative
Armour
Hit Point
Morale
Notes
18
6
3
3
7
1
Regular
Default: Advance (Assault)
Weapon
Rate Of Fire
Close Range
Penetration
Damage
Hand Weapons
1
Melee
7+D6
2
Weapons Teams
Speed
Shooting Skill
CCR
Initiative
Armour
Hit Point
Morale
Notes
18
5
3
4
7
1
Regular
Independent, Default: Hold (Ranged)
Weapon
Rate Of Fire
Close Range
Penetration
Damage
Vrilrifle
1
48cm
20+2D6
2
Ratling Gun
6
36cm
7+D6
1
Vrilfire Thrower
1
Template
12+D6
2
Vrilgrinder Drill
N/A
N/A
N/A
Sets up Ambush*
*Ambush – This unit begins in reserve. When it is placed, it may pop up anywhere more than 18cm from an enemy unit. Any friendly Virum Nascii units not already deployed may follow through the tunnel and pop and deploy with a unit facing touching the tunnel mouth in the case of a regiment or in the case of an individual character.
Master Of Engineers:
Speed
Shooting Skill
CCR
Initiative
Armour
Hit Point
Morale
Notes
18
4
3
4
9
2
Veteran
Hero
Weapon
Rate Of Fire
Close Range
Penetration
Damage
Vrilfire Pistol
3
24cm
12+D6
2
Dan brought the Orca general, two regiments of 30 Warriors each, a regiment of 25 Savage Orcs and 16 Archers – I brought the Virum Nascii Warlord, a regiment of 32 Slave archers, 2 regiments of 16 warriors each, 28 Slaves, 6 Stormtroopers and 16 Plague Priests.
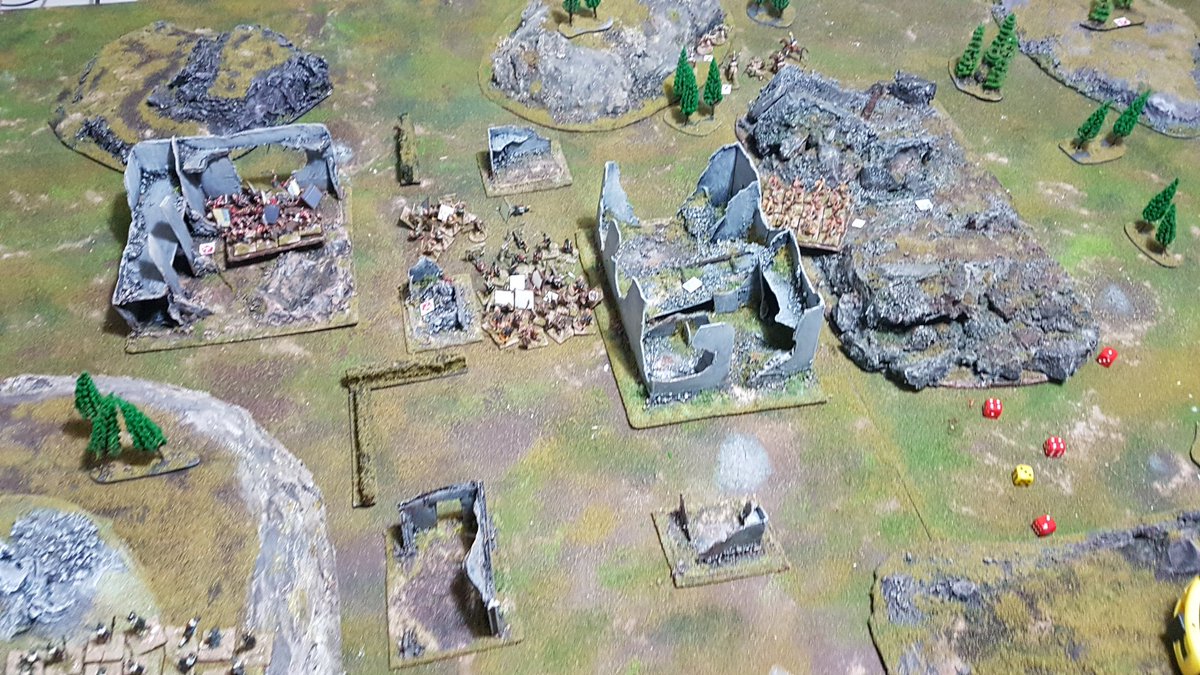
We decided on a specific objective – controlling the sacred stones within a ruined temple. To win, a player would have to have an unshaken (unsuppressed) unit within half a move distance, so 9cm for the VN, 6cm for the slower Orcs. To war!
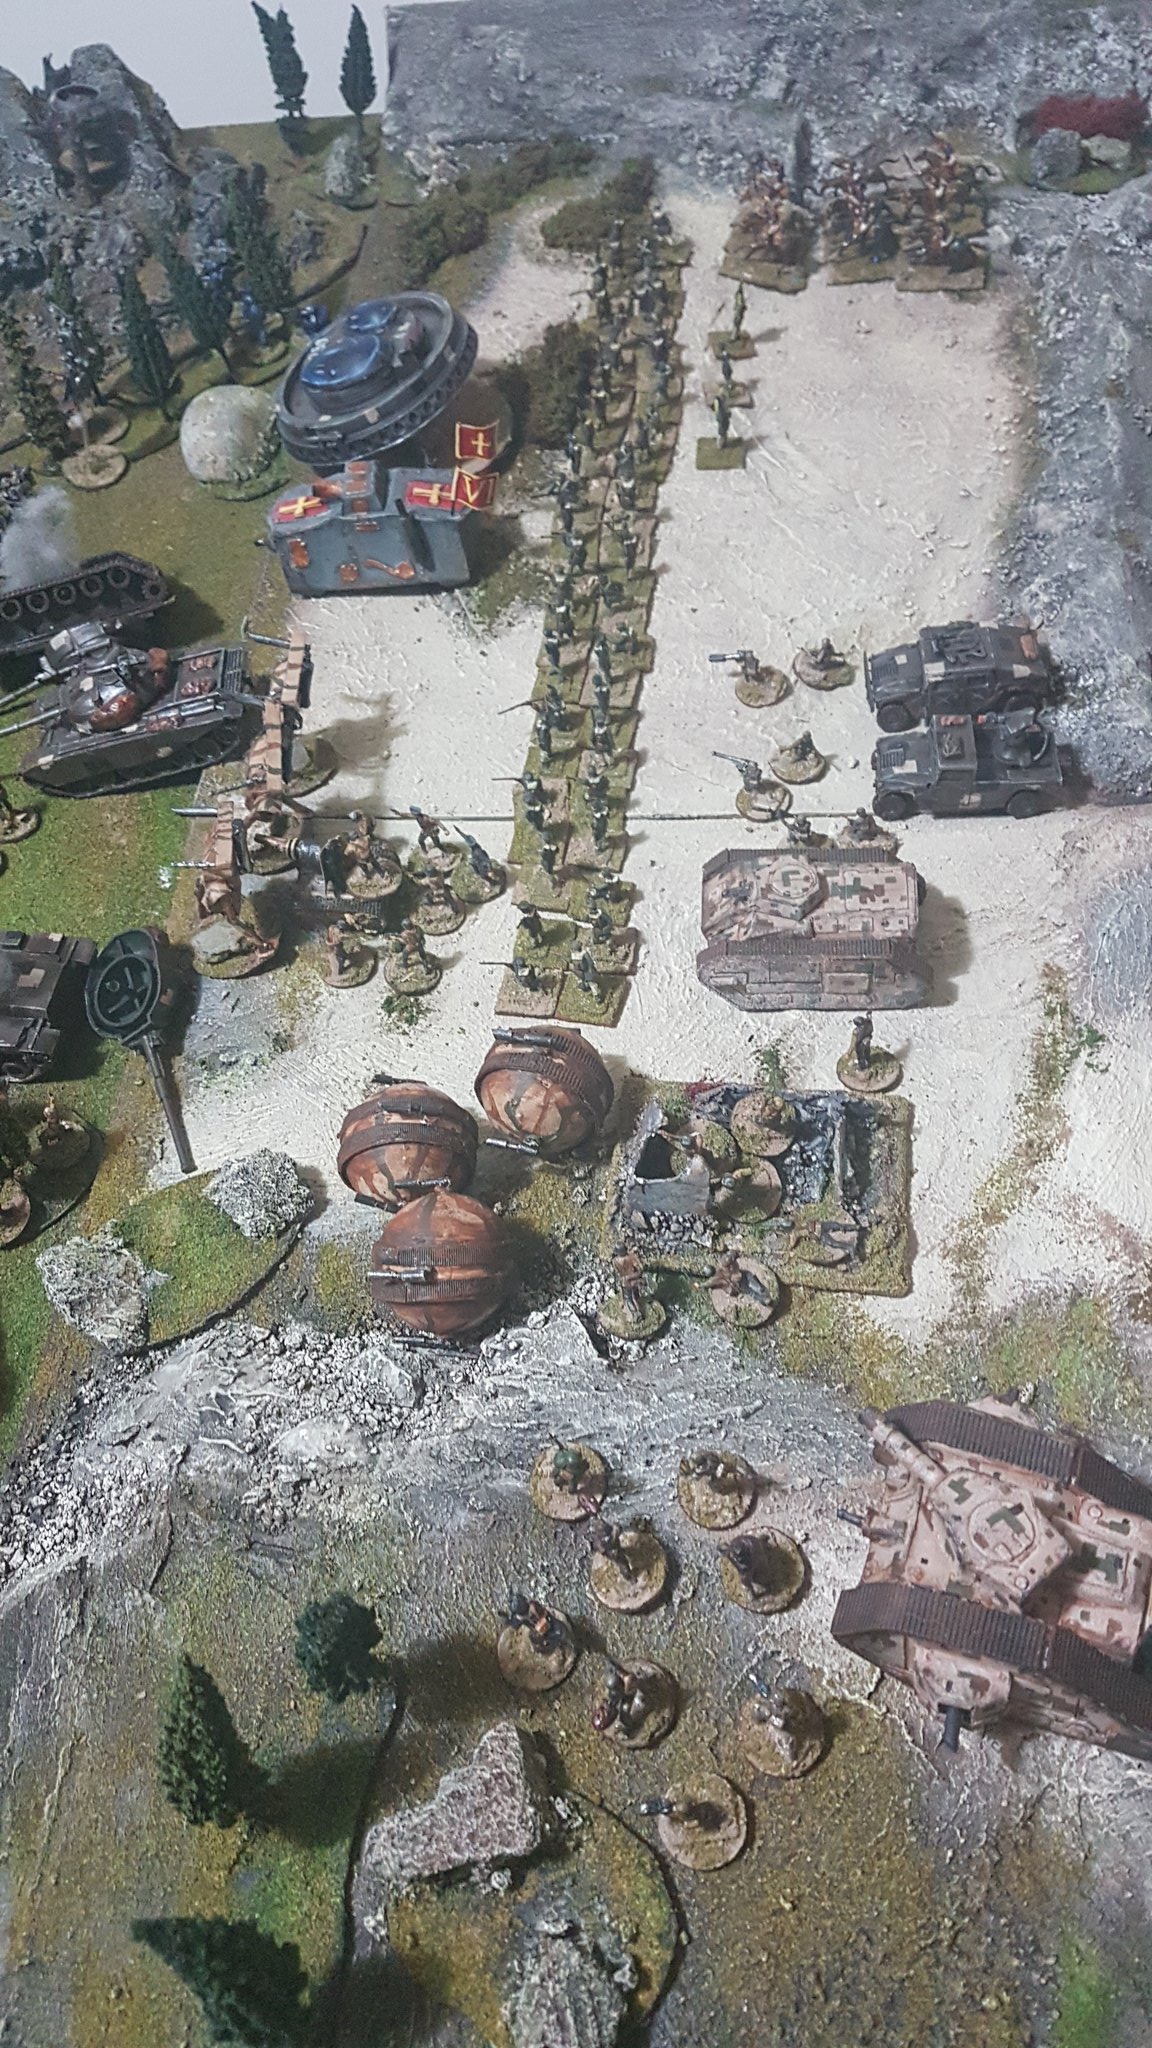
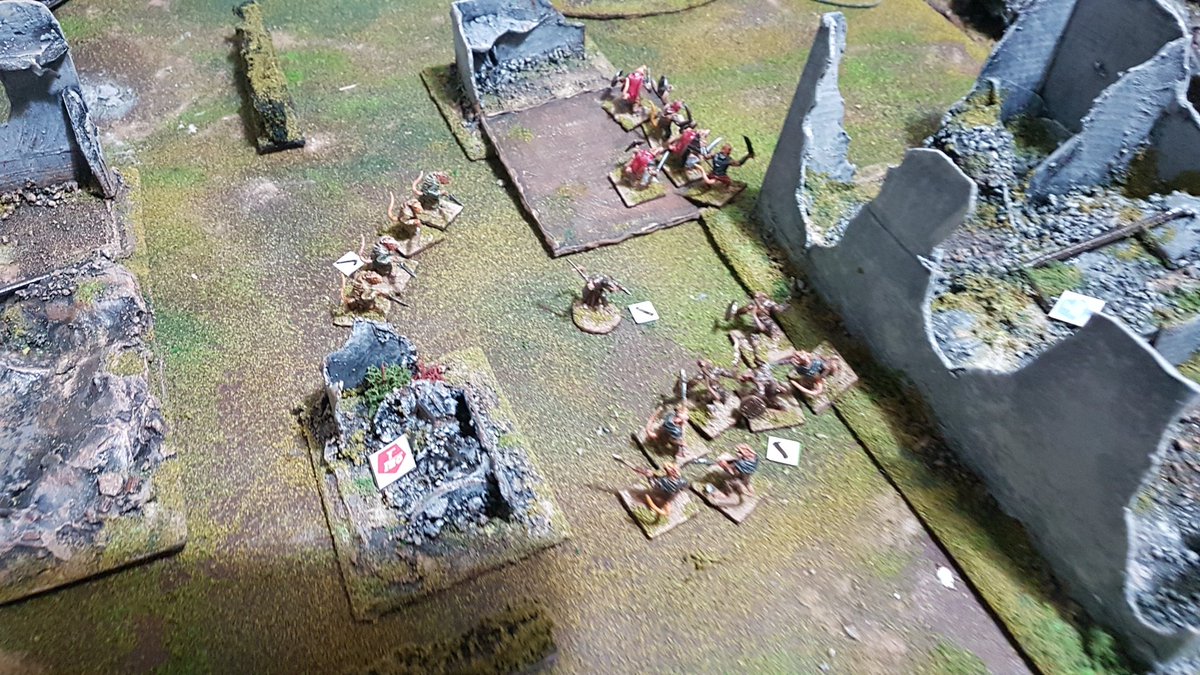
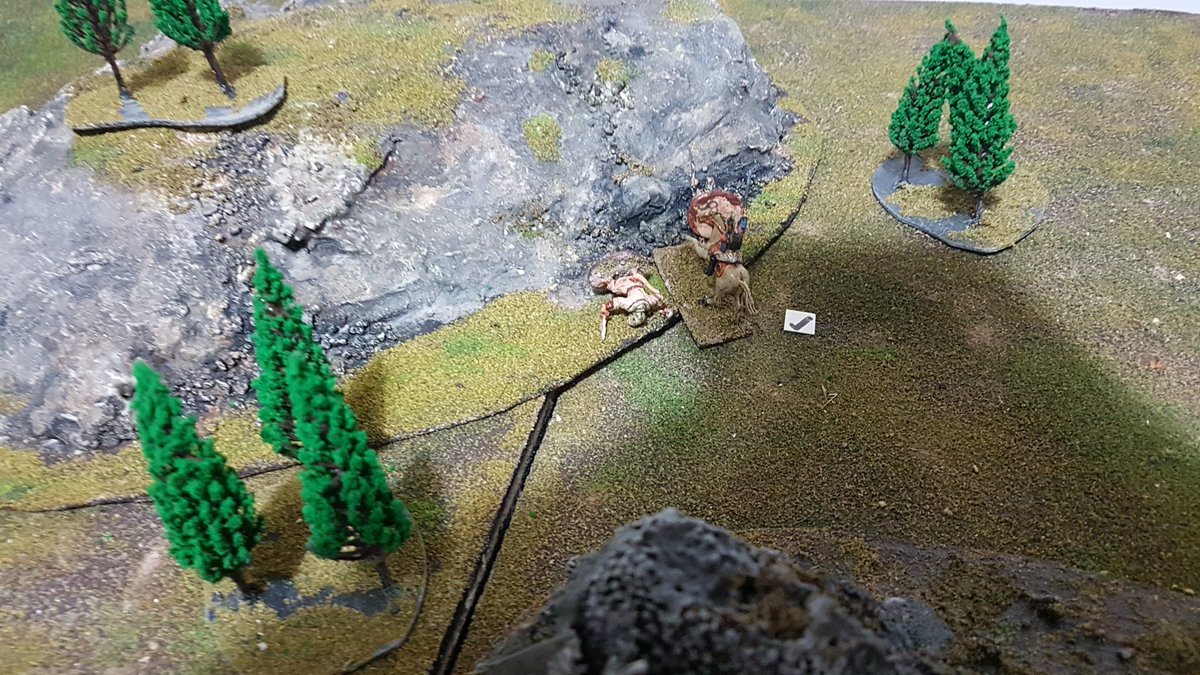
The objective – some holy stones within a ruined. “Why’s dey ‘oly boss?” “Cause dey’s full of ‘oles, don’t ask stoopid questions”Virum Nascii win the deployment roll off, choosing their table edge and forcing the Orca to deploy first.Hordes of chittering Virum Nascii swarm forth! Using a new deployment rule to simulate the increased flexibility of faster armies, basically everyone can deploy a double move forward onto the board – meant 24cm for the Orca, 36cm for the Ratmen.Both side close for battle – Virum Nascii archers attempt to provide covering fire… this is comically ineffectiveOrca attempt a flanking manouevre
Cunning Virum Nascii warlord uses his slaves as bait to try and lure the Orca into doing something rash…Orca flanking manoeuvre hurtles ponderously toward Ratmen lines…Plague Priests ambush a unit of Orca warriors, catching them in the flank
Ratmen warriors ambush a unit of Orca warriors in the rear, causing them to rout!
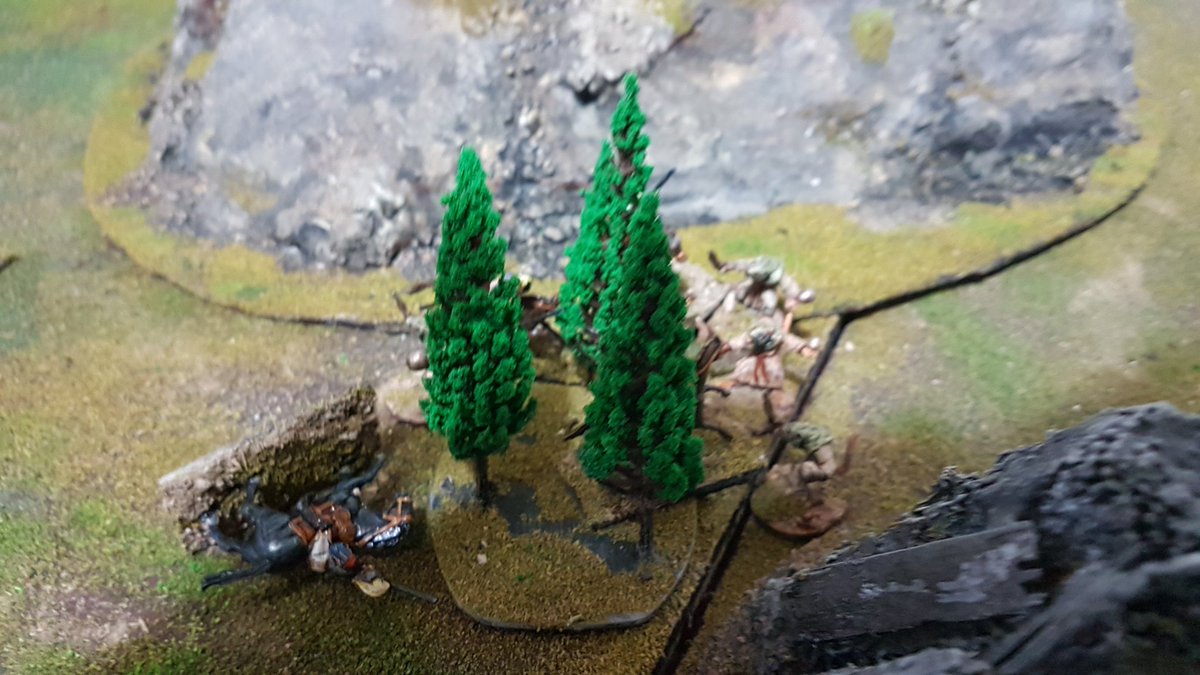
Orca archers provide counterbattery fire, covering the advance of the Savage/ Feral (choose your poison) Orca – this is somewhat more effective than their Virum Nascii counterparts….…causing both the slave warriors and slave archers to rout! Warlord Ratticus does his best to rally the troops…With the Orca flank threat successfully dealt with, the Ratmen encircle the temple ruins…First Ratmen Warrior unit sent in is duly demolished by superior Savage Orca numbers and strength…But then (while the slaves are rallying) a second regiment of Virum Nascii Warriors attacks the Savage Orca from behind, routing them! …Plague Priests catch the fleeing Orca and annihilate them!Ratmen attempt to press home the attack in the temple, but the Orca are too strong and too many!Arrow fire routs the Slave archers… again…Lord Ratticus send in his finest, the Plague Priests – will they get the job done?At the height of the battle, Warlord Ratticus charges Ghazrag The Bloody!…and he is no match for his greenskin adversary!Seeing their warlord fall, the slave archers leg it as the Plague priests start to struggle, with the Stormtroopers looking for an opening..
The slaves rally…
..but the Plague Priests die to a rat to a crushing assault from Orca archers and Warriors!
With just the 6 Stormtroopers and 20 odd largely ineffectual Slave archers against 16 much more effective Orca archers and a block of 20 Warriors, as well as Ghazrag himself, the surviving Virum Nascii realised they had no chance to take the objective and conceded the game. Victory to the Orca!
Although this was by no means a strictly competitive game – we were tweaking the rules on the fly and working out mechanics as we went – it was still really fun and pretty cinematic watching two VERY different flavours of Baddie go against each other! There are still more Orca to come and lots of special units for the Ratmen too so expect another faceoff in the near future… and of course what happens when these meet the Sky Marines of the Grand Alliance or the massed ranks of the Ancien Regime?
Stay tuned for more fantasy wackiness as we get into summer, and who knows, we may even get these rules out and published before the heat death of the universe…..
In fairness, I’m told by some wiser heads in the blogosphere (Hi Roger) that #Zomtober is also a thing, so let’s have a bit of that too…
Halloween is on the horizon and the one thing scarier than other people’s children turning up at your doorstep in facepaint demanding sweets is, of course, zombies – now, I ran a game back early in lockdown testing out Apocalypse Earth: Black Ops rules, which is basically our more detailed small unit action of the main rules, combined with the “Zombie Mode” solo rules in the main rulebook, and it was tremendous fun. So, now we’re (sort of ) free again, I figured we could scale the idea up, on the big table with more troops and MORE ZOMBIES.
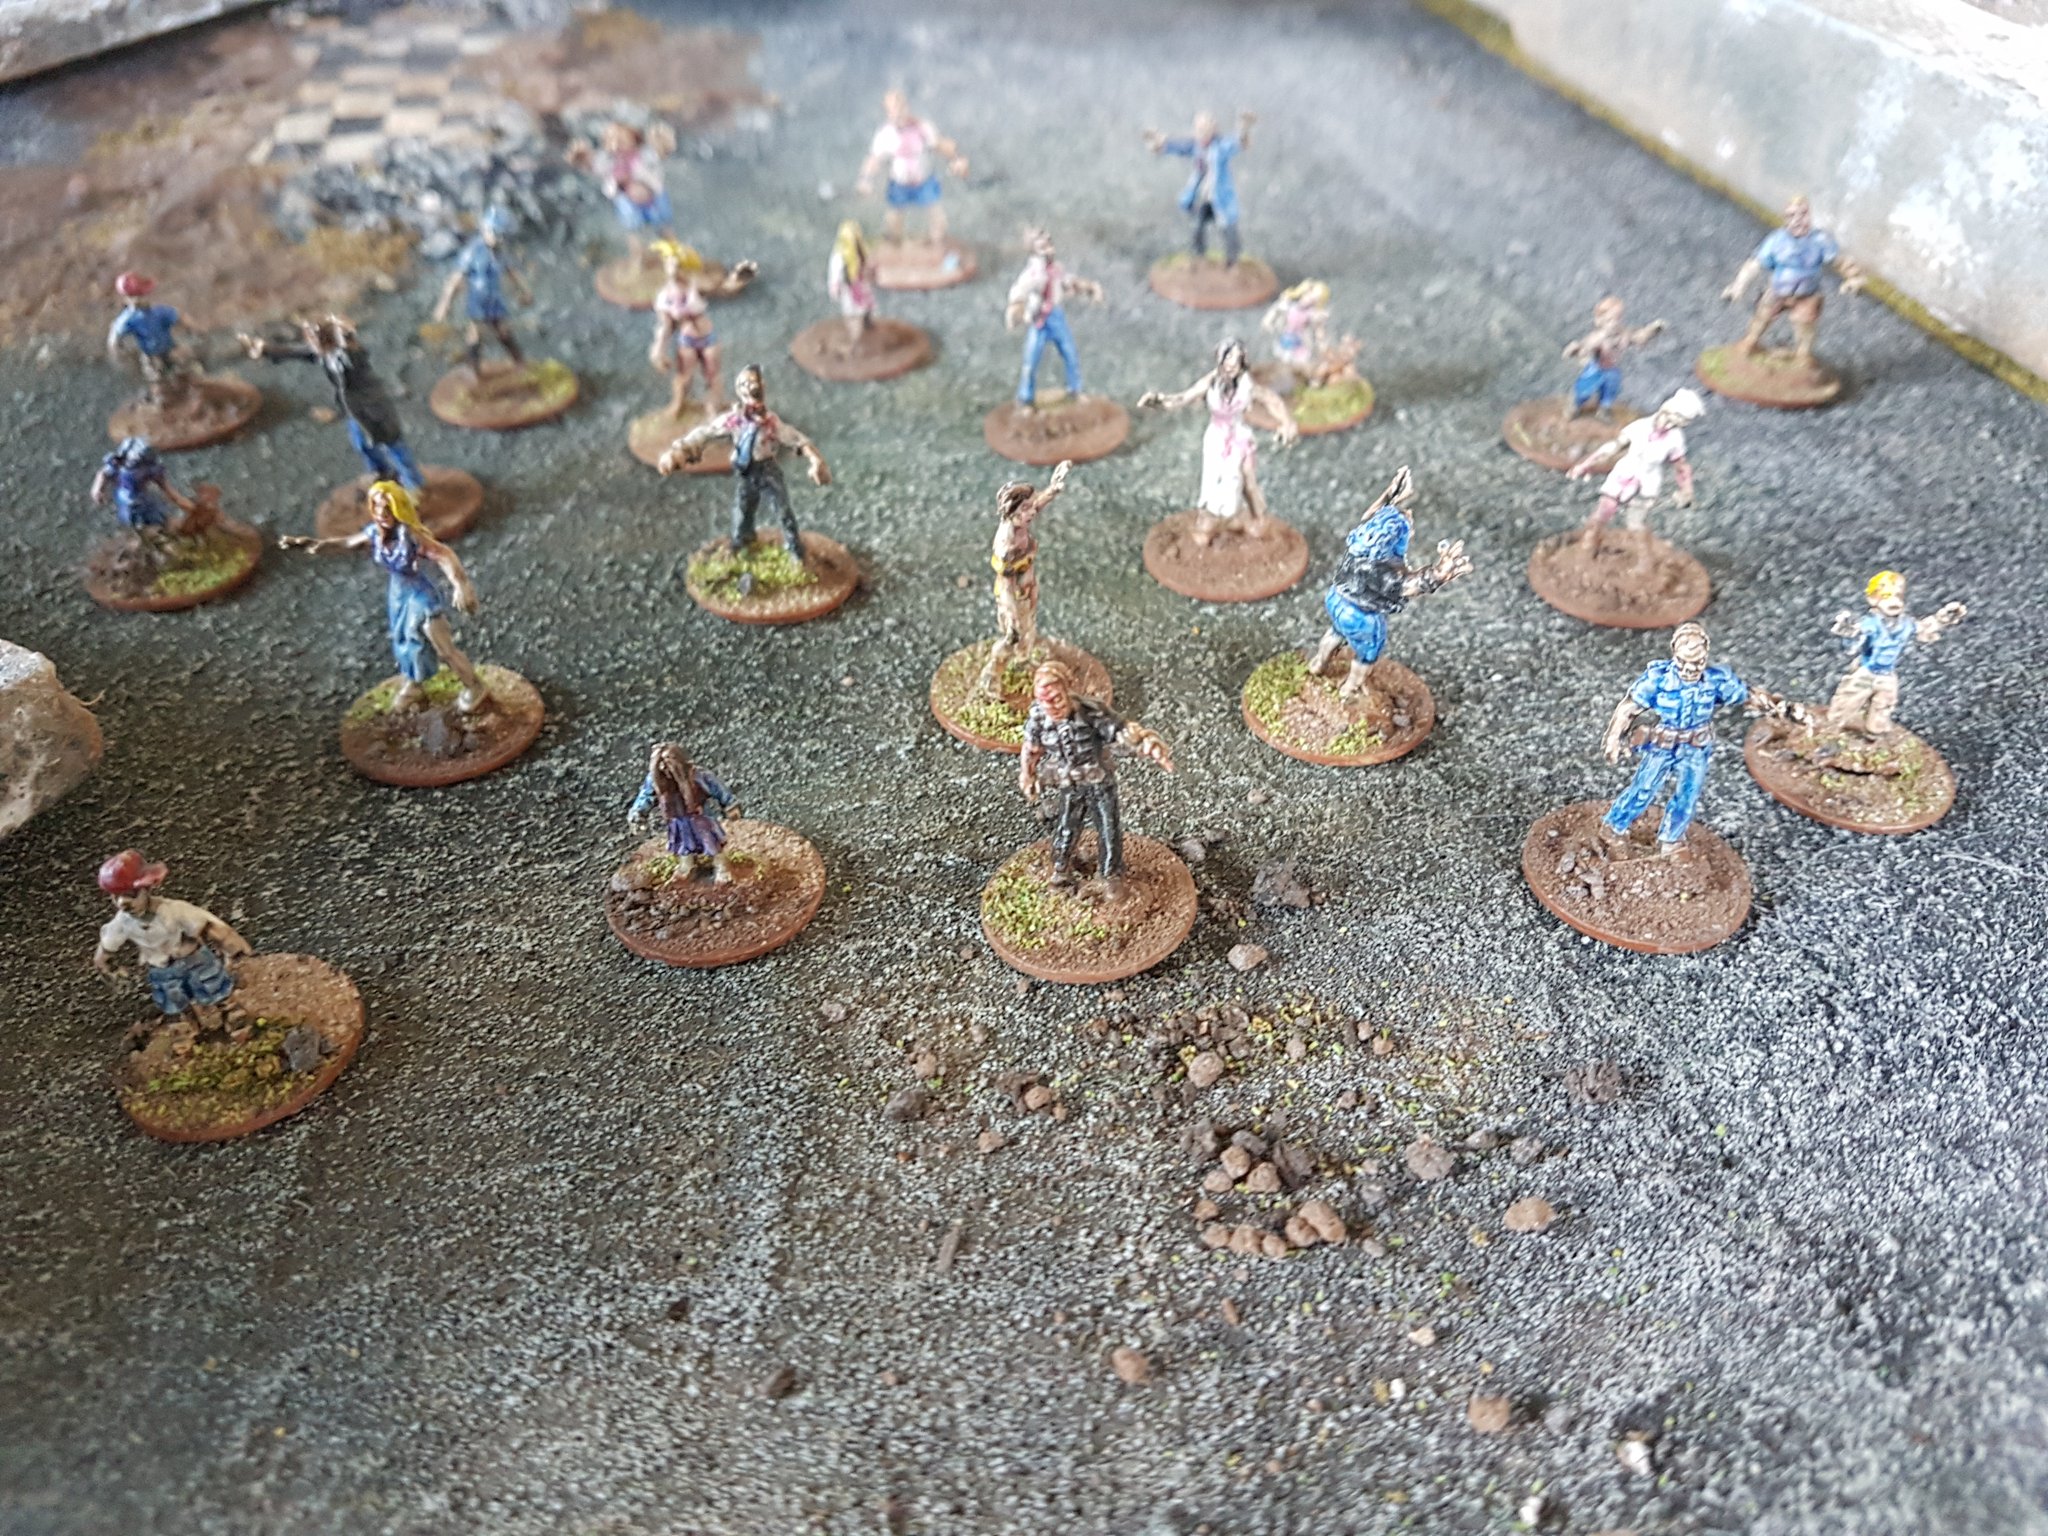
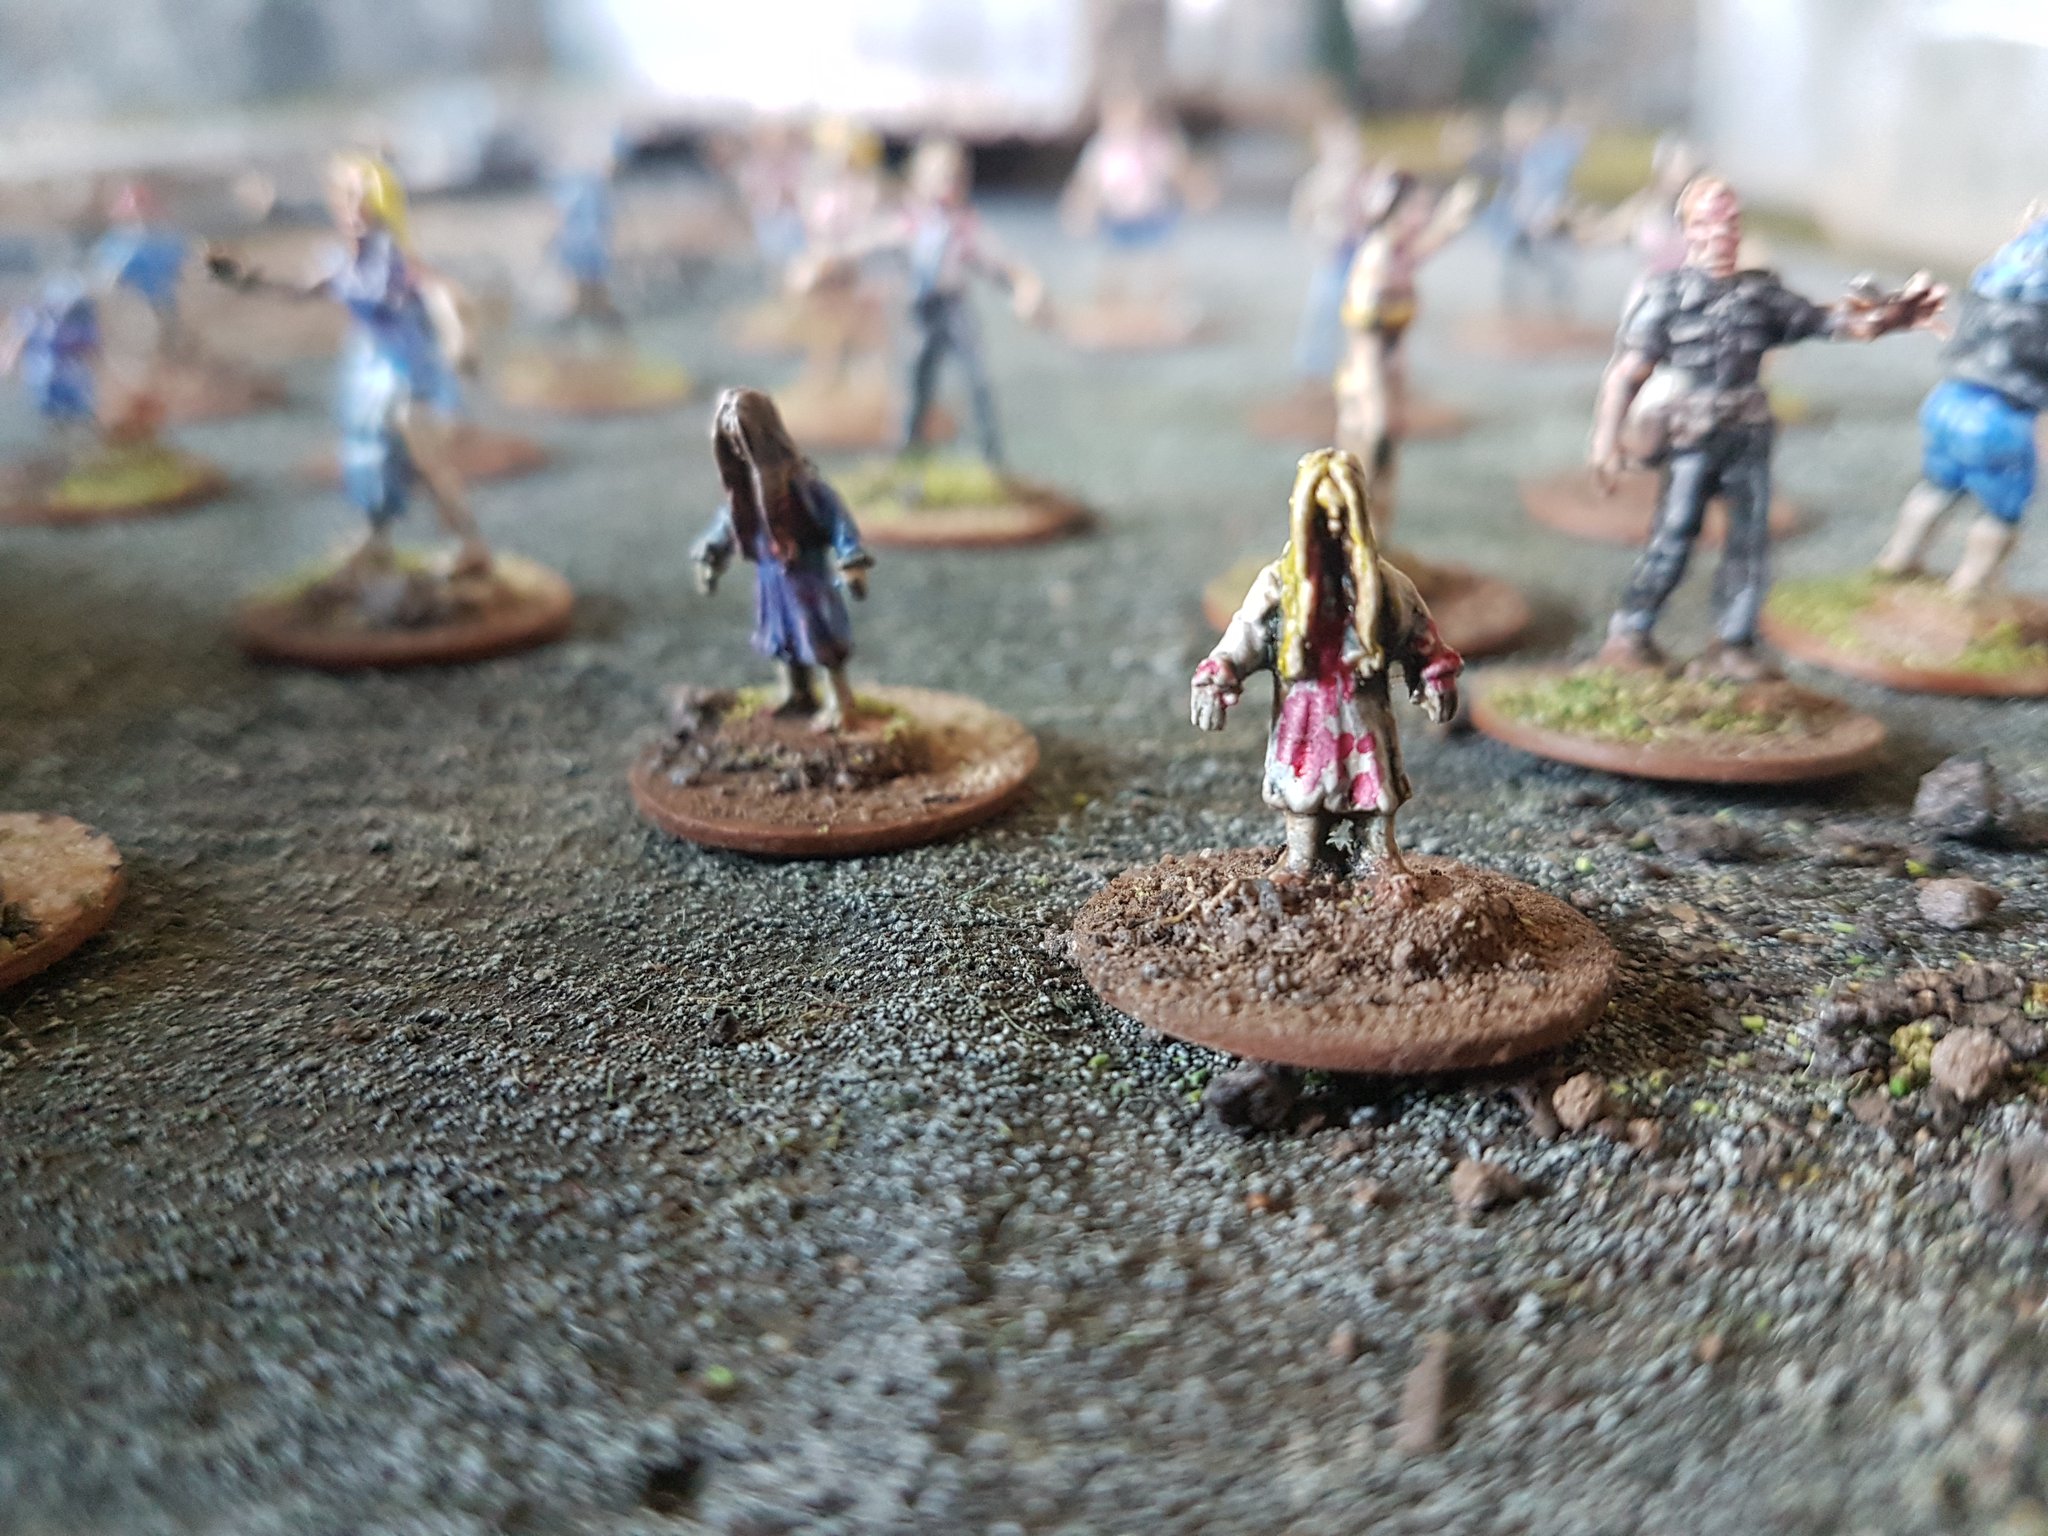
To Ebay! Dark Alliance have put out a couple of boxes of 48 figures heavily modelled on The Walking Dead – well, it looks that way from the box art – and we picked up one of each for a mere tenner a pop. That’s 96 figures, plenty to get started with. We went with a new trick for basing – 20mm washers. These really give extra weight and presence to the models and weren’t too expensive either, coming in at about a fiver for a bag of 100. Superglue attached the figures – and occasionally fingers – to the washers.
Next up, spray prime grey with a vague attempt at zenithal priming, dusting them at a distance with a can of white, and then we mixed up a base coat – part Wilko’s Granite Dust house paint, part cheap flesh tone craft paint, bit of water and a few drops of Windsor & Newton Matt Medium. Each zombie got two thin coats of this (wonder where we got that idea), and then a thin wash of Vallejo Smokey Ink, and another thin wash of Army Painter Green Tone to give the flesh that necrotic, diseased look.
We went with a fairly straightforward palette, starting with blue – those bits got done with a light blue house paint, Wilko’s Duck Egg blue, and then painted over with blue craft paint (Chiltern Arts Ultramarine, to be exact). This acted kind of like Citadel Contrast, sort of like a wash, but it definitely worked. We mixed a white from bone craft paint and Granite Dust house paint, thinned down and then painted that on, before doing the black/ grey bits with either Vallejo German Grey or Wilko’s City Break grey house paint and then overpainting with Chiltern Arts black, thinned down. This gave a nice depth and definition.
I picked out some accent colours on some of them – blonde hair, painted yellow and washed with thinned down Vallejo Skin Wash, and red on a few ties done by Dan with Vallejo Hot Orange and Red Ink. I also stippled on some thinned down crimson which gave the illusion of dried blood. A final light drybrush with bone craft paint sealed the deal and then it was basing – painted the bases with brown craft paint and then PVA, dunked them first in thin dried soil and then sand, before finally a light drizzle with flock. Then out to the shed for varnish and done!
BRAAIIIINS…..
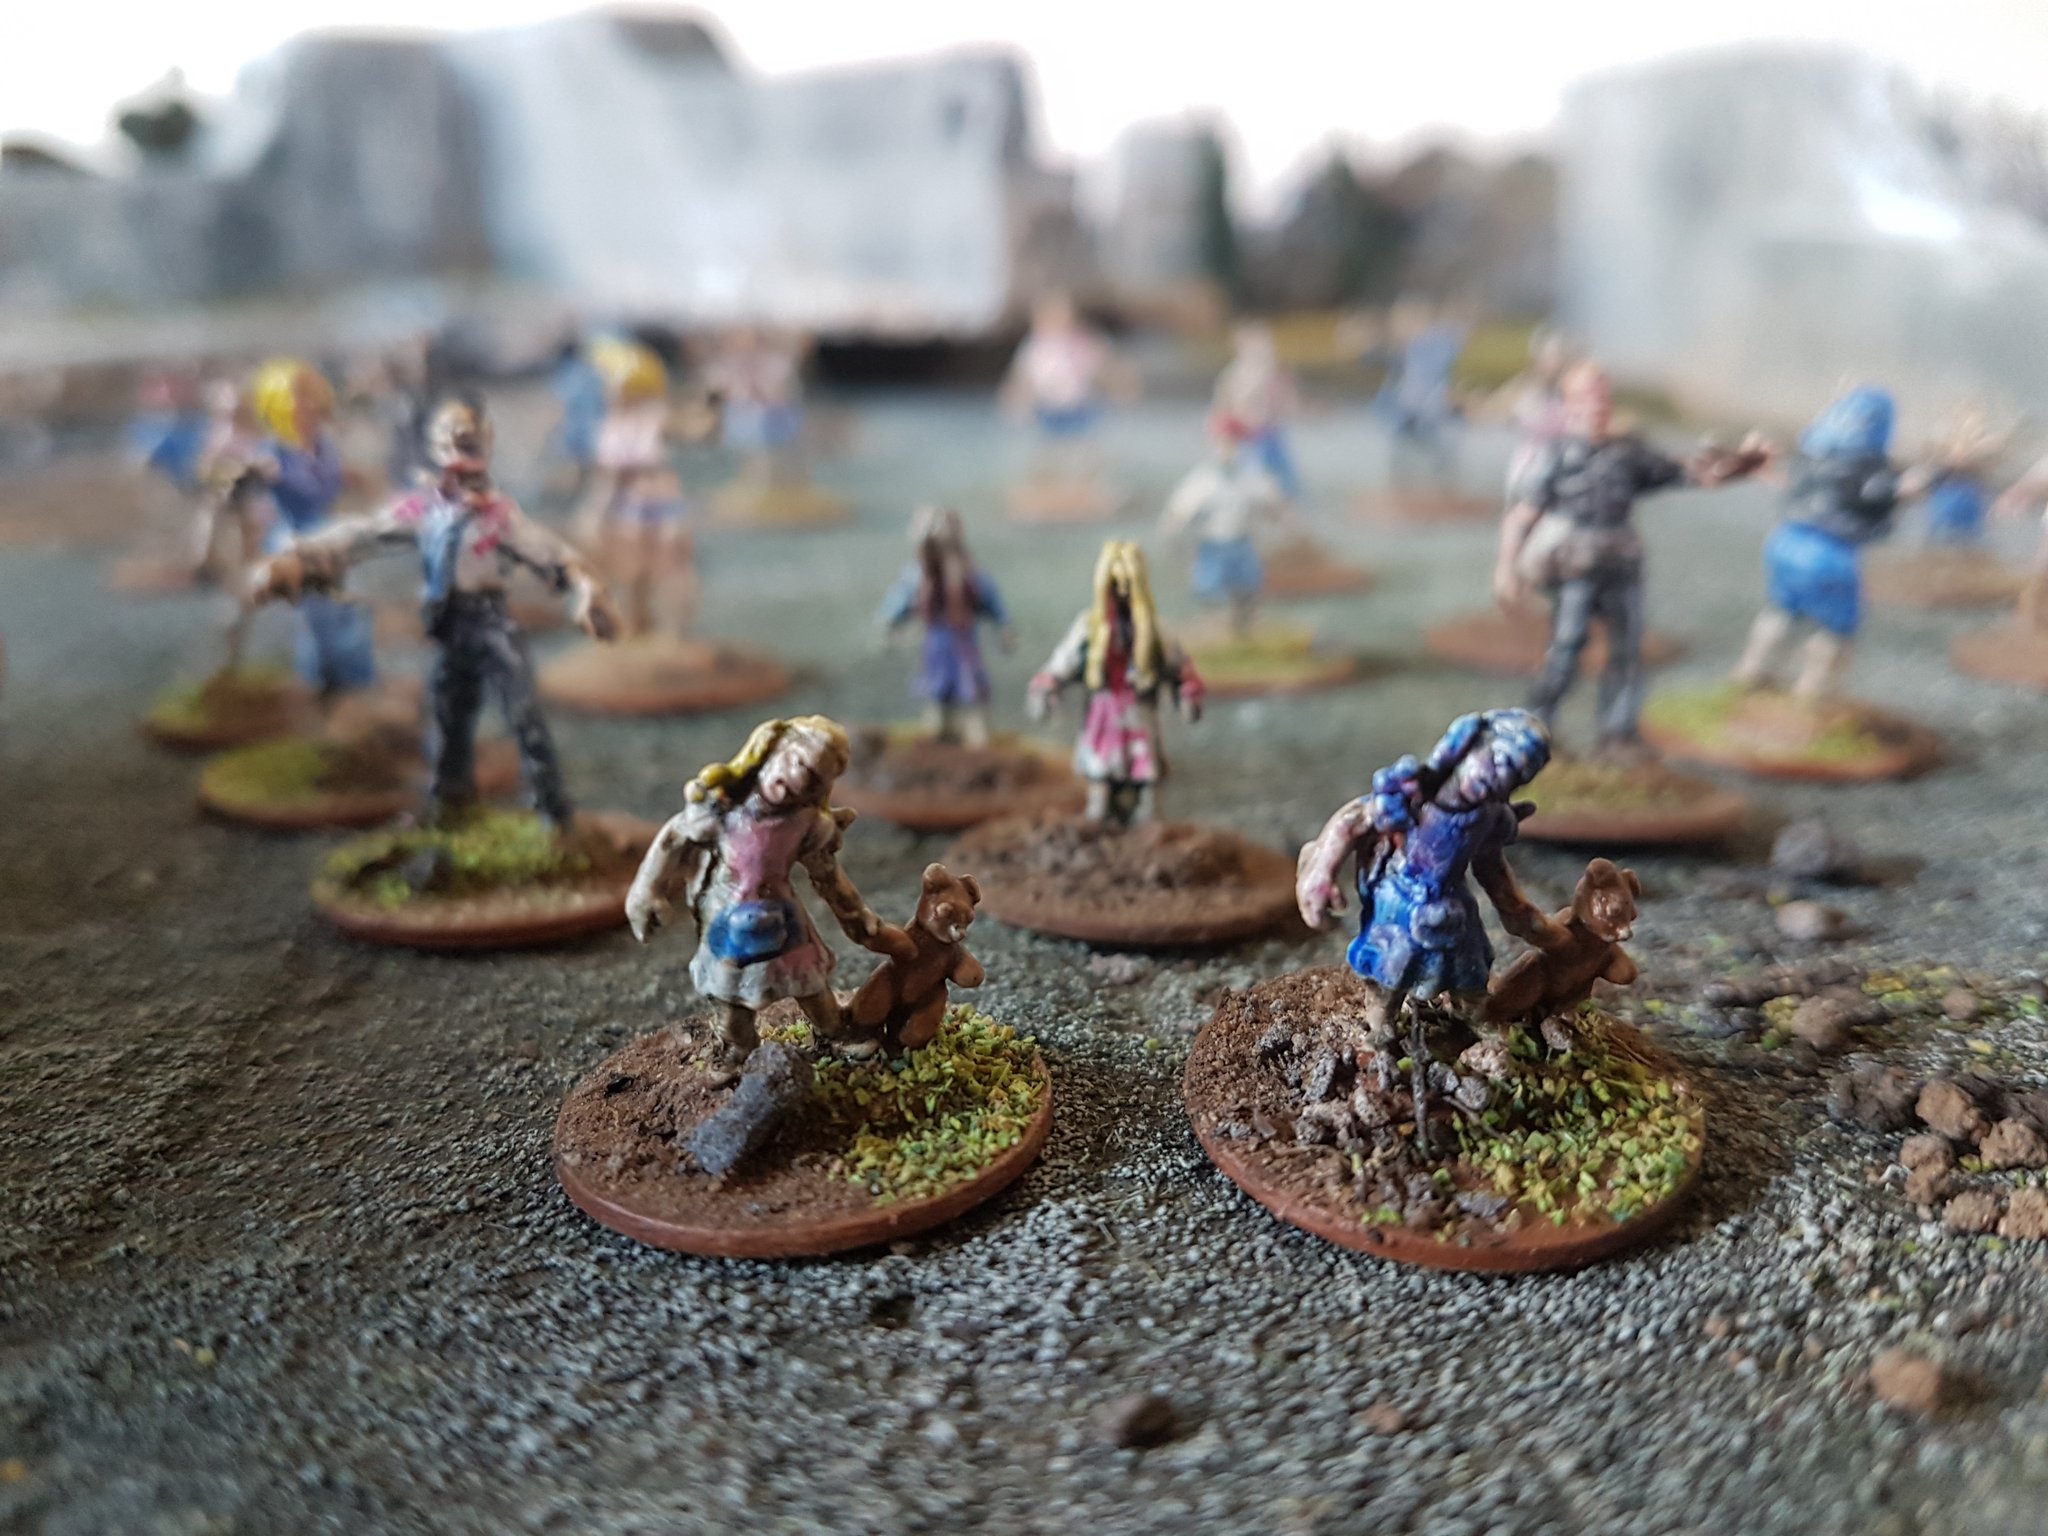
I do like these figures, and aside from a little flash, they paint up well. The kids in particular are really creepy:
Imagine that turning up on your doorstep – “Trick or treat”
I think this one is probably my favourite sculpt, the teddy bear and the slightly inhuman angle of the neck are gloriously spooky!
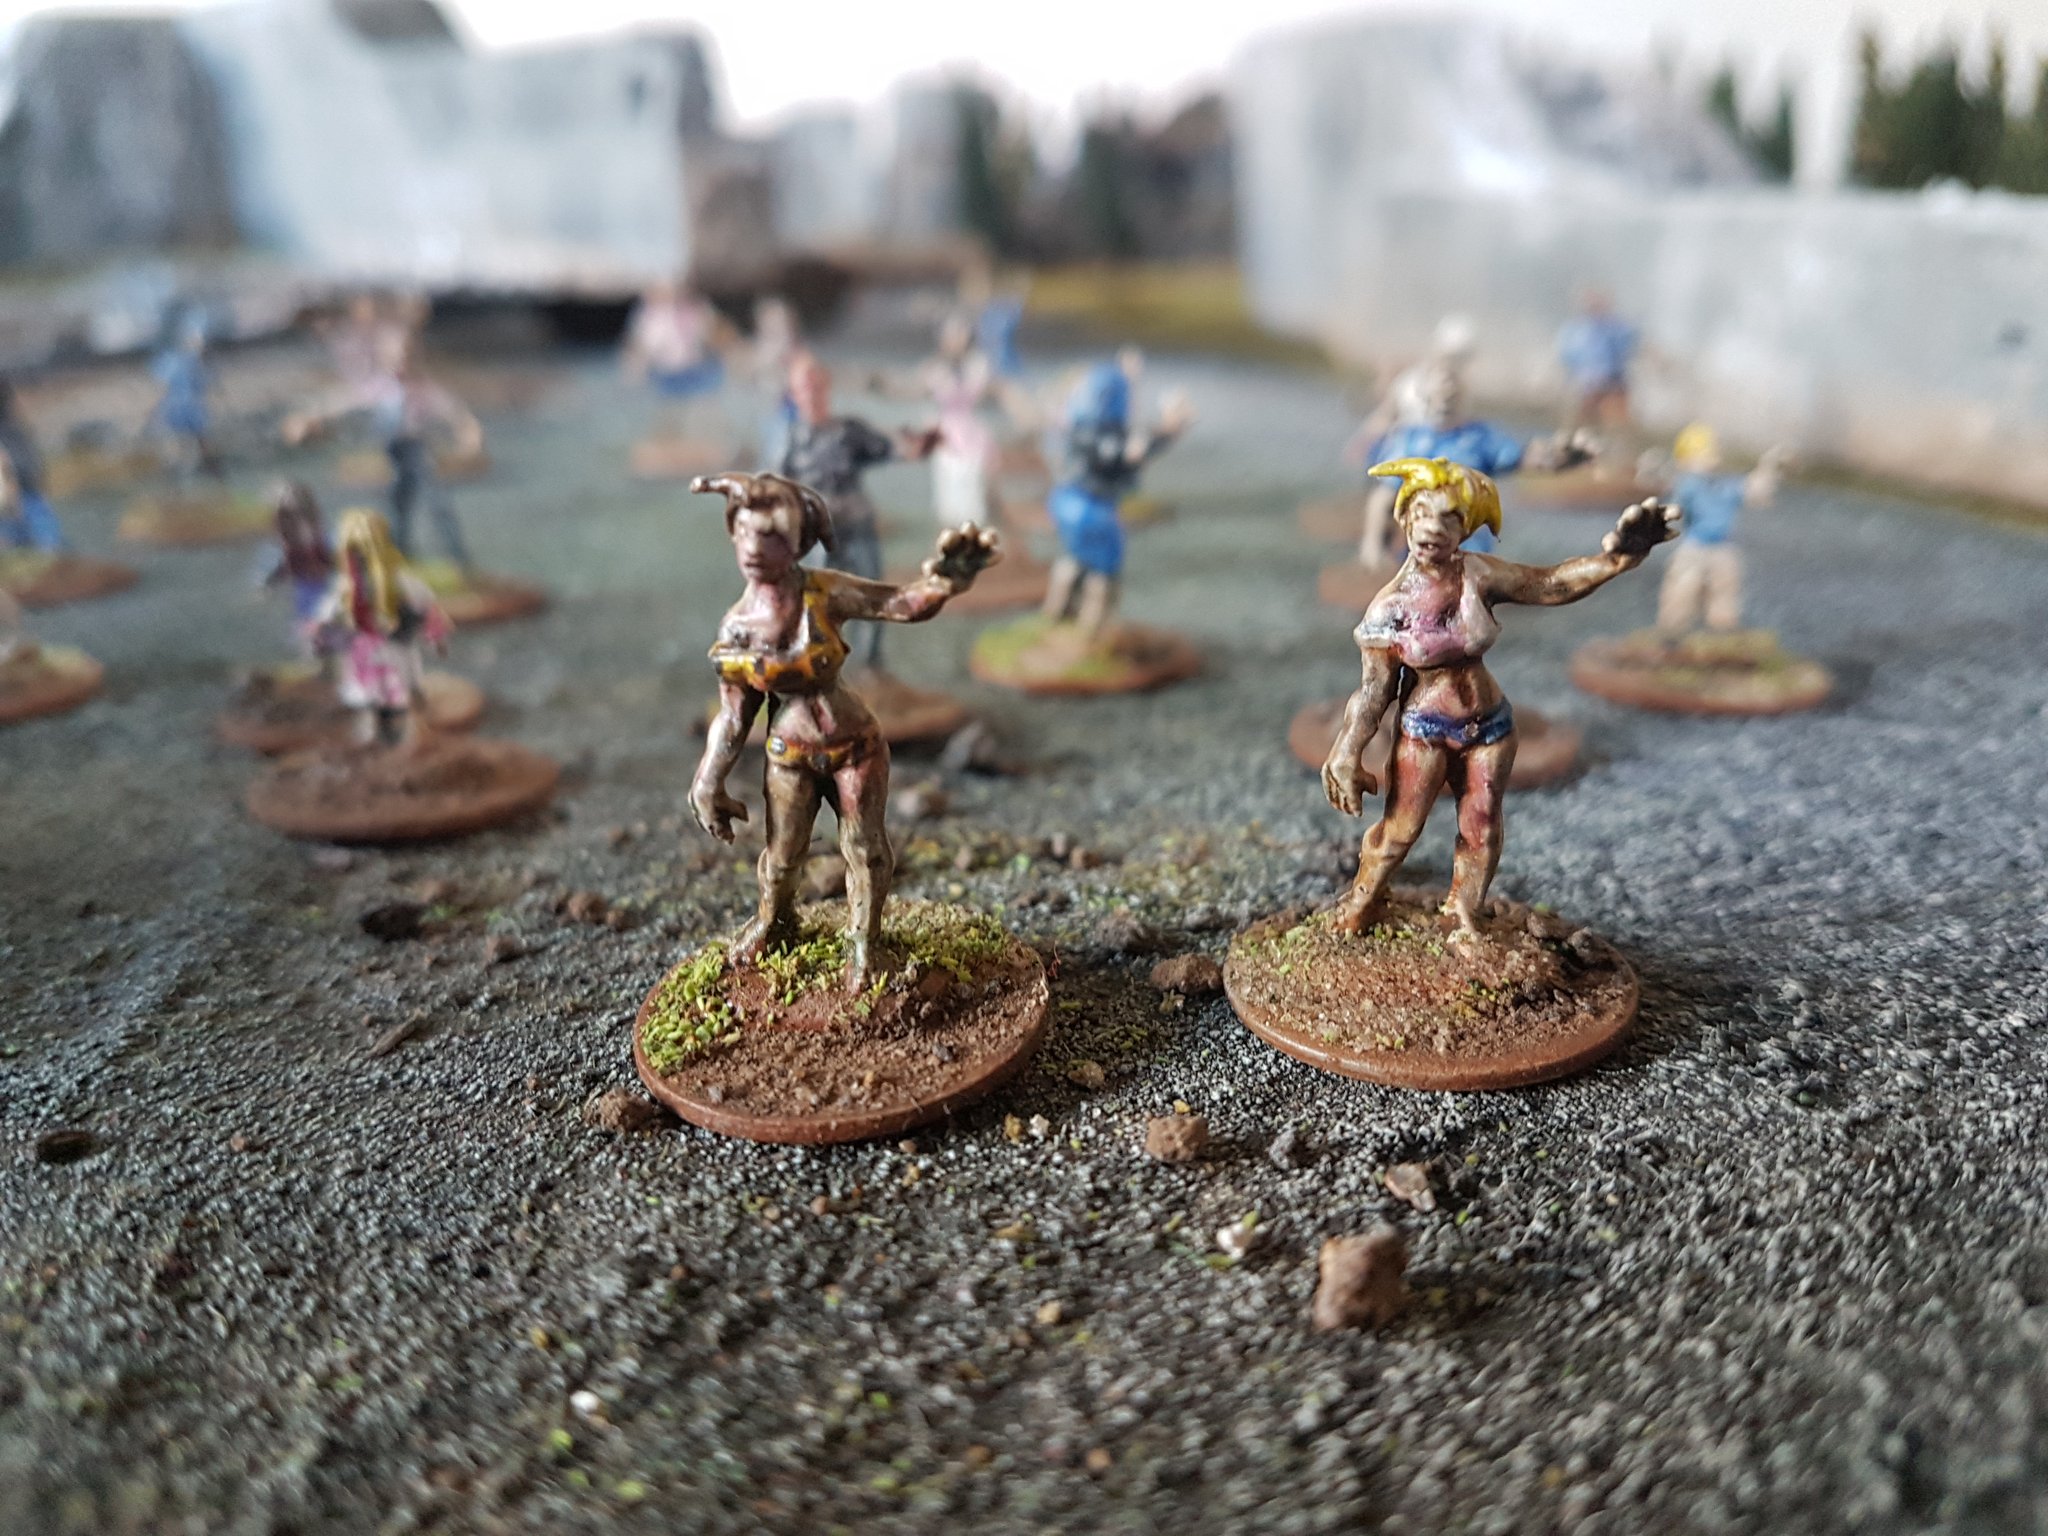
..Although some of the female zombies are… optimistic, shall we say? X-D
“I ALWAYS wear my most alluring underwear/ Daisy Dukes to Sainsbury’s, you never know who you’ll run into”
So, aside from “Sexy Zombie Prostitute” or whatever the hell the designers were thinking, these are good figures, easy to paint up and available at a decent price- have a hobby knife to hand to deal with the flash but otherwise all good.
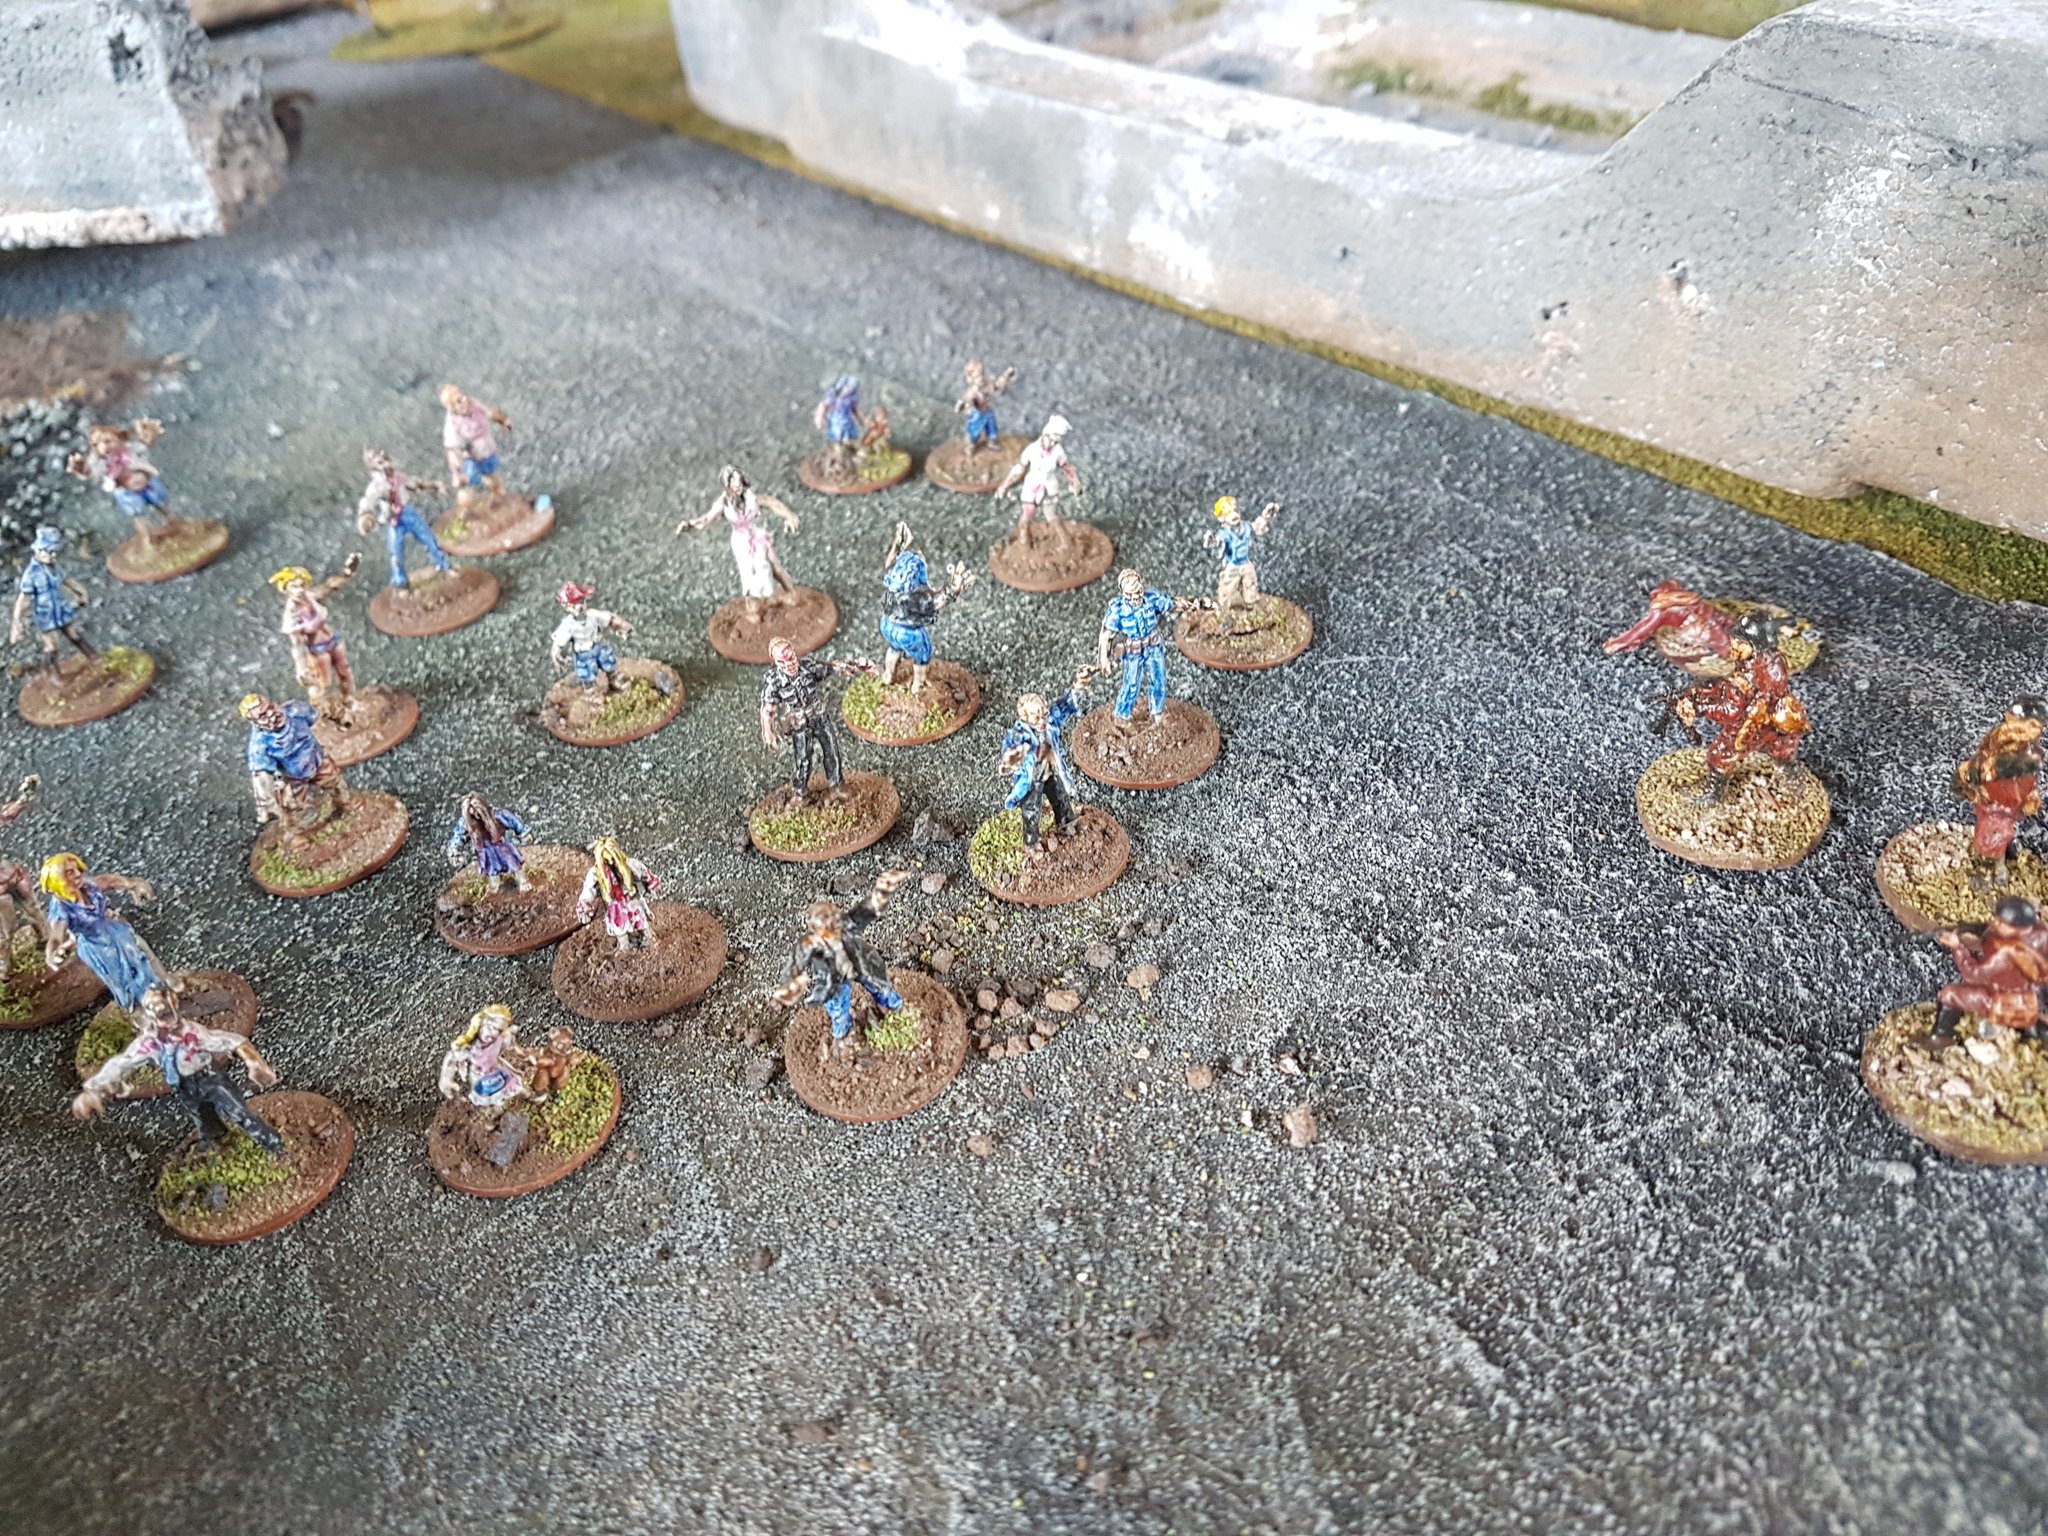
After the upcoming game we’ve also got something else planned – as soon as he saw them, Dan just said “Yonkers”.
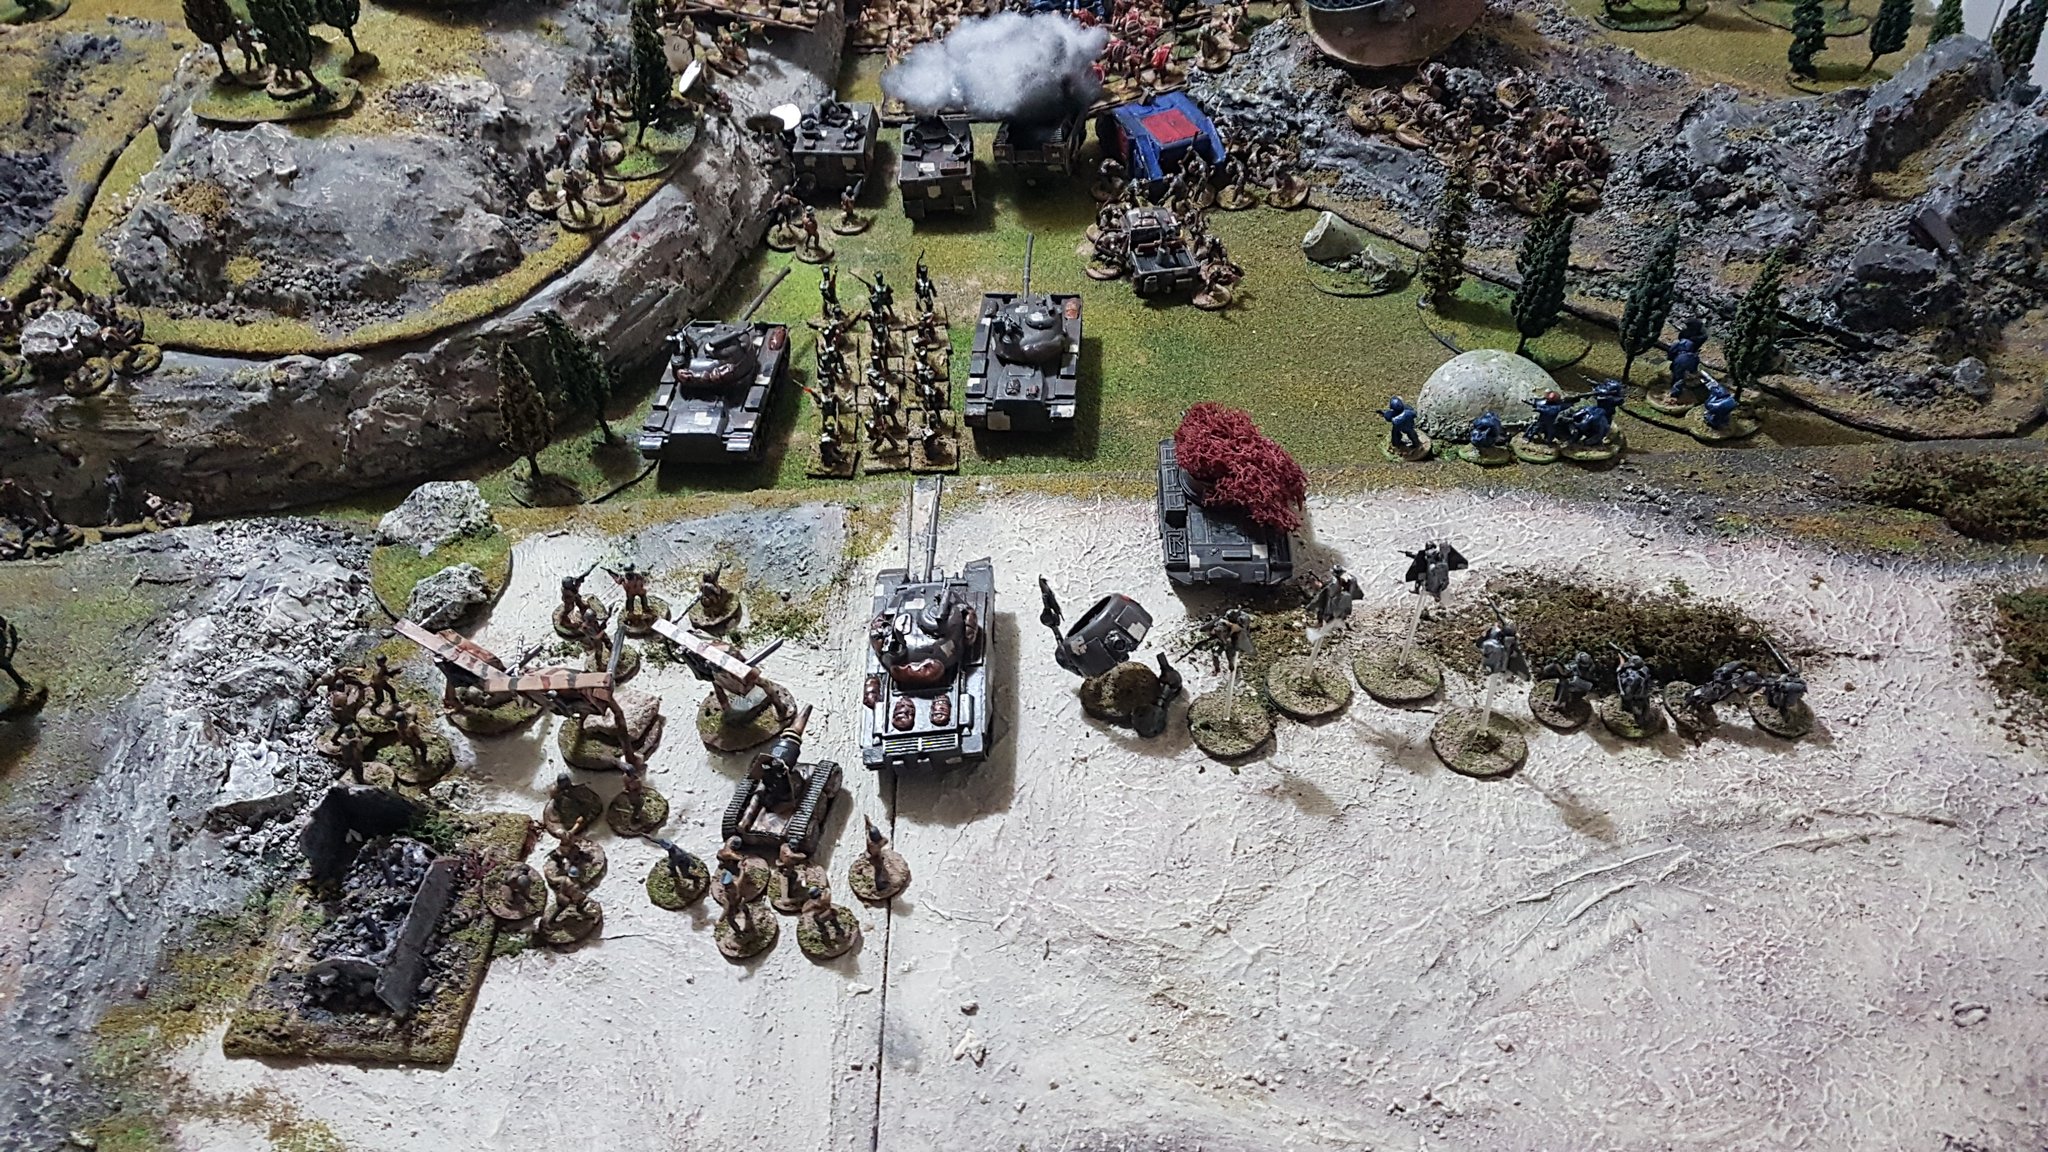
The undead horde about to overrun some hapless Holy Soviet Army conscripts…
So yeah, that’s going to happen (for those who haven’t read World War Z, The Battle Of Yonkers takes place when the US Army tries to take on the zombie infestation in a stand up fight and – spoiler alert – things don’t go to plan).. stay tuned, I know Dan has been playing with some urban terrain ideas based on Mel The Terrain Tutor’s tutorials.
(NB – If you’re new here, go check out Parts 1 & Part 2, because otherwise NONE of this is going to make any sense…)
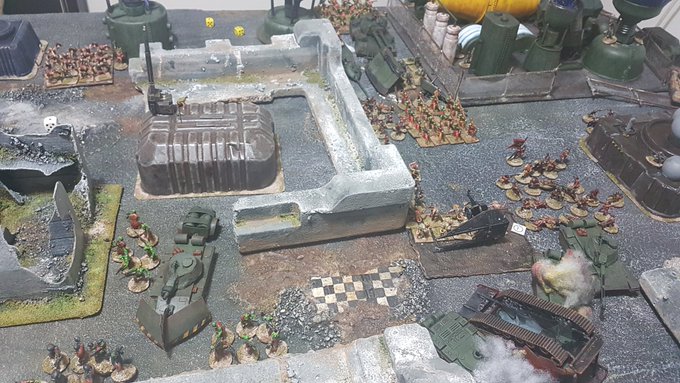
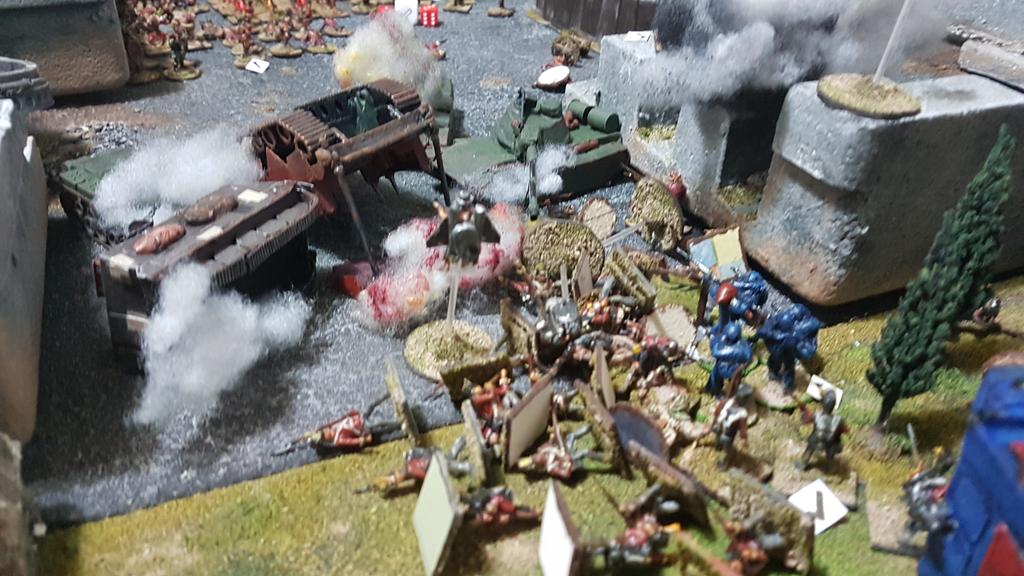
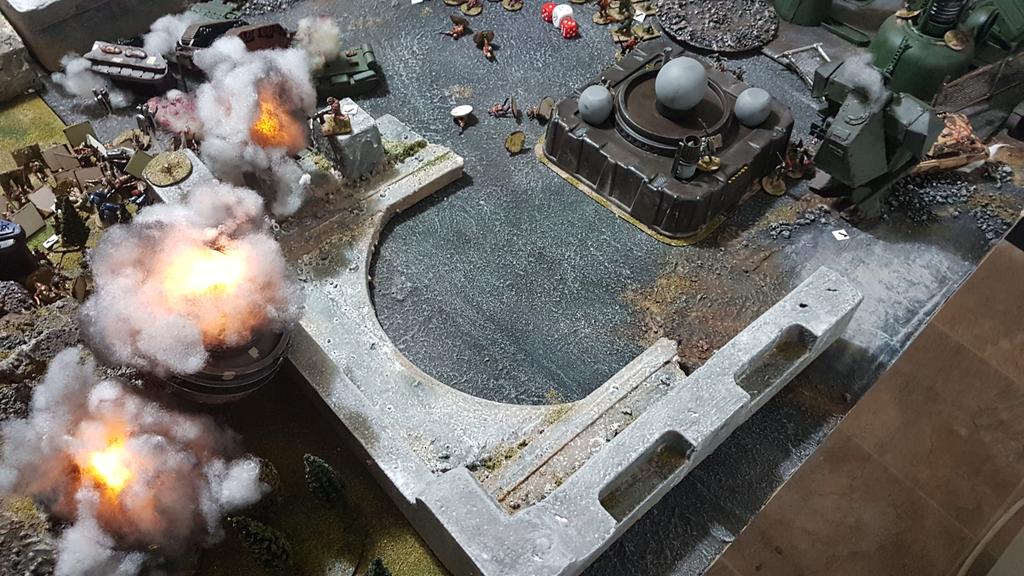
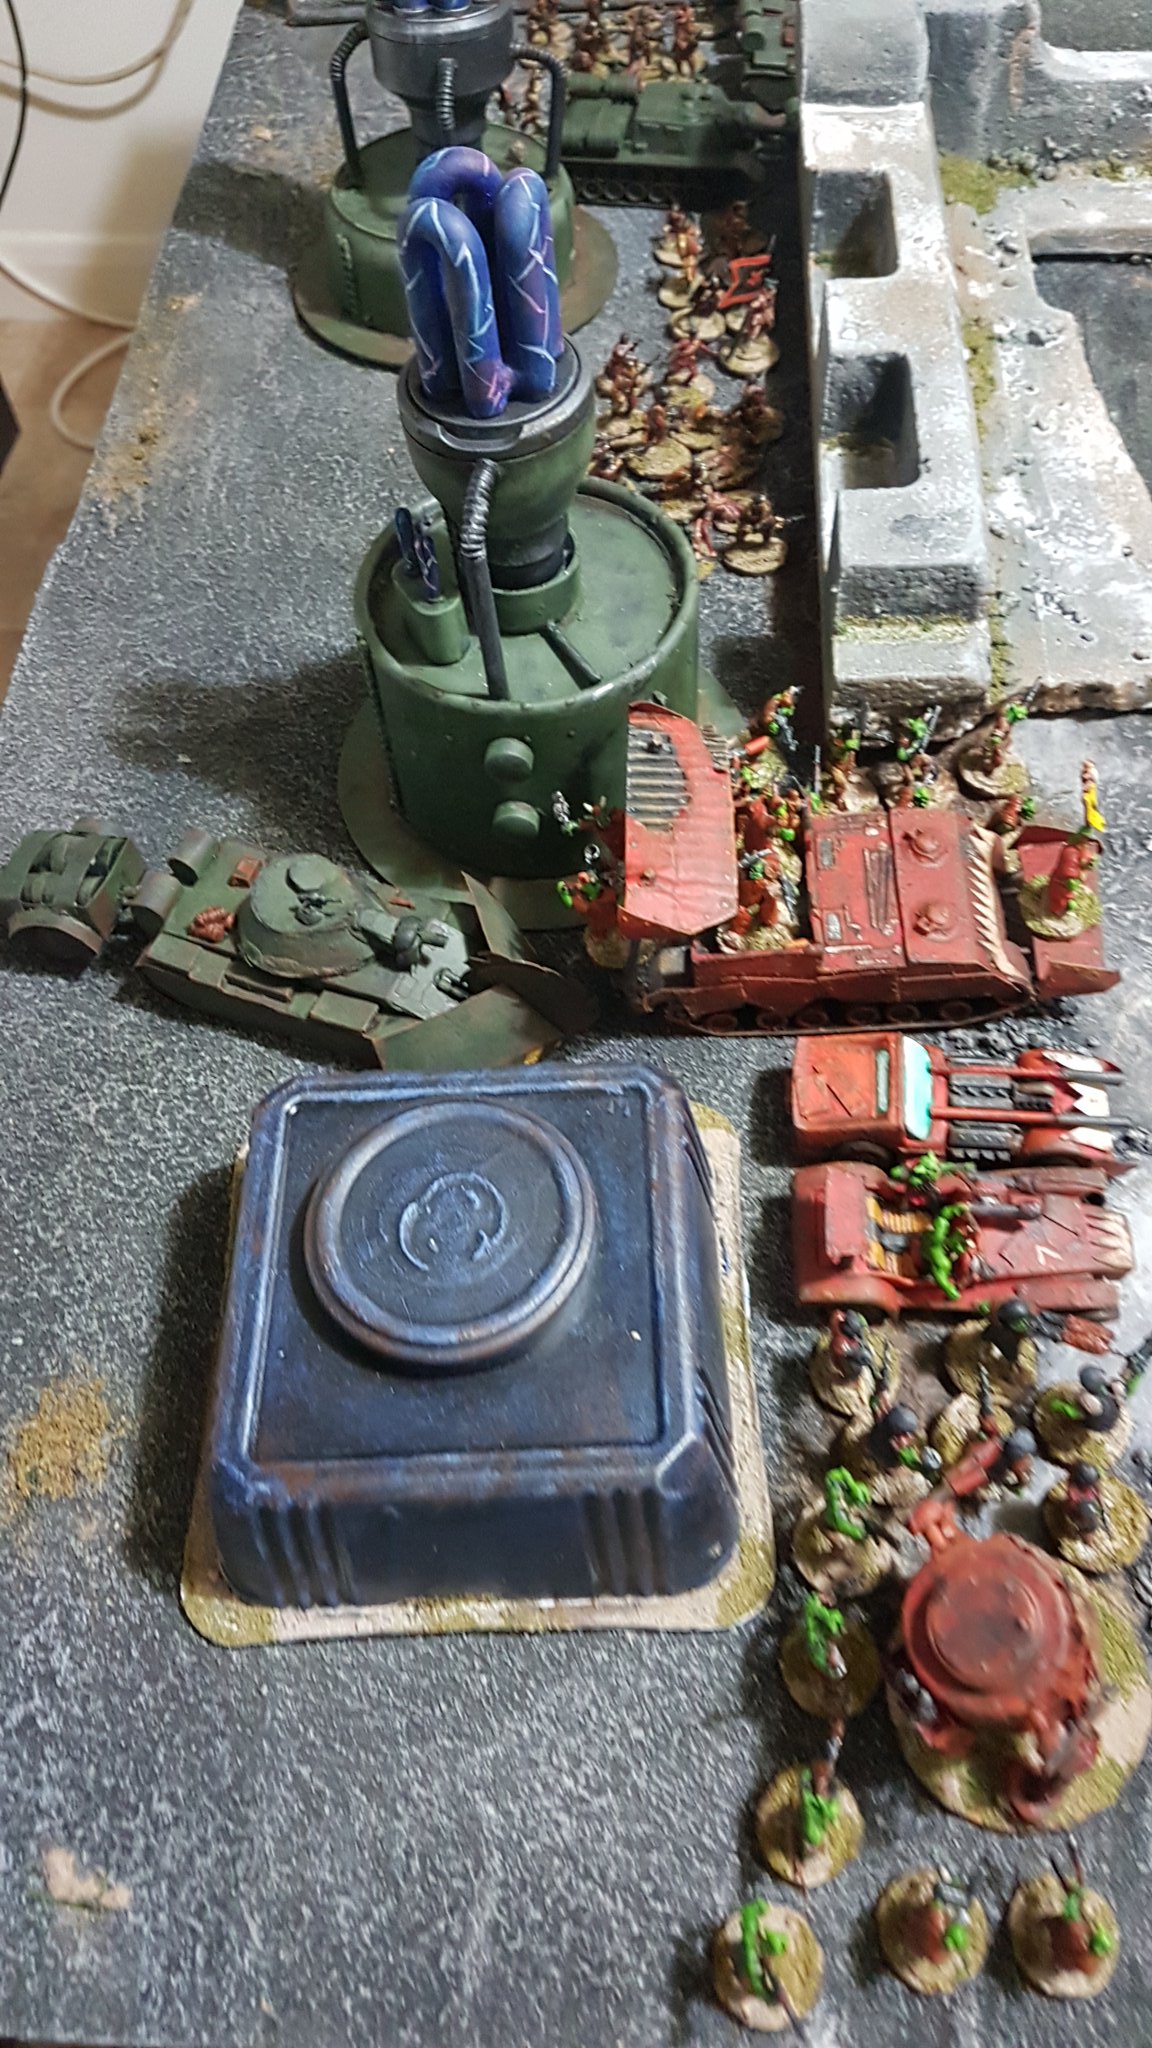
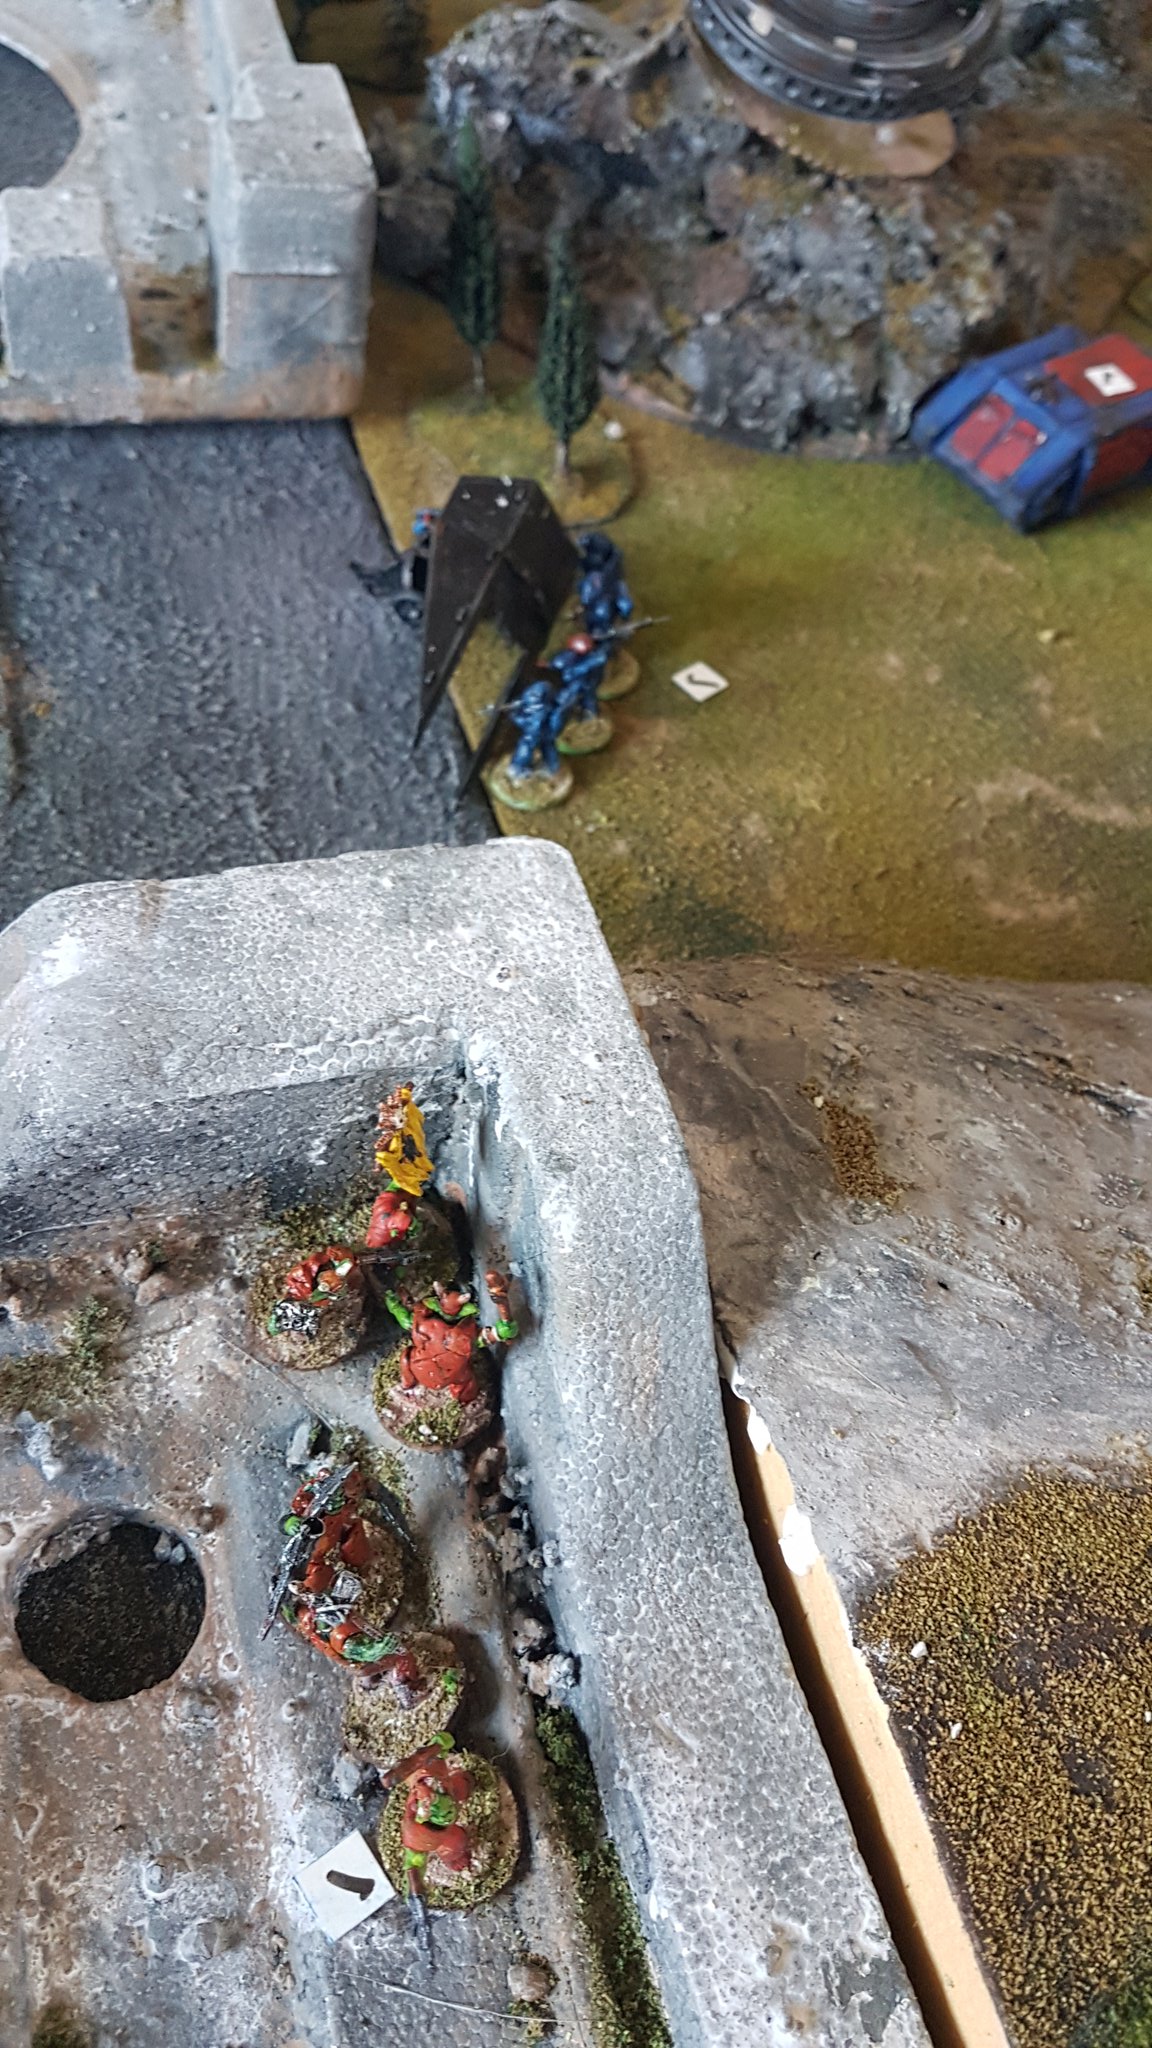
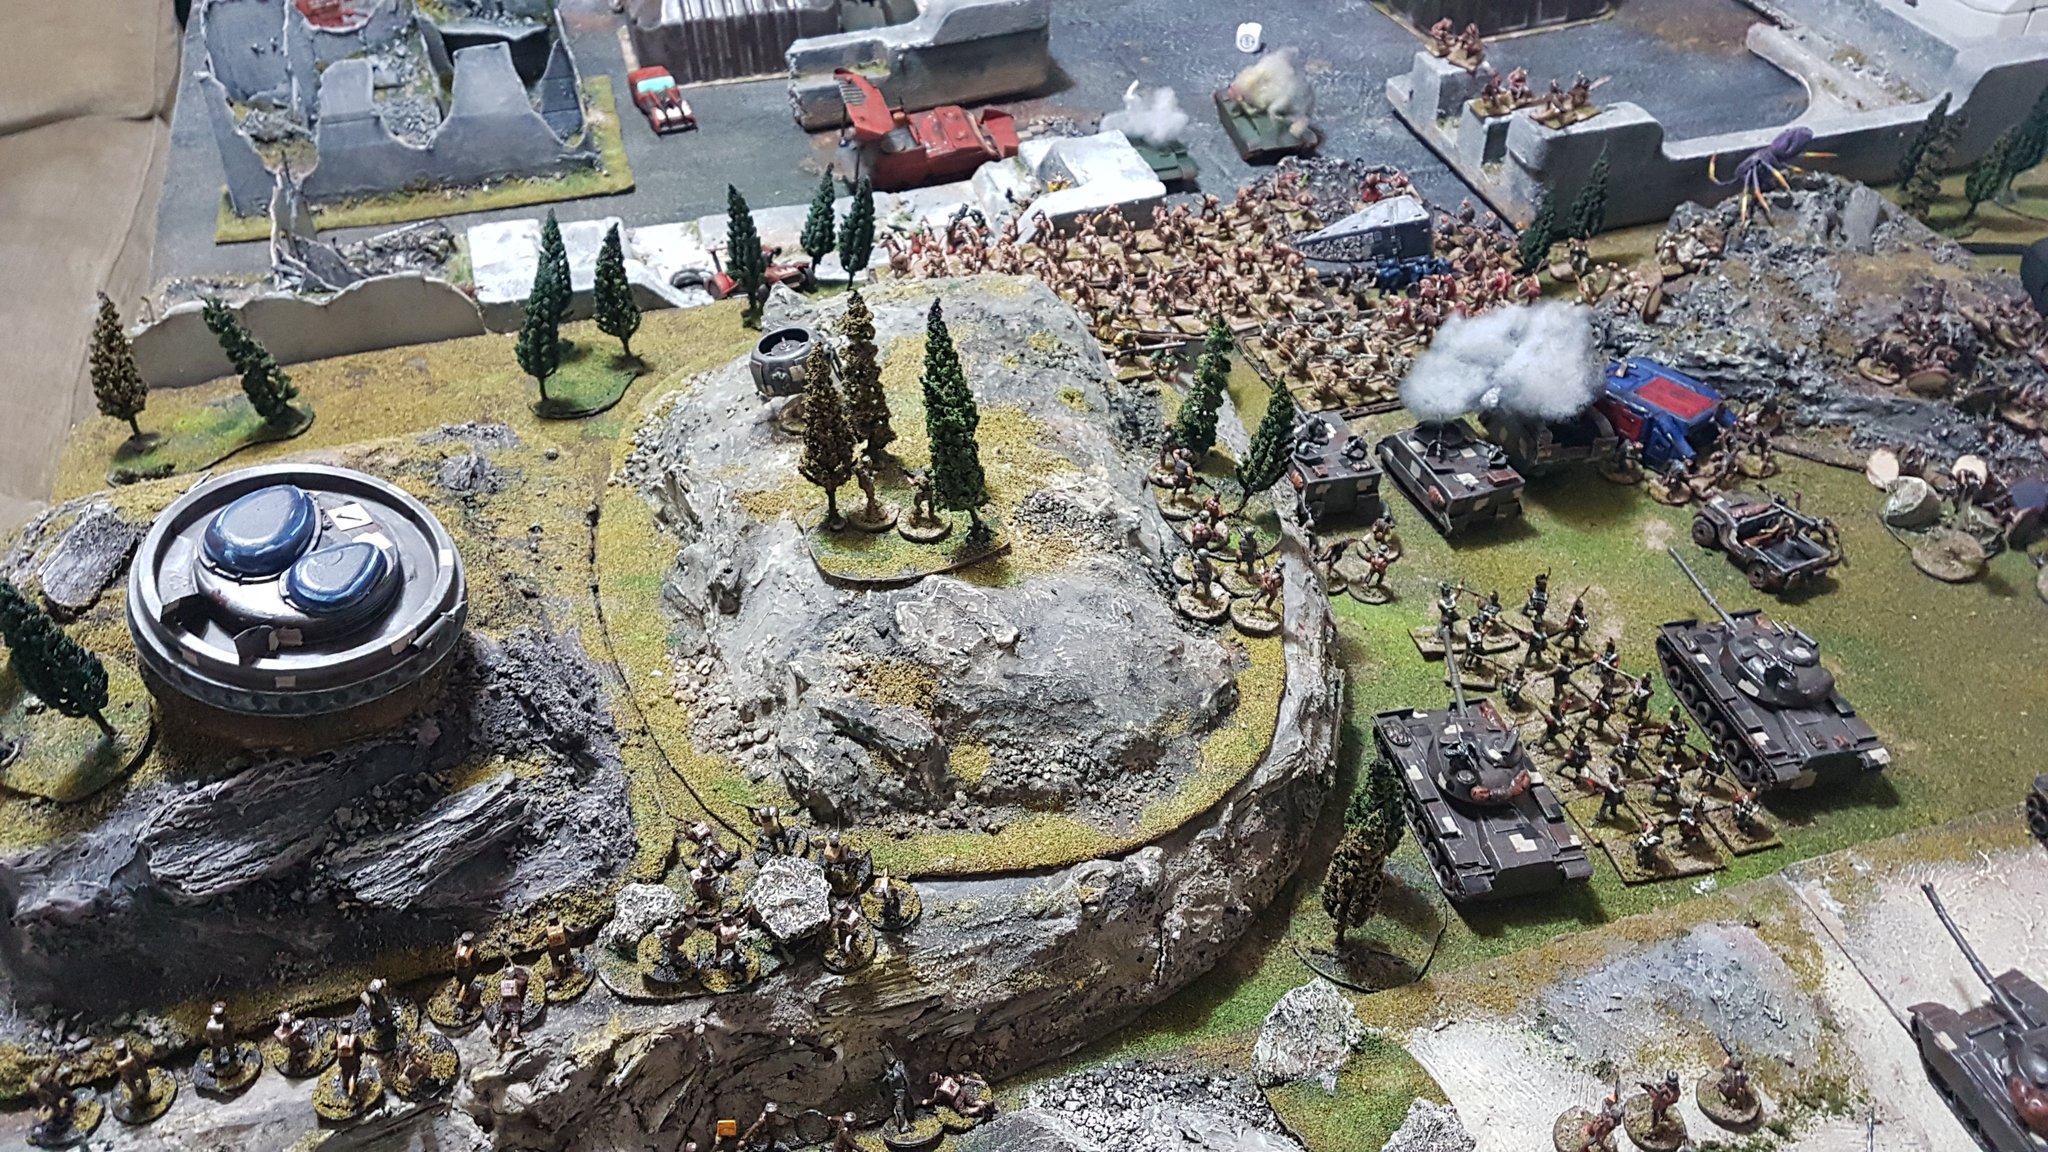
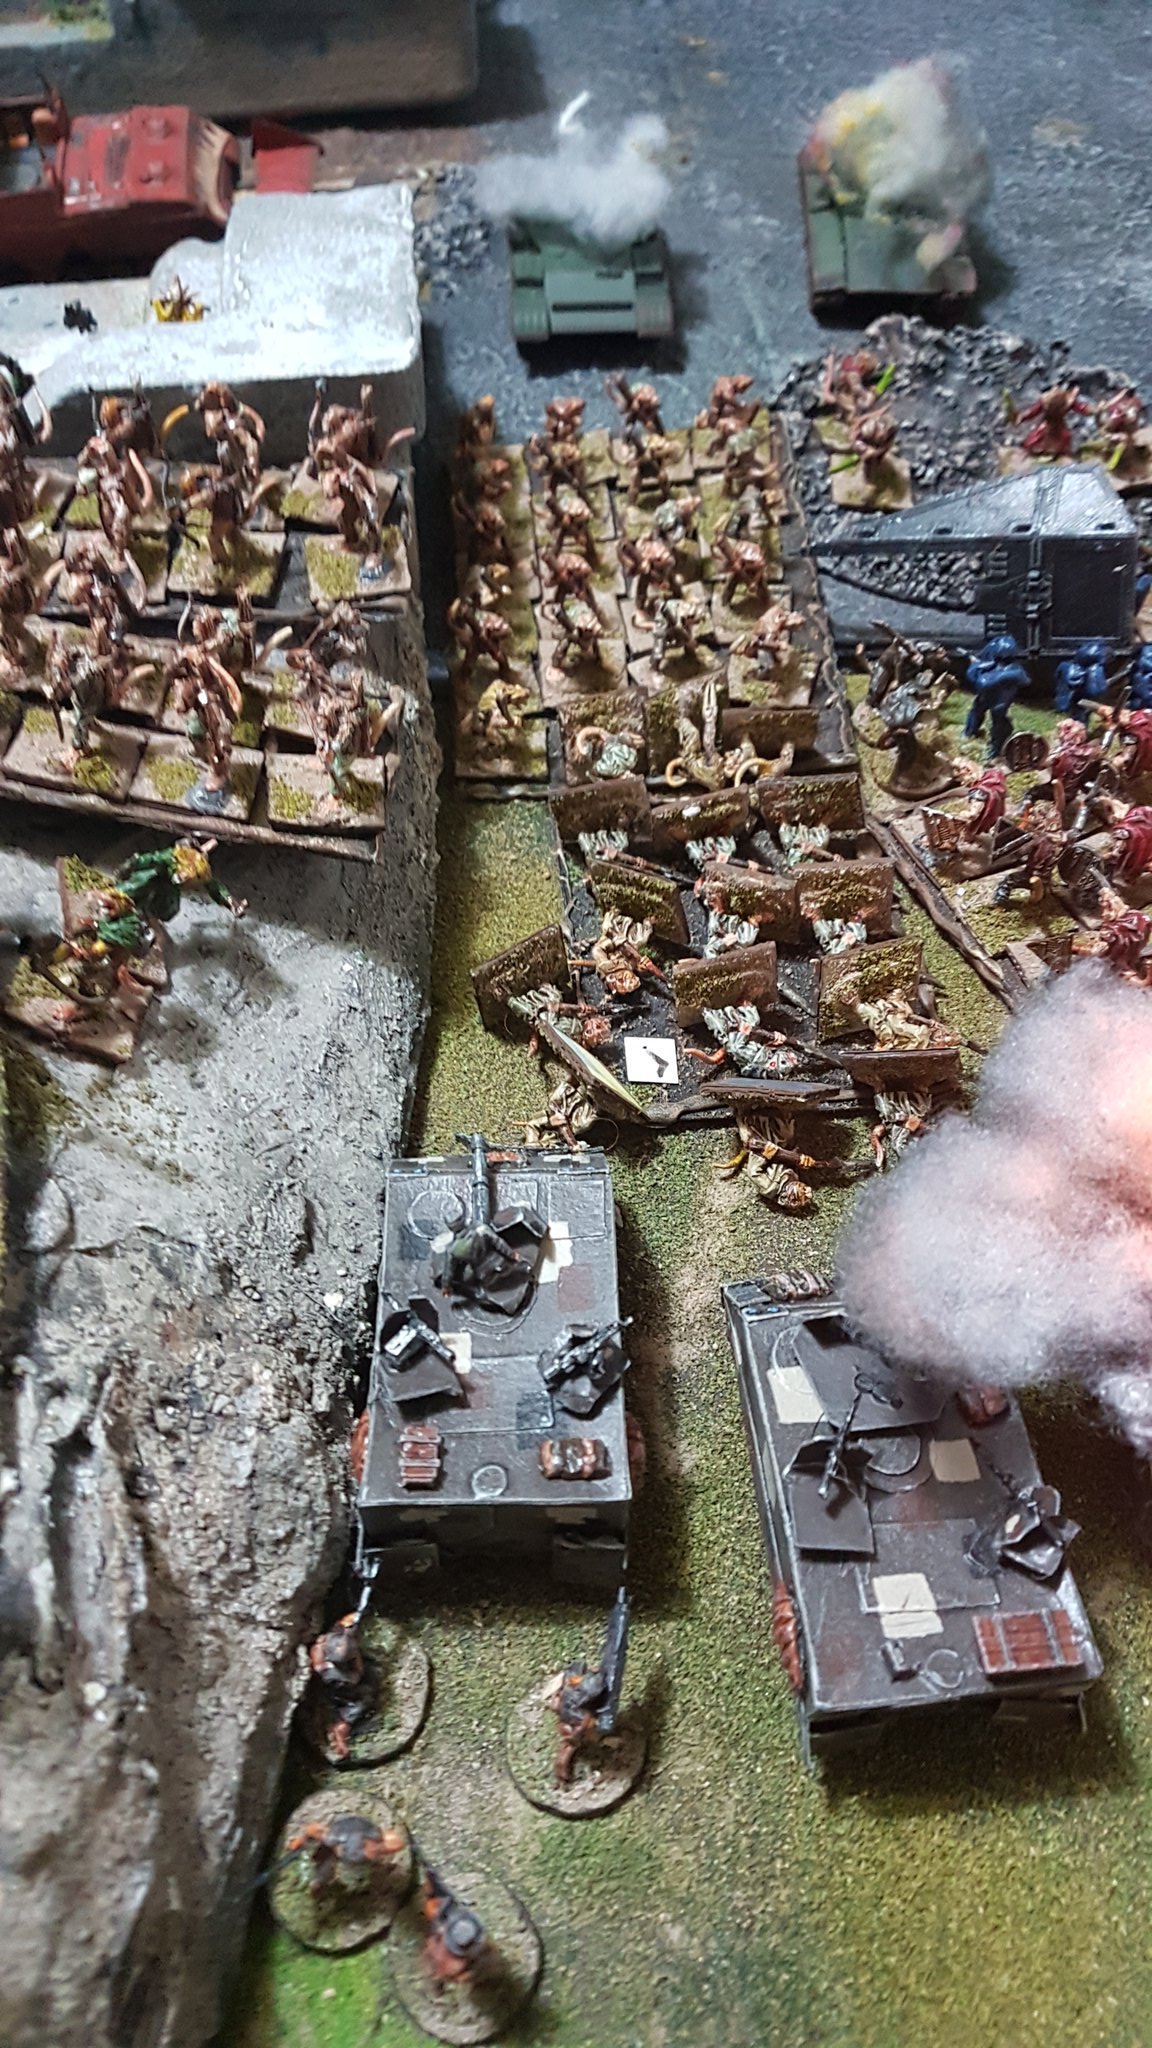
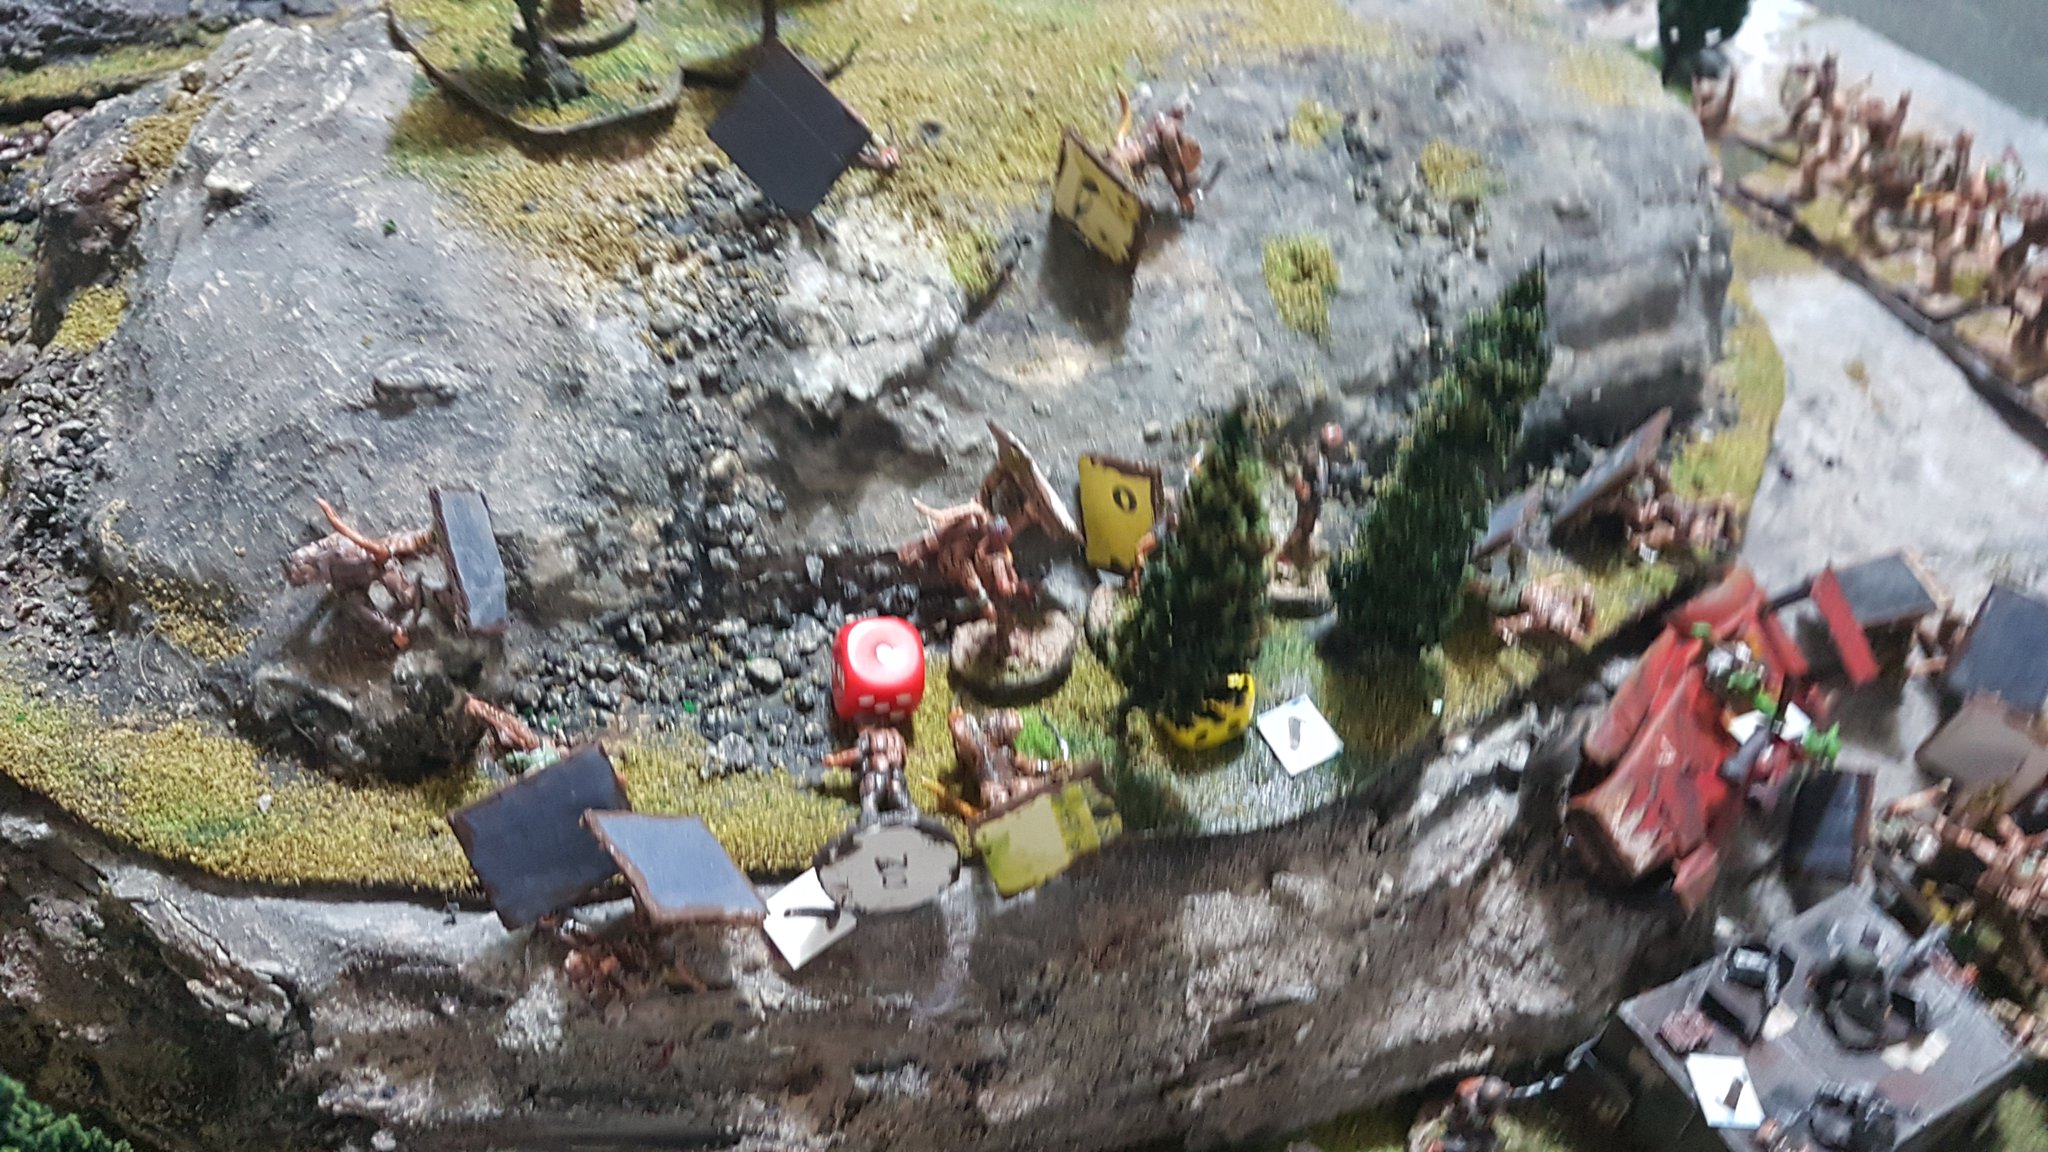
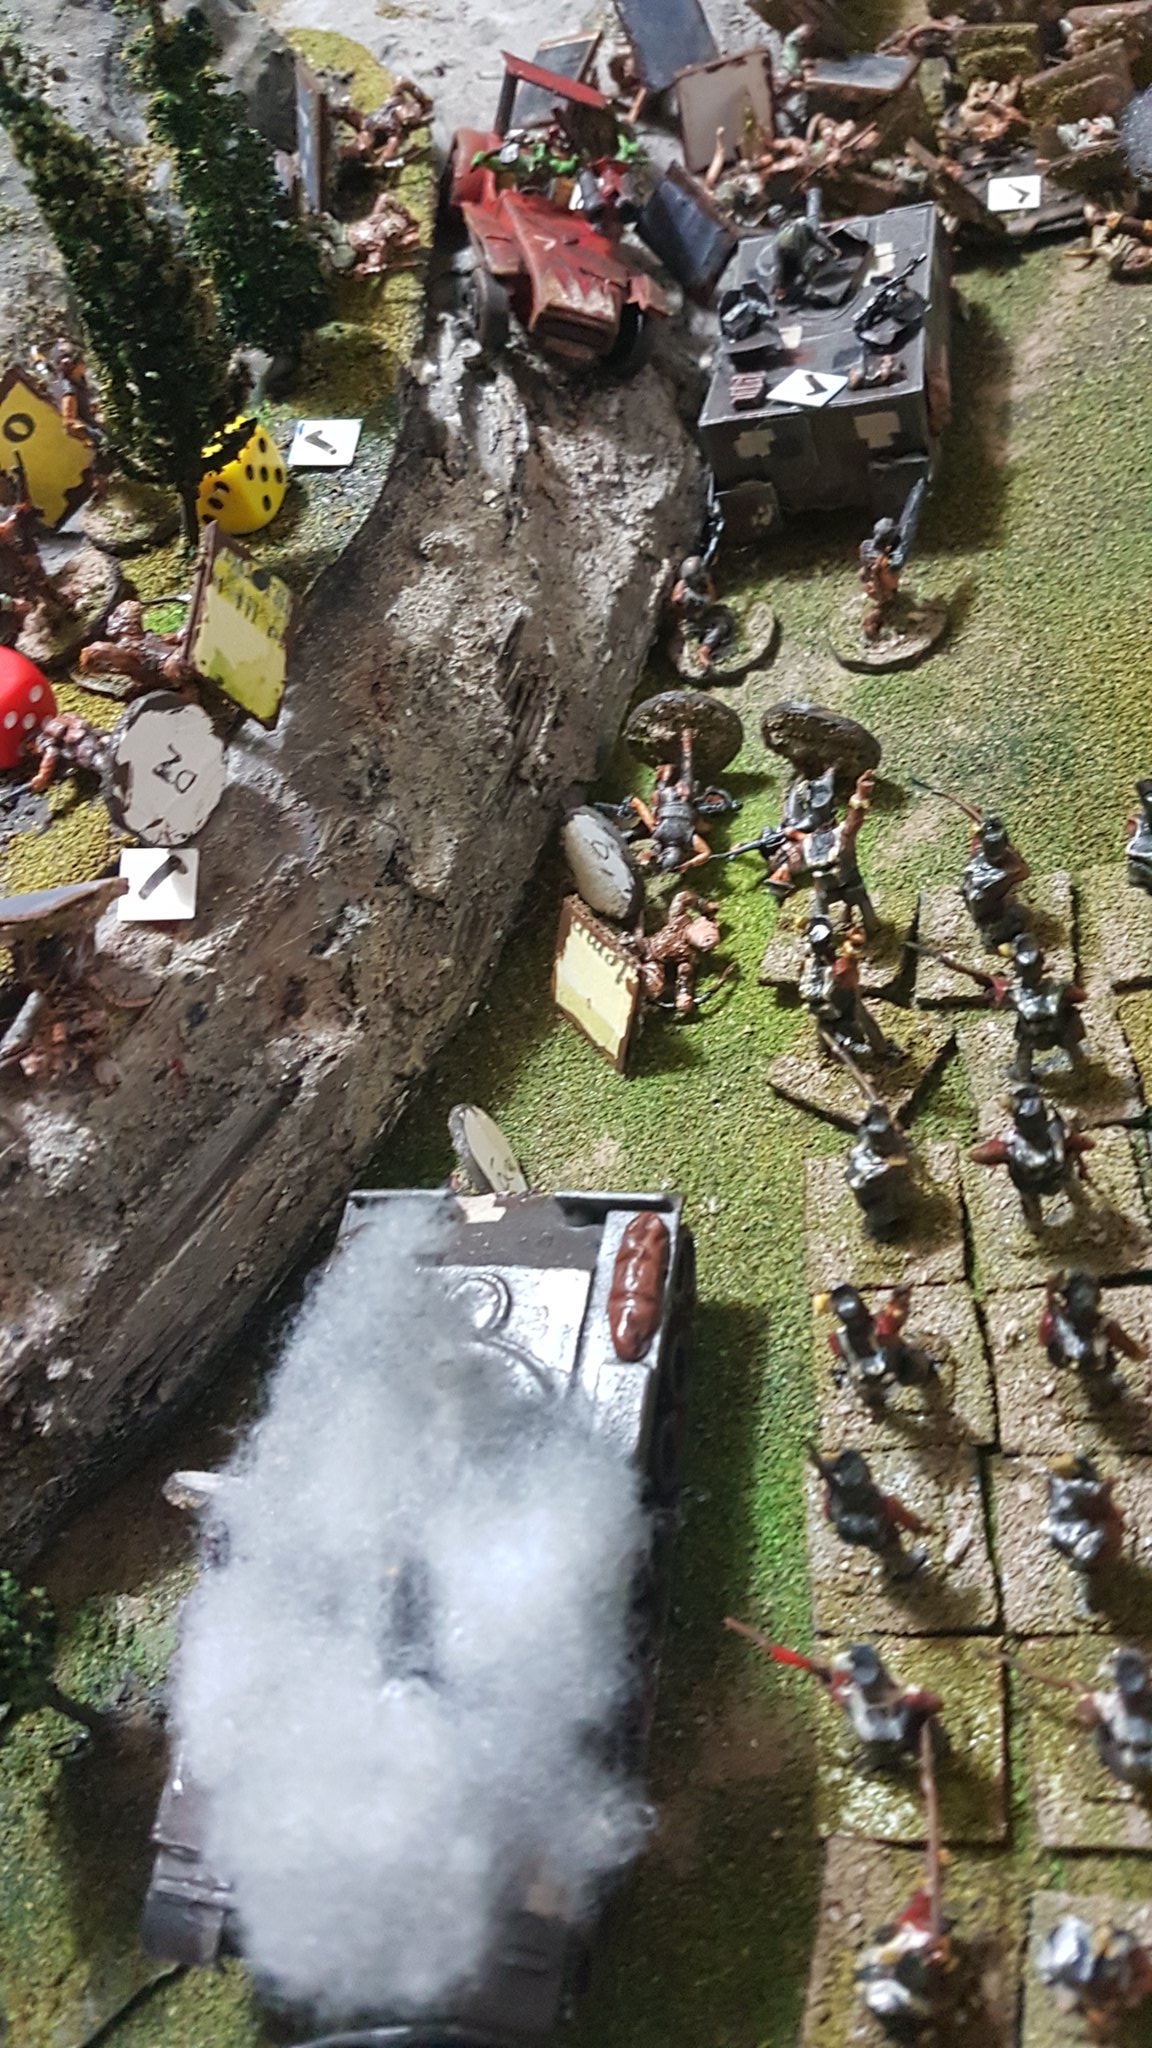
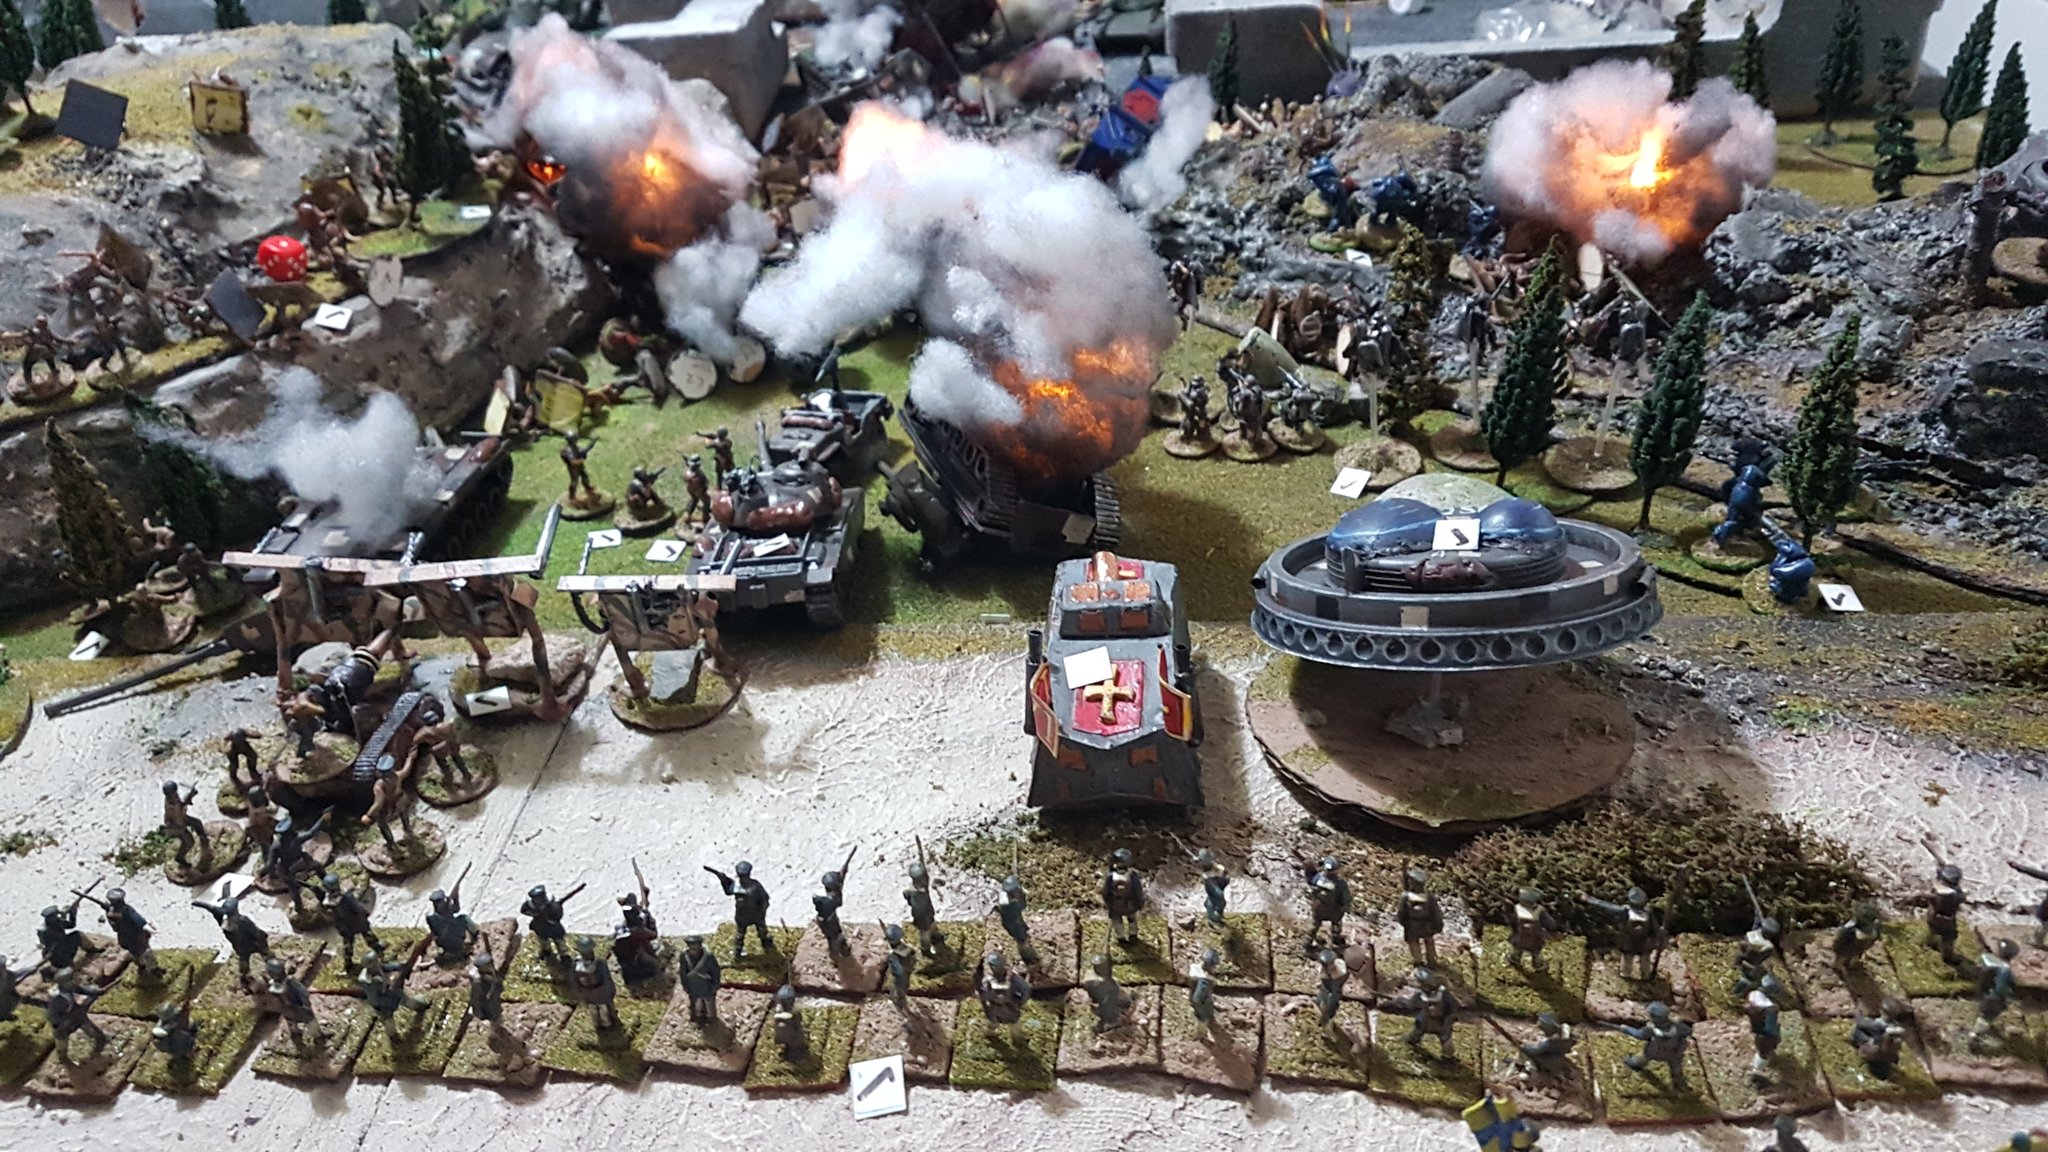
As we left matters at the end of turn 2, the central valley was awash with (now largely dead) Ratmen, but the objective – the crashed spaceship – was now in the hands of a regiment of humble Virum Nascii slaves and heading towards the Baddies’ table edge, and to make things worse the sorcerous cabal of the People’s Front Of Hazzard 237th Freedom Brigade had managed to conjure up a wall of psychic fire across the main approach route!
On the Goodies’ side, the PSLA (or Imperial Guard, depending on your viewpoint) finally showed up, adding a decent chunk of firepower, but as things stood, firepower was not the issue, we had plenty of that – getting it where it was needed was the problem!
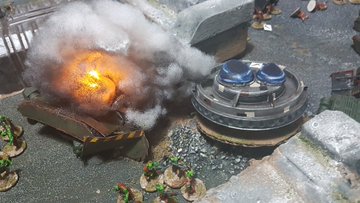
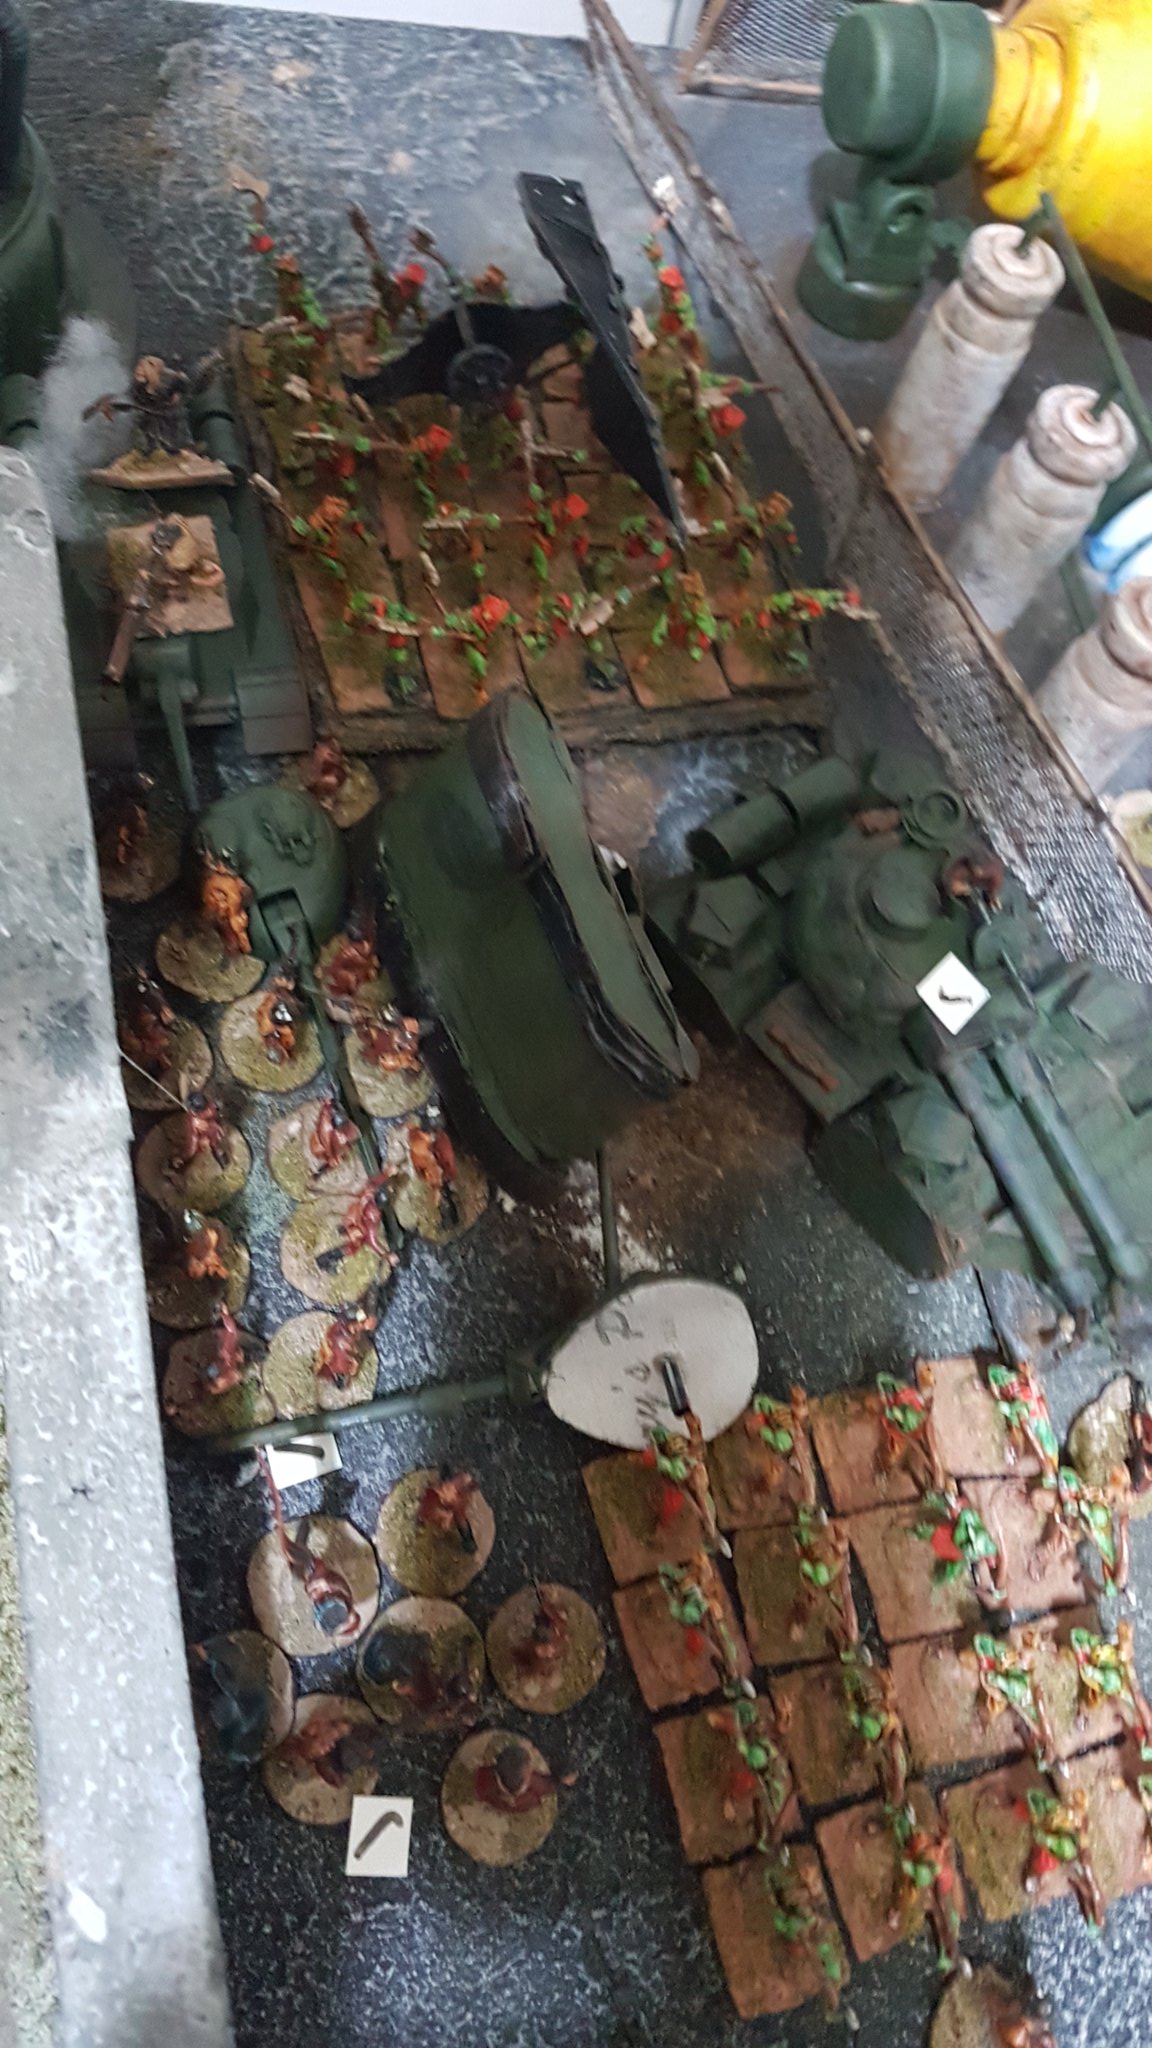
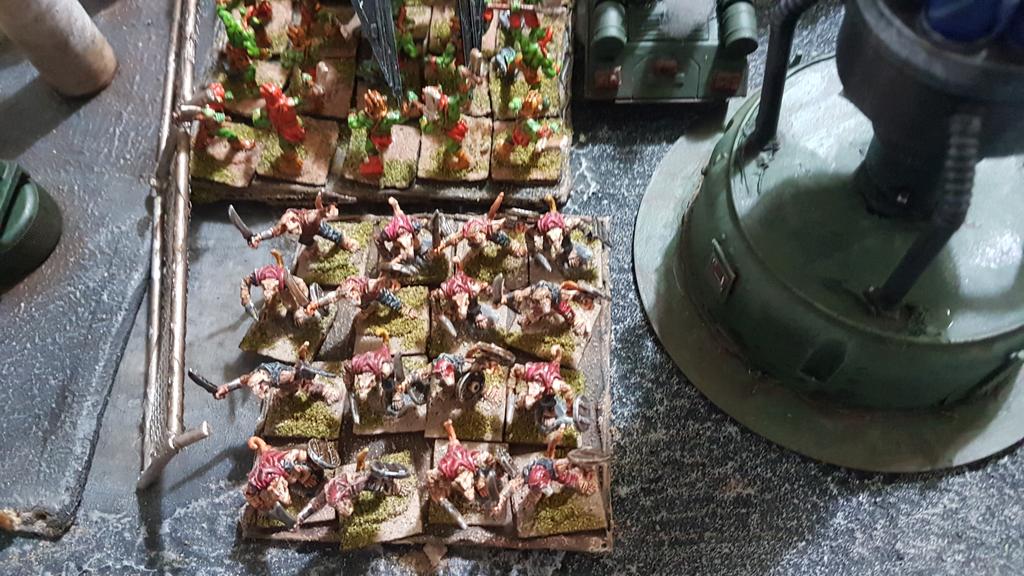
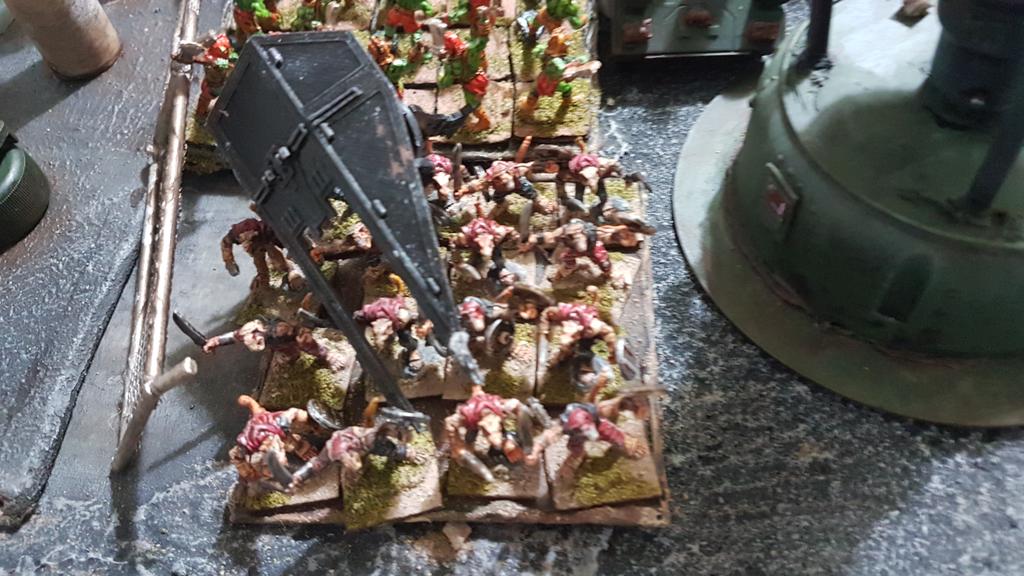
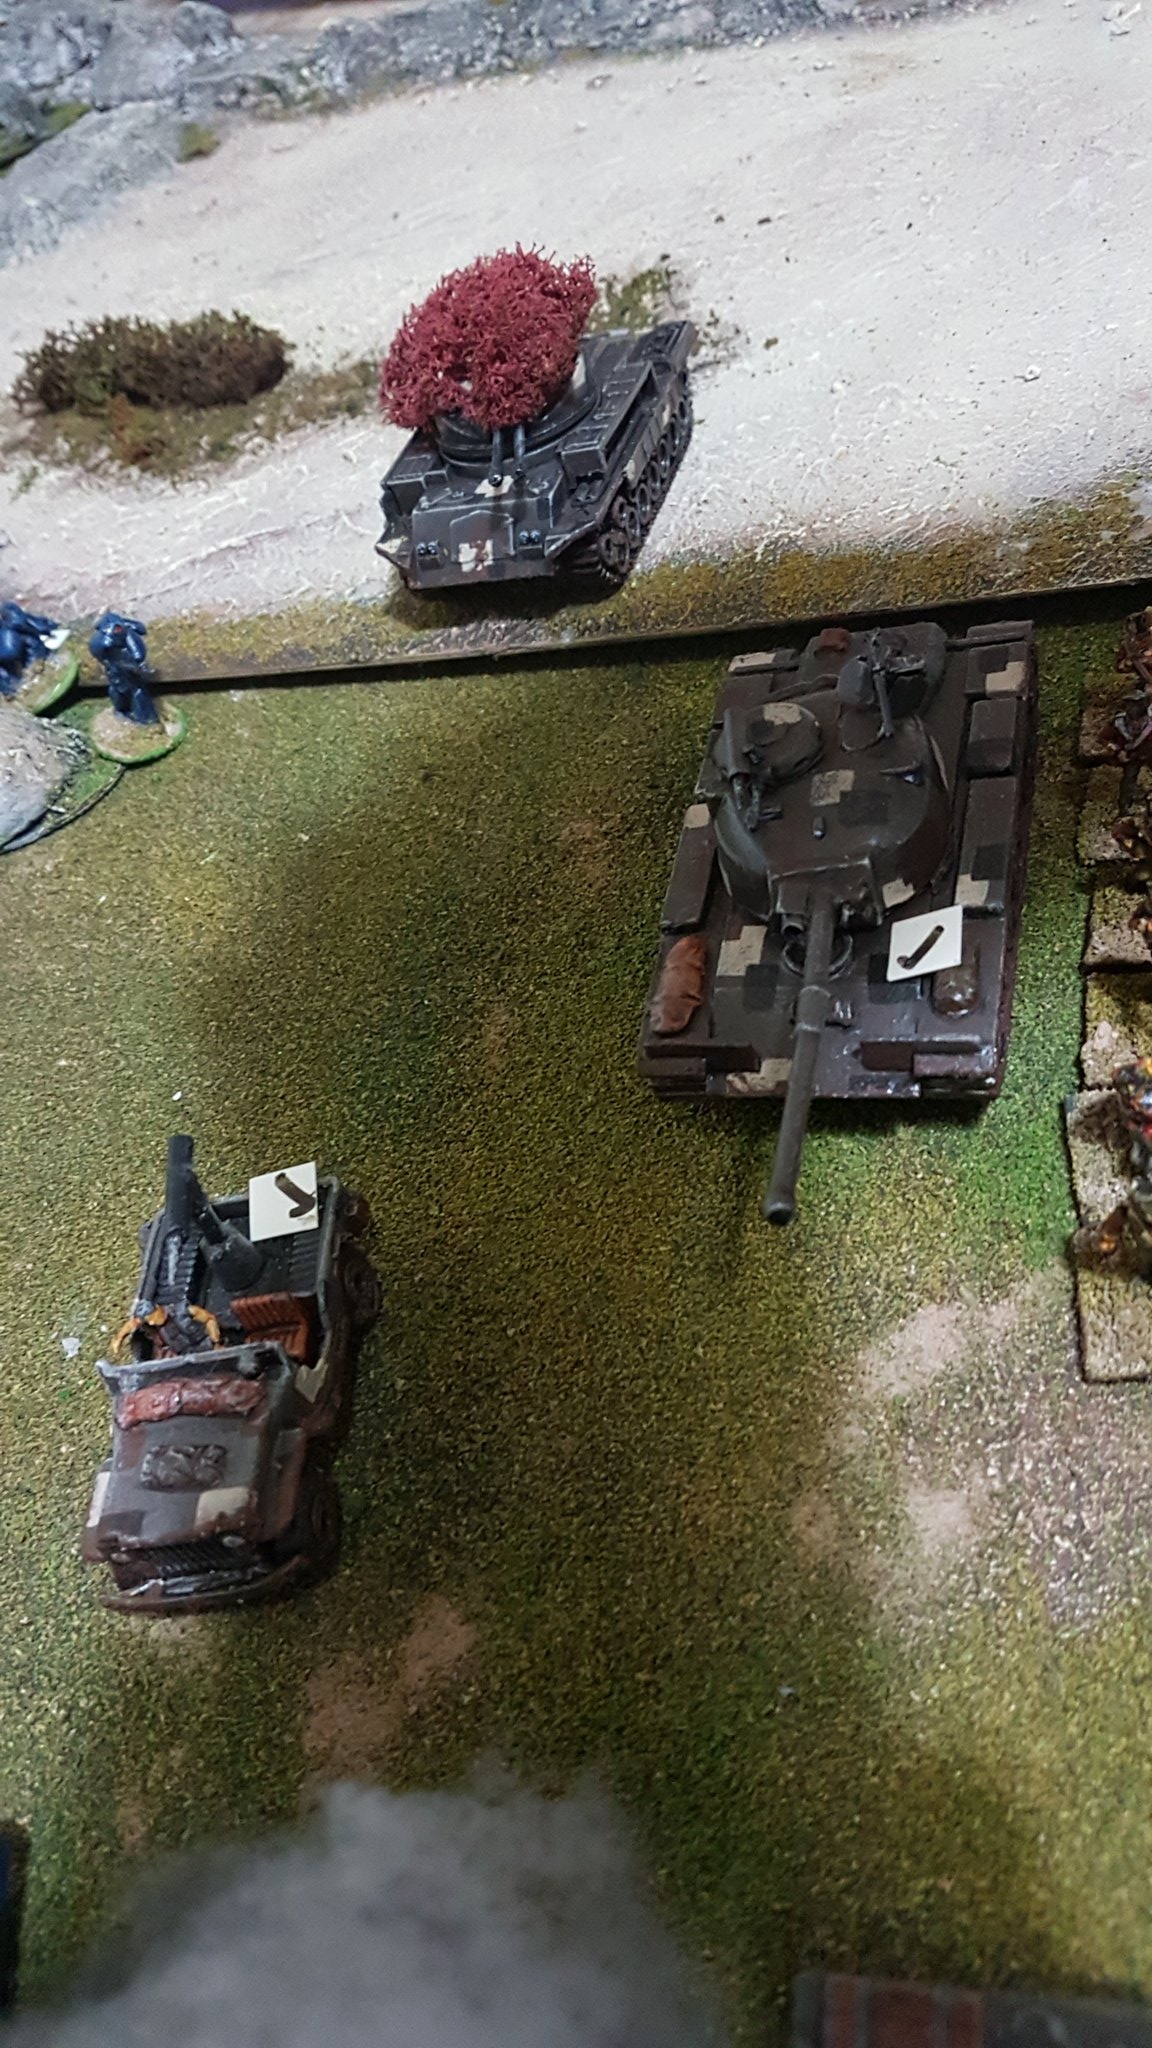
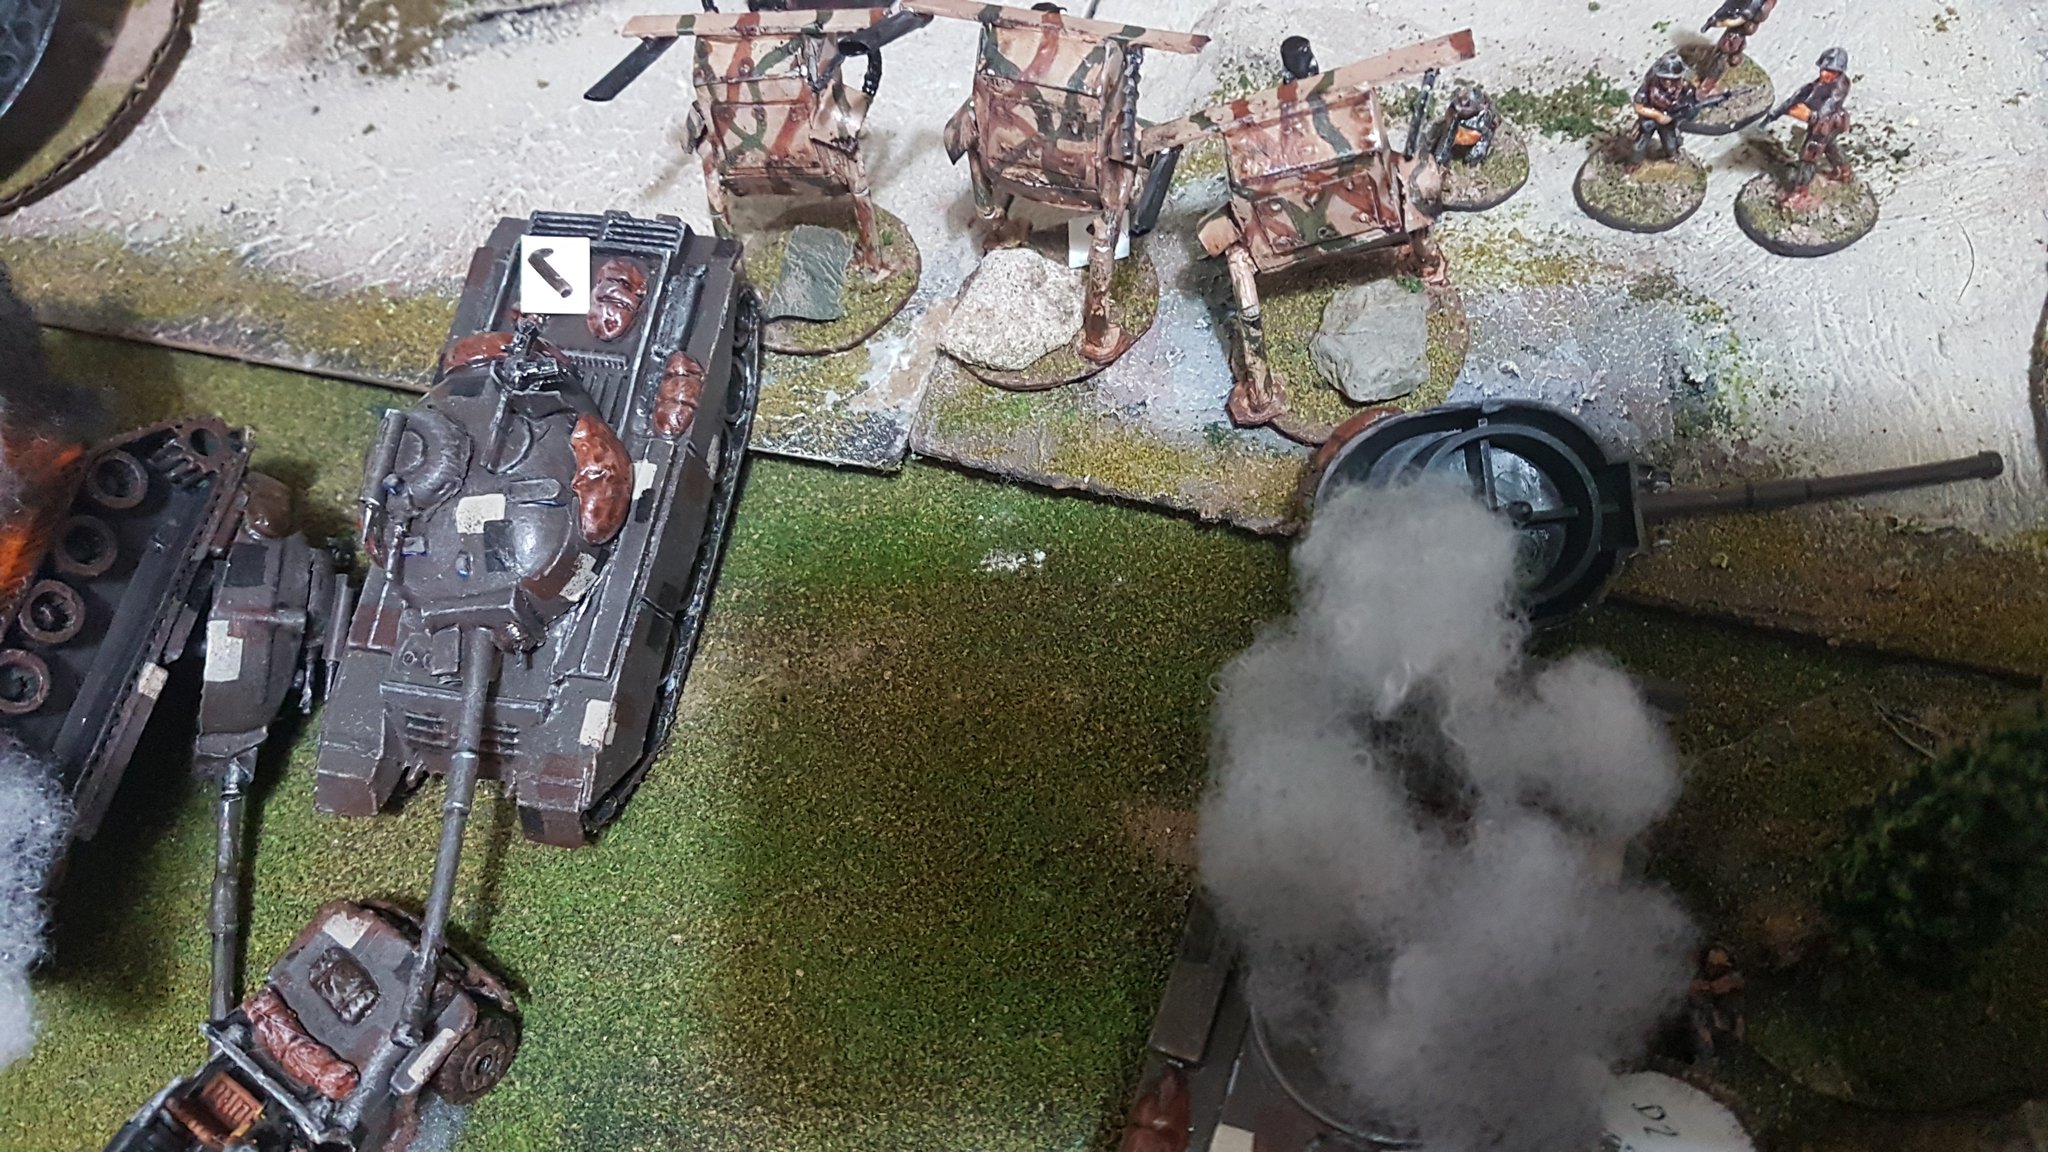
Over on the Baddies’ table edge, Dan cackled malevolently as the Holy Soviet Army’s BIG GUNS appeared, in the form of Stompy Uncle Joe and the IS-6 Rampager (which would prove itself almost offensively useless, but there we go) and another regiment of Orcs arrived, but two more still languished on the sidelines – clearly too thick to find the batlefield.. and off we went for the next turn!
Turn 3 –
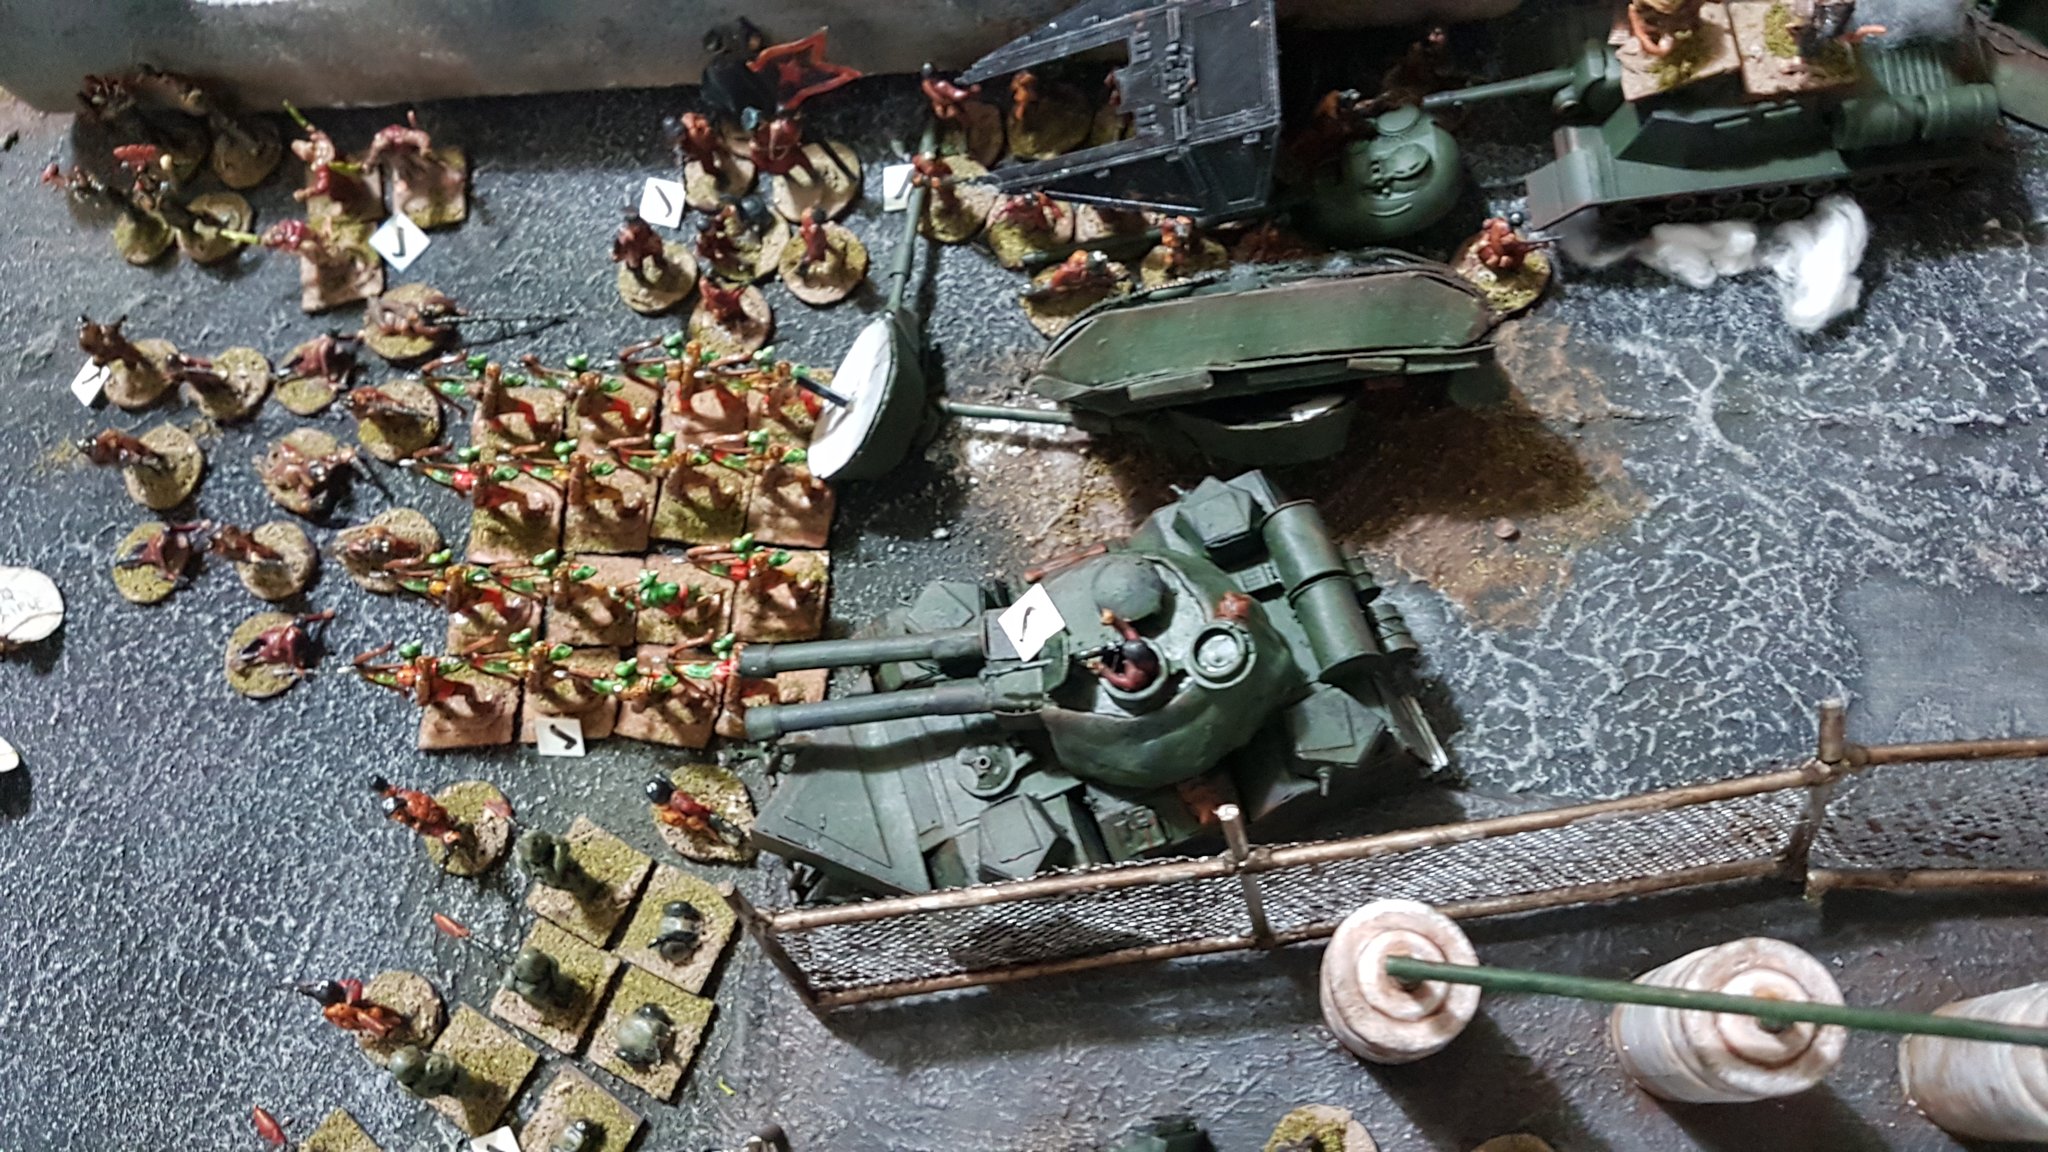
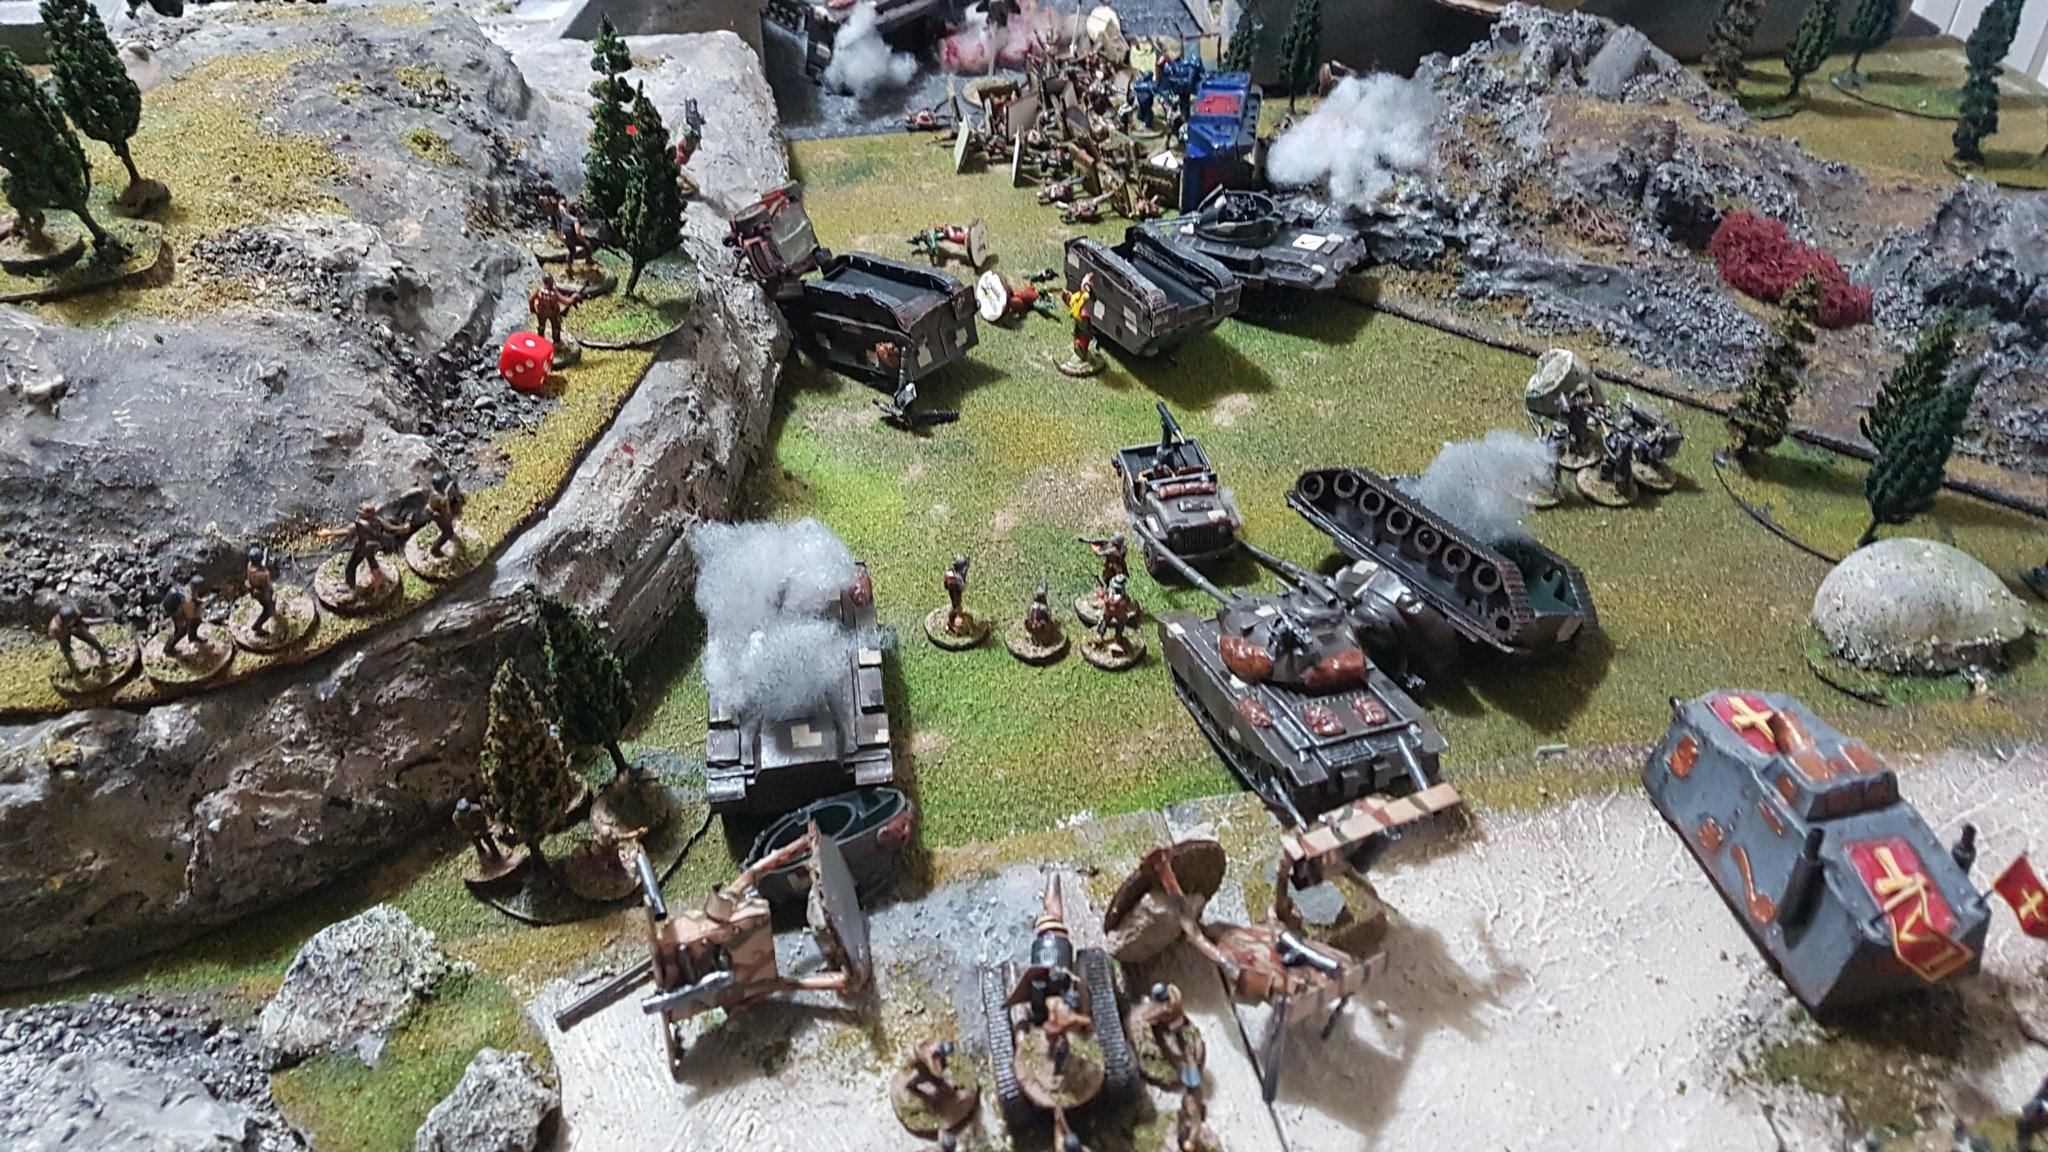
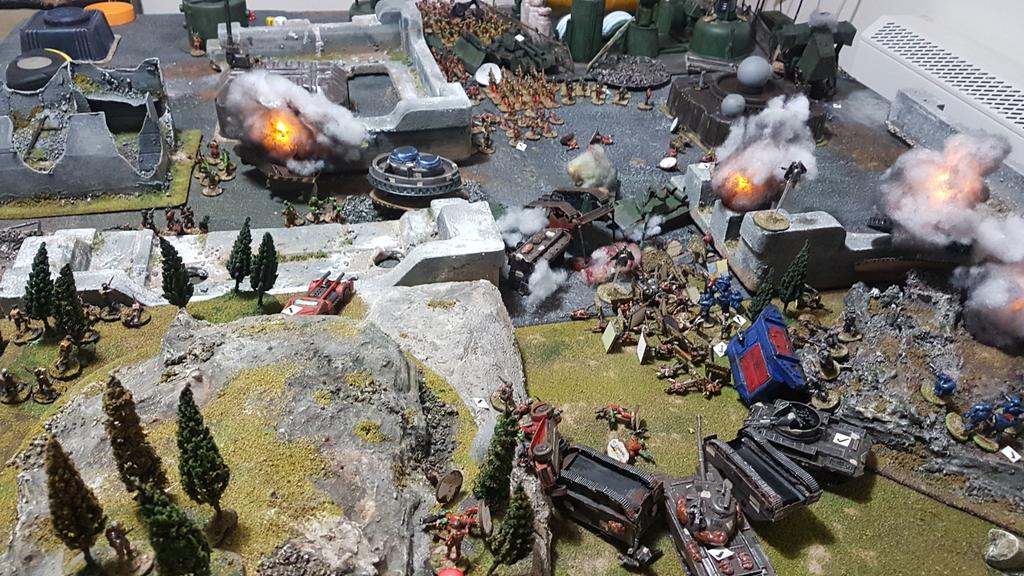
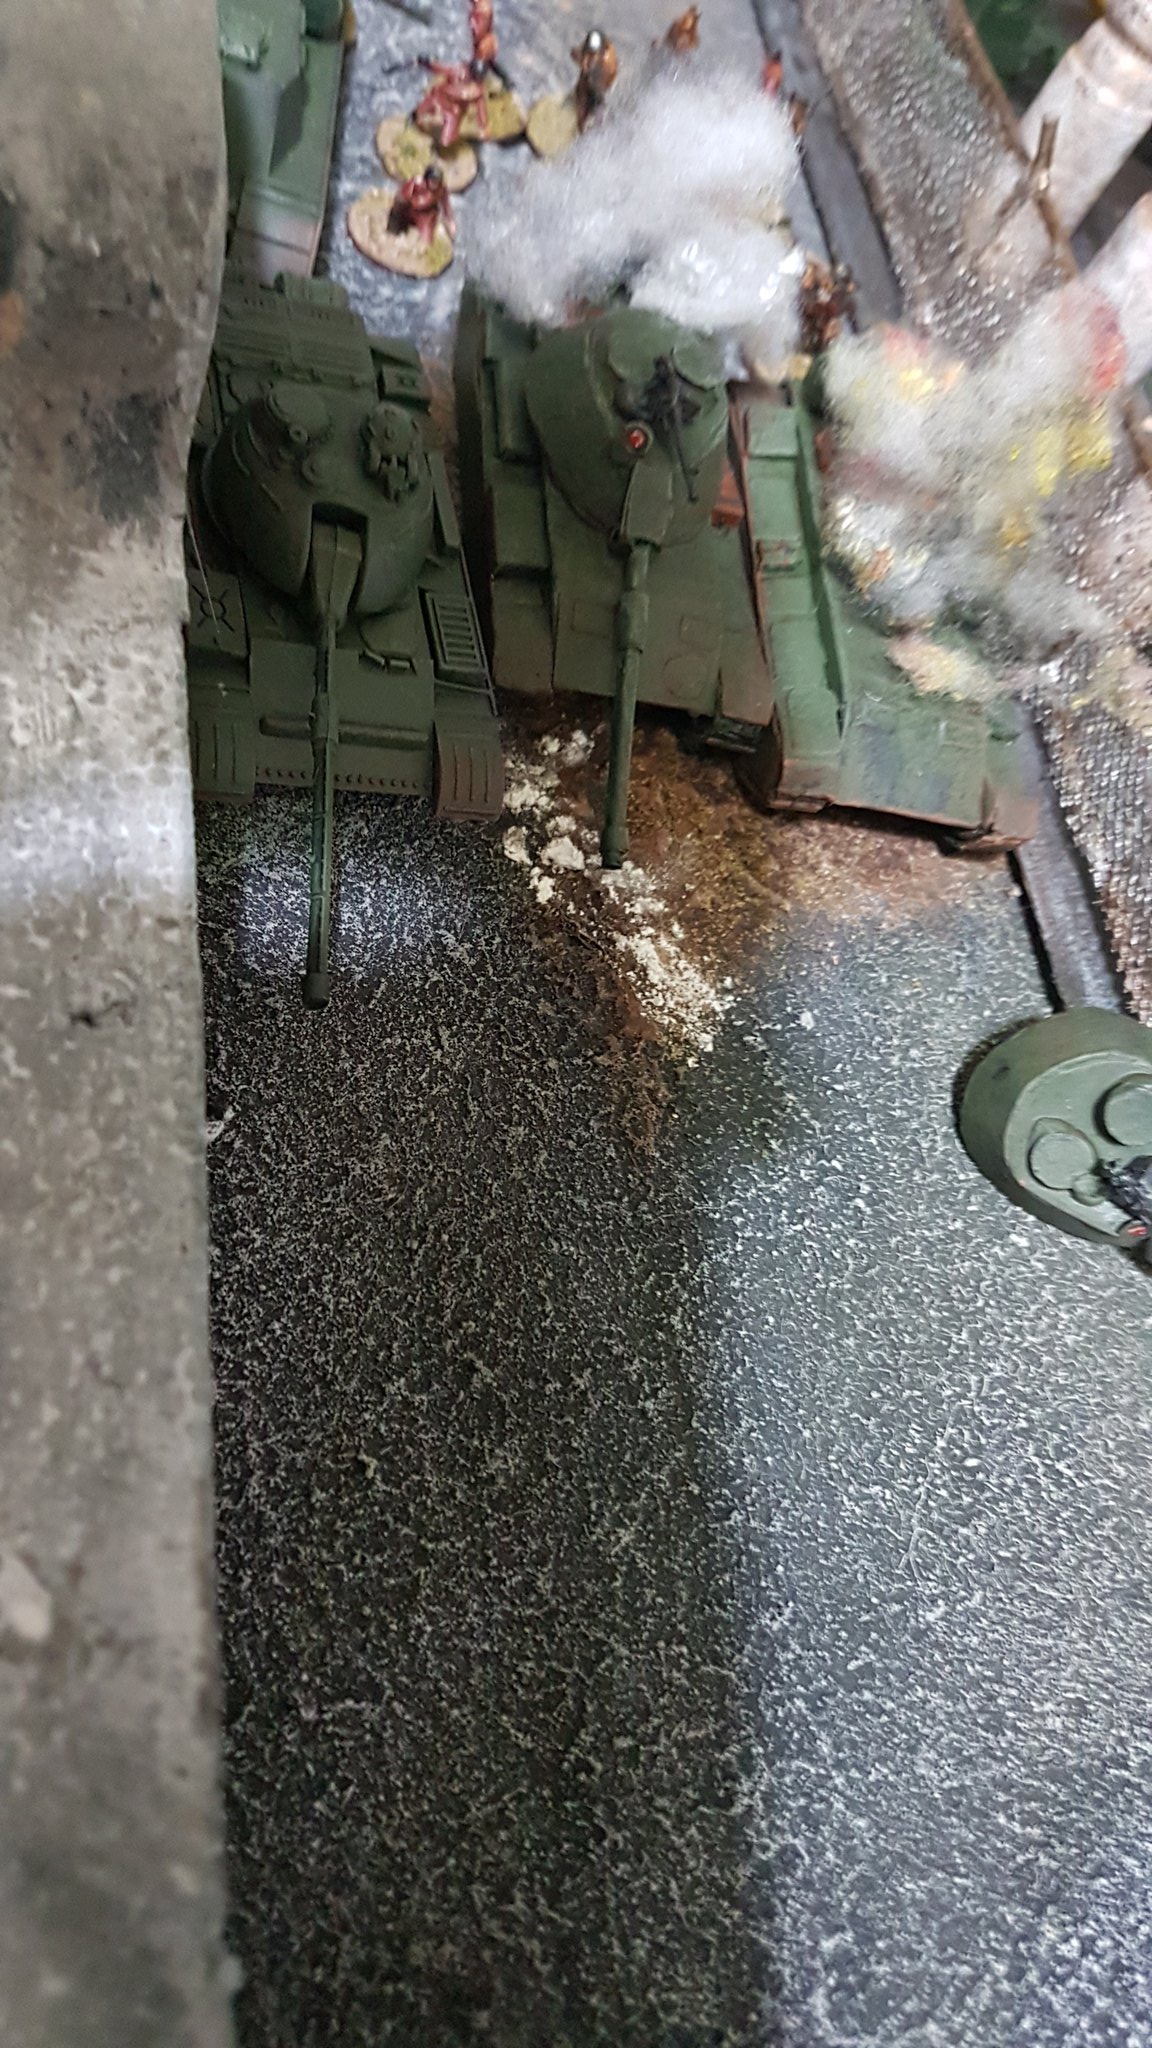
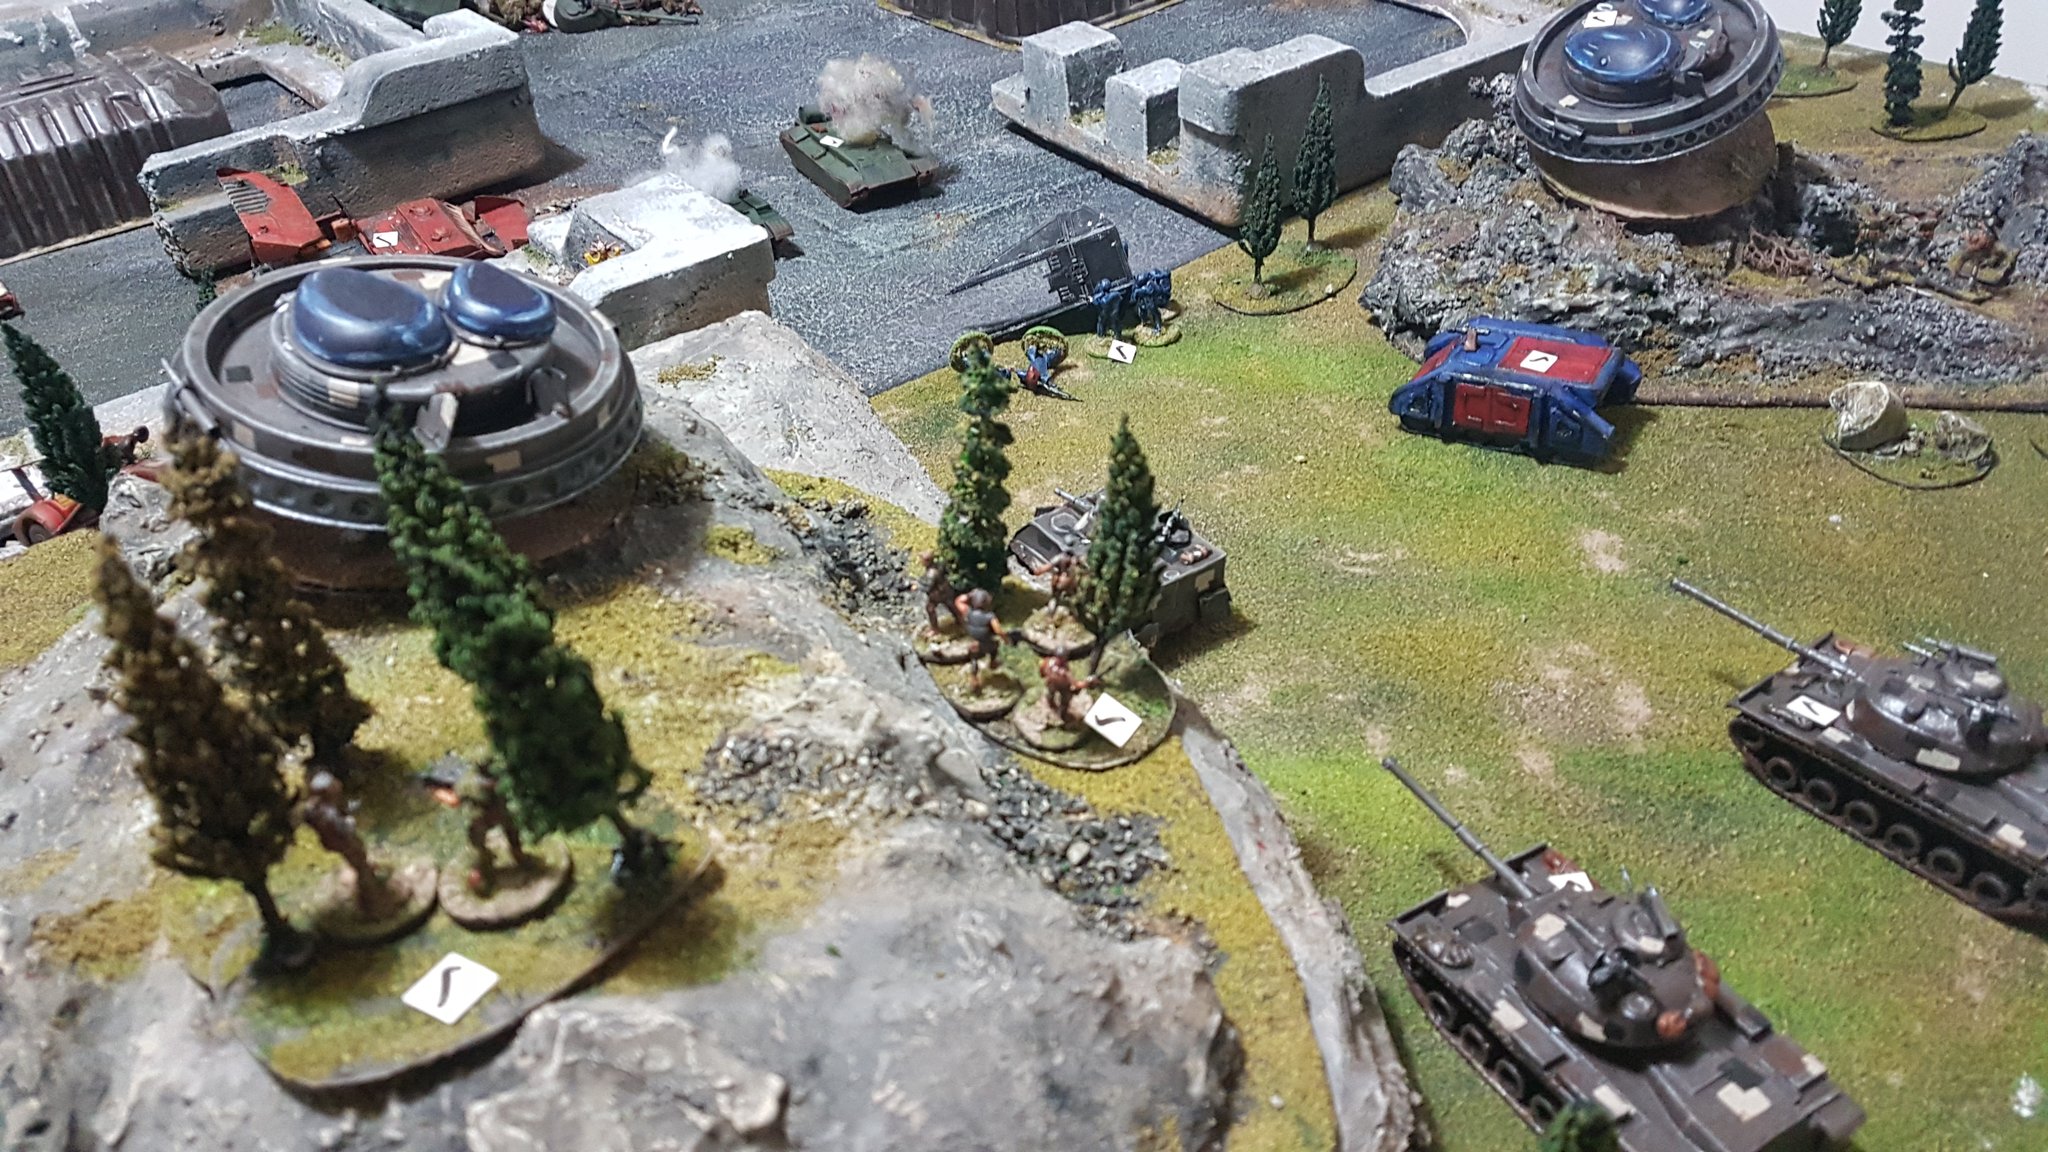
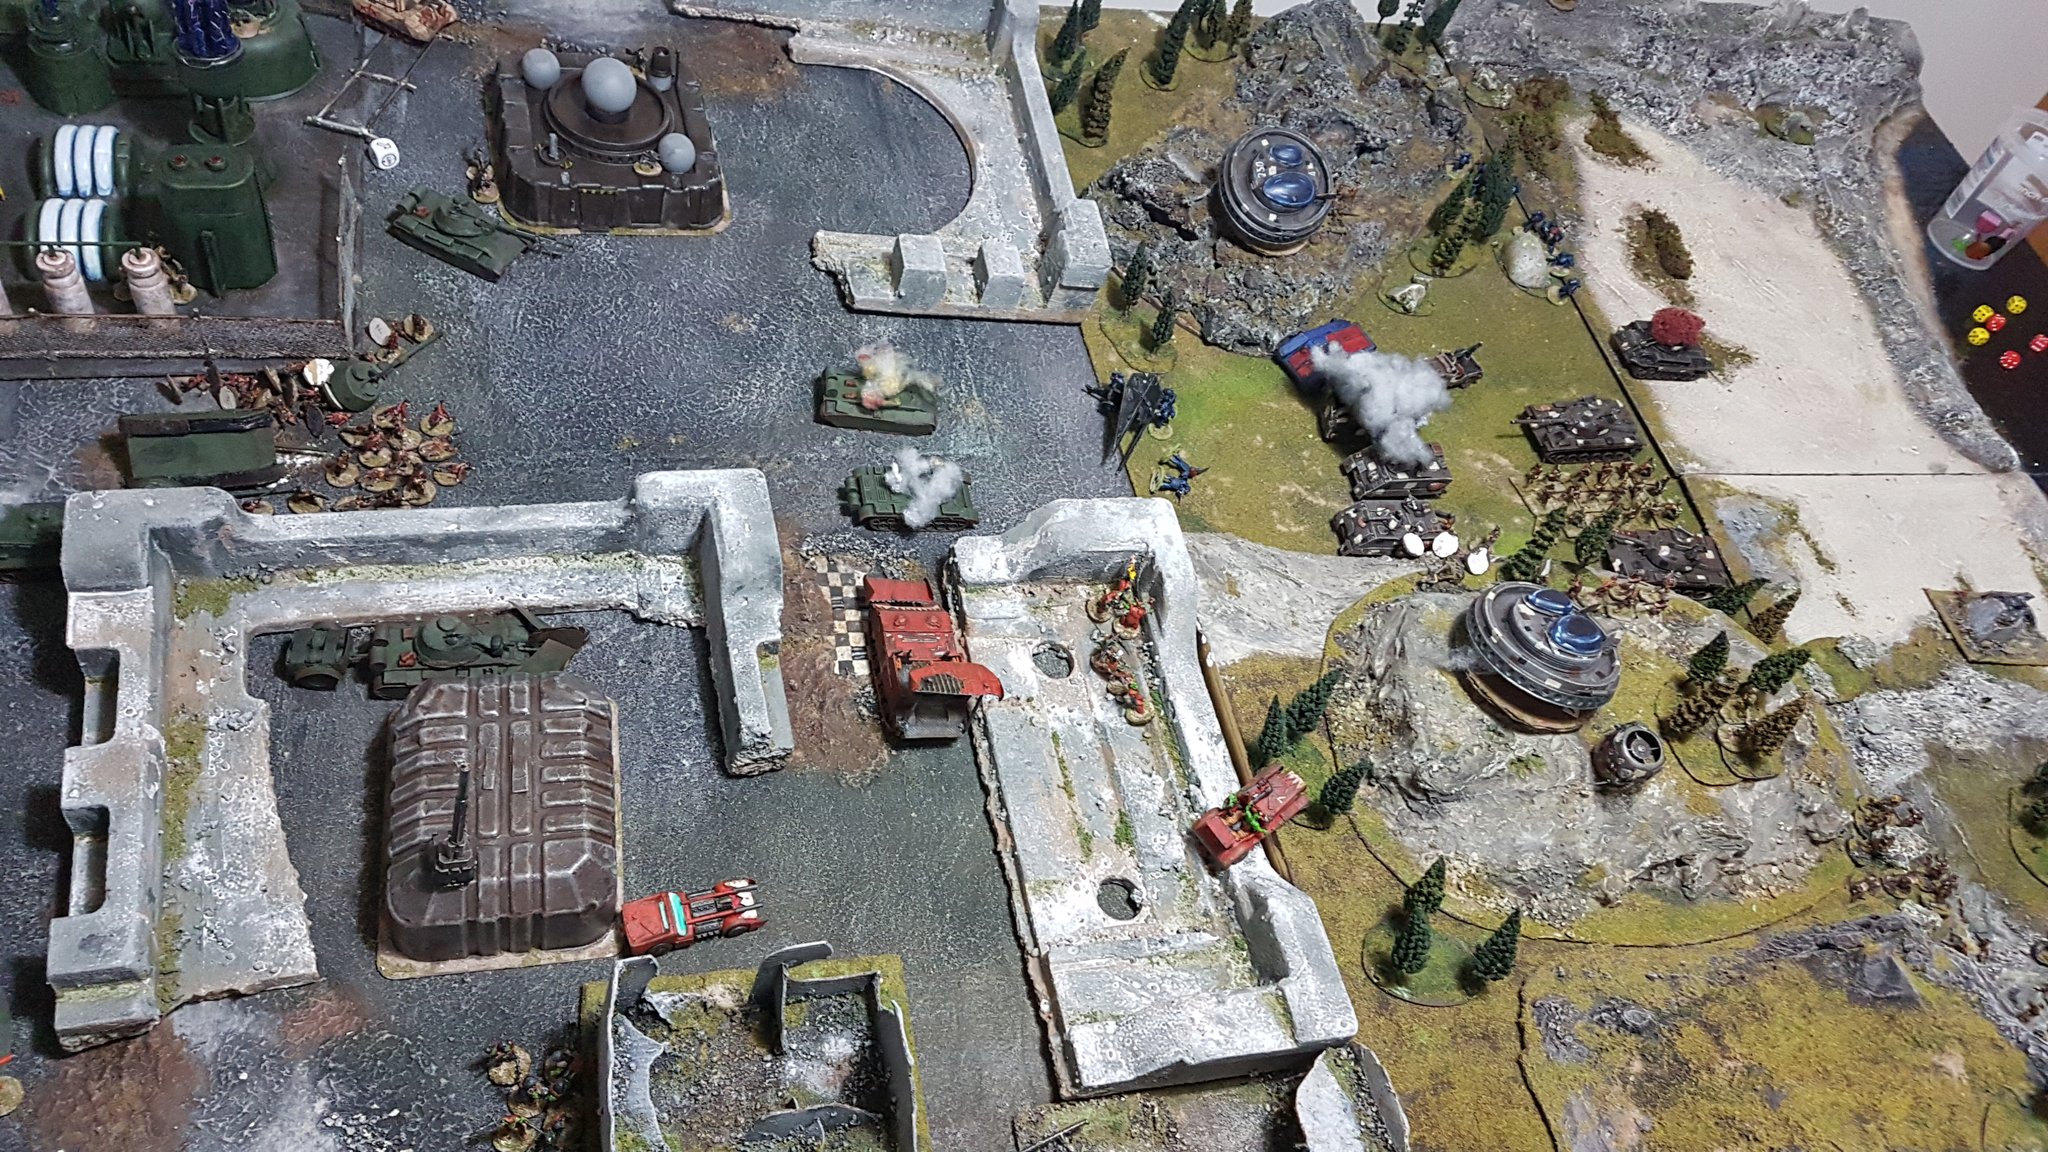
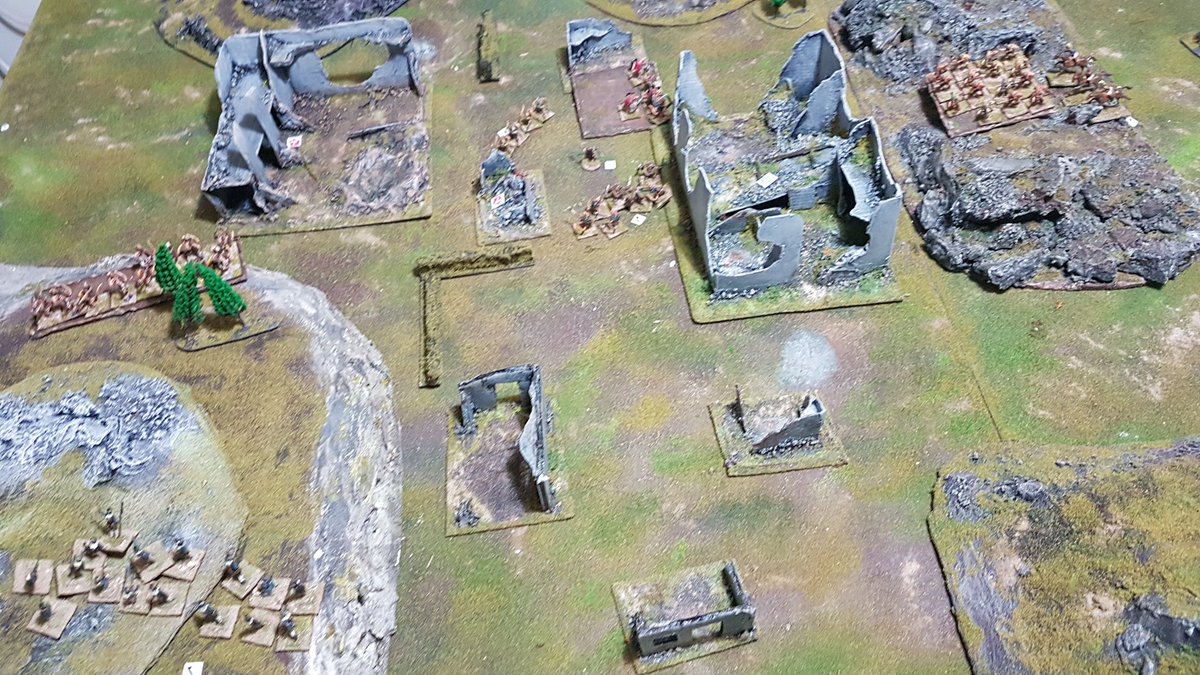
Baddies’ reinforcements – Stompy Uncle Joe turns up in the power station, the Rampager in the centre with another block of Orcs, and pay attention to the regiment of Virum Nascii Warriors top left- they’ll be important later on….Goodies’ reinforcements hit the beach! The Guard arrive, along with the (literal) cavalry from the Ancien Regime, as well as the rest of the League Of European Nations troops
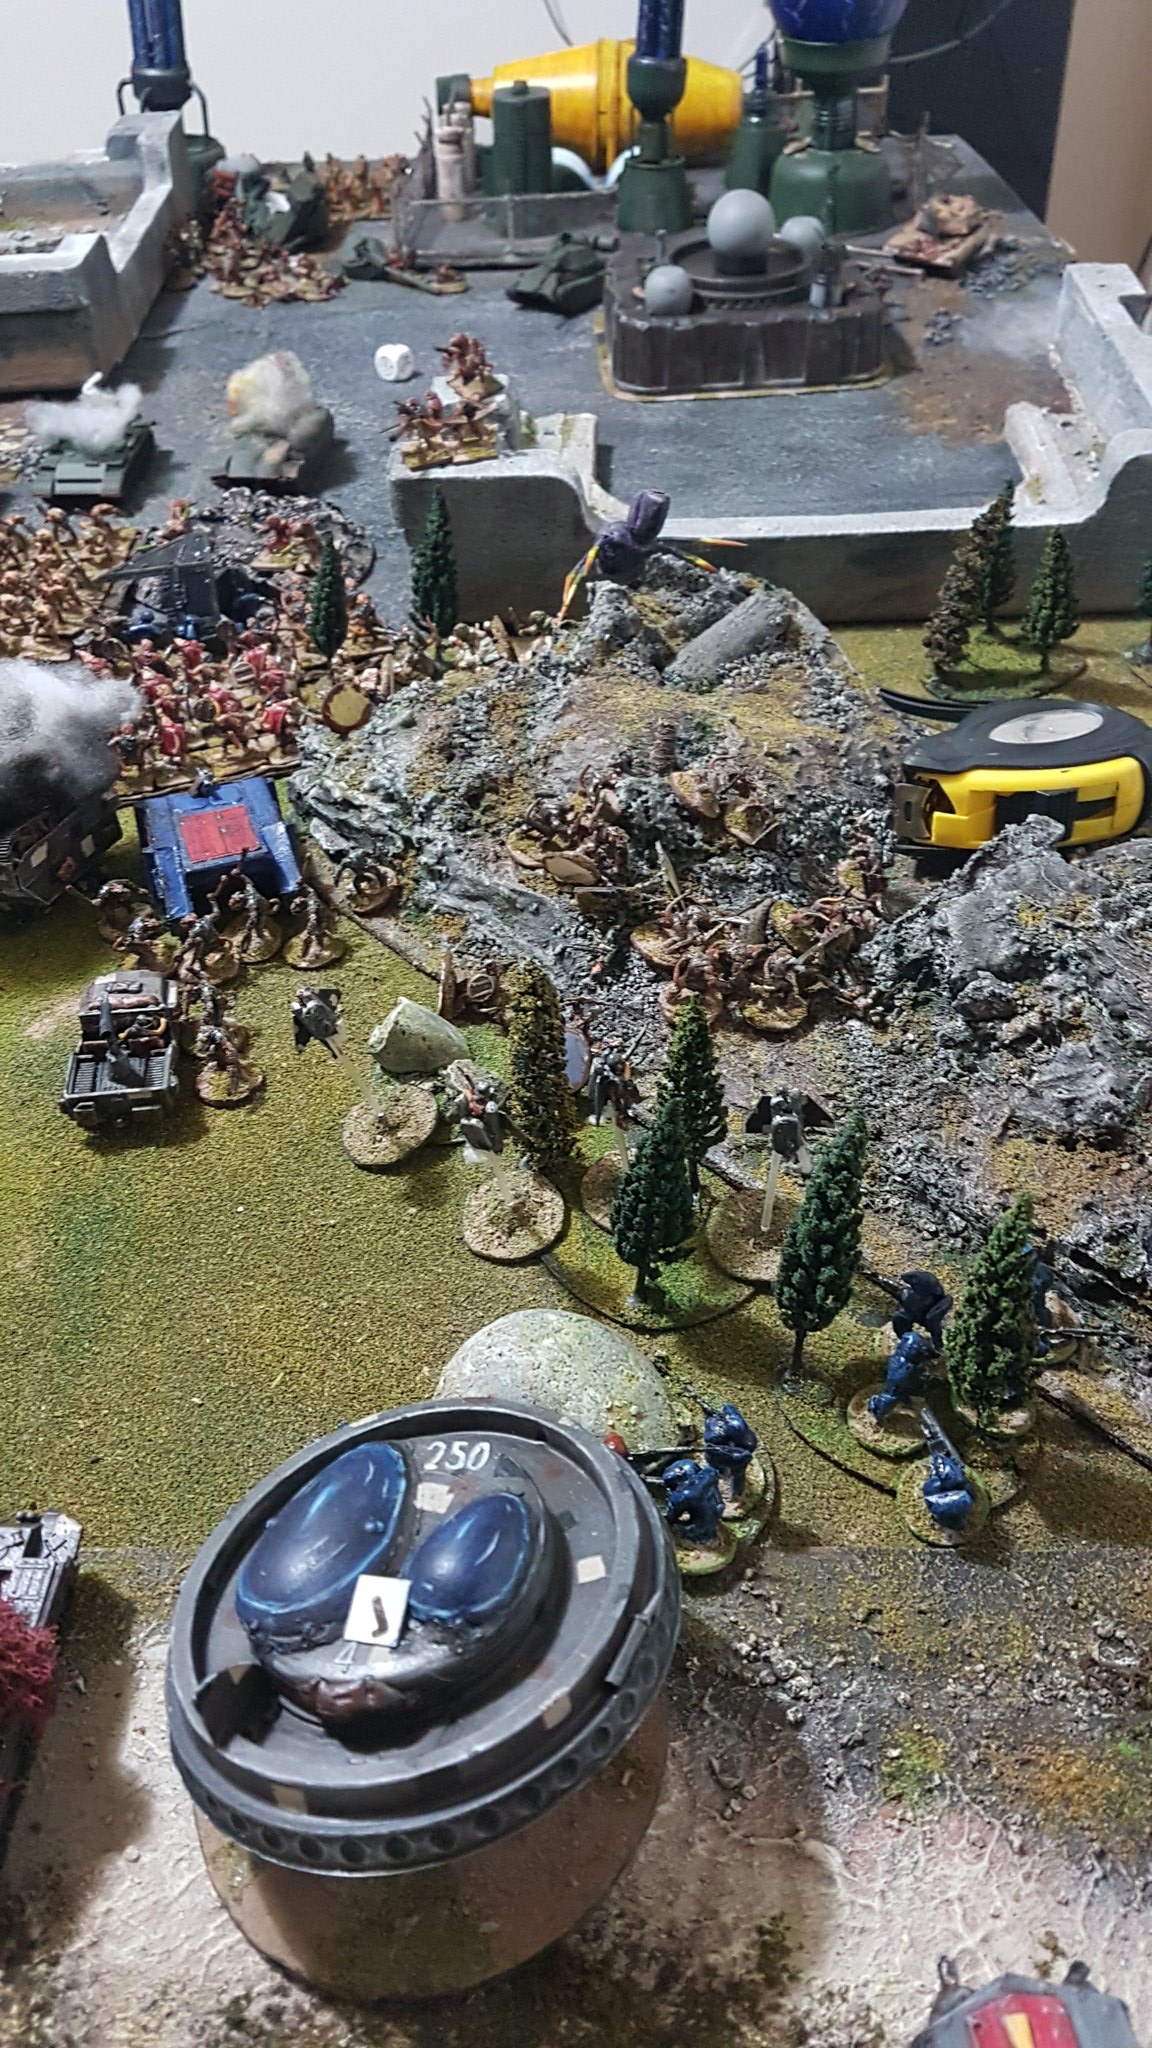
The Baddies secure the initiative and opt to move first – Virum Nascii Vrilseers conjure up a hole in reality for the Slaves carrying the spaceship to jump into, but it goes awry, scattering toward the power plant
Atlantic Alliance Silverbugs race forwards, gunning down Virum Nascii slaves and suppressing them
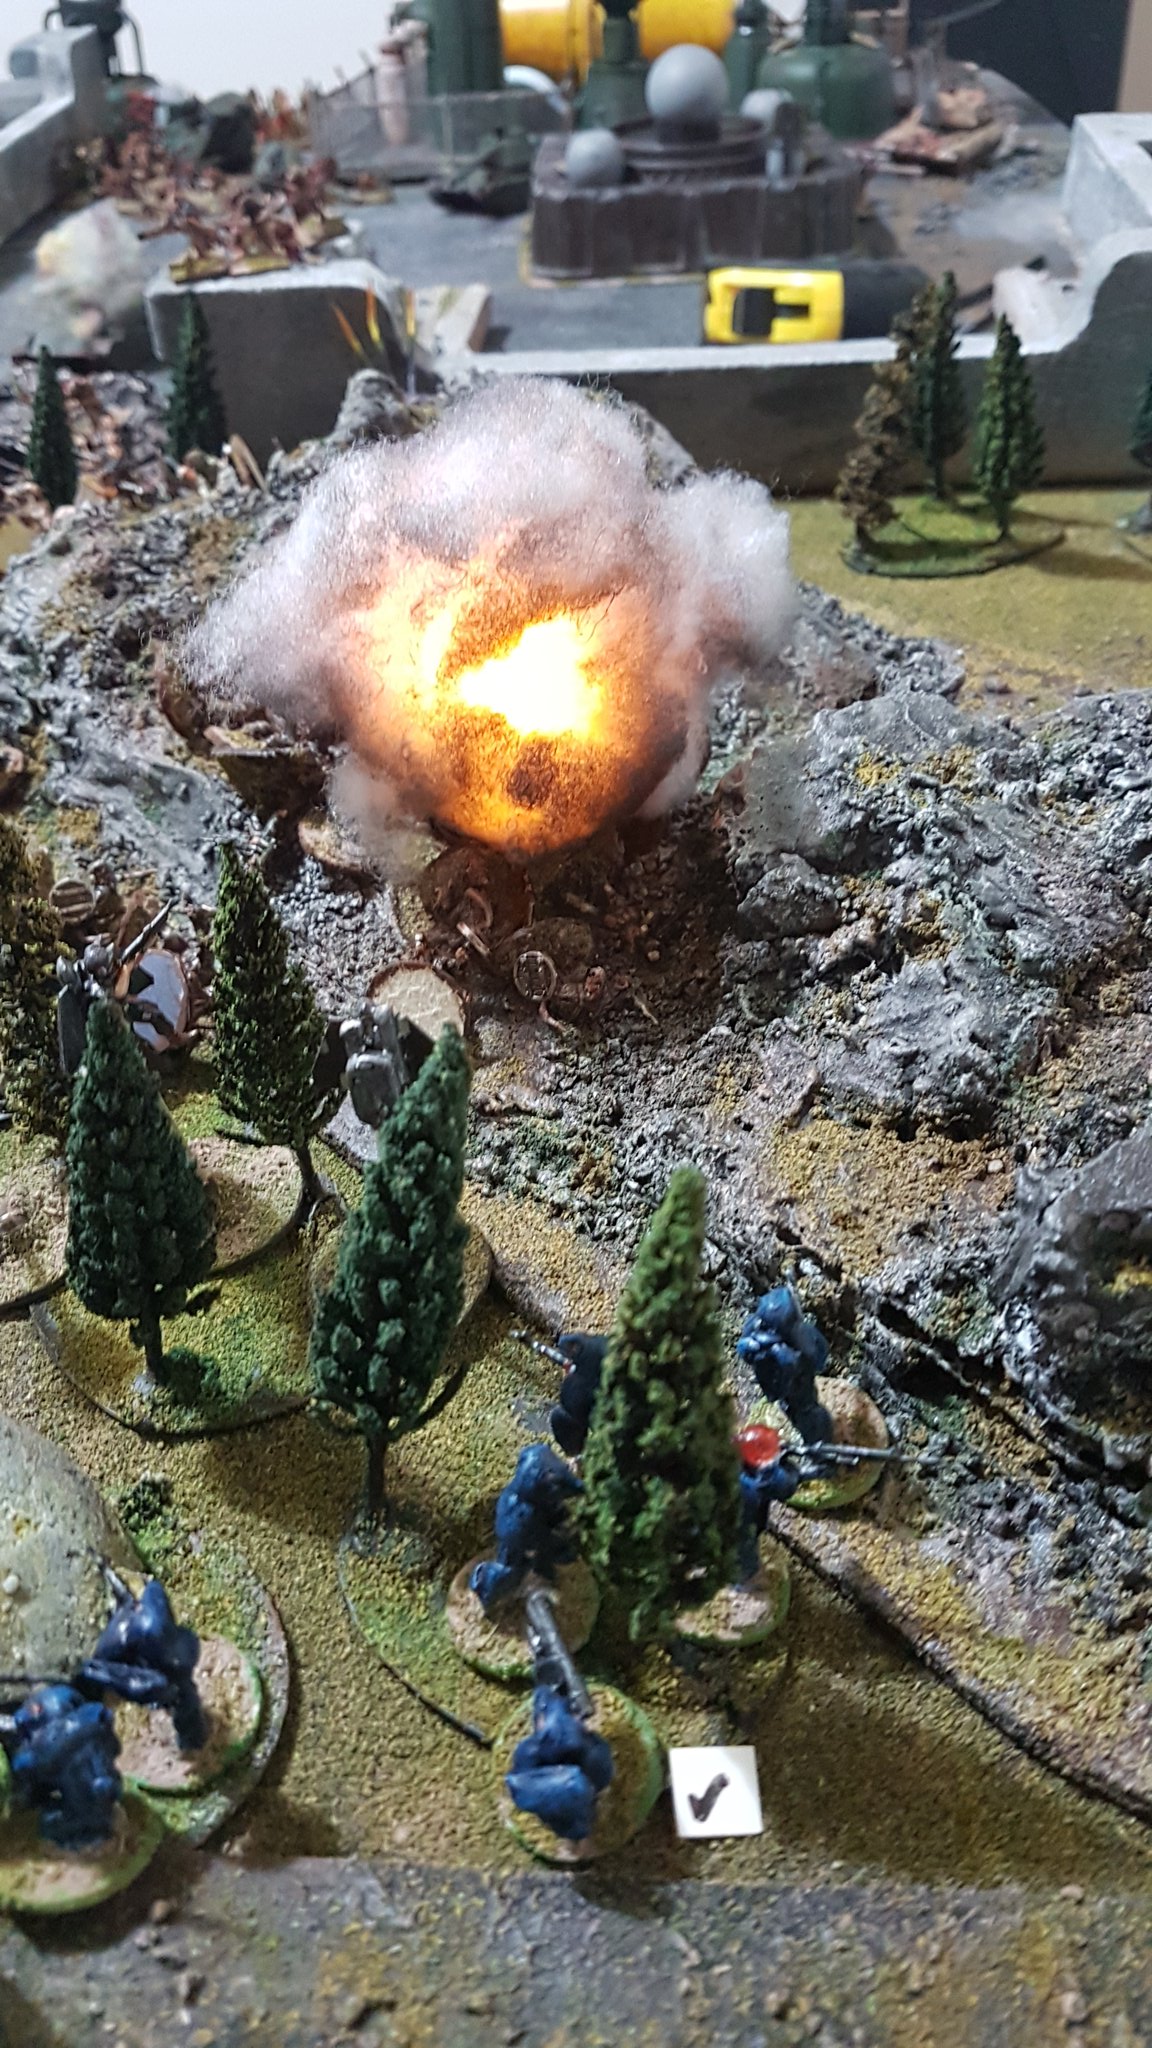
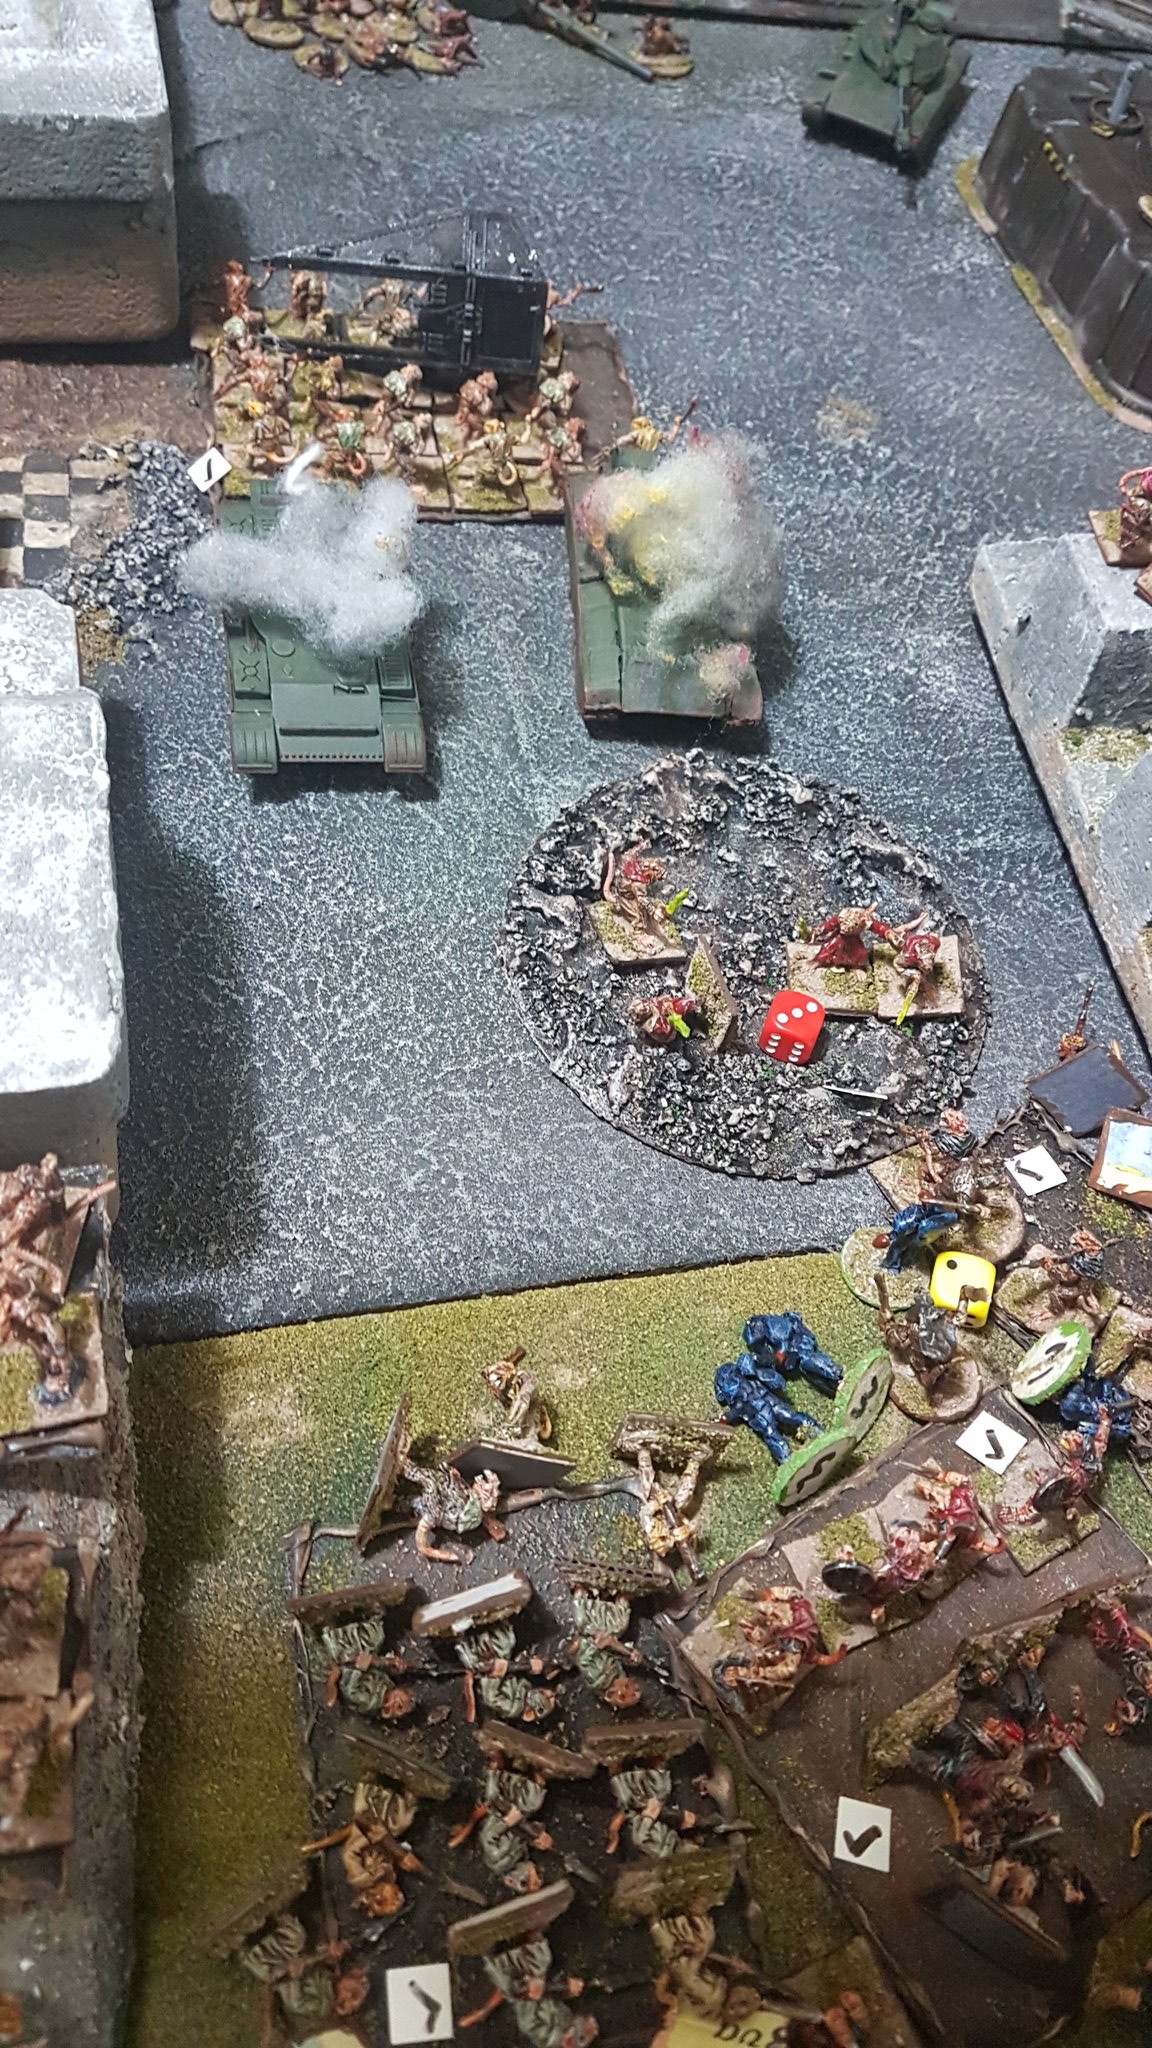
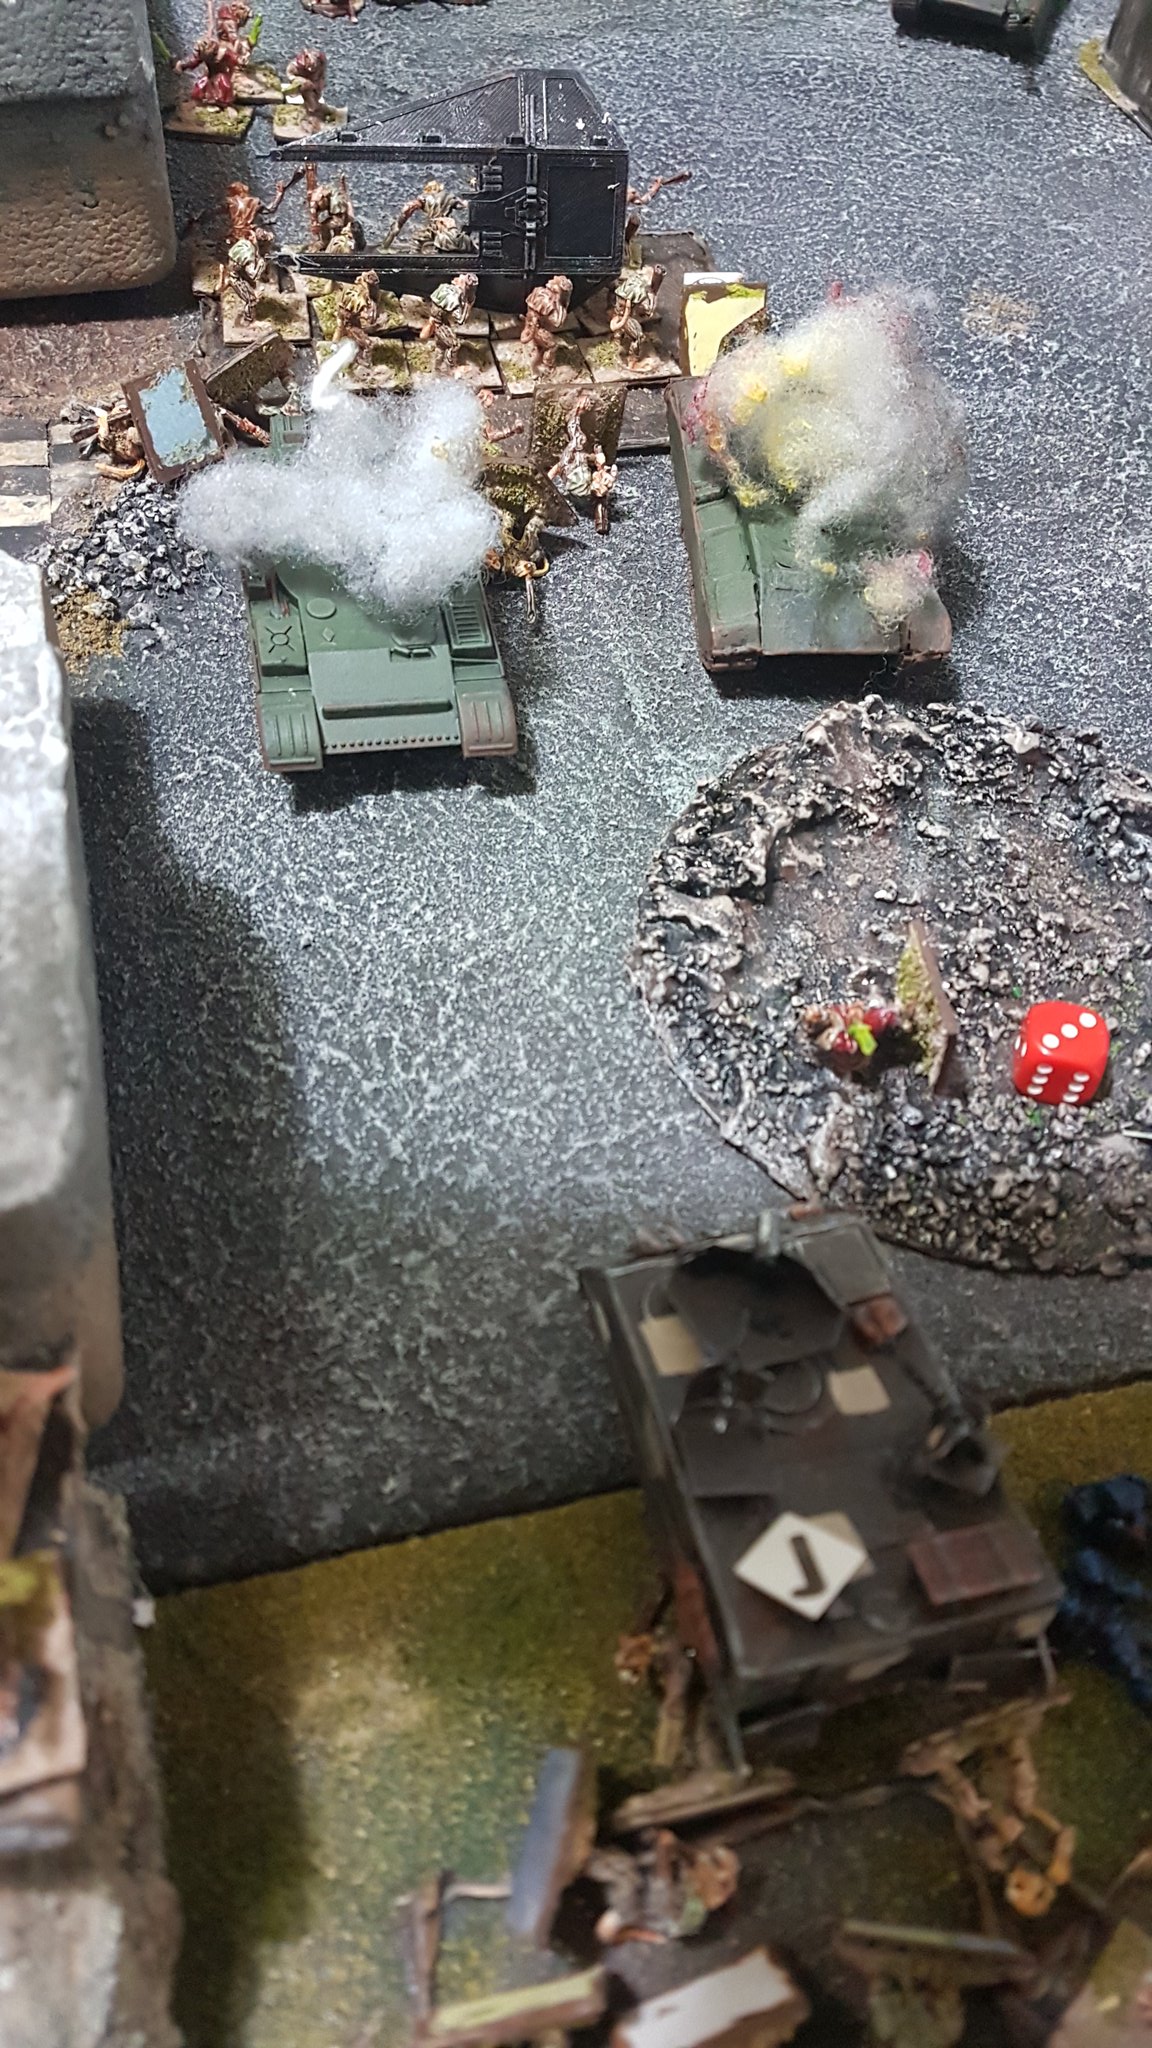
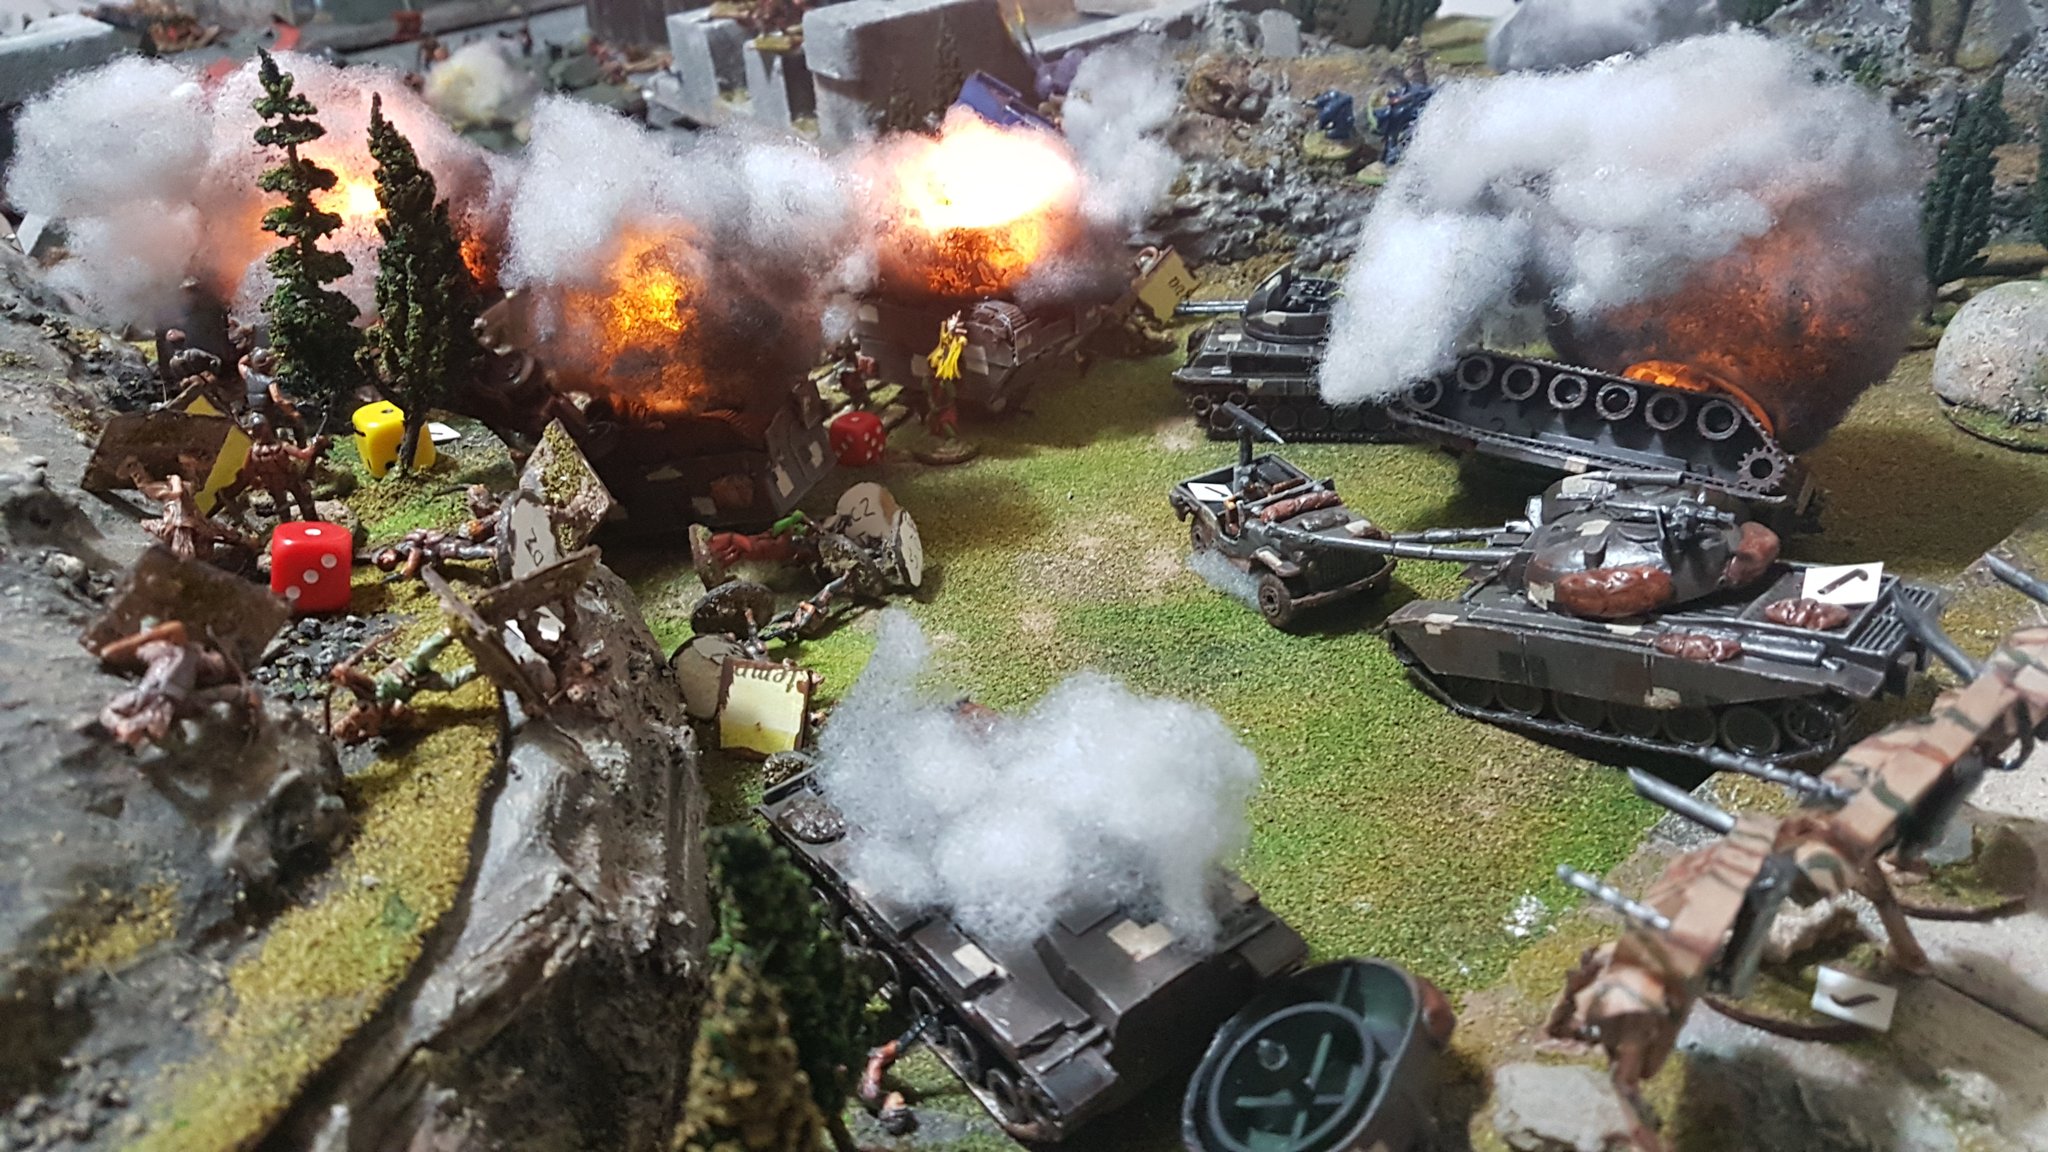
Just as her crew was readying to immolate the advancing Sky Marines, Inferna is riddled with Stinger TOW ADATS and Roswellium-tipped cannon rounds, exploding spectacularly!
Ancien Regime grenadiers finish off the remaining Ratmen in the valley, being reduced to just three men in the process!
Although the Virum Nascii slave regiment is now suppressed and unable to move, No. 2 Rifle squad picks up the spaceship and begins to move back towards the Baddies’ table edge!
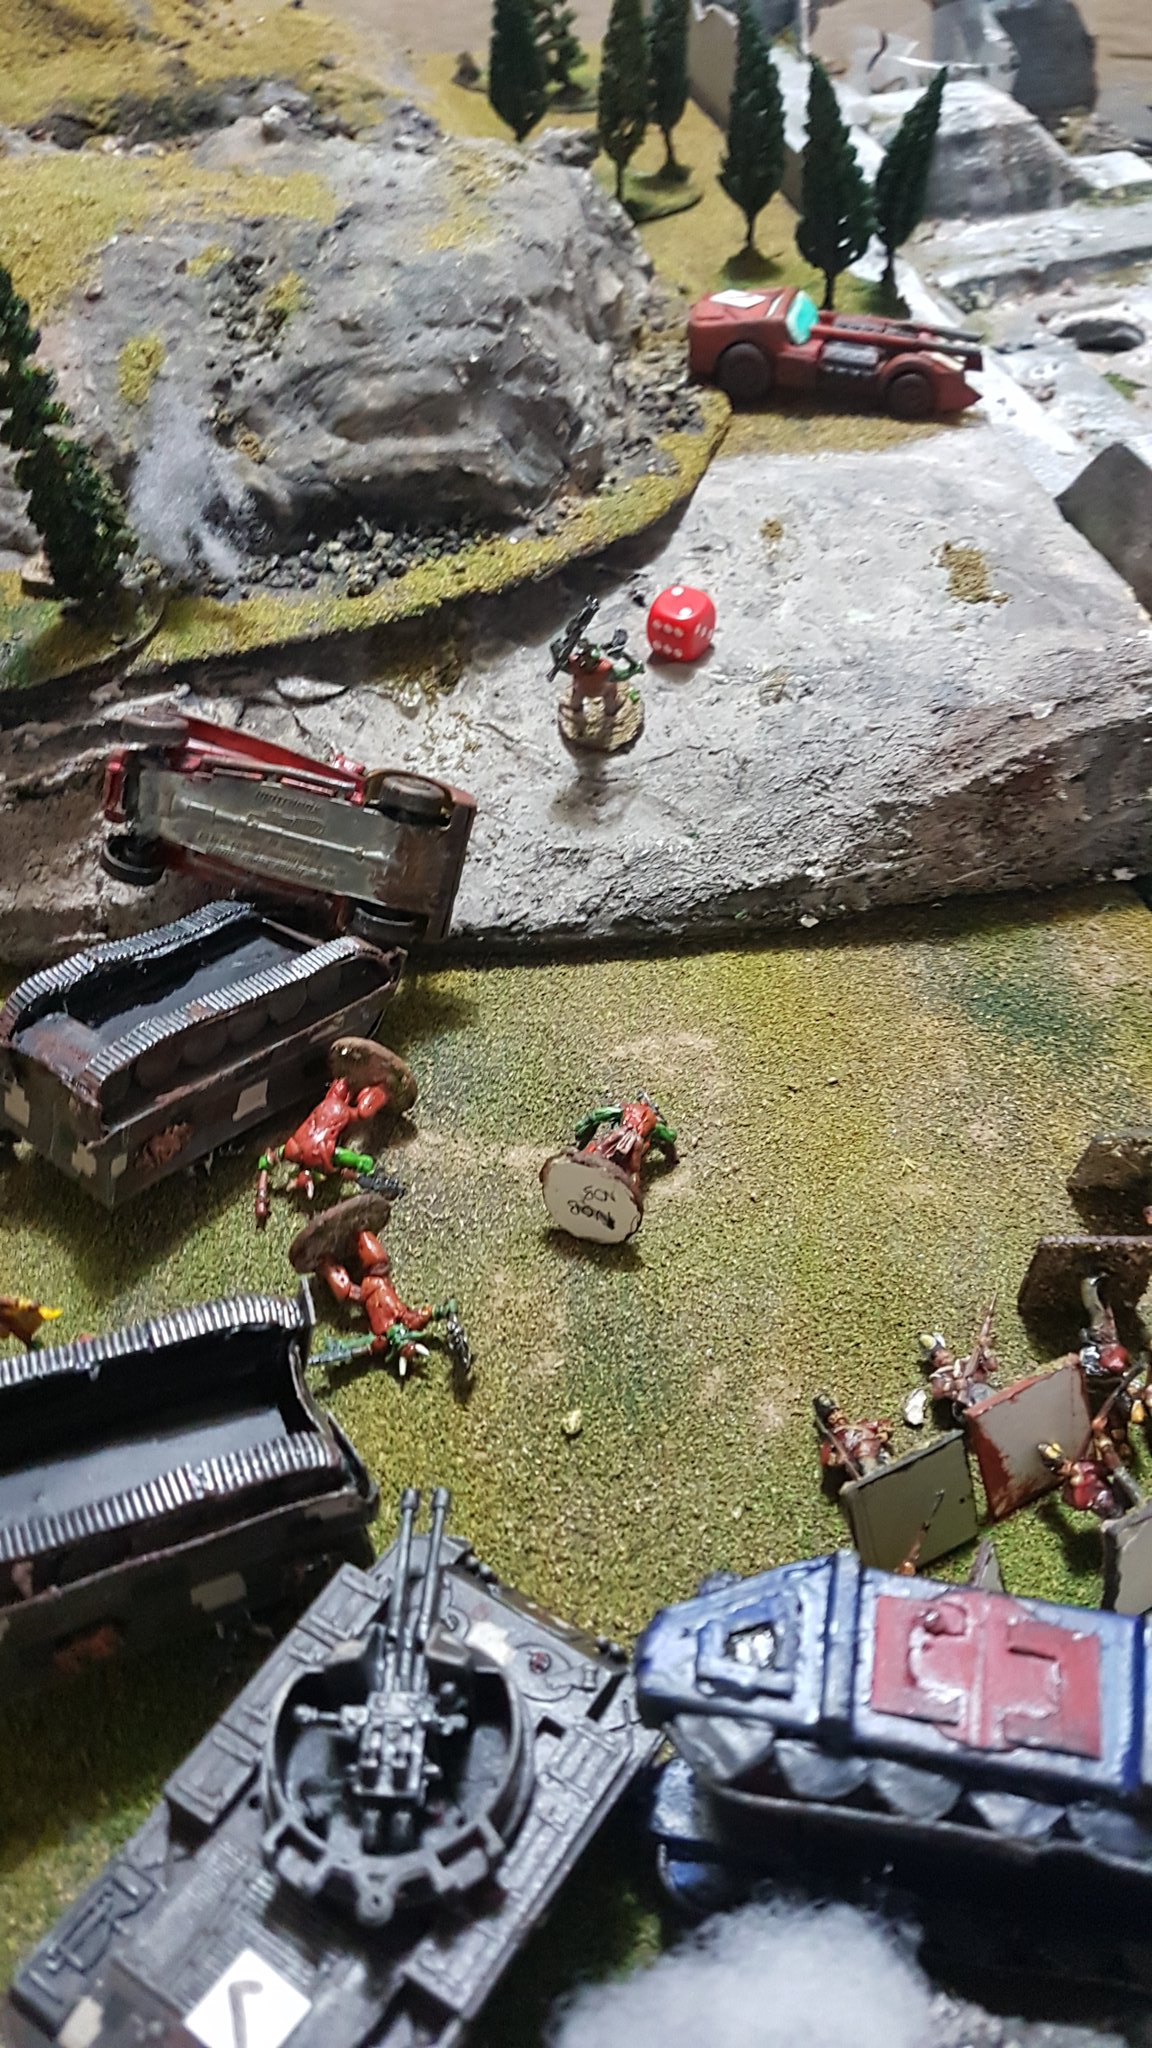
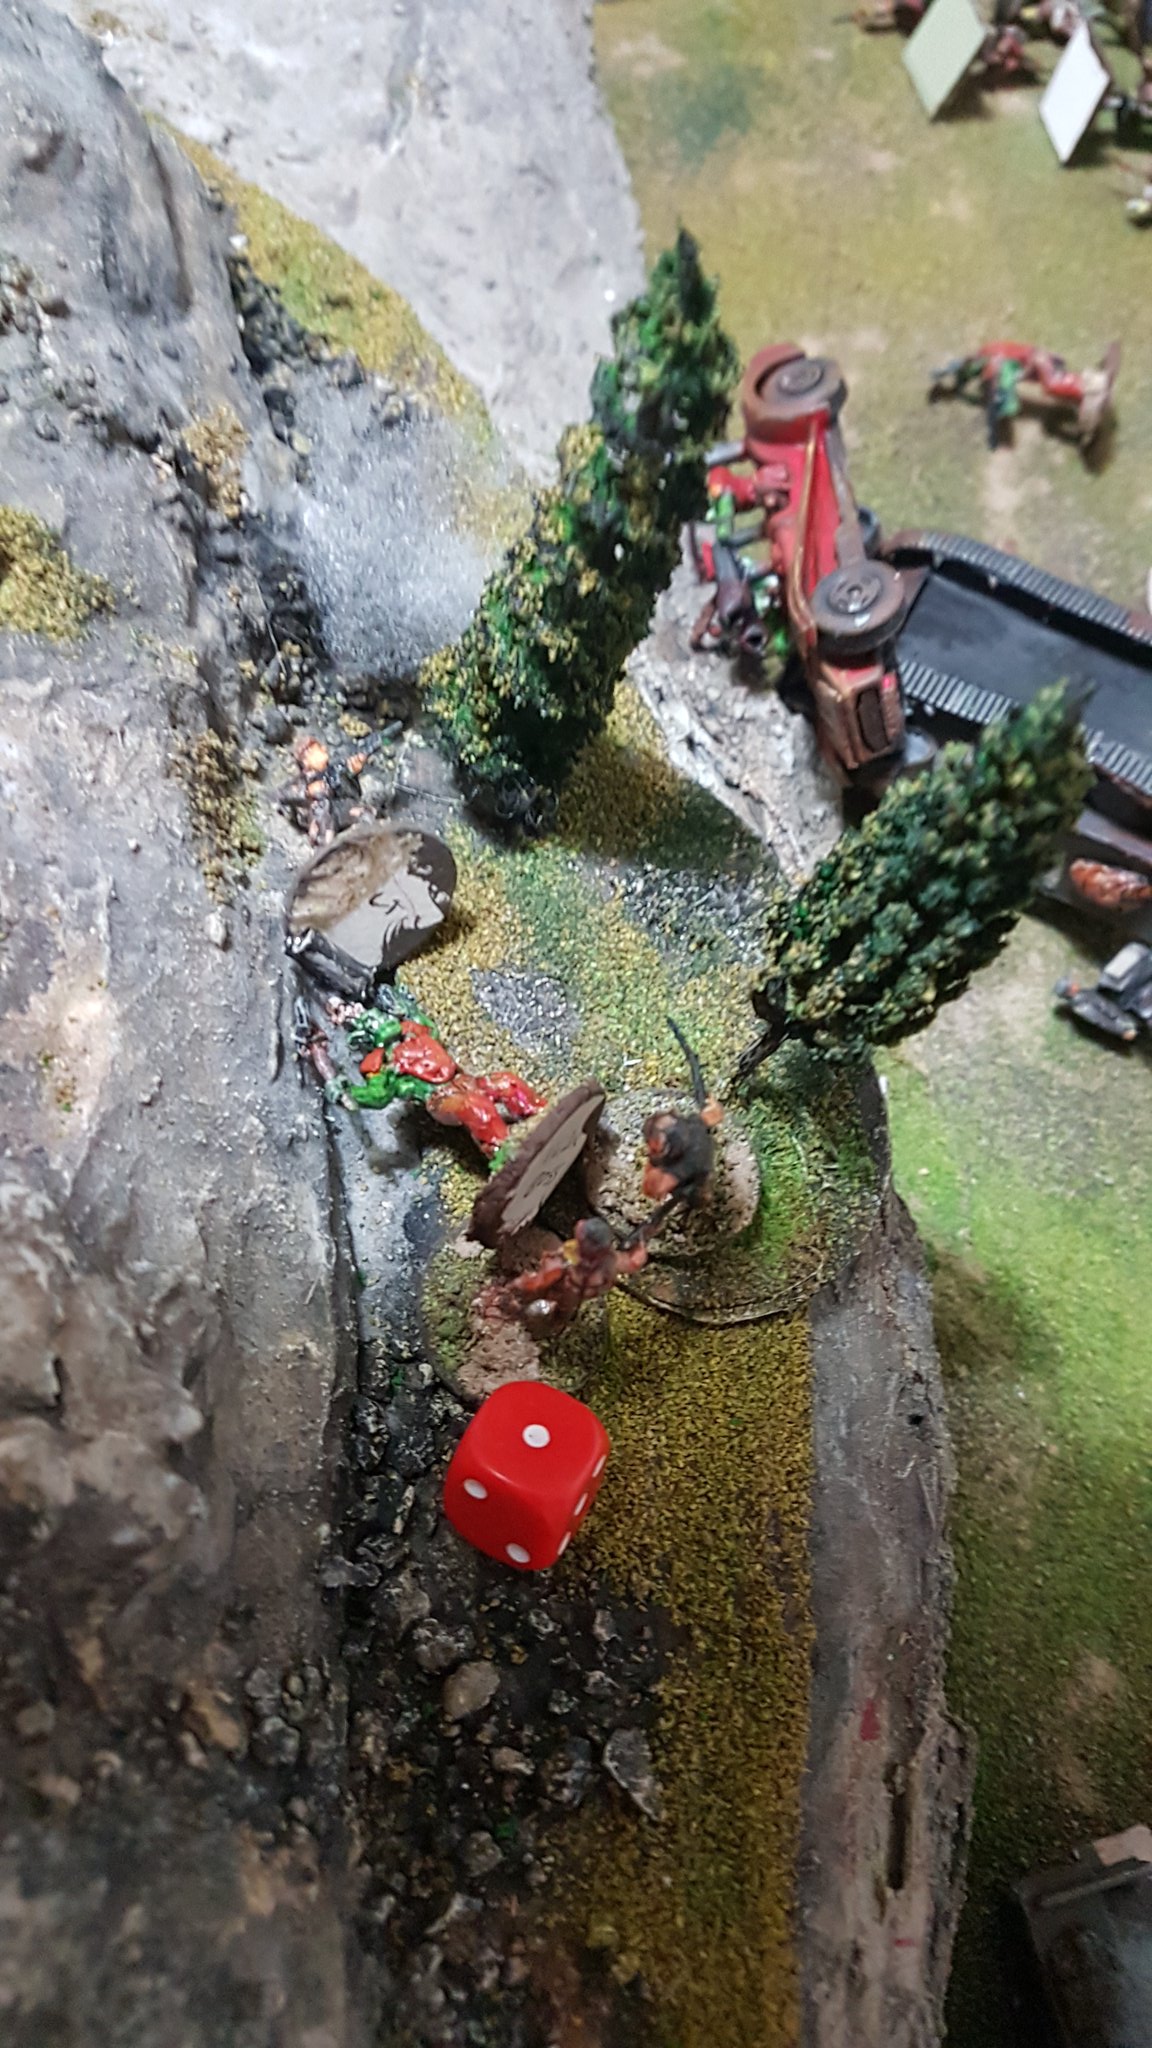
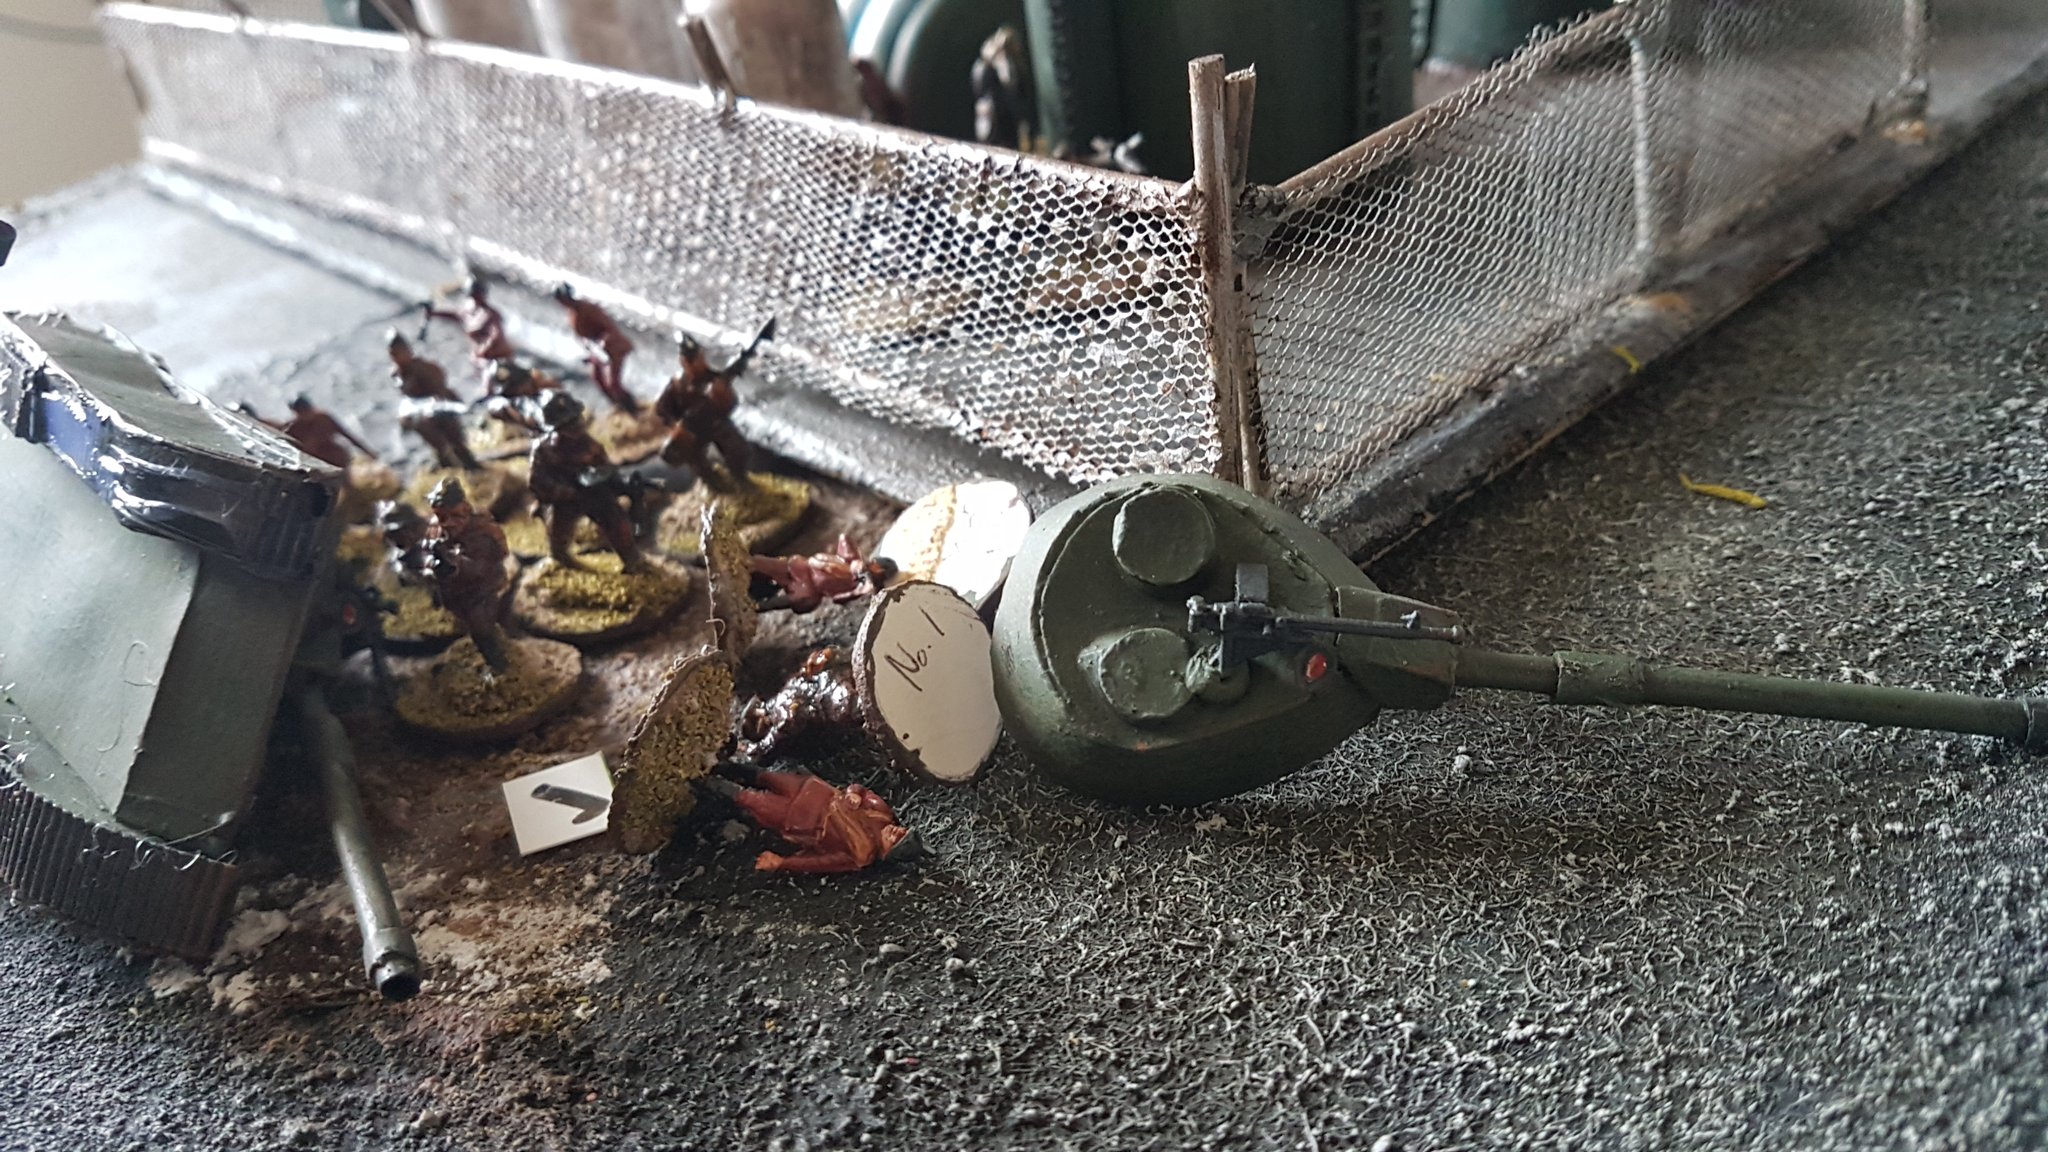
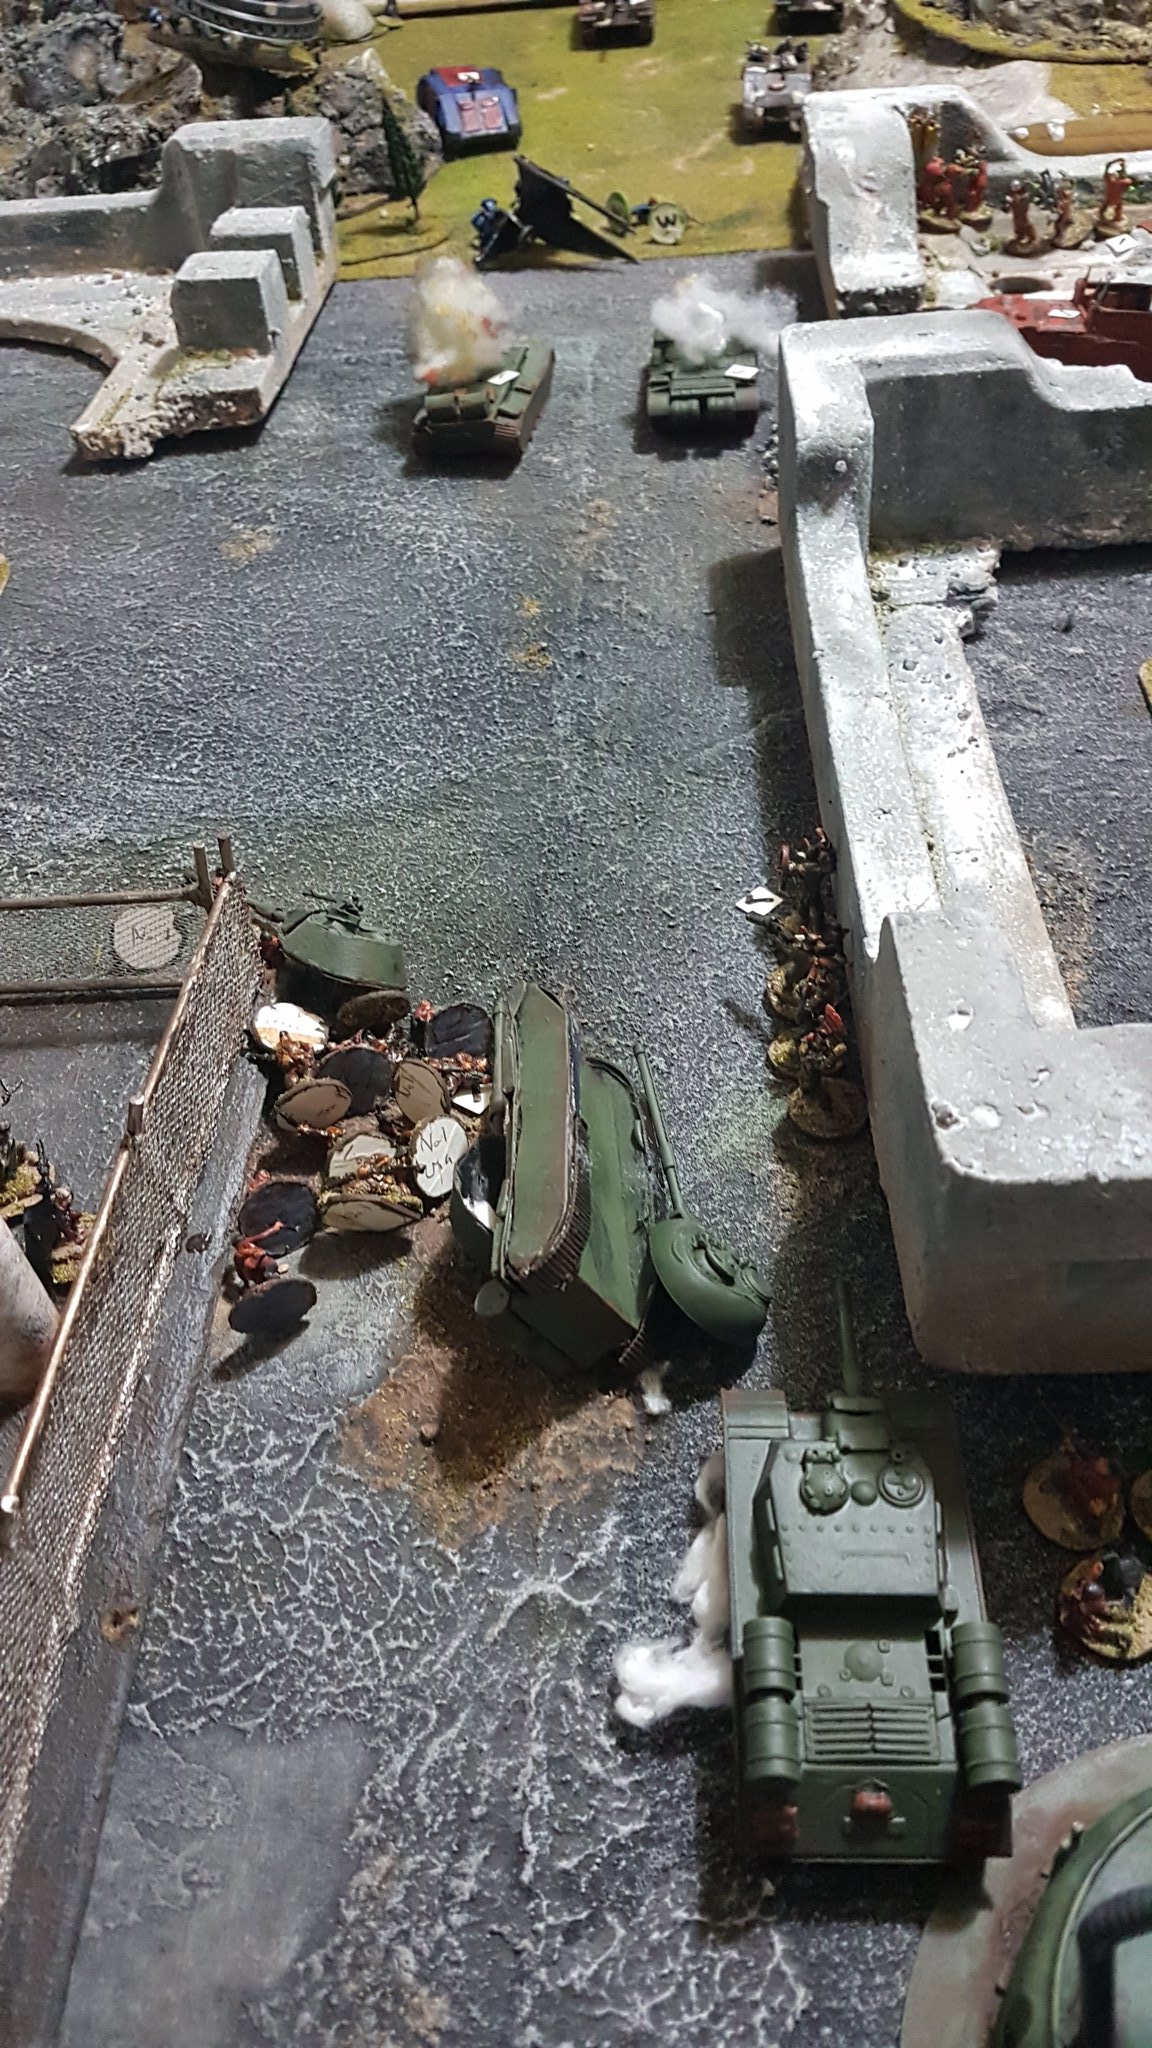
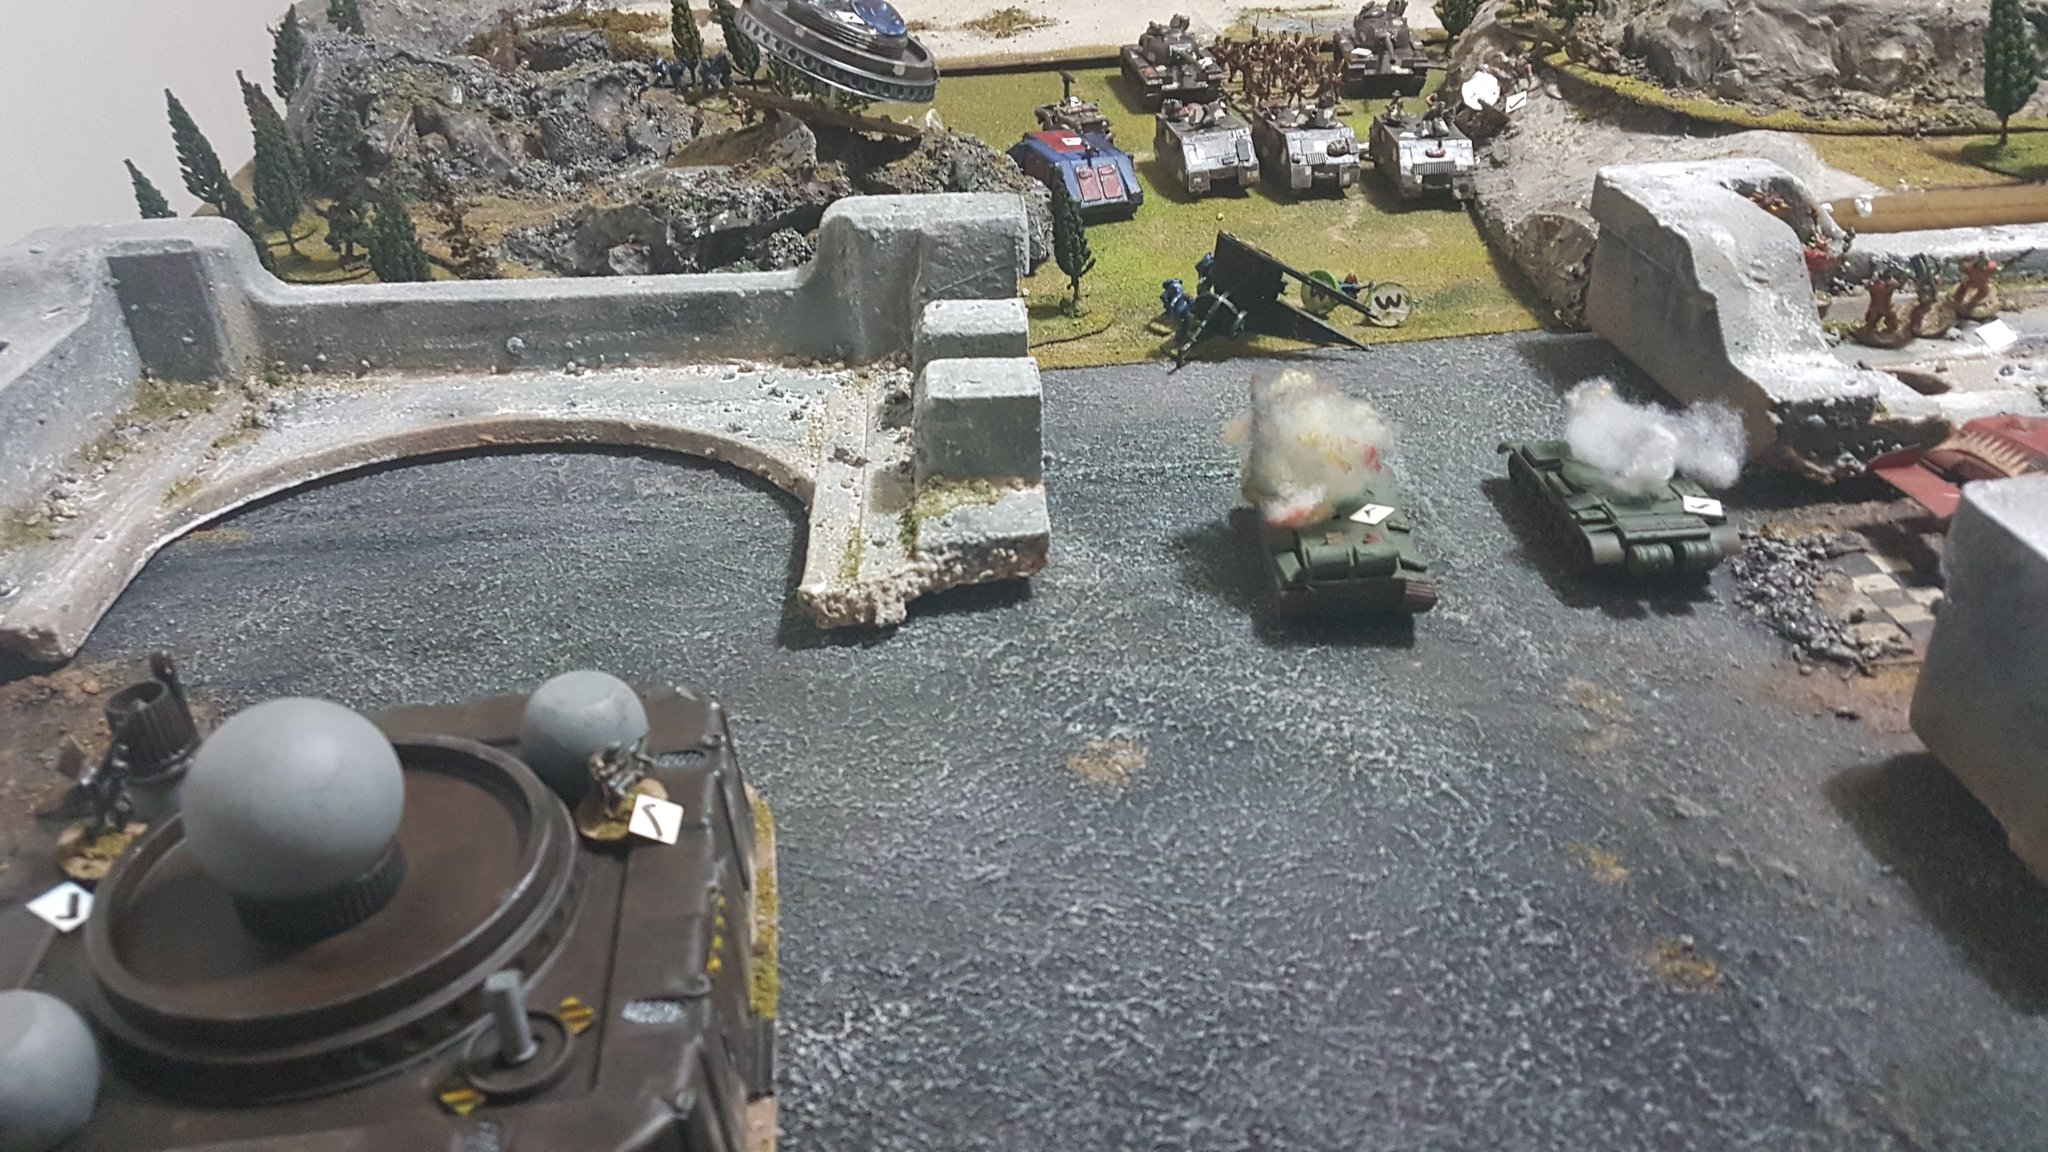
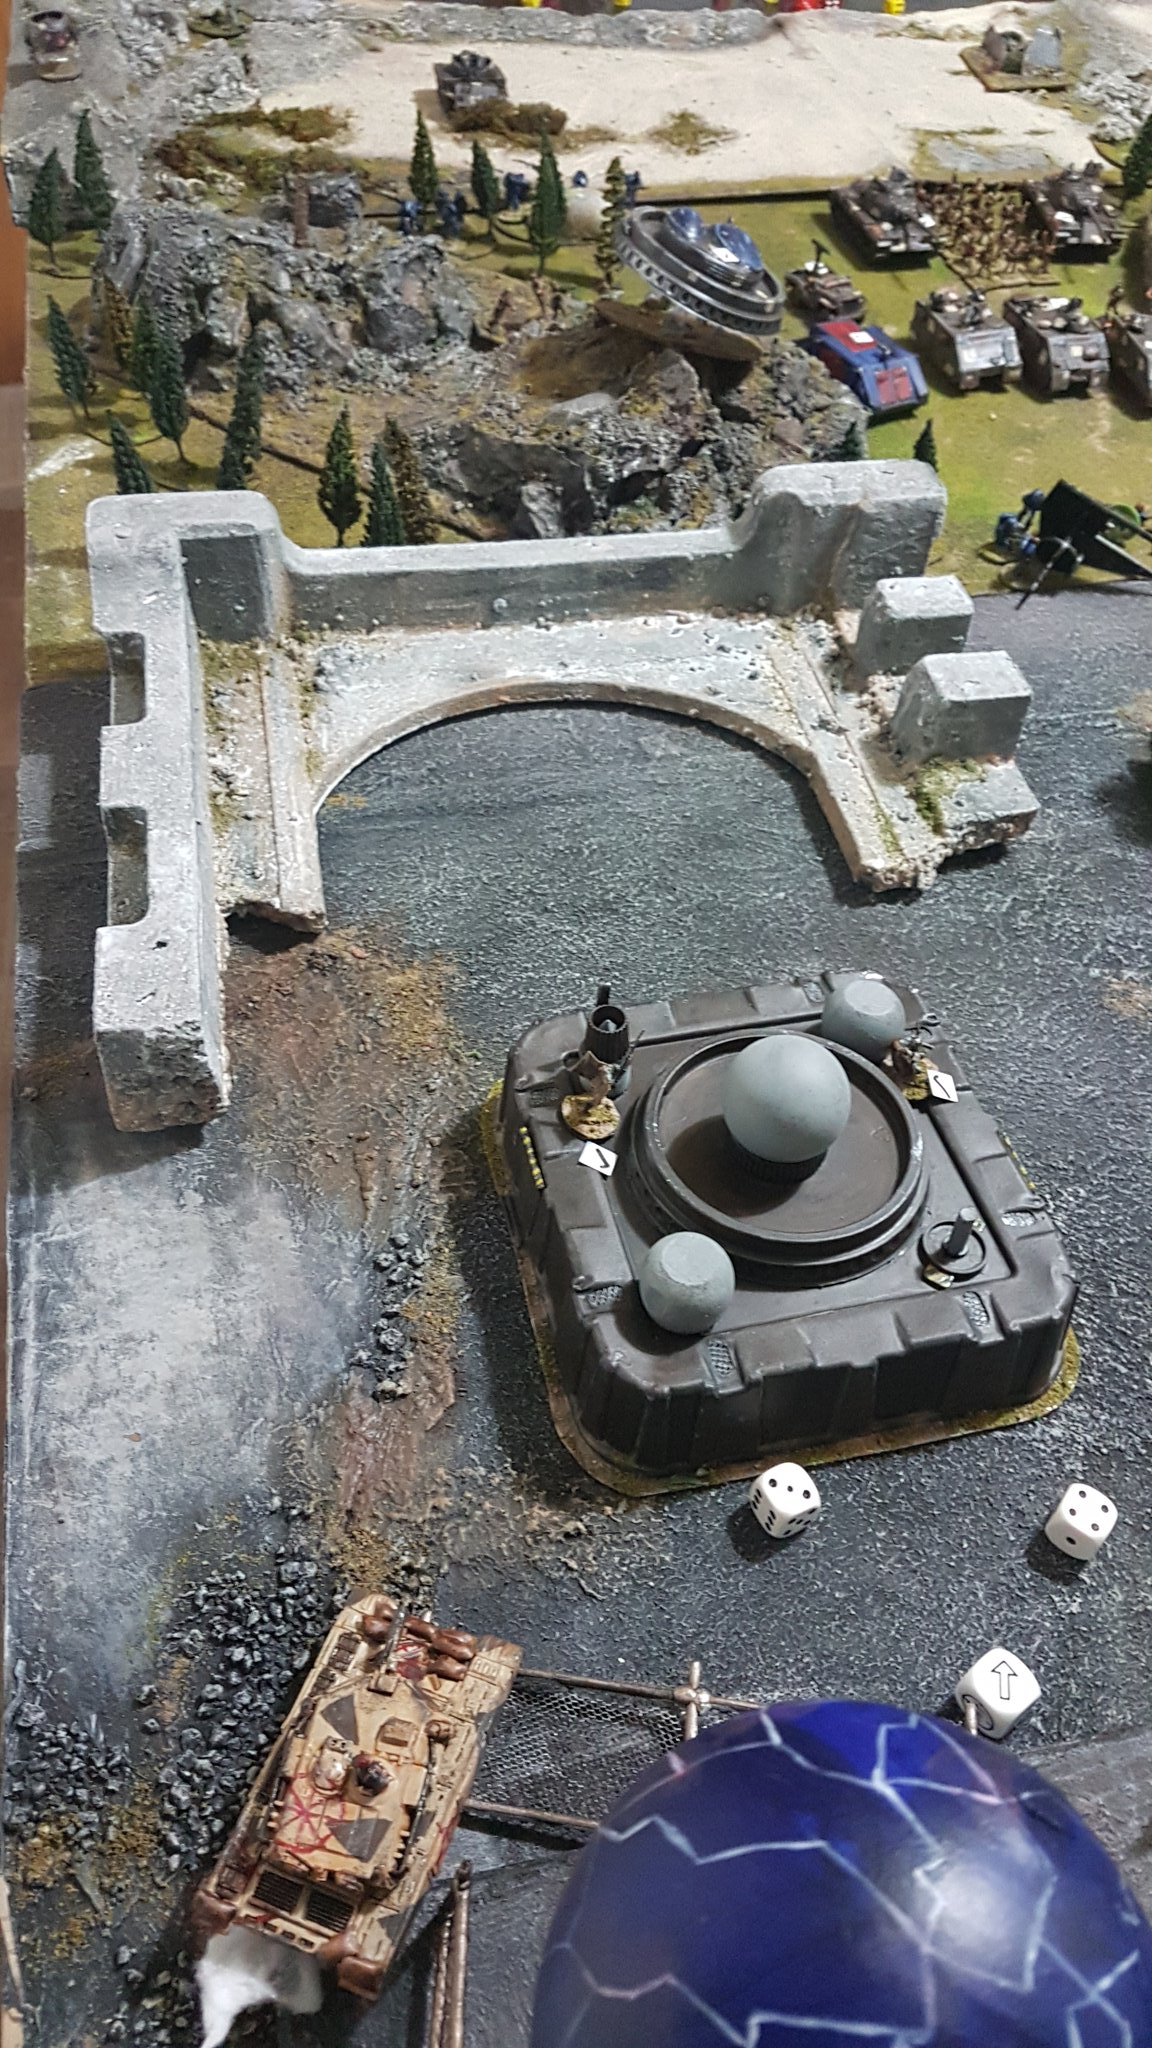
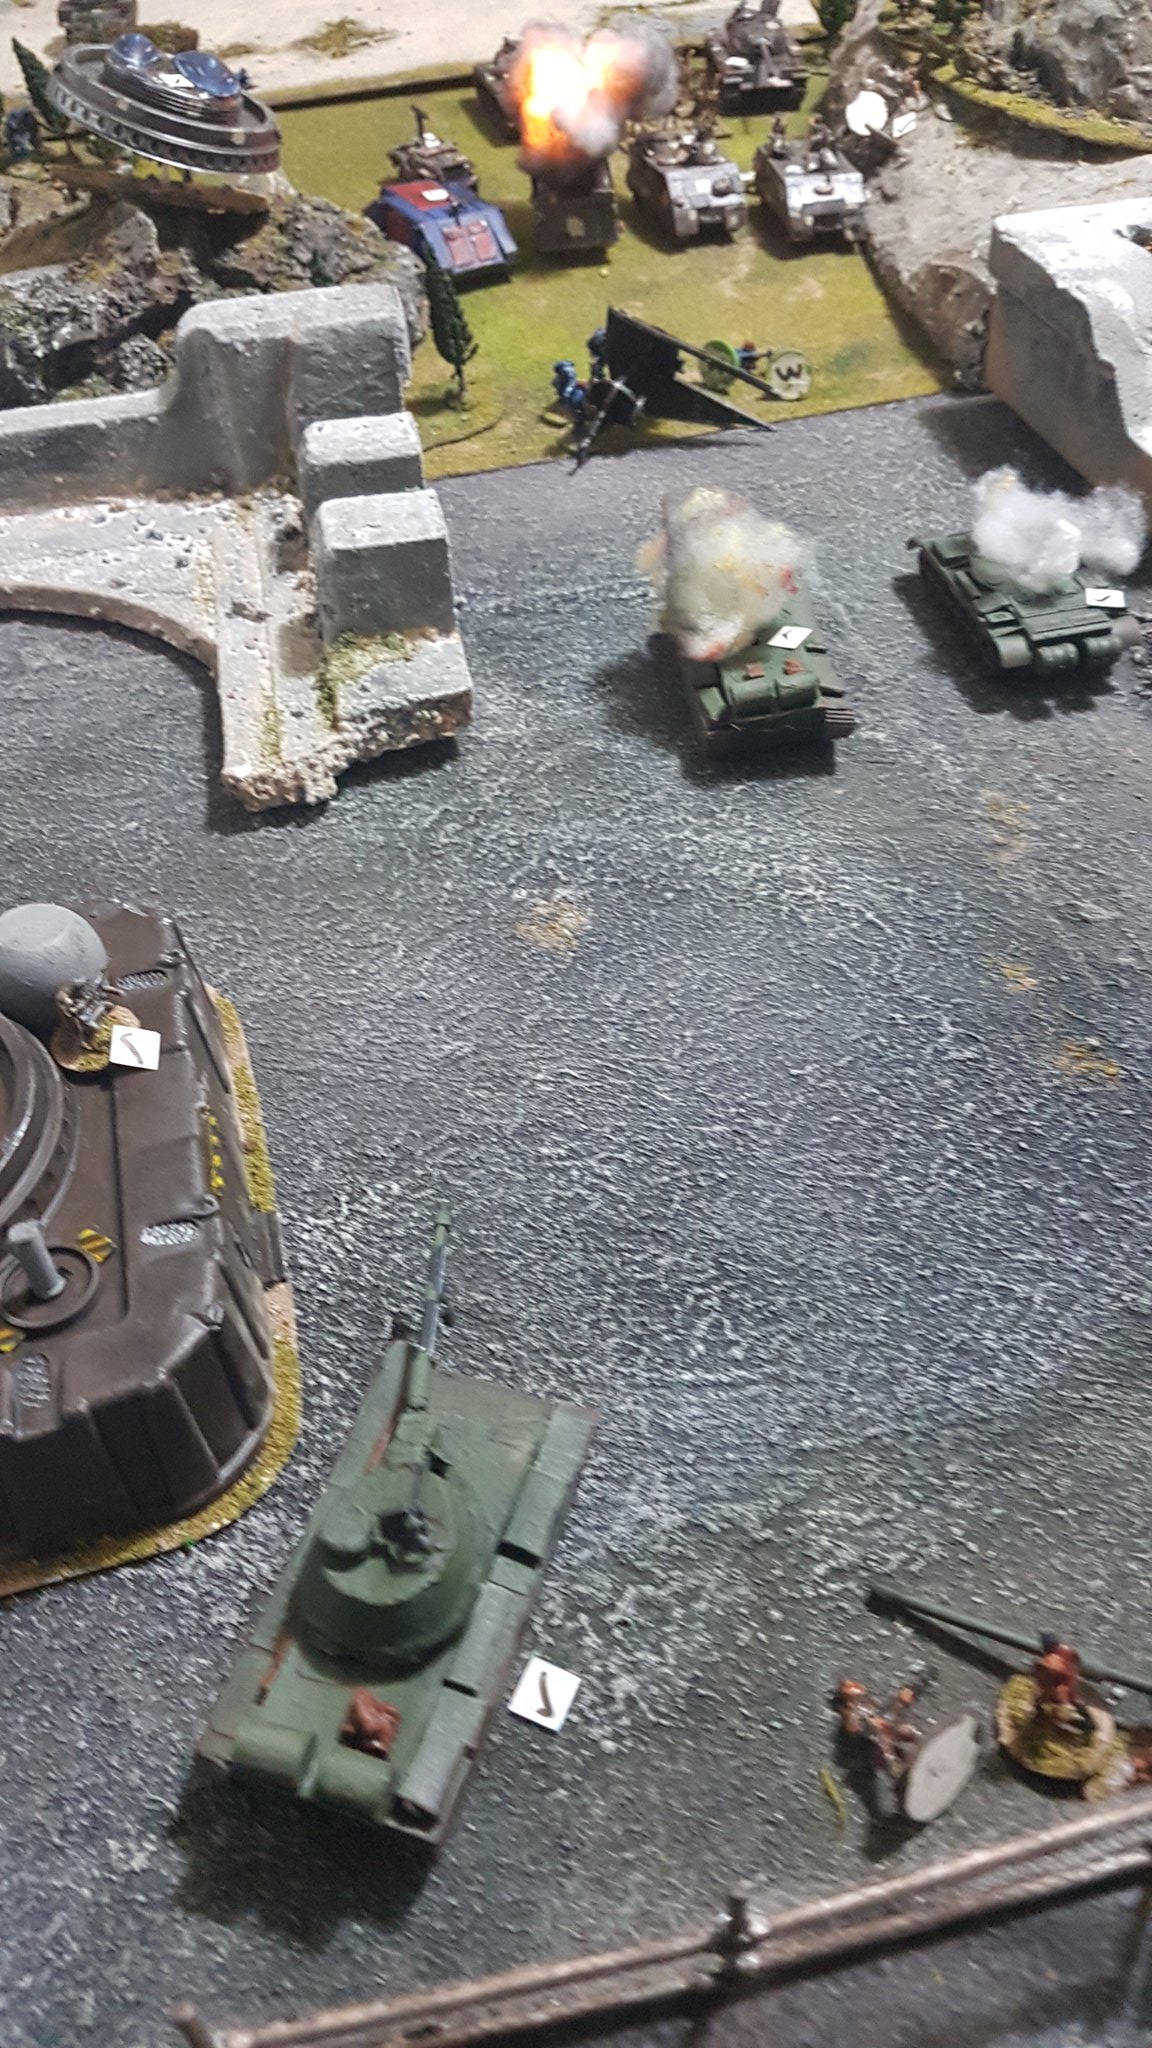
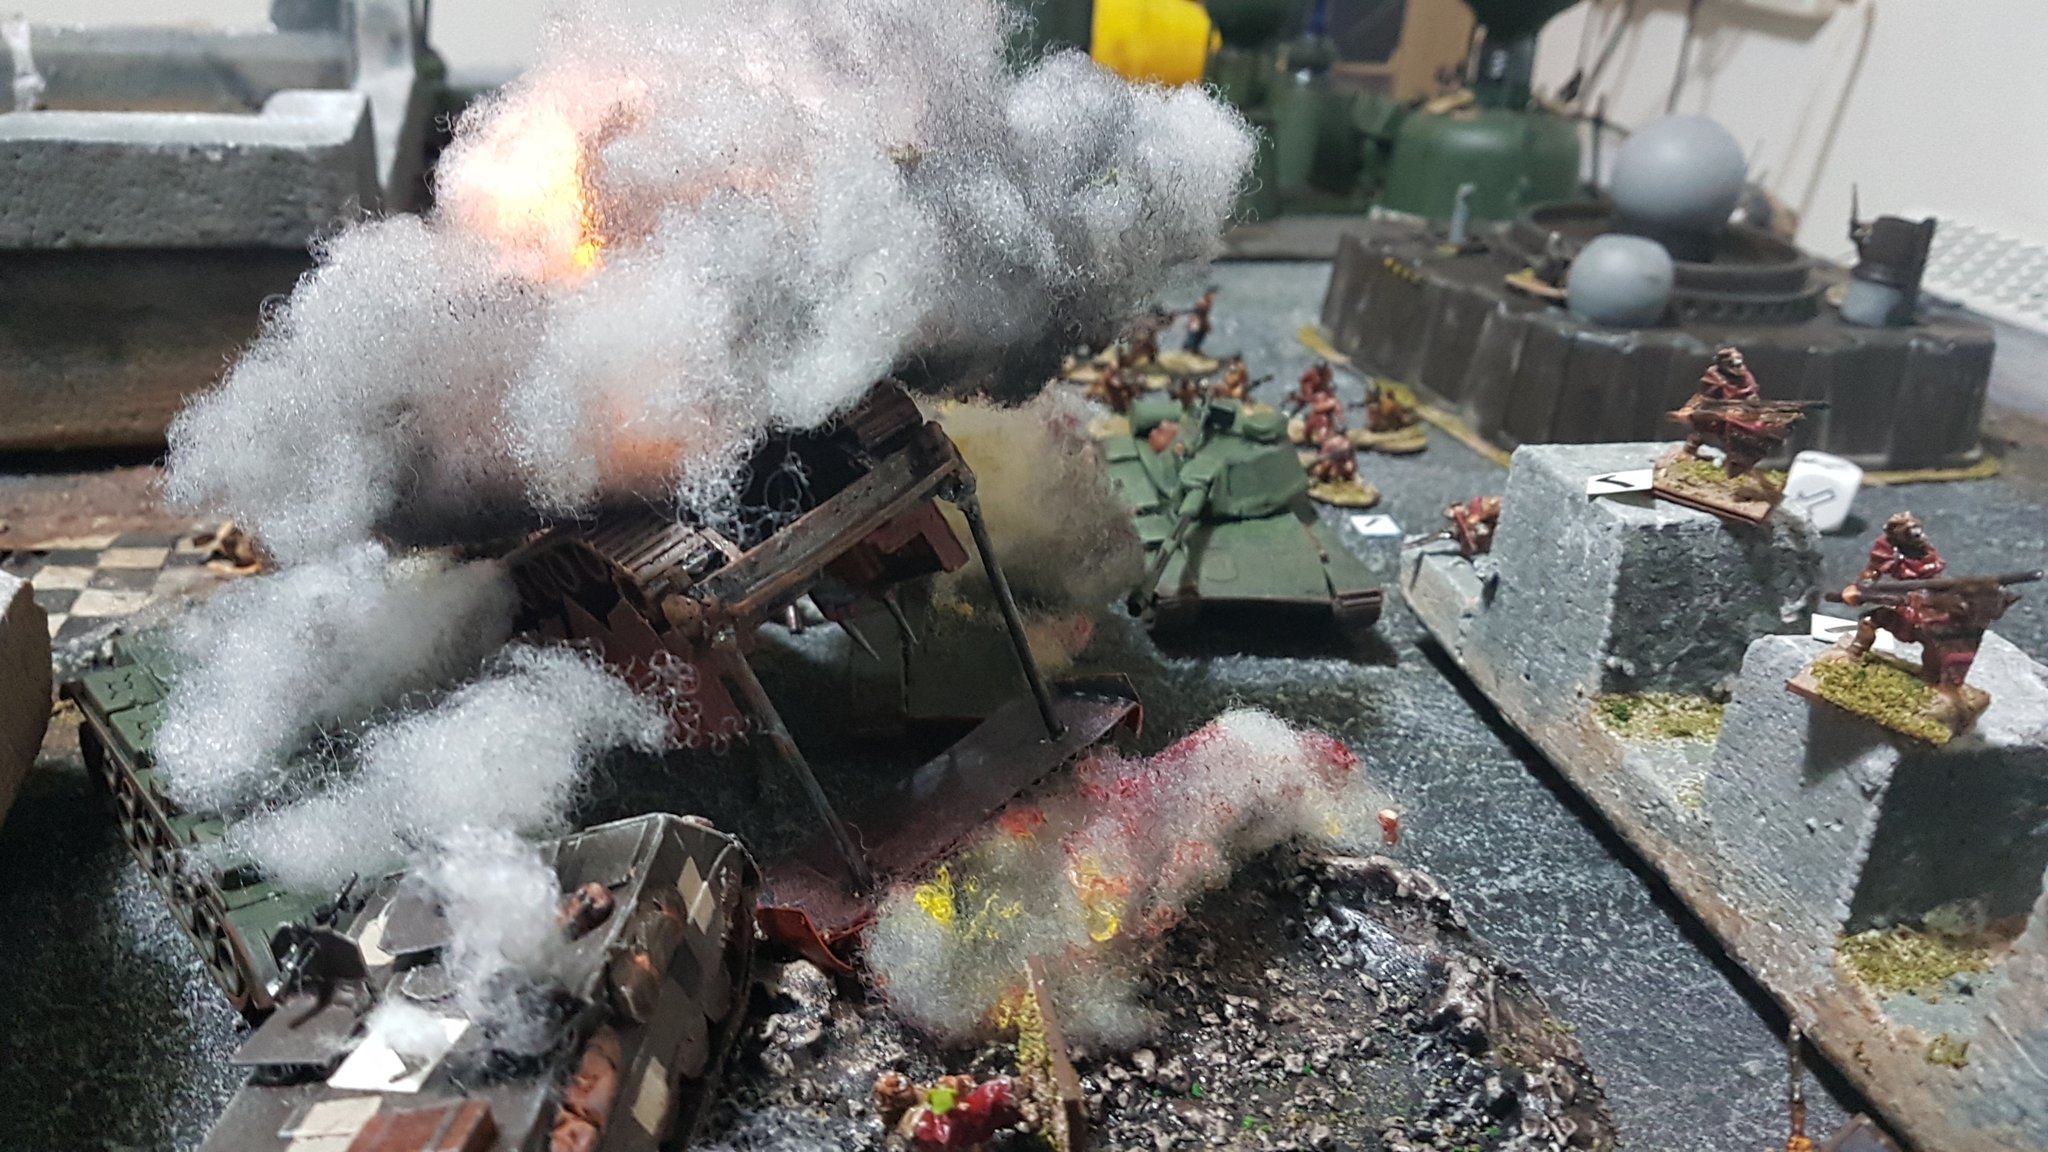
A strong roll of Baddie activations sees the IS-6 Rampager managing to knock down a chain link fence, but despite twin 140mm cannons, two heavy and four light machineguns…. that’s all it accomplishes…. meanwhile the Orc Archer regiment picks up the crashed spaceship and hands it over to No. 3 Rifle squad who move further back toward the Baddie table edge – a very skilful hand of “Pass The Spaceship” by Dan!Newly arrived regiment of Orc Warriors politely thank No. 3 squad and make off yet further with the crashed spaceship!Although almost all of the Virum Nascii are dead by this point, a survivng Vrilfire rifle team manages to take down two Jagers! Such is the curse of the newly painted model… Desperate to clear a path through to the rapidly disappearing objective, the M42 Stealth Tank decloaks and twin autocannons lay waste to Da Skooderia, leaving only the Warboss…… who then rolls Frenzy, clearly thinking “Sod it – WAAAAAGH!!!” and charges straight up to engage Buffalo 2-7s HQ, killing Lt. Grant before Platoon Sgt. Mcauliffe finishes him off!The surviving T-48 swings into position to block off the valley – between the wrecked vehicles and the wall of psychic fire, there is now no way through for the Goodie troops, it’s all down to the Rocketeers and Silverbugs..… and then from out of the power plant comes Stompy Uncle Joe, the massive Soviet war mech immolating a Silverbug with his lightning launcher (taking out a Virum Nascii vrilrifle team as collateral damage, but hey)The Goodies are throwing everything they’ve got in an attempt to force a passage – on the left the Sky Marines are advancing briskly through the hills to take on the remains of Da Skooderia, while Crimson Fists supported by a Centurion hammer at the centre, but the Baddies are getting away…Remember the Ratmen warrior regiment from earlier? Well so did the PFH 237th’s cabal of sorcerers, successfully managing to teleport it in base to base contact with the Orcs currently carrying the spaceship.. With the dice gods smiling on him, Dan then successfully activates them (being teleported doesn’t mean they’ve had a turn yet) and they shoulder the spacecraft – then leg it straight off the board! It’s a firm victory for the Baddies!
So there you have it, a very smart Hail Mary play with a little luck on his side and my opponent snares victory! In fairness, had Dan not had the luck he would have won the next turn anyway, there was no way I was going to be able to get enough firepower into position to stop his troops running off with the objective. He damn near won at the start of turn 3 anyway, as the Virum Nascii Vrilseers created a reality tunnel for the Slaves to jump in to – had I not got lucky with it scattering, and not managed to suppress them, he would have had it in the bag right then.
Thoughts? Well, I think I did my usual trick of playing it like a straight up battle where the objective was to destroy the opponent – Dan on the other hand actually played the scenario… which was even more galling because I wrote the scenario!!! Reviewing the battle, he played very cleverly, and with all the ruthlessness that befits a Baddie general – the sacrifice of the Virum Nascii “rat bombing” me on Turn 2 and using the tough-as-nails Skooderia units to stymie me in the centre, then blocking the valley choke point with a psychic fire barrier… well played, sir, well played!
Right, after that MAMMOTH battle report I shall be handing the keys over to my colleague and going and lying on the sofa with a wet flannel over my head and quite possibly a large gin on standby…
Stay safe, healthy and thrifty out there wherever you may be in hobbyland, we’ll see you very soon!
And thus was battle joined… We’ve decided to split this report across a couple of posts due to the sheer size of the game and therefore the length of time posts take to write… with this one, there’s every chance you wouldn’t be hearing from us again this side of Christmas! Anyway – enjoy the first two turns:
Turn 1 –
Goodies – most of the Atlantic Alliance, all the Sky Marines and the Crimson Fists arrive.
Baddies – most of the Holy Soviet Army (but no IS-6 or Stompy Uncle Joe), Da Skooderia, most of the PFH 237th arrive.
Goodies bag initiative and get the first few shots off – a Silverbug glides forward and looses off a pair of Stinger/TOW ADATS missiles at the lead T-48sThis blows the cannon off one tank and severs the fuel line of the second, which is quickly finished off by a salvo from the Avenger cannon. First blood to the Goodies!Holy Soviet Army troops wait for the signal to move alongside the Orcs of Da SkooderiaElements of the People’s Front Of Hazzard 237th Freedom Brigade shelter in place in the Skalk Point plasma generator station. Creighton light assault vehicle on the extreme left.Crimson Fists deploy from their APC to secure the objective while Da Skooderia leadership deploy forward into coverCrimson Fists lose two commandos to fire from the Holy Soviet Army No. 1 Rifle Squad…Reaction fire downs four Soviet riflemen, but the Russians hold fast under the gaze of their CommissarMobile units on both sides sprint for the objectiveLethal fire slaughters Soviet riflemen caught in the open, immobilising and cutting the fuel line on the assault gunOn the Goodie’s left flank, Grand Alliance Sky Marines advance through the heights above the beachExpert sniping from the Milibandalorian boys deployed on the roof of the command centre annihilates Bravo squad in a storm of plasma! A superb long range Stinger/ TOW shot from combat support bot (top left) arcs and twists through the trees ,immobilising the 237th PFH’s Creighton tank!Having been lurking out of sight in the power station, another T-48 roars out of cover and demolishes an M113 with it’s main gun, although fire from it’s machine guns patters harmlessly off the Crimson Fist’s power armour“Comrade, was that tree always there?” – M42 Stealth Tank performs its’ party trickThe situation at the end of Turn 1 – Goodies command the objective with a single Crimson Fist squad, but have lost two of the elite troopers, plus an M113, damage to a Silverbug, as well as all of Bravo squad and the RTO. Meanwhile the baddies have lost almost all of No. 1 rifle squad, a T-48 and 3 more damaged.
Turn 2 –
Goodies – most of the rest of the Atlantic Alliance bar the two Humvees, League of European Nations – HQ, Jagers, infantry, Ancien Regime rifle regiment & Steam Tank
Baddies – More Soviet infantry, Orc Archers, and as you’ll see, the bulk of the Virum Nascii…
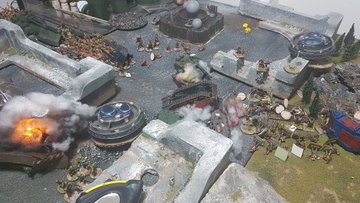
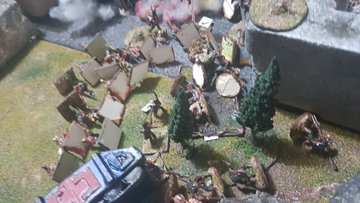
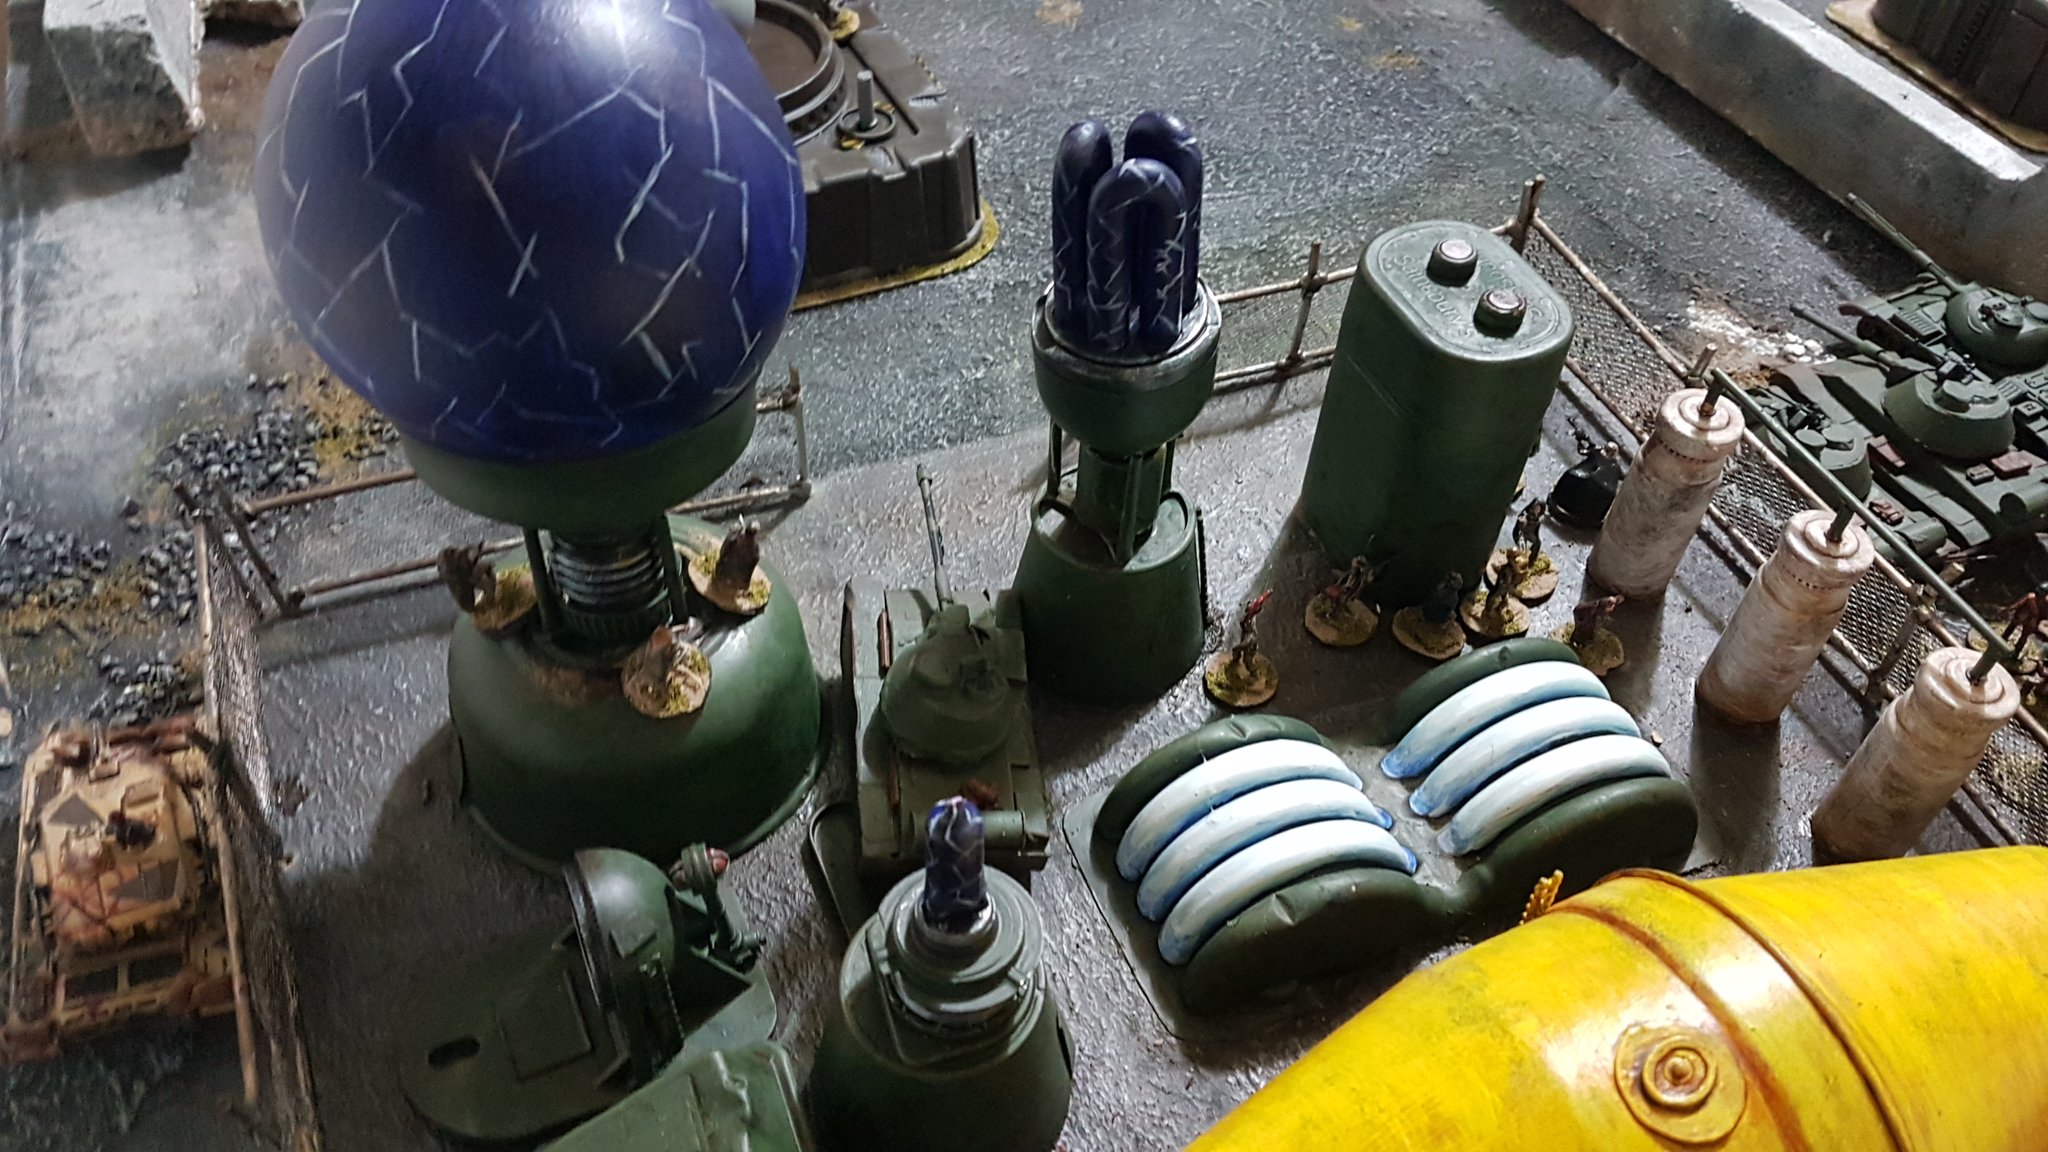
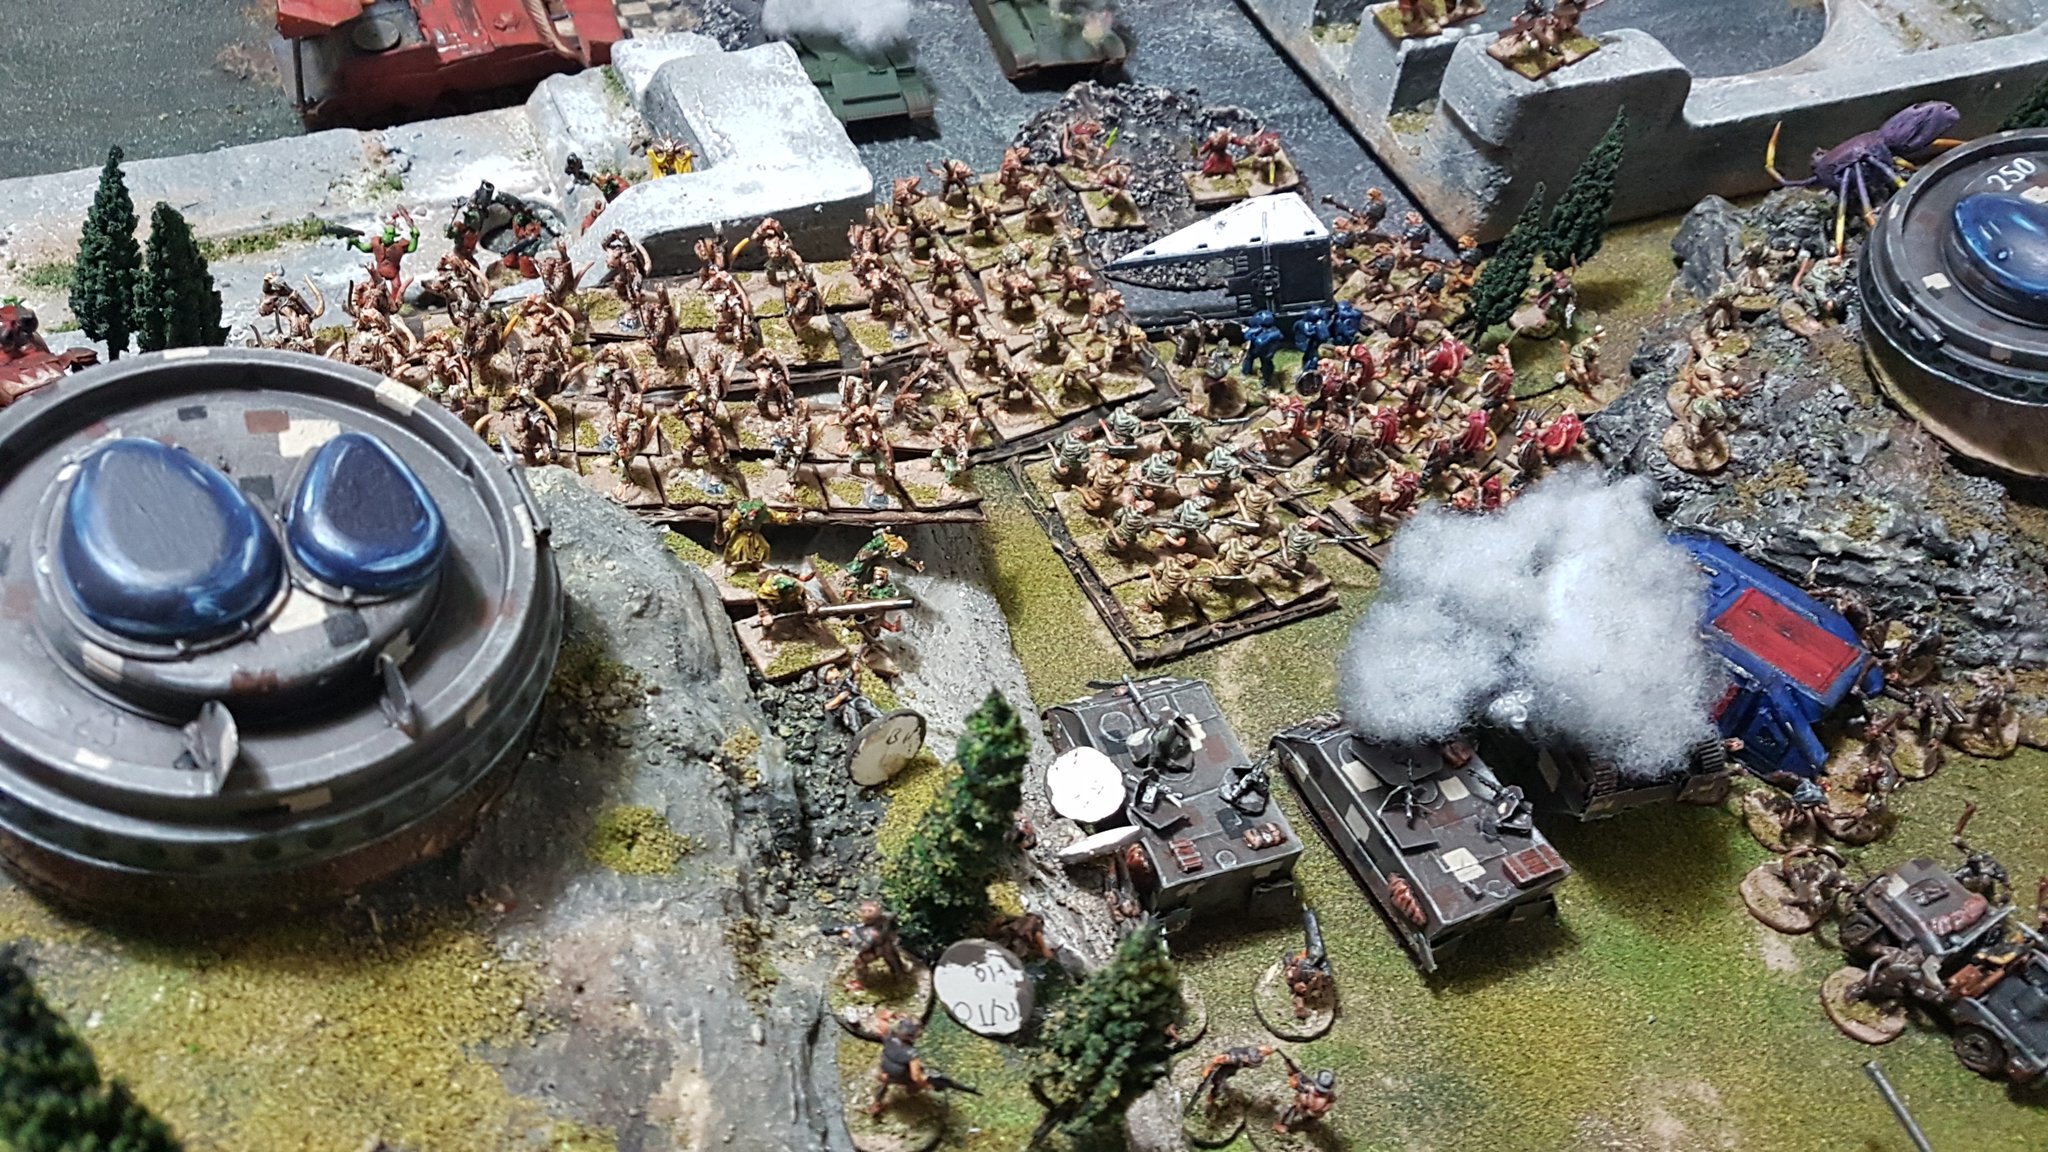
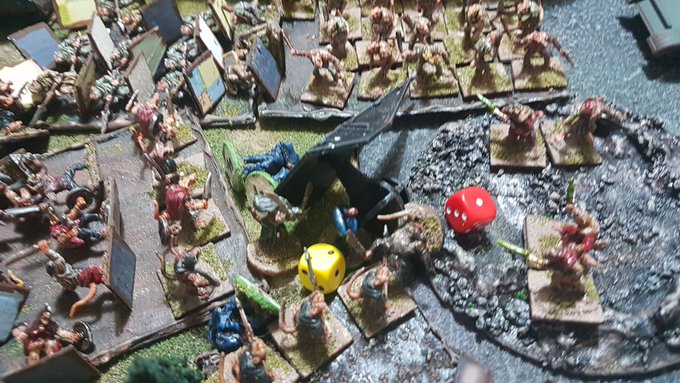
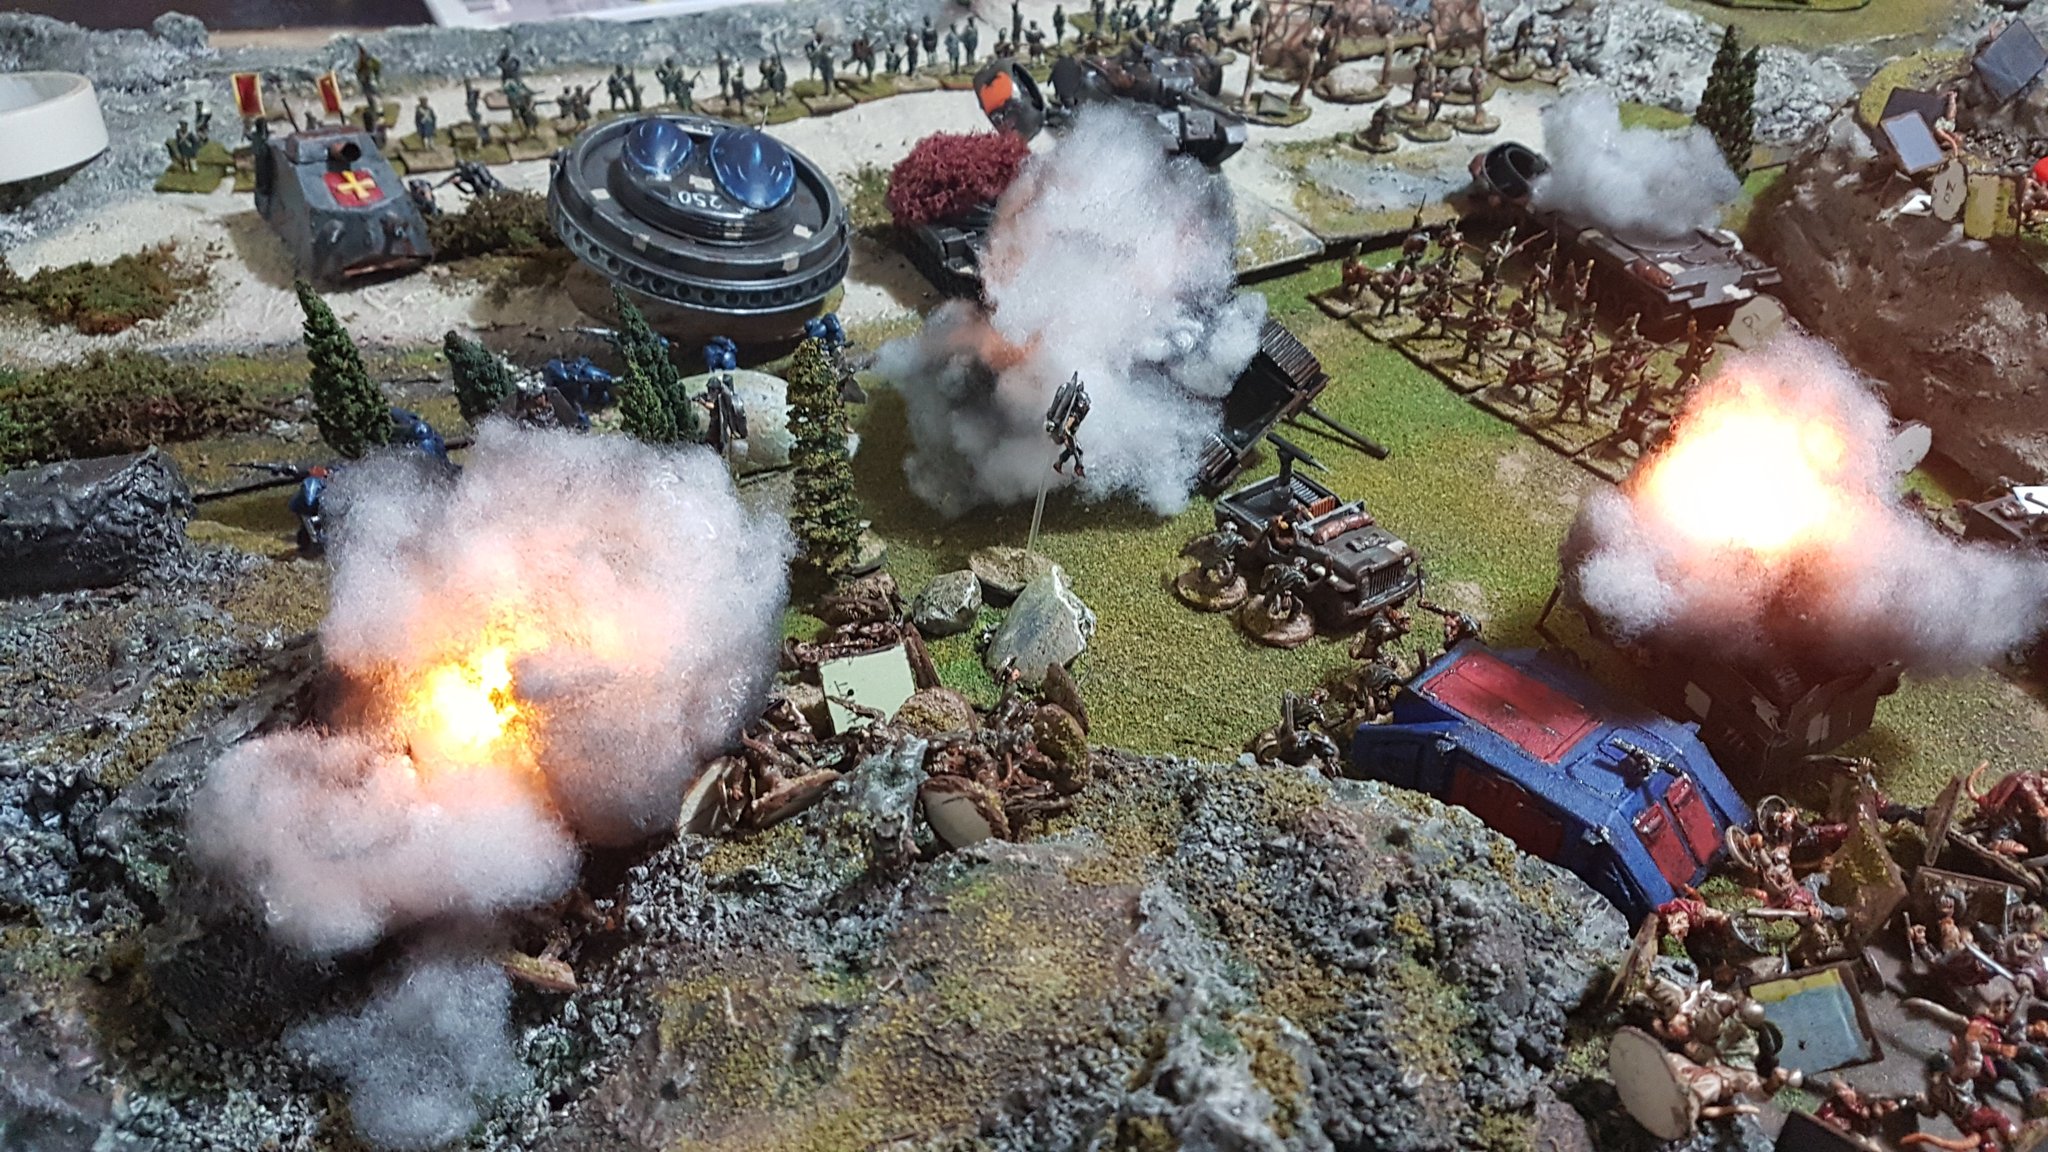
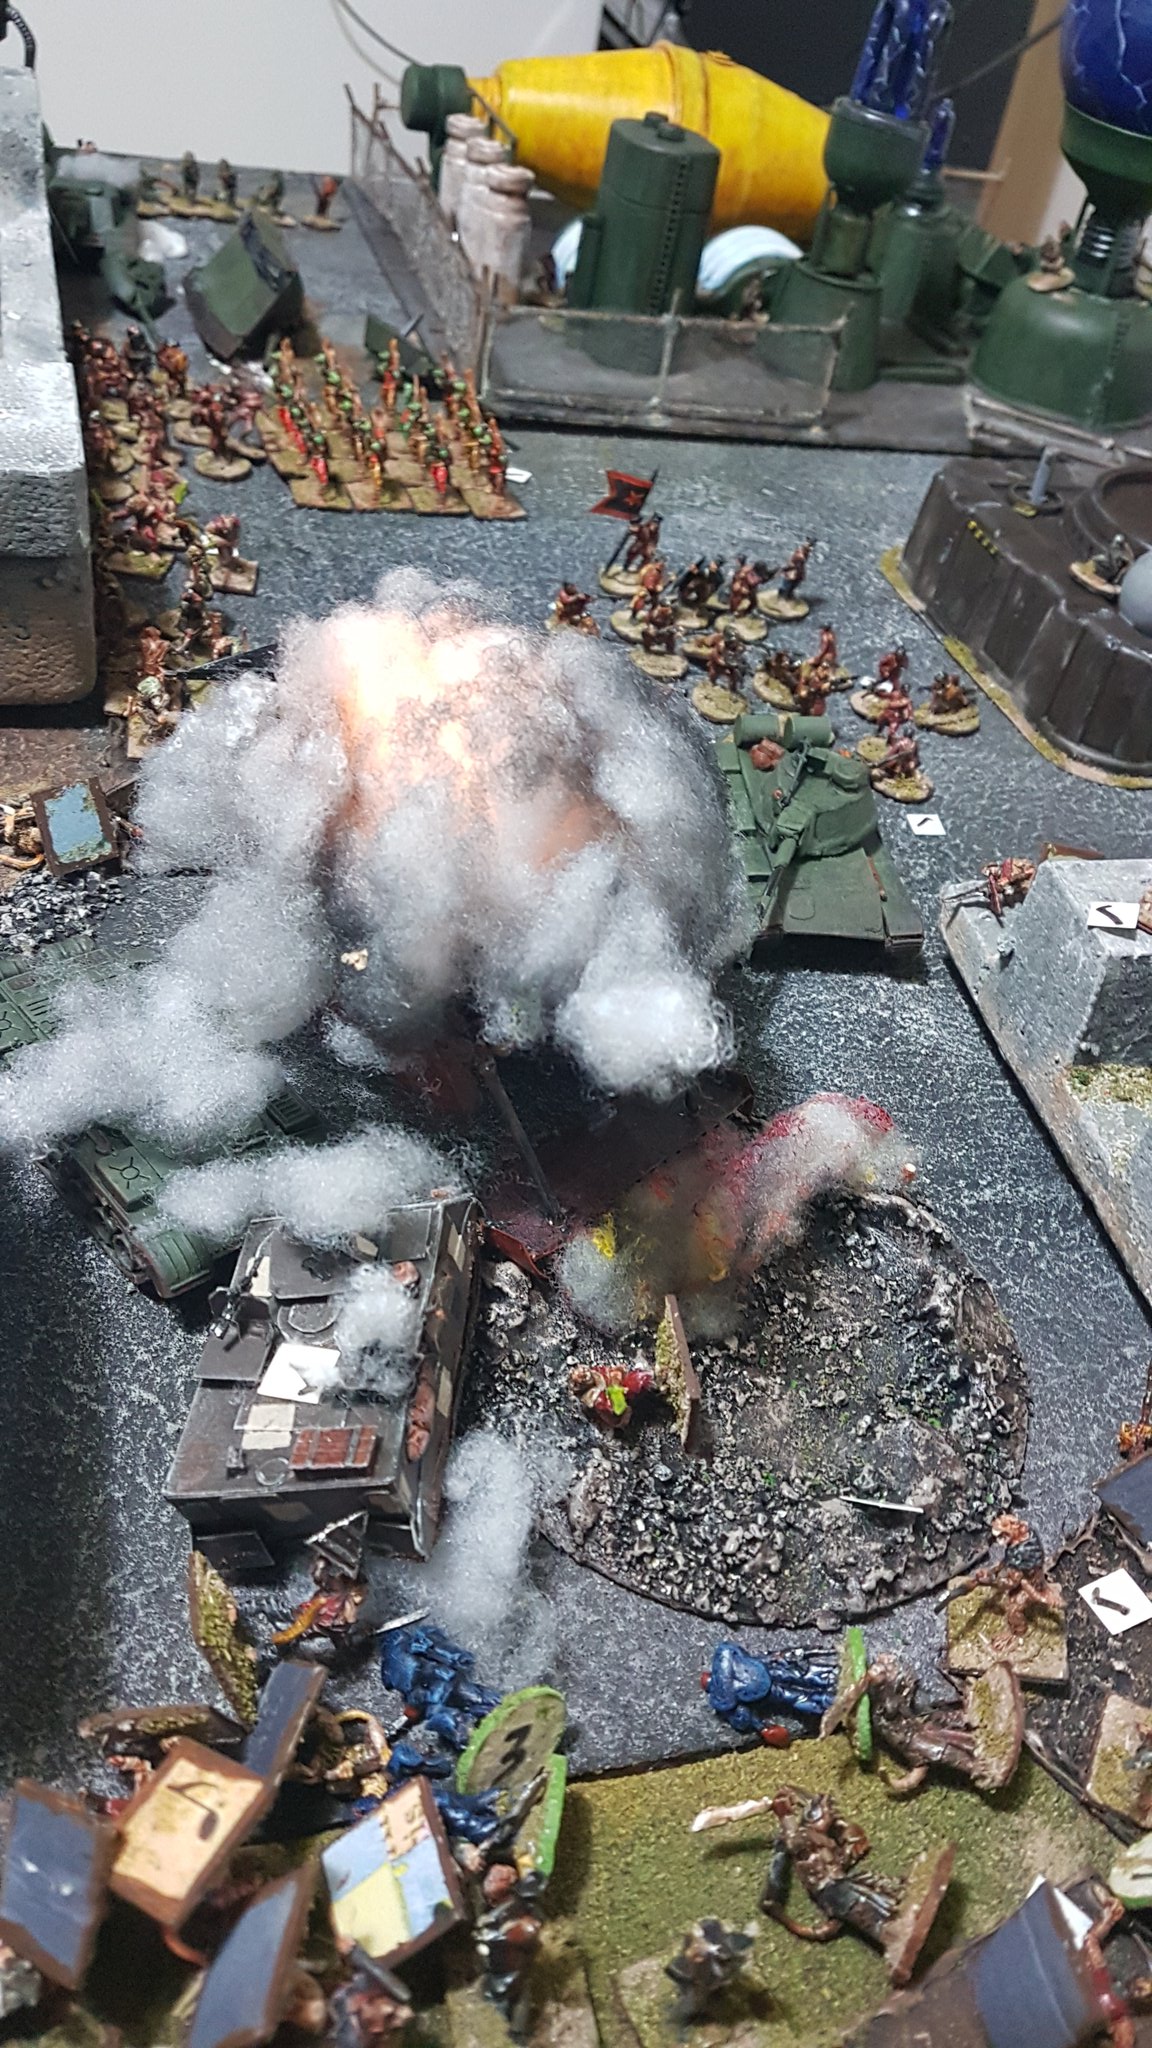
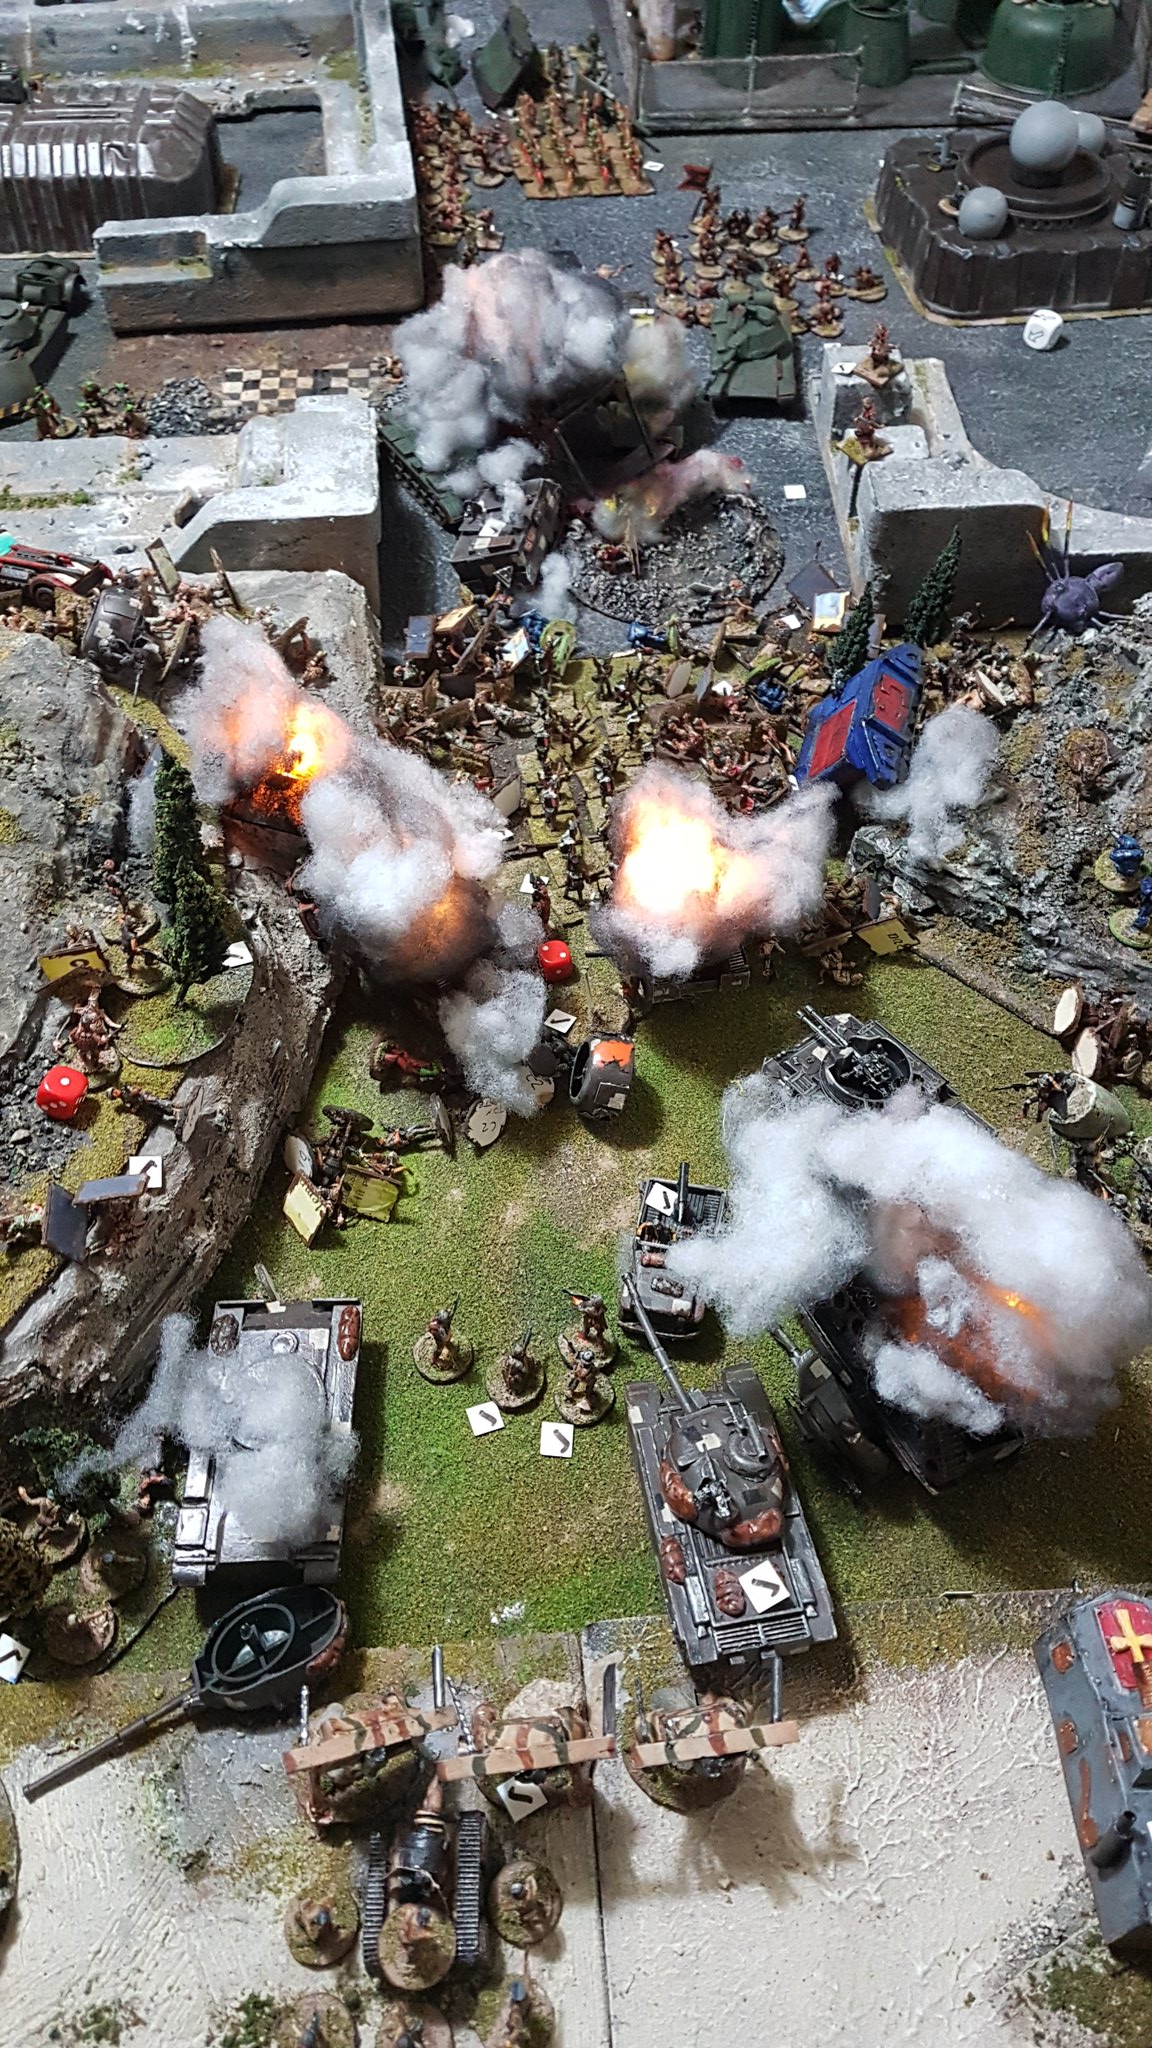
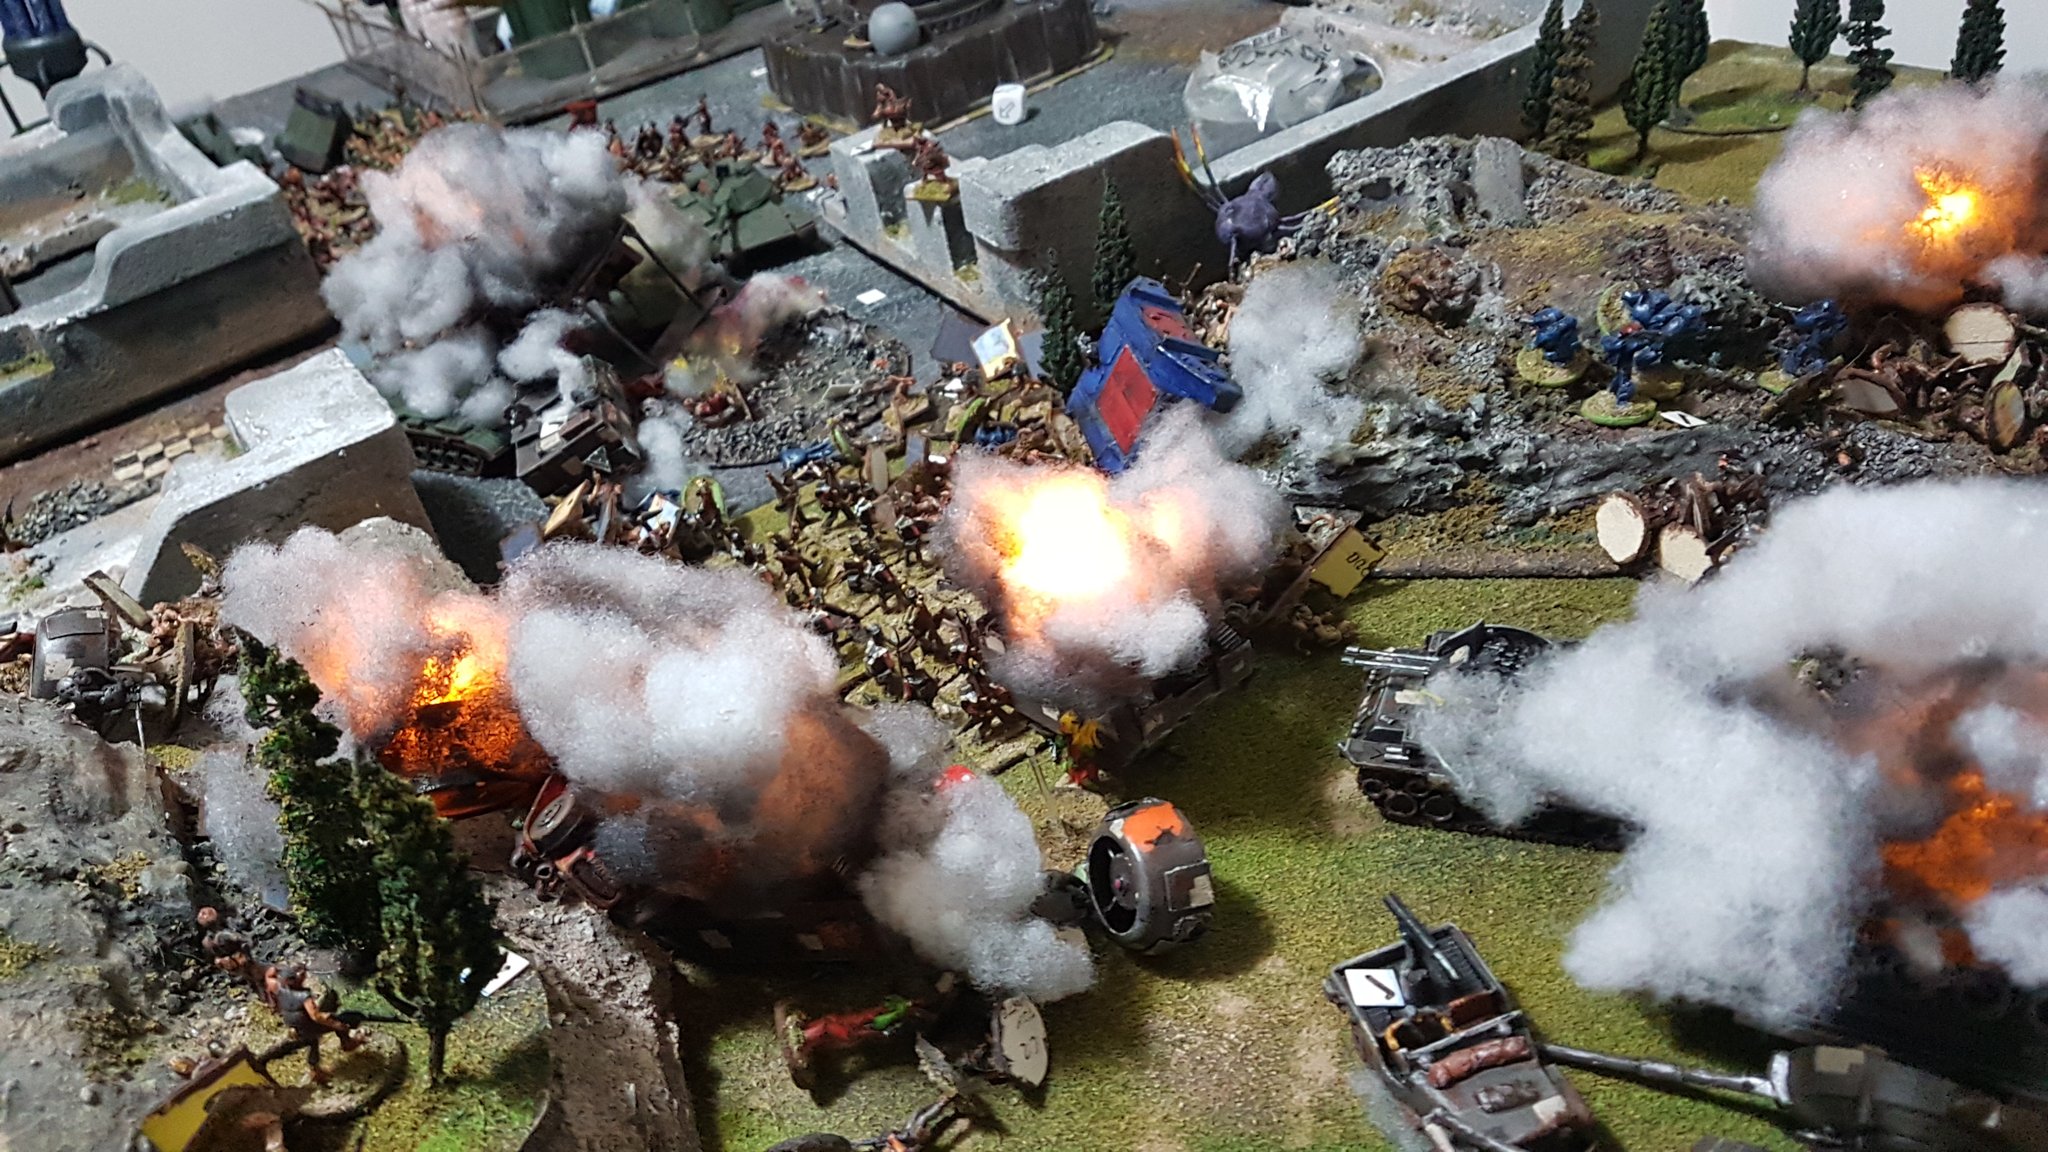
Allied reinforcements hit the beach, but look at the top of the photo….ALL THE RATS!!!!!!!!! Turns out, Dan had had the plan for this ever since we wrote the rules for the Virum Nascii special weapons teams – the Vrilgrinder teams had been steadily tunnelling through reality itself and as a result they were able to deploy right on the objective, swamping the Crimson Fists lead fireteam and Pedrov Kantrov!Silverbugs let loose their weapons and arch away from close assault range, Avenger cannons downing three plague priests..Stinger/ Tow ADATS missiles blow the heat cannon off the CreightonThe Rocketeers throttle forward to try and help the embattled Special Forces team but the rats achieve Frenzy and tear the elite SAS troopers apart! Said Ratmen are promptly immolated by a plasma missile from the Crimson Fists! The survivors pumped full of heavy calibre explosive rounds“There’s too many!”Swamped by Virum Nascii from all sides, even Pedrov Kantrov can’t hold out!While the Goodies are distracted by the whirling melee, massacring Ratmen right left and centre – a regiment of humble Slaves pick up the objective and start to leg it back to Baddie linesAtlantic Alliance M113 darts forwards, machine guns pouring fire into the Slave regiment with the spaceship, killing 7 slaves and suppressing themMore Virum Nascii Slaves swarm the Allied infantry on the heights, wiping out Delta squad but dying to a rat in the process..Kimi Rorkonnen brings Red 7 into play, his gunner Felipe Masha unleashing the heat cannon onto an Allied M60A3 Centurion, blowing the turret off!Virum Nascii special weapons teams come into play, Vrilrifles damage an M113 pursuing the Slaves carrying the spaceship – immobilising it and blowing a machinegun off itThe second team blow up an M60A3!!Jagers Marsch!Cobra missiles from the Jagers demolish Red 7, adding to the utter carnage in the central valleyZe Churmans are heavily in the fight, 88mw laser destroying Da Skooderia’s battlewagon…But the sorcerer cabal of the People’s Front Of Hazzard have managed to conjure up a psychically induced wall of fire across the entrance to the ruined town!The view from the Goodie lines as Turn 2 ends…Utter carnage in the centre!Utter chaos as we try and work out who’s winning….Charles LeclOrk in warbuggy Red 16 surveys a scene of utter bedlam and devastation…and most heartily approves!
So that’s the end of turn 2 and despite monstrous casualties the Baddies are in a good position… they’ve got the downed spacecraft and are scuttling back to their table edge with it, and the main route for the Goodies is largely inaccessible due to wrecked armour and magic fire… what adventures will turn 3 bring?!? Stay tuned, stay thrifty, and stay healthy and safe out there, we’ll be back soon!
We live in strange and confusing times. Fake news, claims and counter-claims.. it seems like everyone has an agenda these days and it’s hard to know who to trust. But here at Skinflint HQ, we strip away the opinions and get straight to the facts, to answer the burning question so many of you want answered.
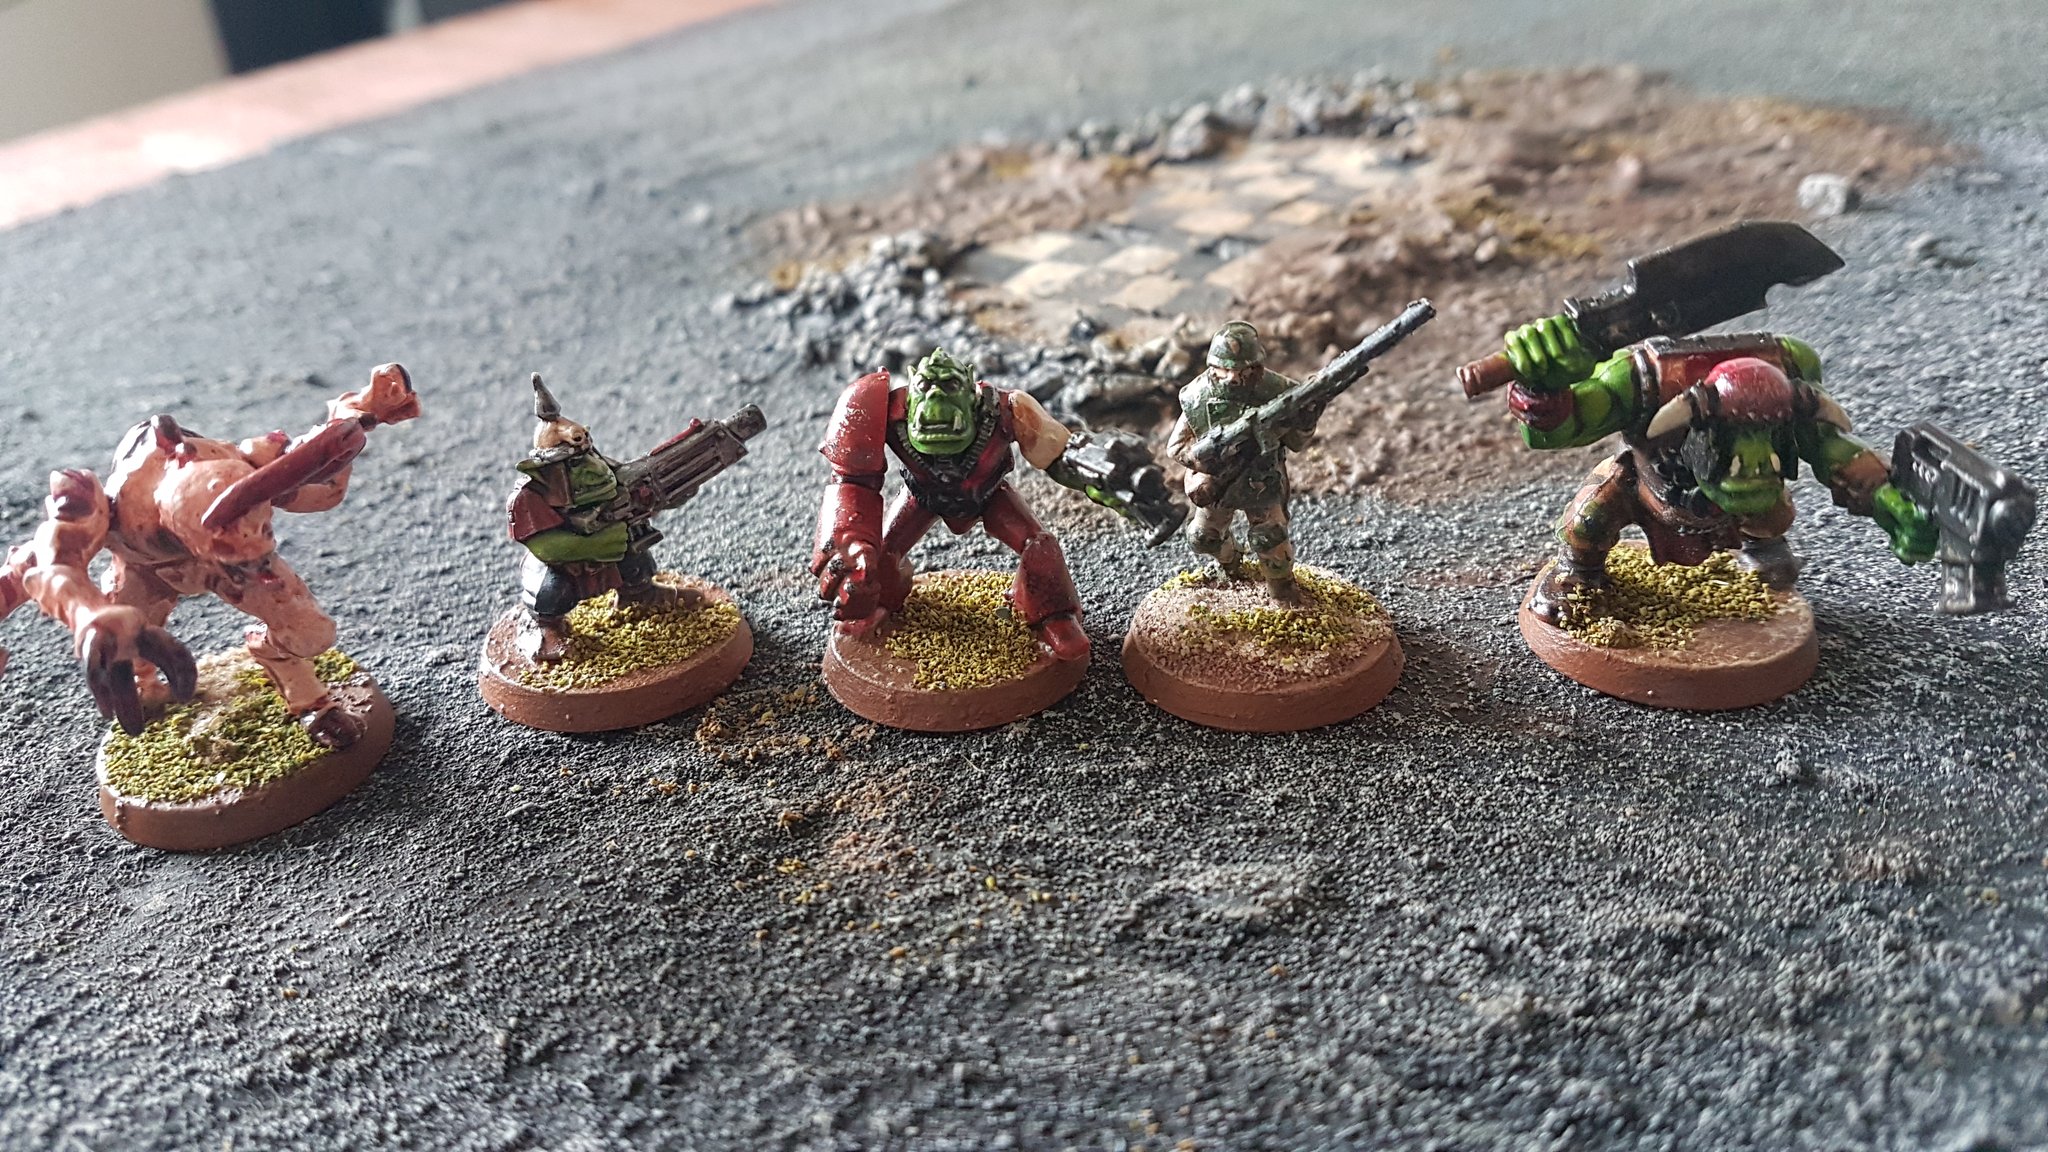
Just how well do Valiant Miniatures’ “heroic 20mm” WW2 miniatures scale with 40k figures?
I set out to find out – inadvertently ordering a full box rather than the single sprue I had planned to, but not going to argue with the results, 65 figures for £14.95! So maybe that Imperial Guard army you fancied doing isn’t so far out of reach?
I had actually got something slightly different in mind (assuming the results of my experiments were up to par) – we’ve already got the Guard for 40k in 20mm, and just doing the same thing in a slightly different scale seems a bit pointless to me (not to say we won’t do that at some point, but still) – I had actually planned to build a Levy platoon for Firefight, to work through the campaign in the rulebook, probably for a bit of Deadzone too, and I was planning to give them a bit of a “Colonial Marines” kind of vibe to try out another lost system from the 90s… more on that another day!
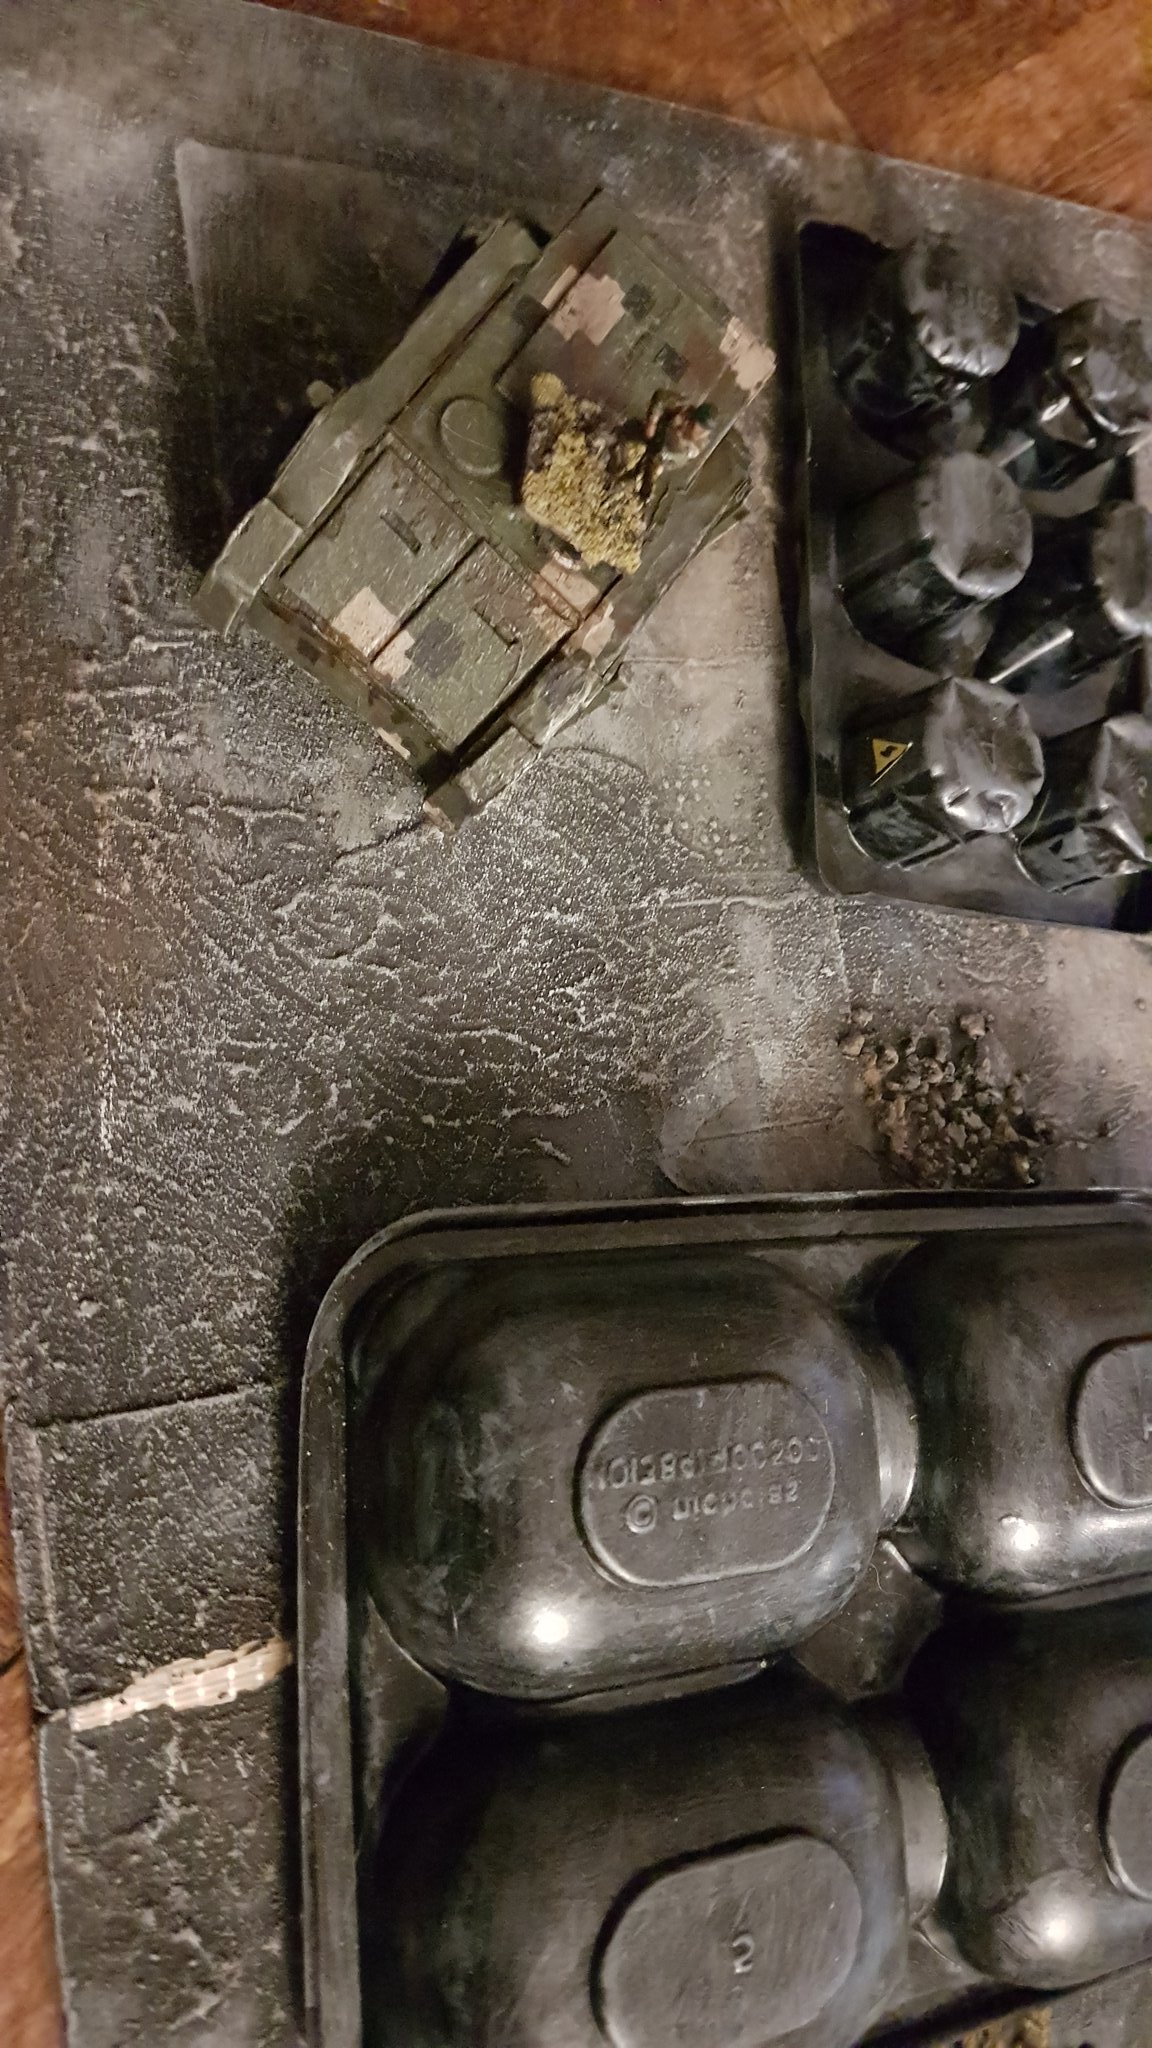
For my test figure, I based one of the little guys (late WW2 German infantry) on a 25mm round base, and after having drawn inspiration from this thread on TMP, I started to sci-fi him up a bit using card, superglue, granny grating (thanks Dan!) and greenstuff. He got a visor for the helmet (cardboard – this got knocked off during the conversion process and forgotten about, whoops), some body armour over his tunic (cardboard again), a greenstuff facemask – in the grim darkness of the far future, it pays to be COVID-secure – and some granny grating to turn his Mauser rifle into a lasgun/ pulse rifle/ autogun.
Mask, as is de riguer these days…
Body armour and knee pads
Upgunned with granny grating
Next step was basing – a bit of filler to smooth over the lip where the mini joins the base itself, followed by Ye Olde PVA & Sand mix, then a spray with white primer and a thin Smokey Ink wash. I’m not sure this really has an effect on the shading, but as I get older and my eyes start to go, this is really helpful to outline which bit is where on the miniature.
And the result:
Now we’re getting the 40k vibe..
I took my cue from the “Aliens” and “Avatar” films for the paint job, going with a craft tan base coat and a digital (ish) camo pattern using Army Painter Goblin Green, Vallejo Russian Green, Olive Drab and German Grey, all unified with a thin Smokey Ink wash and a very light bone drybrush.
I’m pretty happy with the result, he’ll do well for Firefight once he’s got his mates with him and he’s generically sci-fi enough to work in a variety of settings. And I’ve got 64 friends for him, all for under £15!
As you can see, he looks pretty good – I think he works as a “true scale” human, he’s a bit puny looking compared to the Ork, but that’s kind of how it should be.. he’s taller than the Gretchin but much less imposing than the Marine, and that again is how it should be. So maybe those folks looking for “true scale” Marines are missing the point, the actual way to go is to downsize the humans?
Anyway, that’s it for now, I’ve got a LOT of superglueing to do to build a platoon of these guys! Stay safe and thrifty out there, we’re getting there now….
So, sitrep – things suck. We’ve passed 19,000 dead here in the UK, the NHS is running on fumes, America has projections of almost a quarter of a million dead and God alone knows what’s going to happen when Covid-19 hits the slums in places like Bangladesh or Calcutta. Here in the UK, the maxim is stay home, stay safe, protect the NHS – and regrettably it seems many people can’t even manage that. It’s a bleak and scary time.
But it’s also a time to maintain a sense of proportion. Yes, We’ve lost 19,000+ to the virus – but we regularly lose 8,000 to seasonal flu. In the US it’s estimated that 24,000- 63,000 fall to seasonal flu each year. Let’s be realistic – statistically you’ve got a 99% chance of surviving the virus should you contract it. The projected death rates are simply from the fact that we have huge populations. My heart goes out to those who have lost loved ones from this, but it is NOT the end of the world. 100 years ago, Spanish flue tore through a world recovering from the butchery of World War 1, and despite having nowhere near the scientific base of knowledge we have now, the world endured and survived. We will endure and survive this too.
Dan and I are both following the rules and staying at home, and we both have a personal stake in this – Dan’s wife is a nurse, my girlfriend is an HCA (health care assistant), and we both want them home safe at the end of each shift. So I implore you (although if you’re smart enough to read this blog you’re smart enough to know this anyway) – STAY HOME. IT’S NOT LIKE THEY’RE PUTTING YOU DOWN A F*CKING COAL MINE. STAY HOME & WATCH NETFLIX… pretty sure the WW2 generation could manage this without issue!
Anyway, rant over – seeing as my other half can’t come over and my gaming buddy is under lockdown too, I decided to do movie & game night with a zombie theme.. hey, you think things suck now? Imagine that the virus reanimates it’s victims…
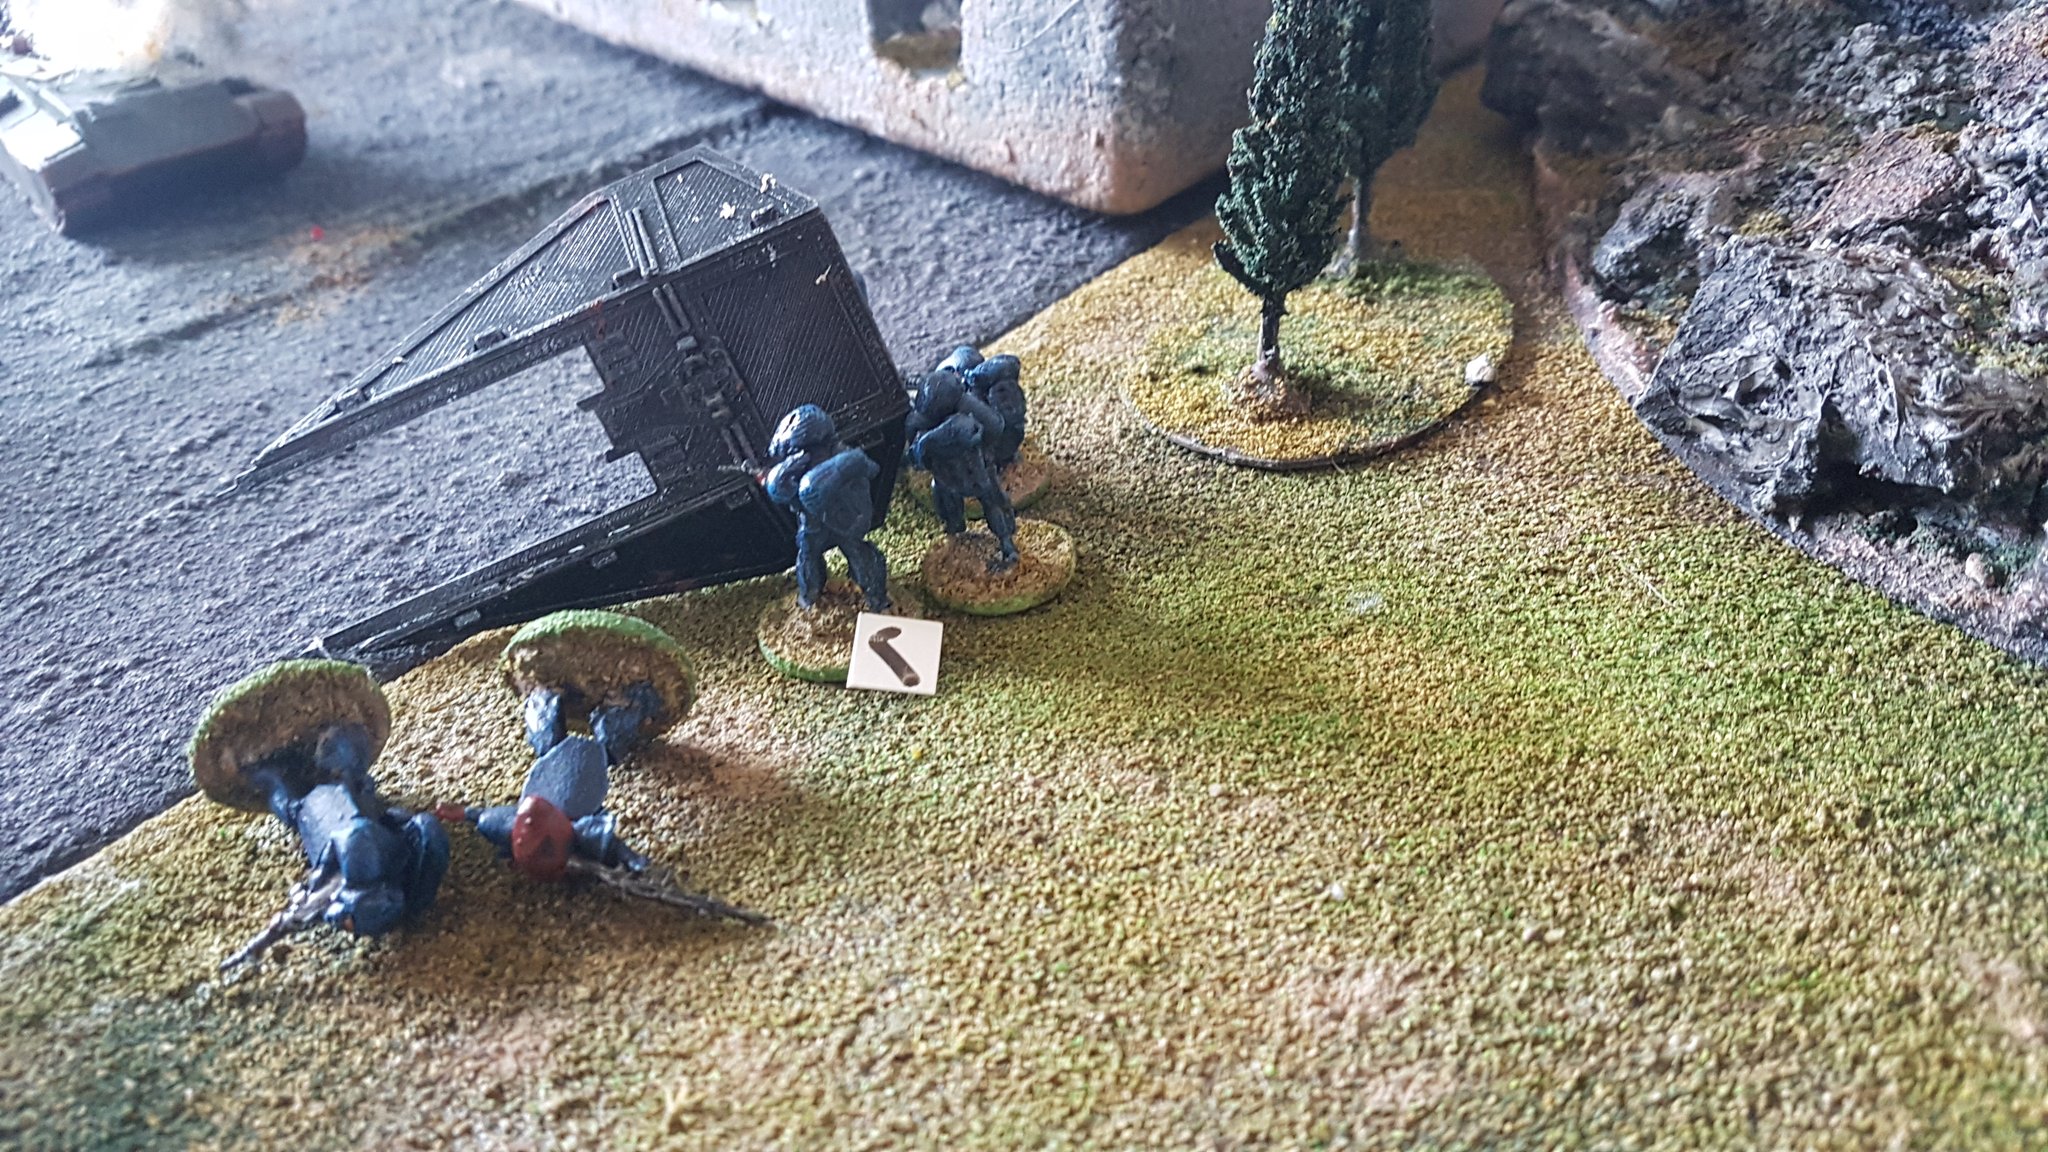
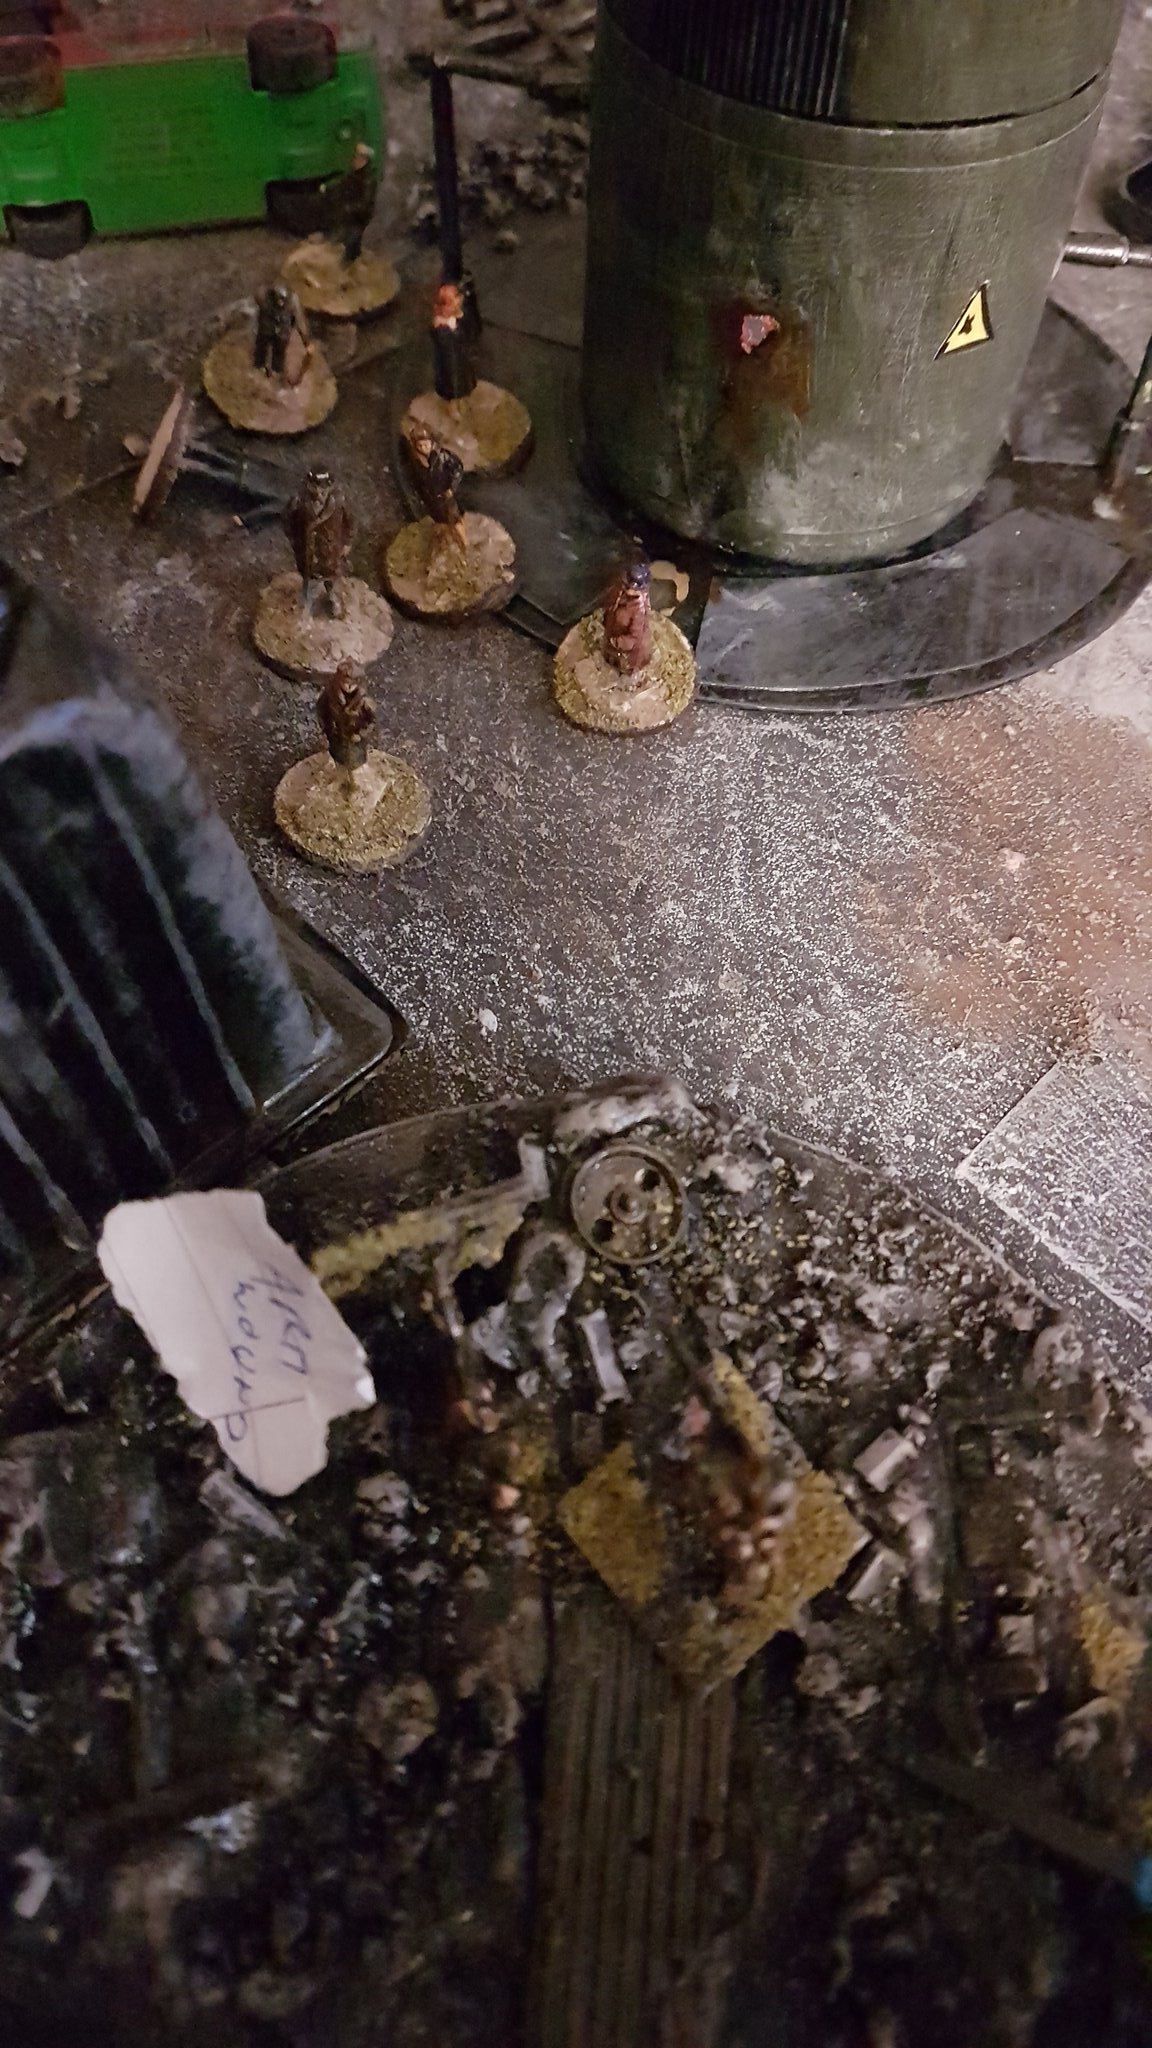
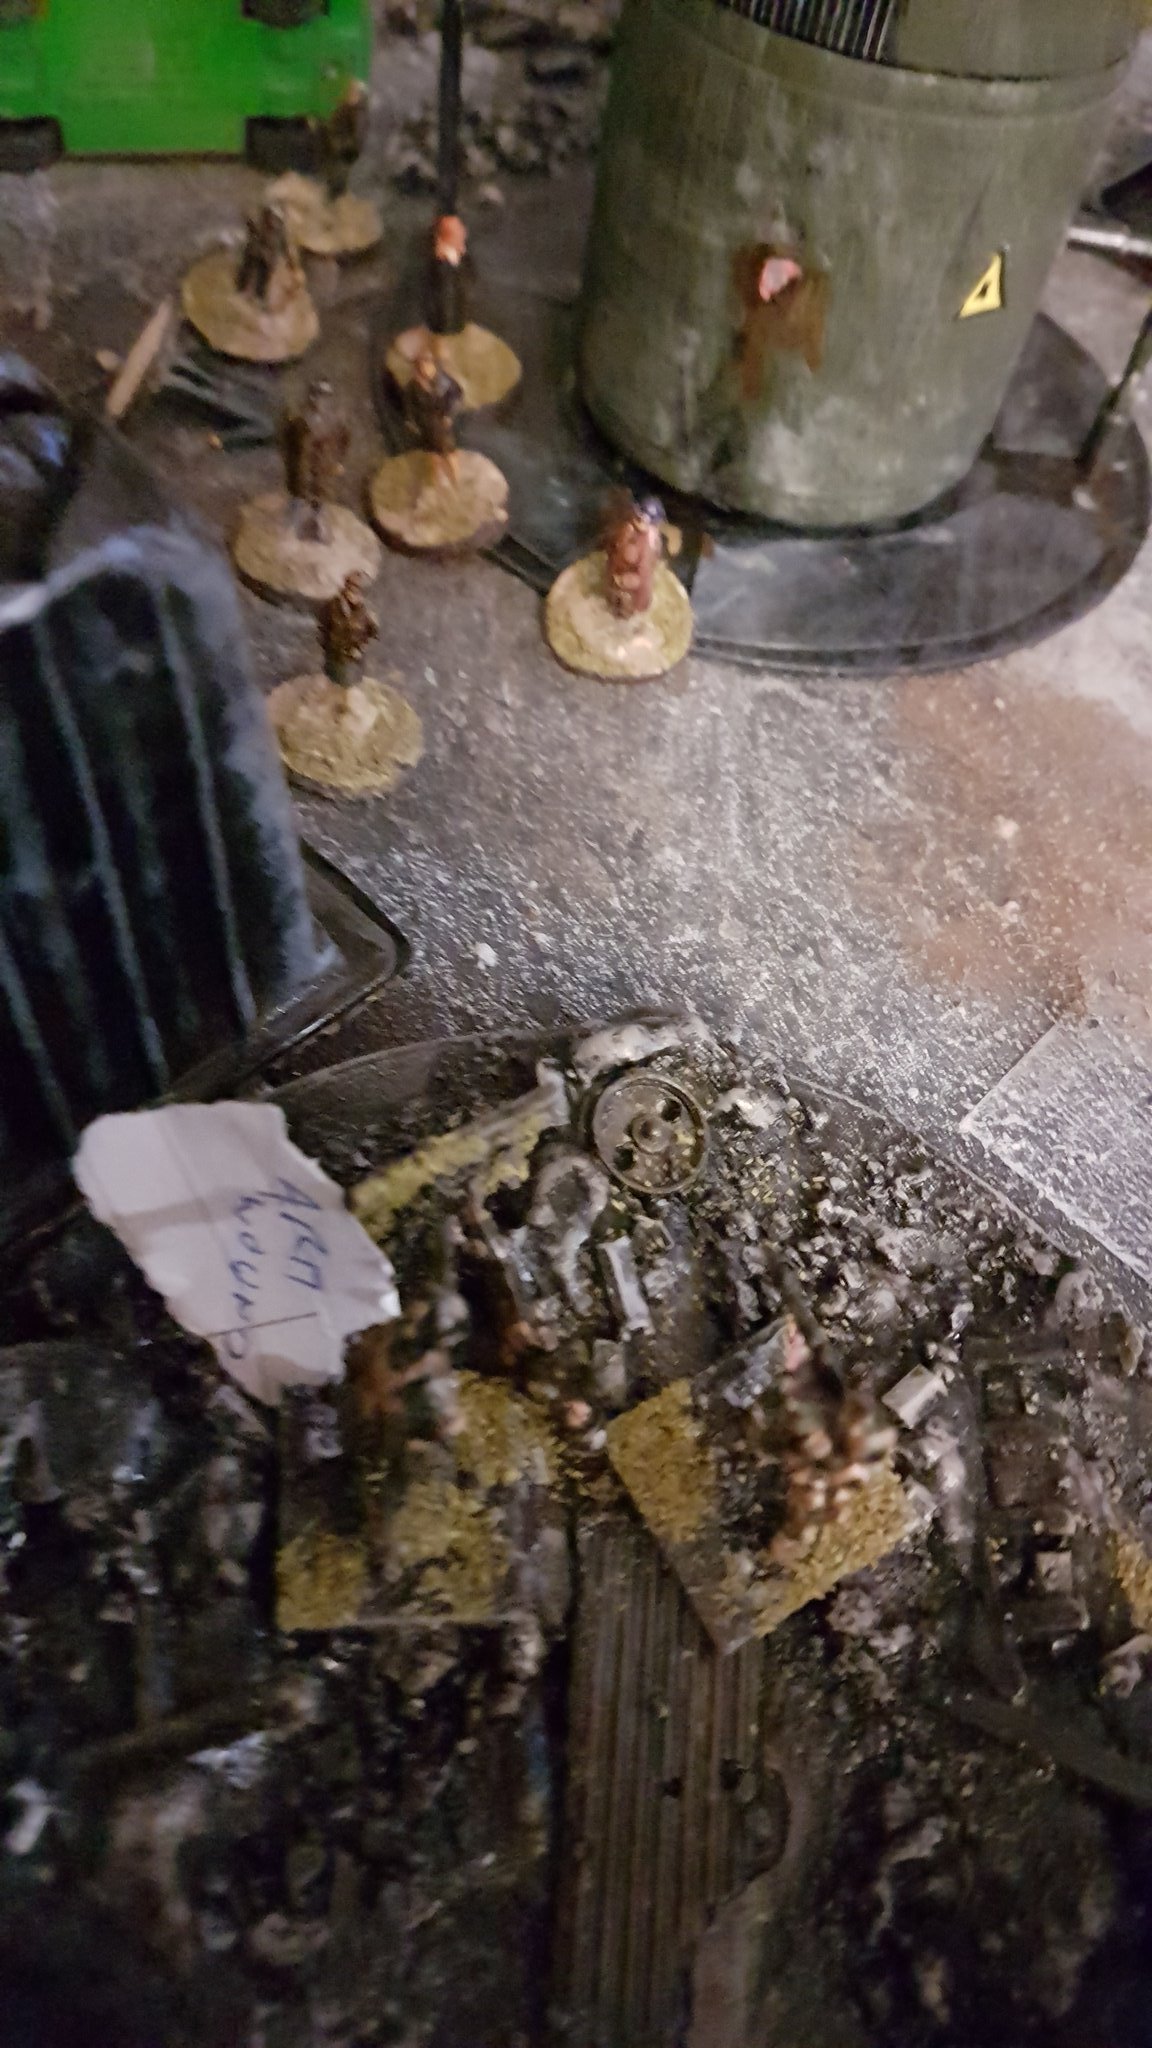
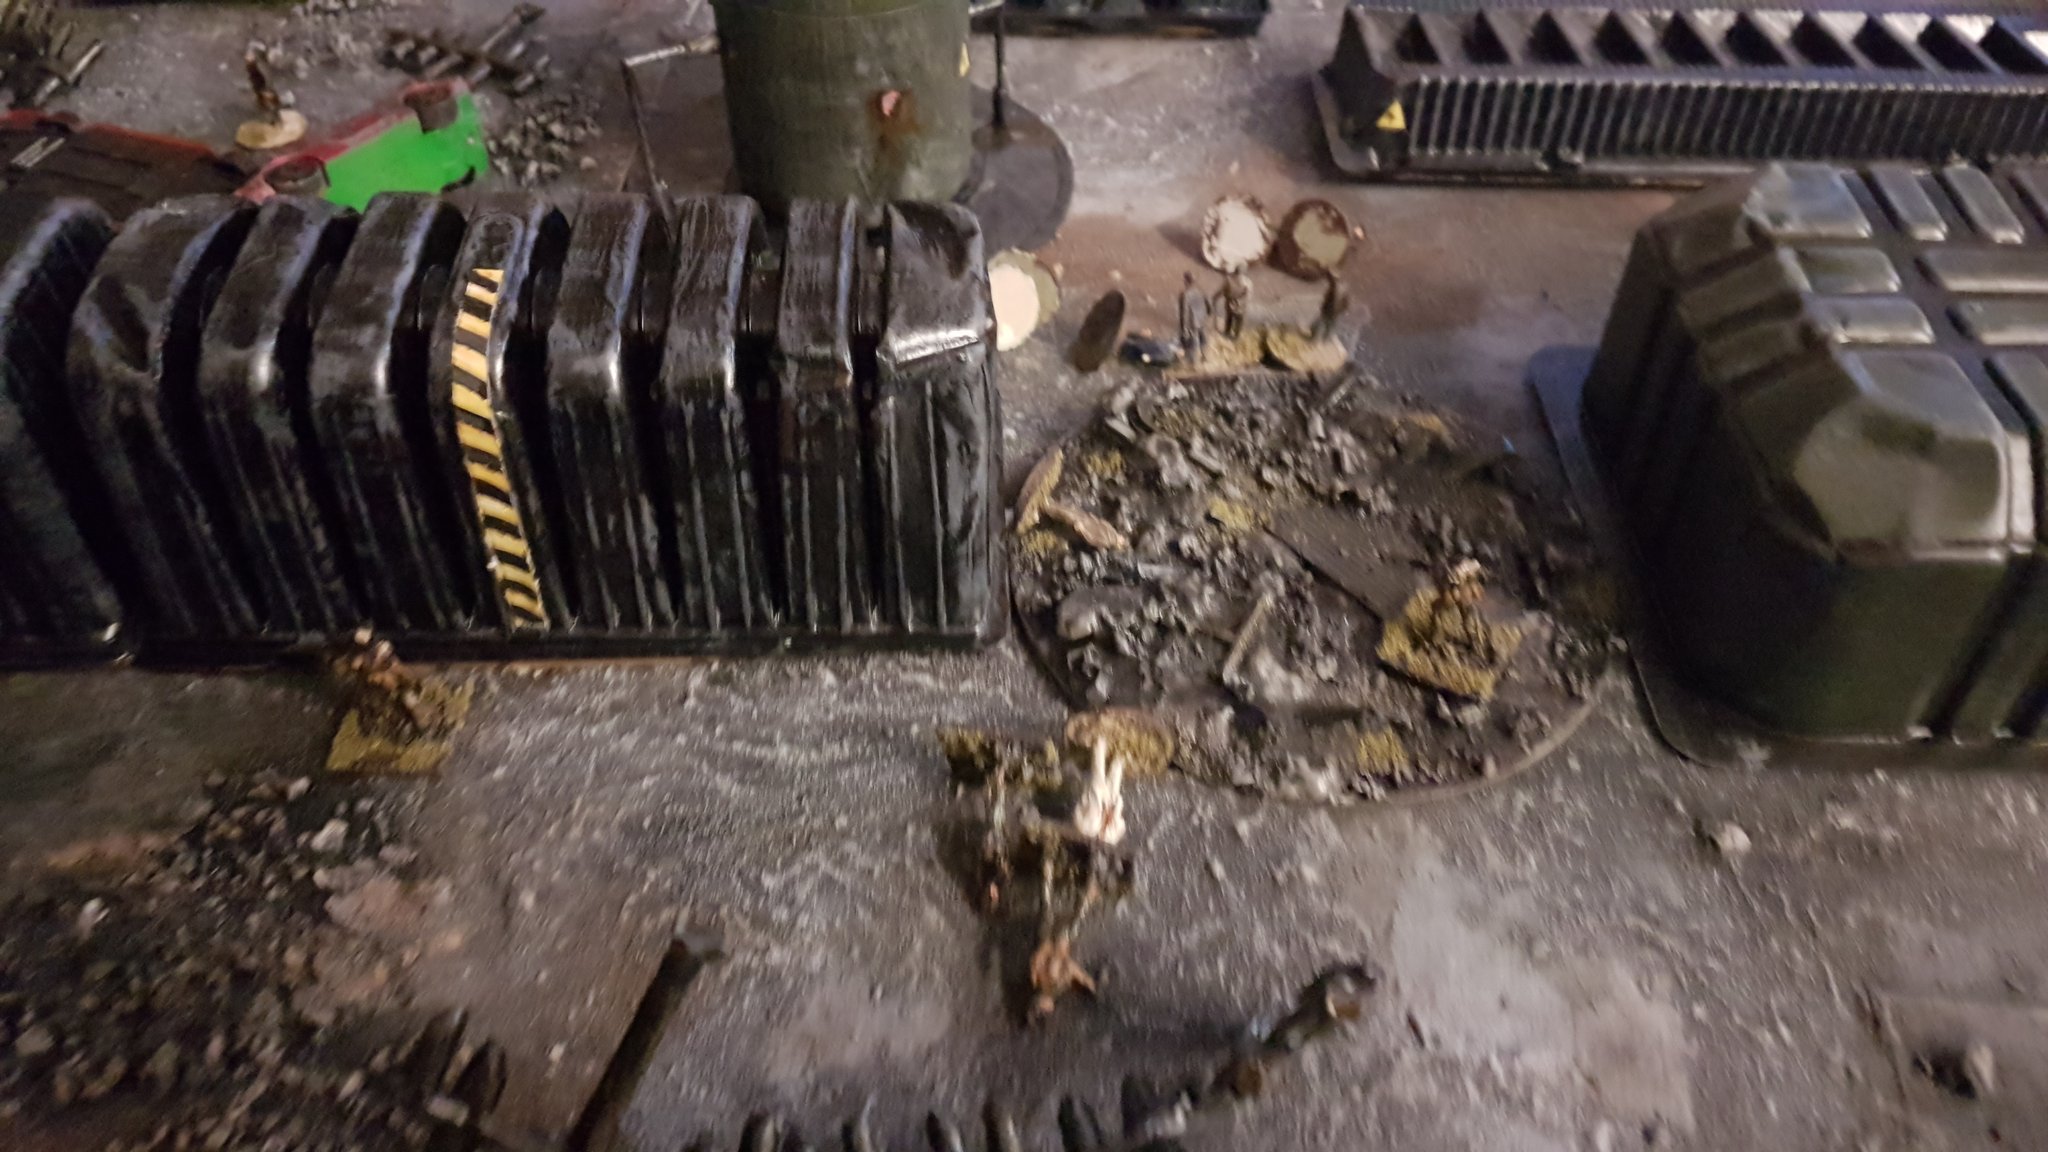
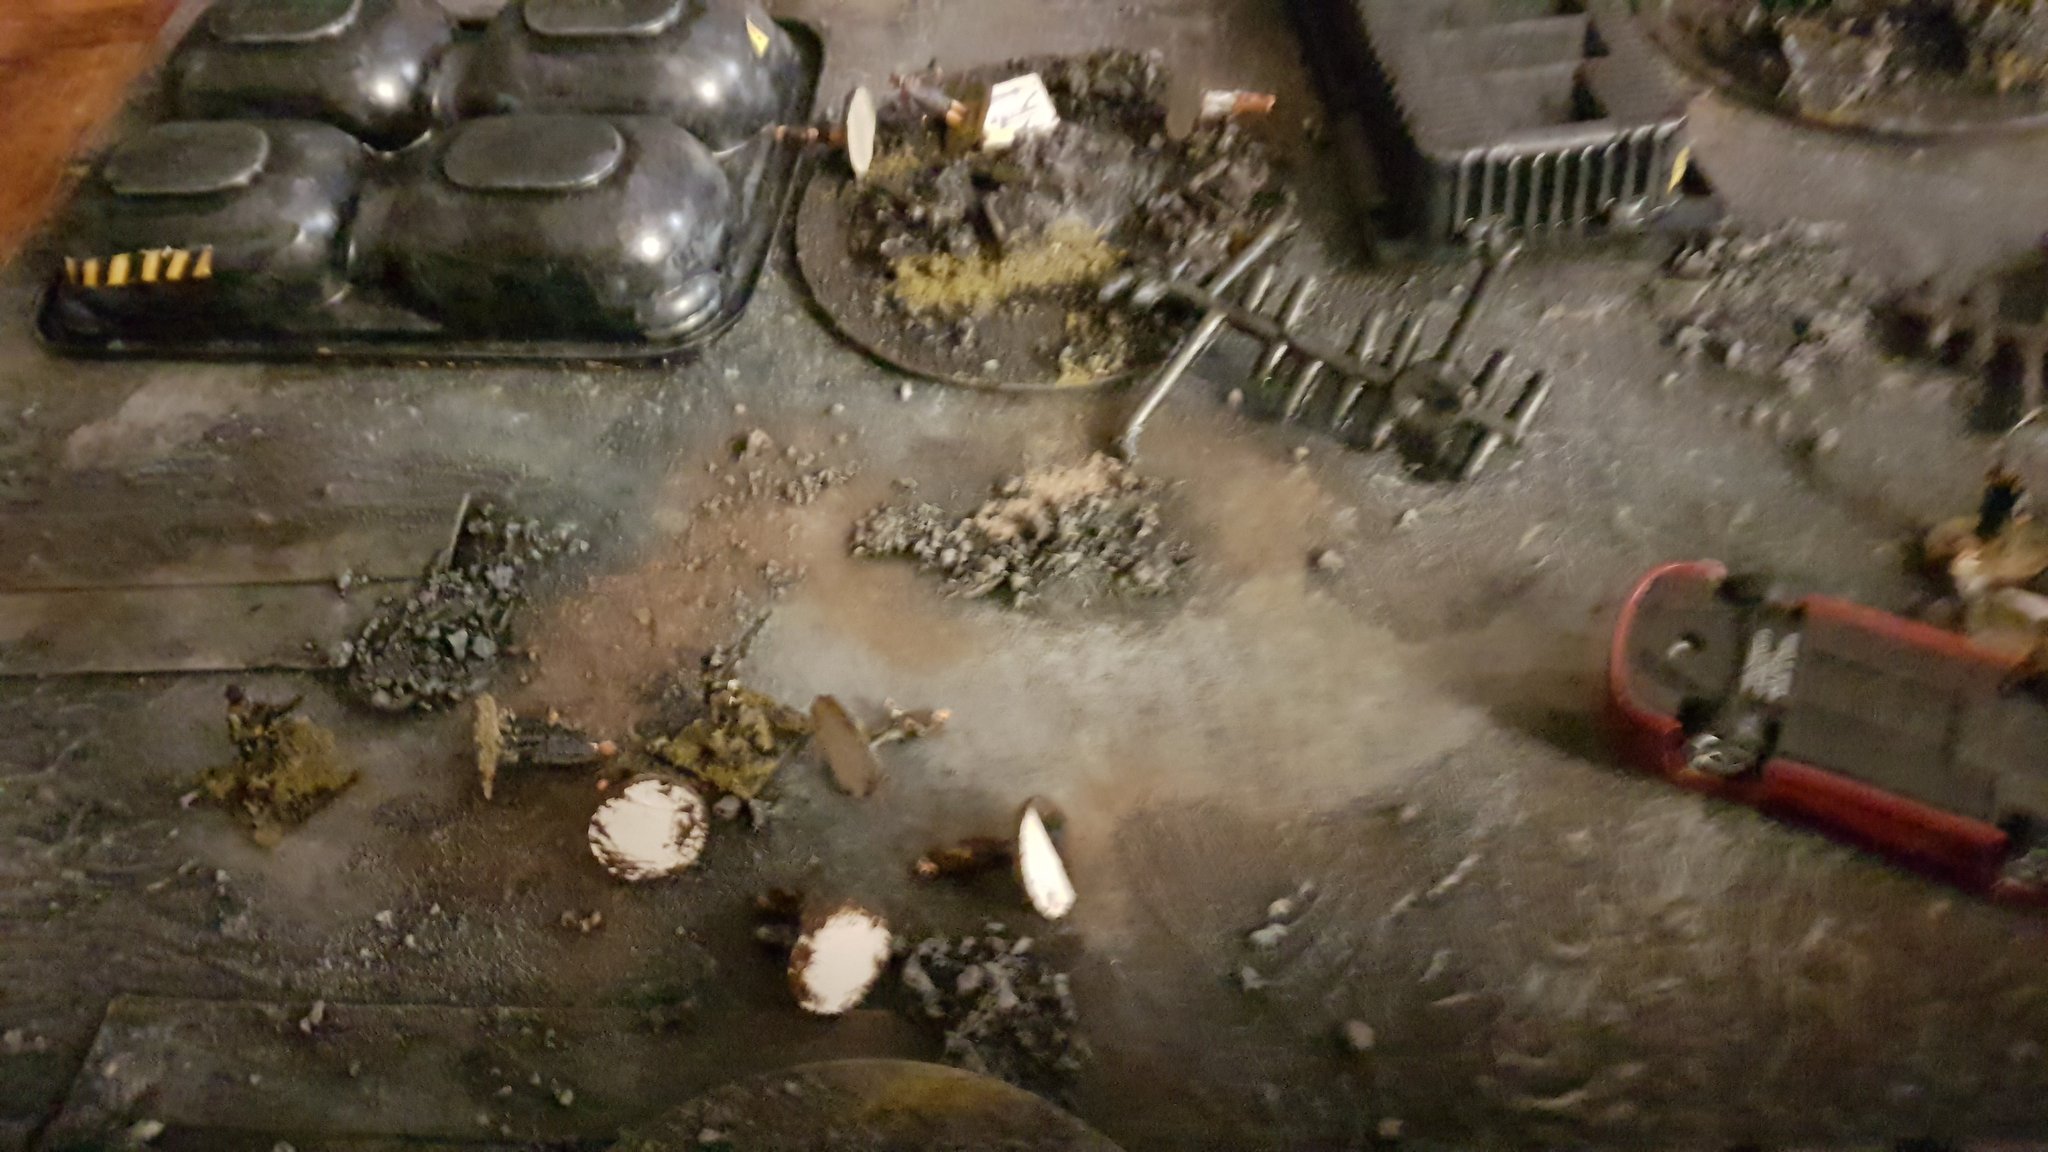
So with that in mind, I set up a solo version of Apocalypse Earth: Black Ops – our skirmish RPG variant on the main game rules – with the idea of an Atlantic Alliance Special Forces team moving through a derelict industrial estate to rescue a group of scientists trapped in an abandoned APC.
Special Forces team deploy bottom left hand corner – Lt. Hunt, Specialist Moss (RIP) Hill, and Stewart with himA drone eye view of the battlefieldThe team deploy in coverIncoming!Zombies spill from their spawning points all over the boardThe team move out but Stewart takes an arm wound, caught in the open by a zombie with a pistol!The rest of the team close up in supportThey down a zombie but more approach, forcing the team to pull back!Stewart downs a zombie but return fire stuns himJust what you don’t need in a firefight!Specialist Moss pitches in to help the stricken Stewart, but…Reload? Seriously? Did no one check their weapons before they shipped out?!?As CO, Lt. Hunt dives in to provide covering fire for his team…Oh, f*cking seriously?!? Did NOBODY check their weapons before they left?!?Zombies fall upon the team! An ignominious end as the team are overrun and eaten!
Hmm. Slightly unsatisfactory experience, if I’m honest. However, I had given all the zombies guns and a fair old turn of speed, which, in addition to their numbers probably gave them an unfair advantage. After a few minutes rumination I reset to go again, but this time the zombies would have no weapons, a CCR of 0, a move allowance of 8cm, and the team’s weapons would be replaced with more advanced “pulse rifles” with a ROF of 5. Let’s give this another shot!
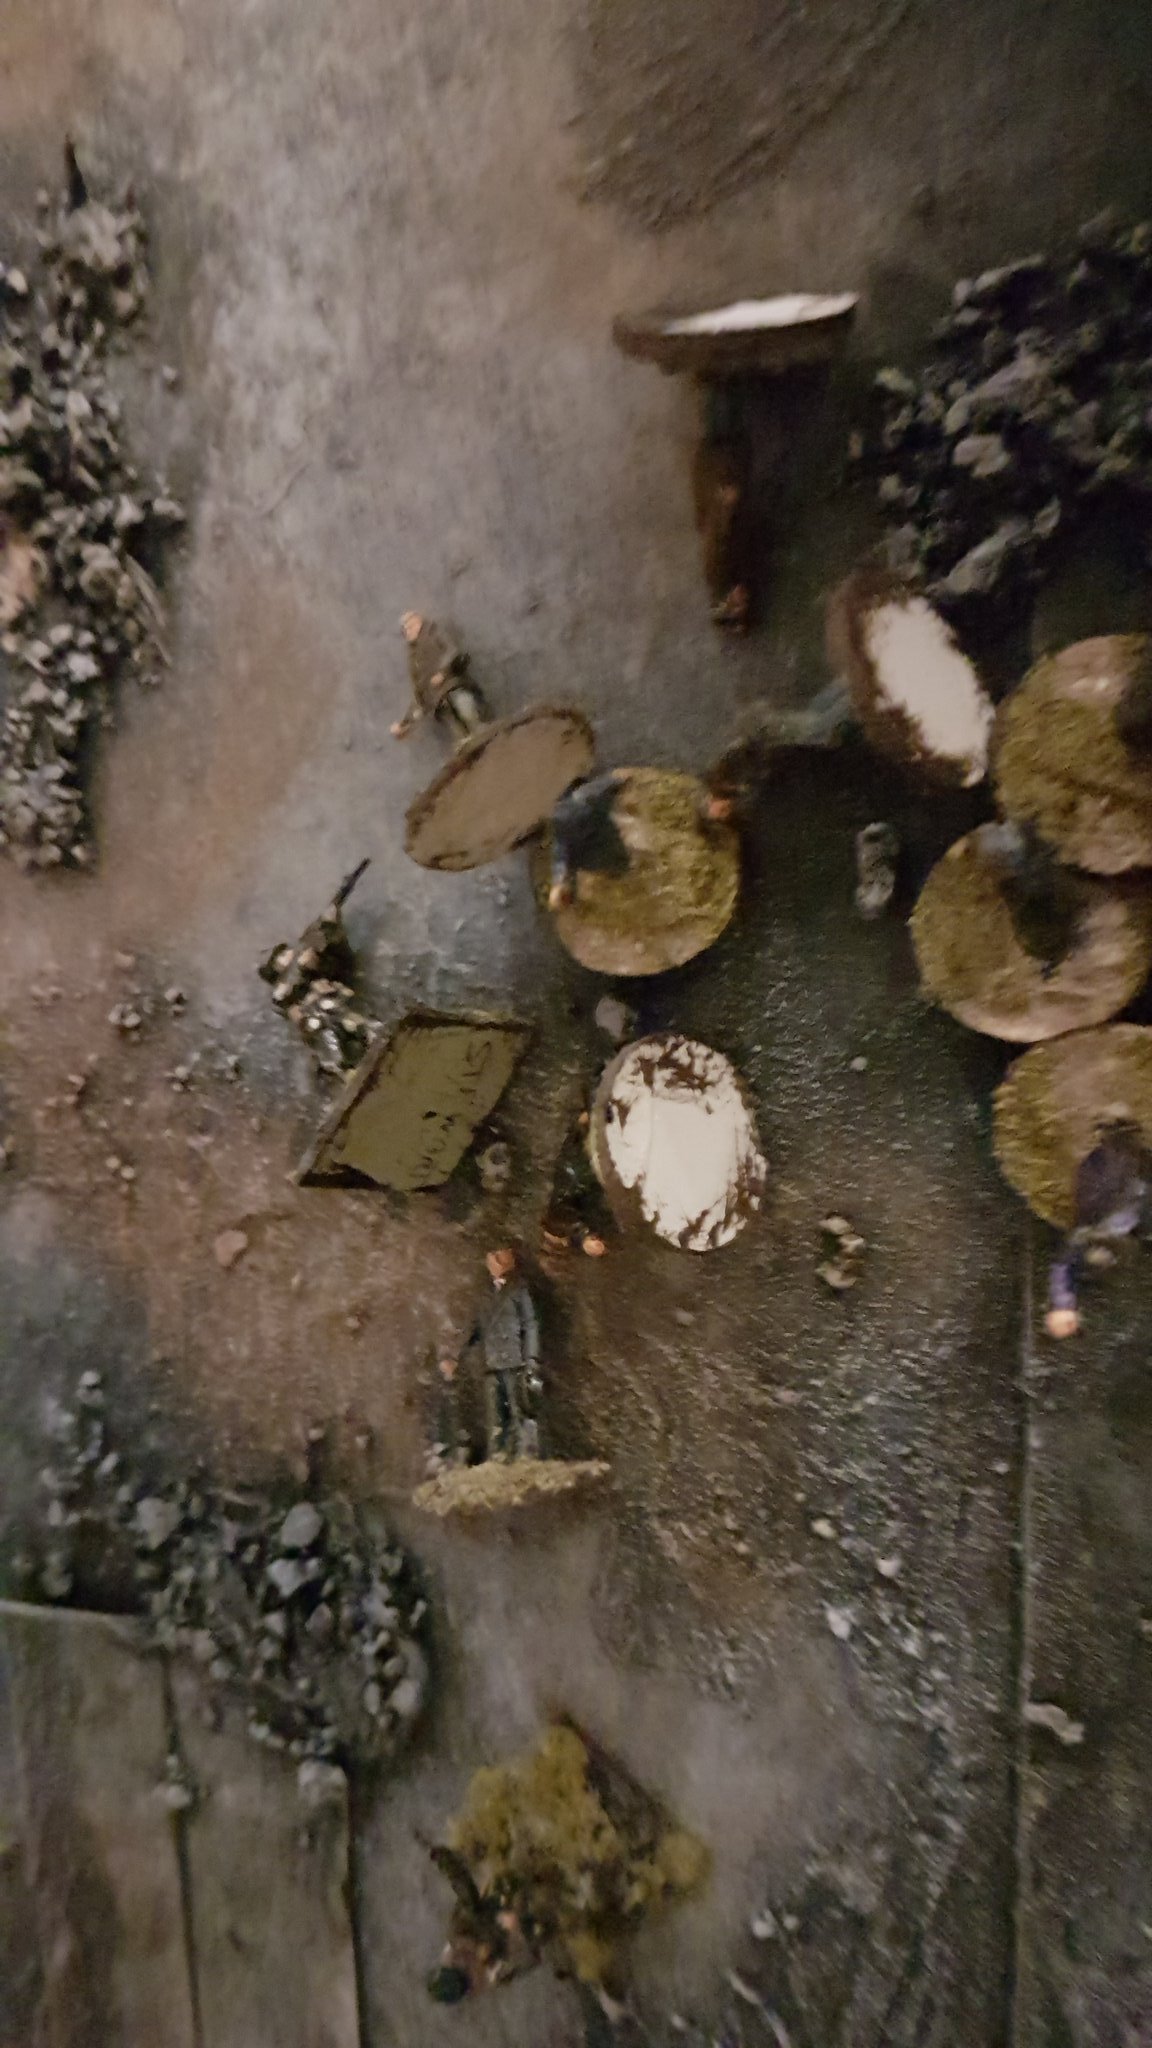
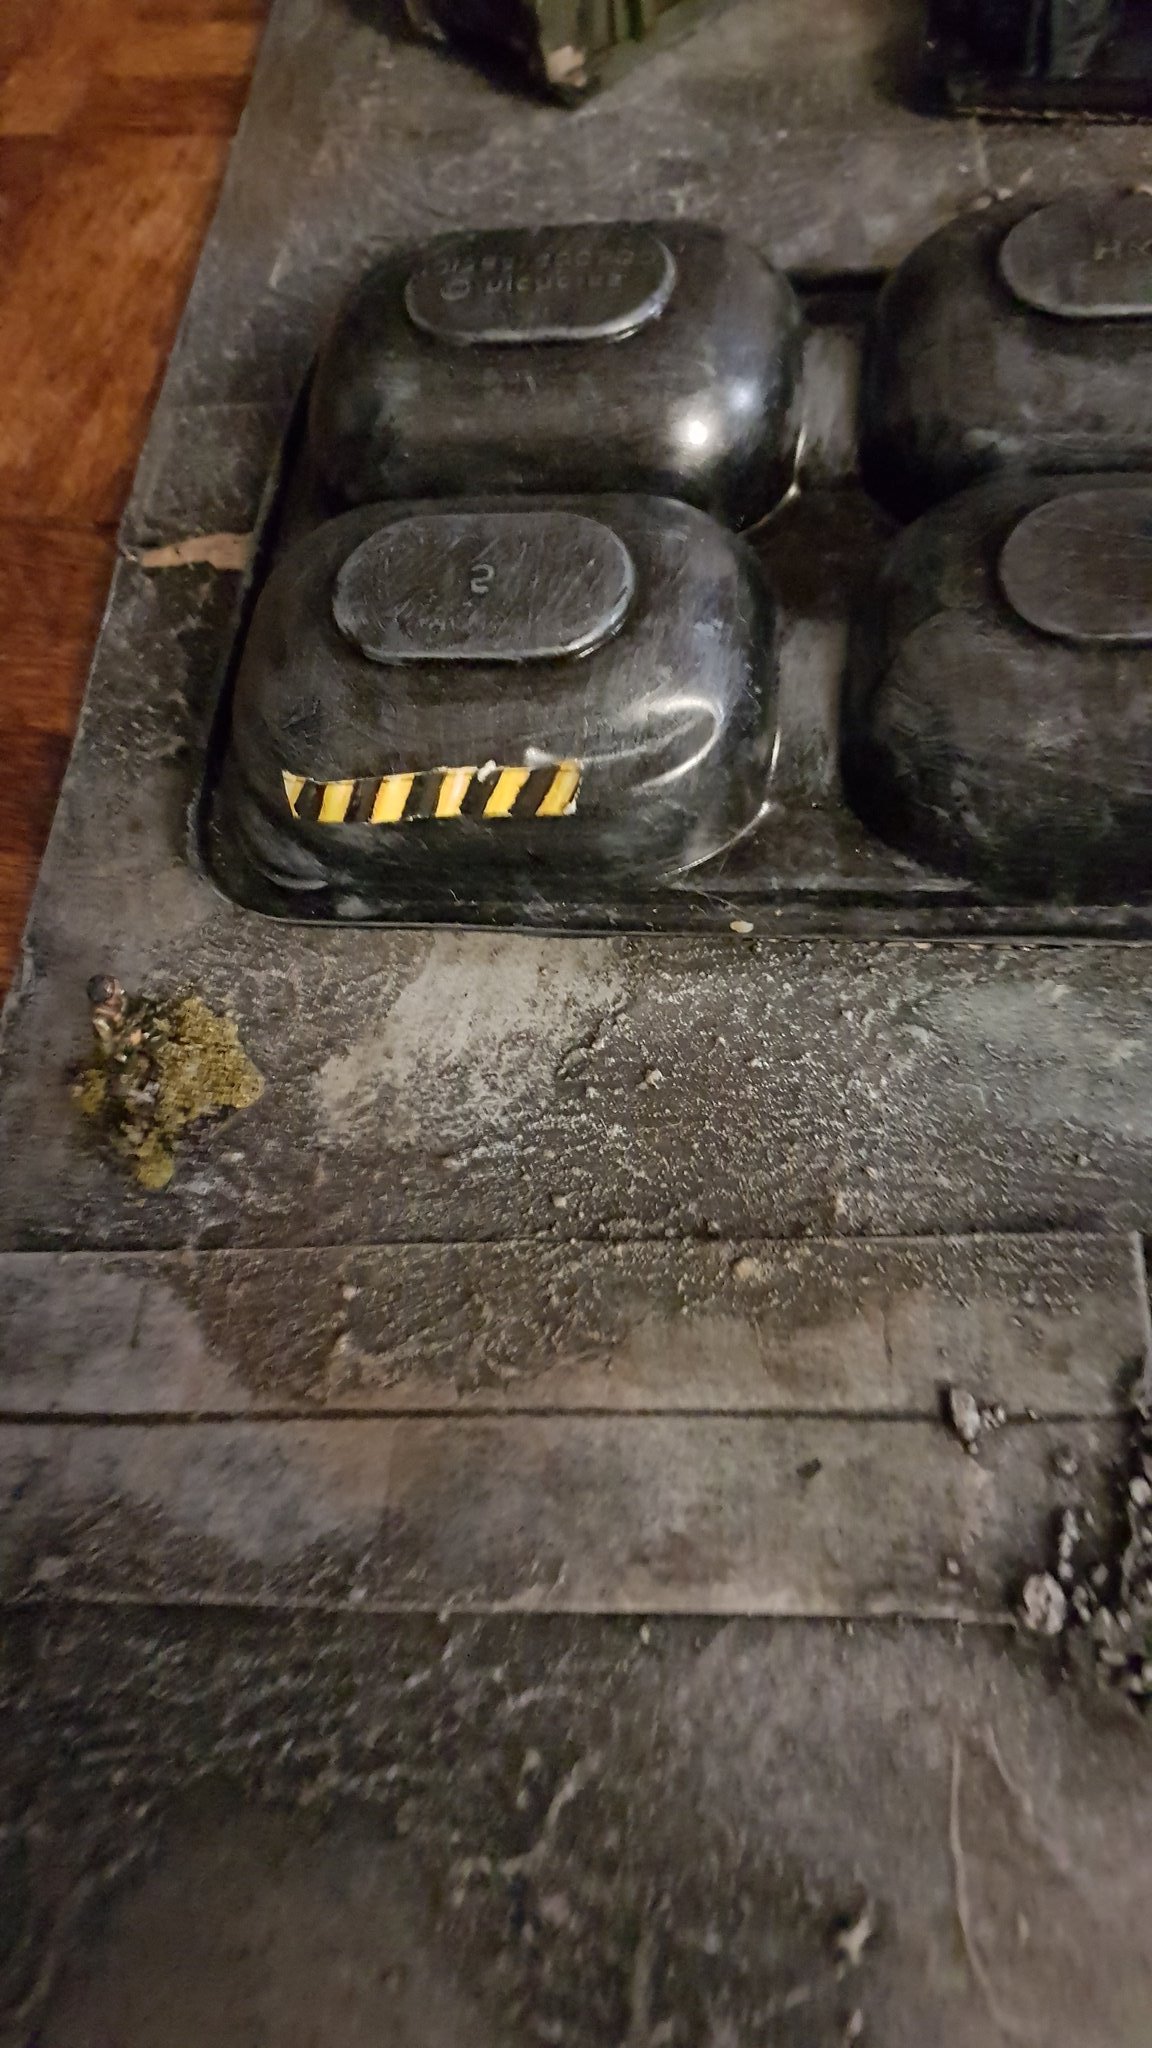
The team deploy into cover in the bottom right hand corner Zombies pour forward as the team take sniping positions, keeping their distance and using their firepowerBut Specialist Moss lets them get too close, felling two but three more fall on his position!Specialist Hill moves in to support, Stewart and Hunt massacring zombies in a lethal crossfire!Hill falls to the zombie hoard. Remembering the mission, Hunt bawls to Stewart to get moving – their mission is to rescue the civilians, not slaughter the numberless zombies….Stewart and Hunt move efficiently across the battlefield, using fire and movement to cover each other…Stewart falls to a massed horde of zombies catching him from a flank – there simply aren’t enough bullets! Now it’s down to Lt. Hunt..Hunt skirts around the side of some industrial machinery, keeping his distance from the zombie horde…Making it to the APC by the skin of his teeth! Whatever those scientists know, it better be more valuable than yet another formula for erectile dysnfunction or male pattern baldness disorders, that’s three highly trained and valuable Special Forces soldiers who’ve ended up as a zombie’s lunch!
Whew, well, that second go around was a LOT more intense and cinematic! I got bogged down in the early phases trying to gun down the zombies but that was never going to happen, their sheer numbers were always going to win out, so I should have kept moving as fast as possible, only shooting when necessary and keeping my distance. Oh well, as an Atlantic Alliance player I guess I’m too used to standing my ground and gunning down Dan’s Holy Soviet Army hordes… and once all this coronavirus hideousness is over, I’m very much looking forward to doing that again!
As always, stay safe, stay thrifty out there and we’ll see you soon (hopefully). Love to all our friends out in the blogosphere!
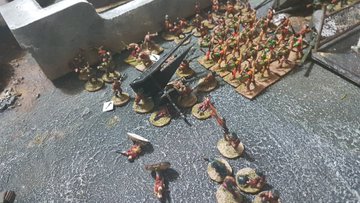
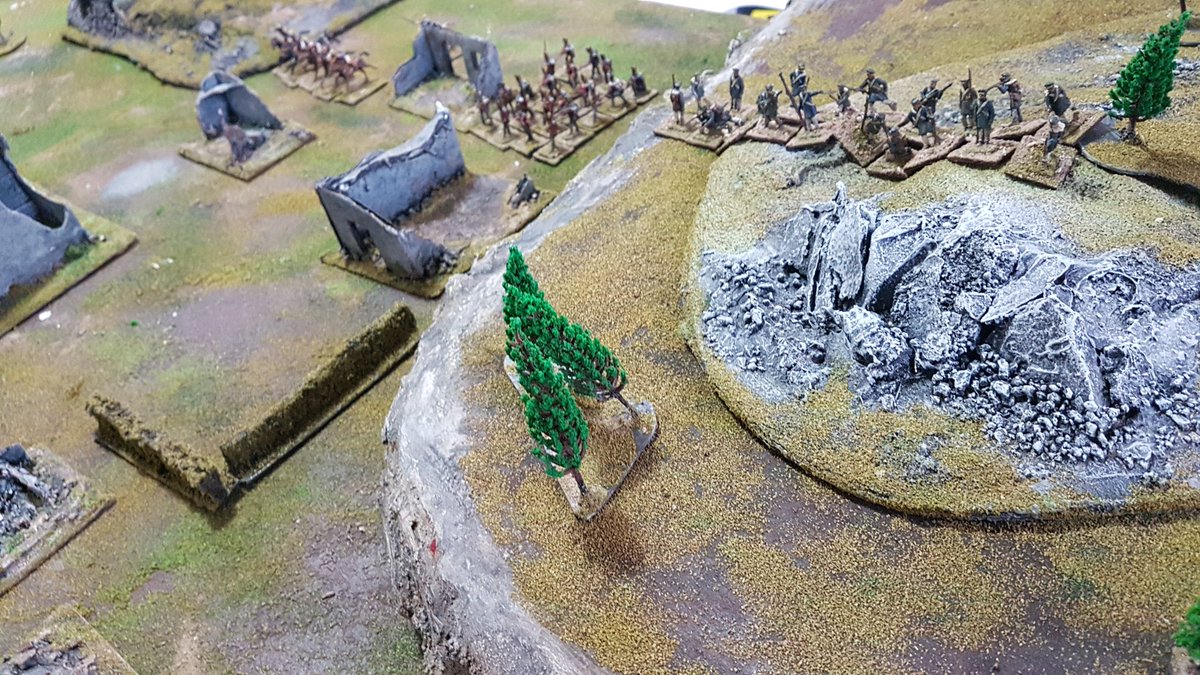
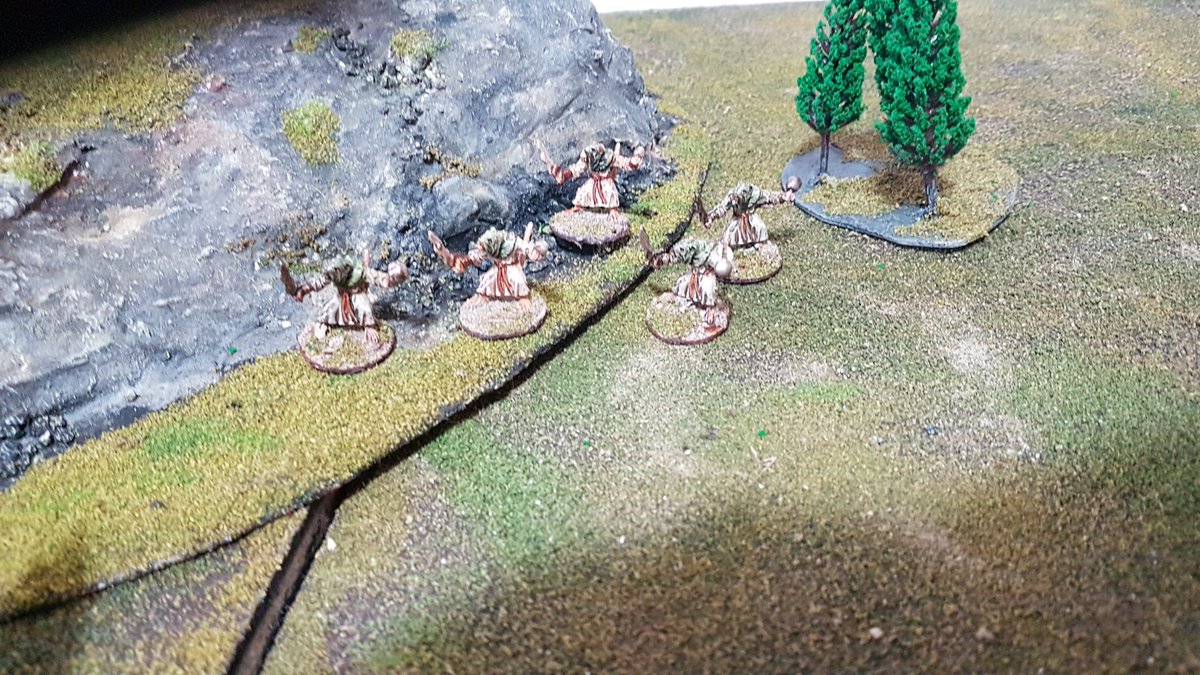
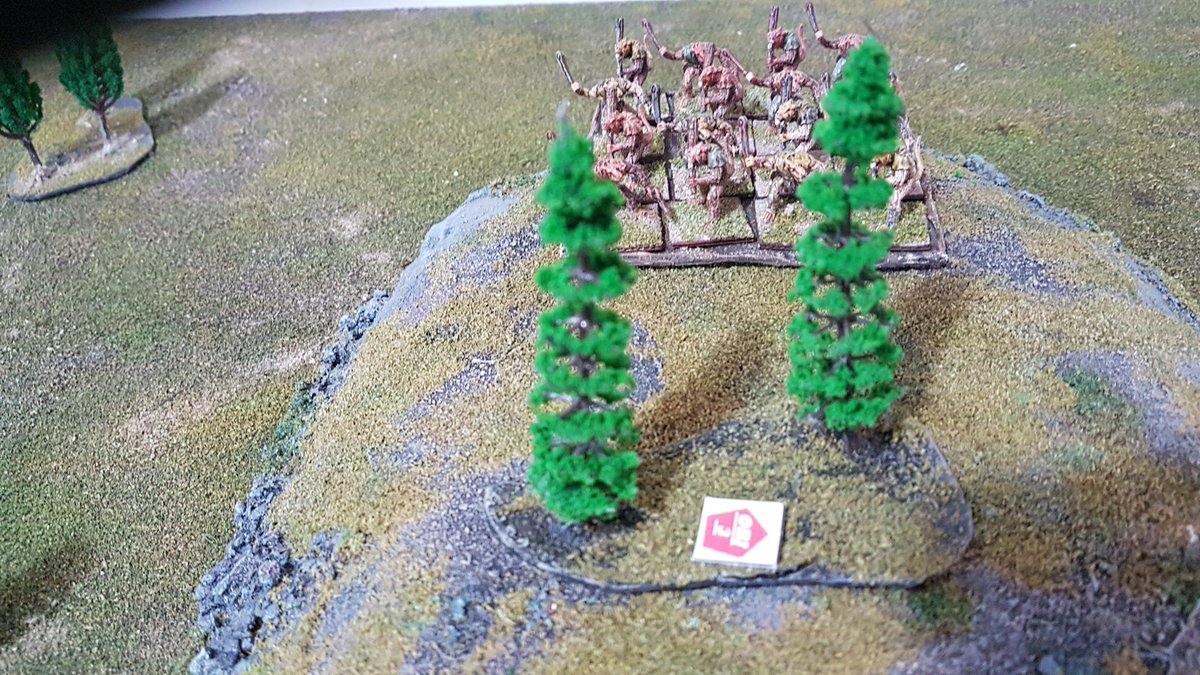
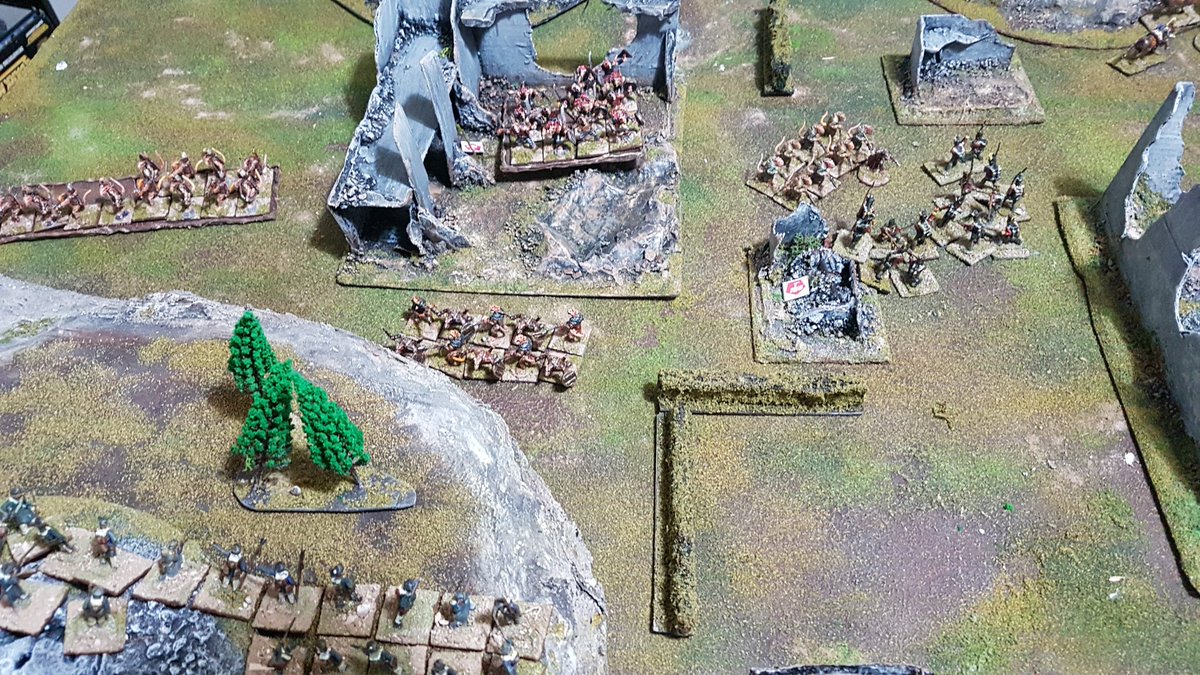
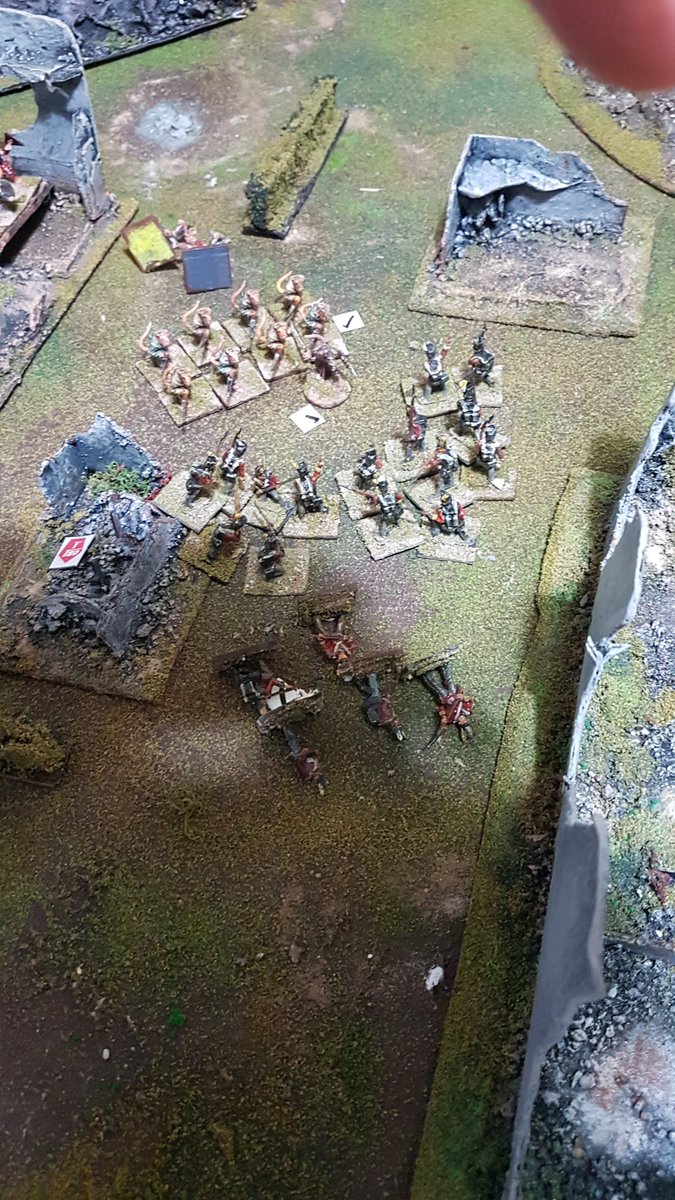
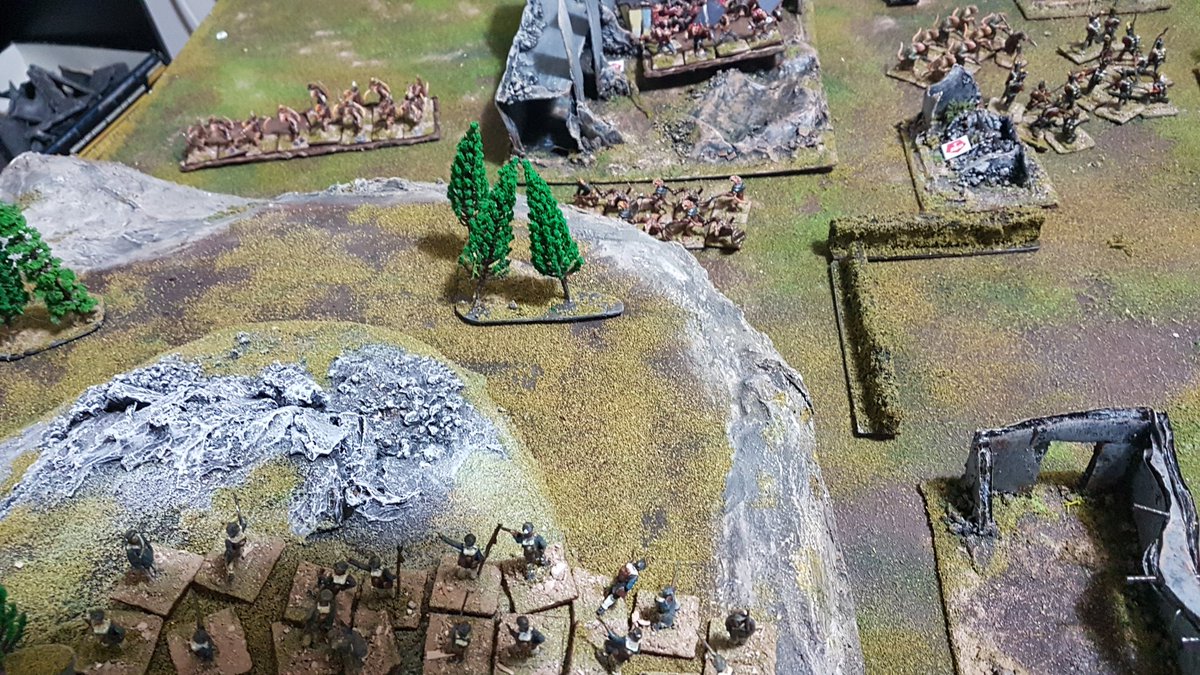
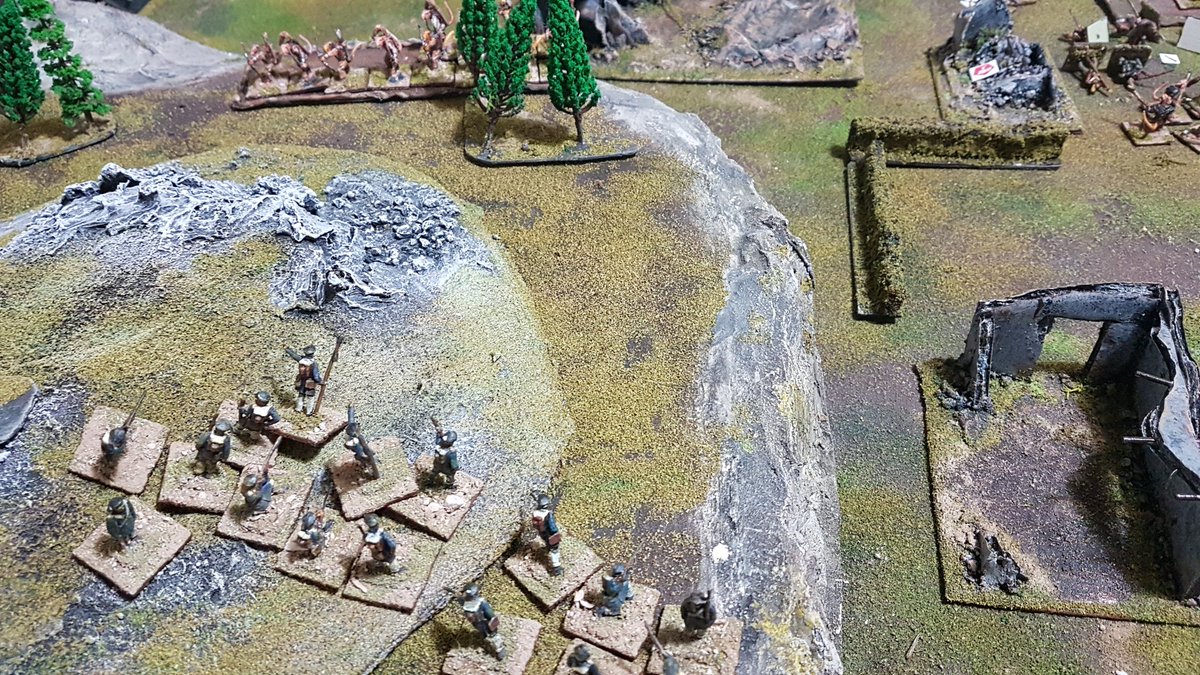
Human forces line up, riflemen on the ridge covering the infantry about to advance into the ruined village
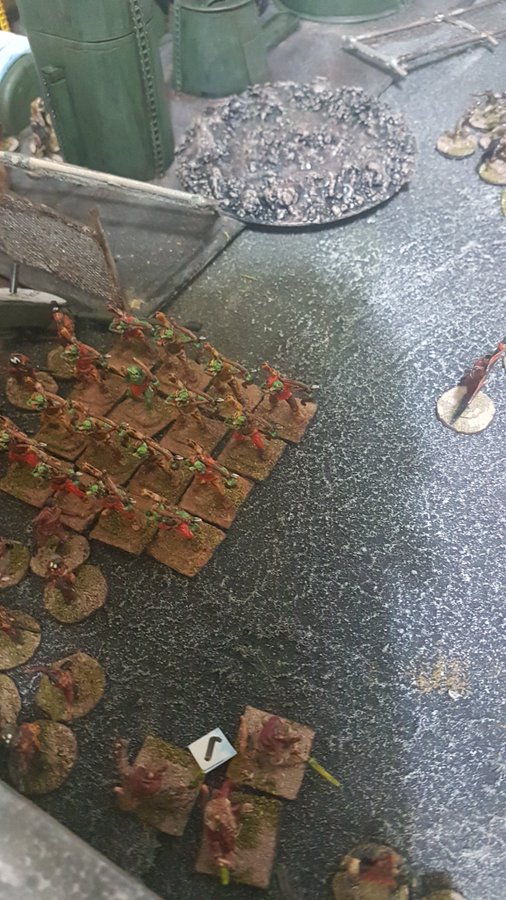
Ratmen line up opposite, slaves with “slings” on the extreme left flank
Poison grenadiers loiter in the centre, looking for targets of opportunity
Out on the far right Ratmen flank, the Slave unit is tasked with holding an uncontested objective
The two forces face off…
Who will prevail?
Turn 1
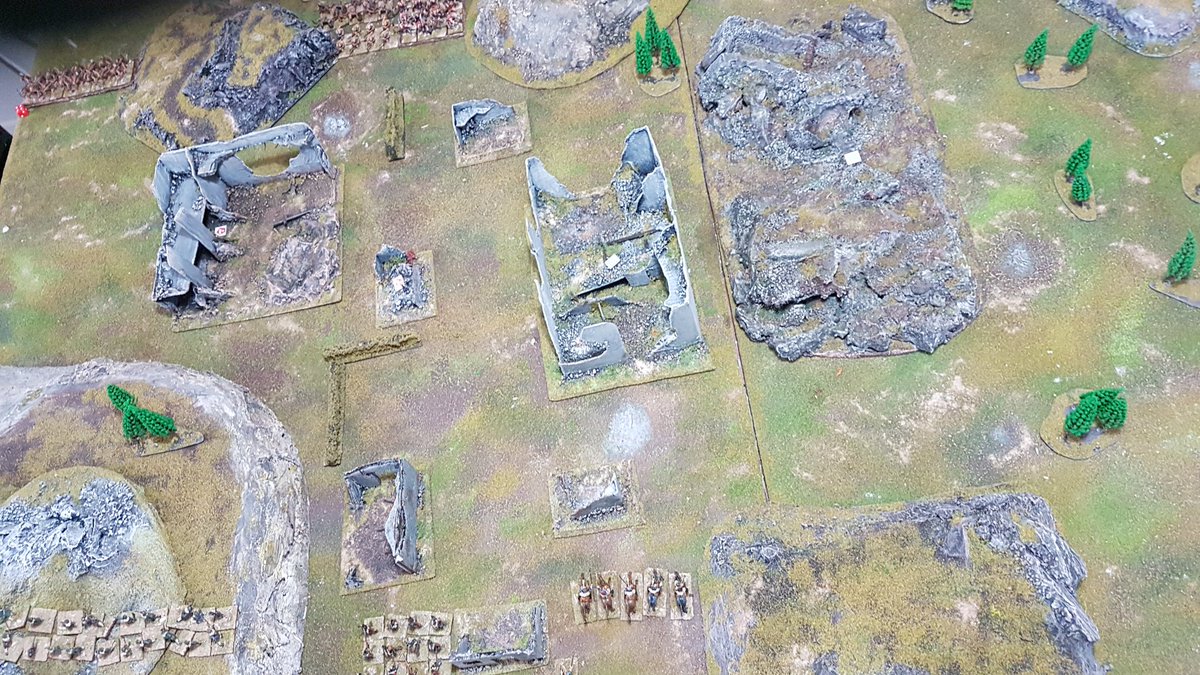
Both sides advance into the ruined village, looking to claim the densely packed objectives
Poison Grenadiers draw first blood, downing a cavalryman with a grenade
Whilst out on the Ratmen left flank, Slaves advance to seize their first objective
Turn 2
In the centre, human cavalry led by the Captain bear down on the Poison Grenadiers, killing two and forcing the others to withdraw, while the Slave unit bears down on another objective and battle is joined in the ruined village..
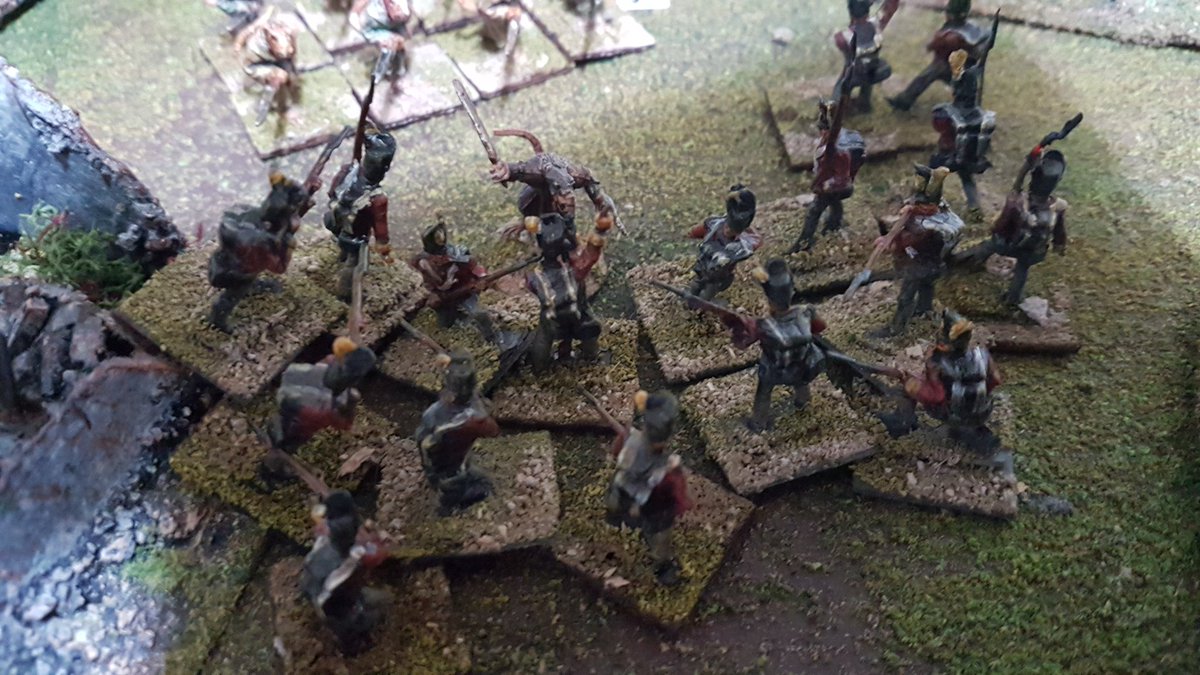
Human infantry engage the block of Ratmen warriors in the village streets
After driving them off, however, the Ratmen Stormtroopers pitch in!
Meanwhile the Captain leads the cavalry against the remaining Poison Grenadiers
But another cavalryman falls to their arcane lethal devices!
Archer slaves advance on the riflemen, albeit largely ineffectually – rifle fire drops four slaves and a few warriors, while infantry engage rat stormtroopers and Warlord in the village centre
Bloody gutter fighting around the ruins
After selflessly letting his bodyguard weather the melee attacks, the Ratman Warlord wades in!
By this point both sides had secured two objectives, but losses on the human side were mounting up more rapidly than the more numerous Ratmen – could superior human firepower prevail?
Turn 3
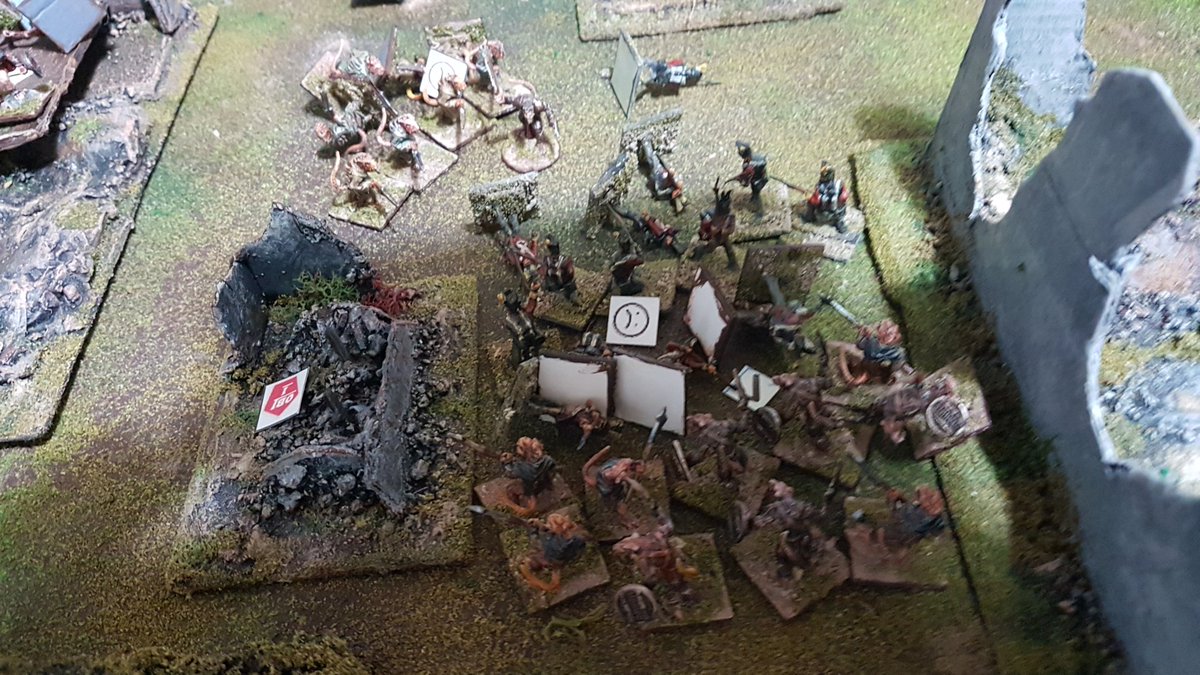
Slaves are moving in in a pincer movement while Stormtroopers rush the human infantry from the rear
Carnage in the streets, causing the human infantry to Waver
Who quickly rally to return the favour, charging the Stormtroopers in the rear..
Riflemen pour fire into the Ratmen, retreating out of arrow range- they successfully wipe out half the Warriors, causing them to Waver
As we ended Turn 3, It was 4-1 to the Ratmen in terms of objectives secured as superior numbers were beginning to tell..
Turn 4 (Final Turn)
Between the Warriors, the Stormtroopers and the Warlord, that’s it for the human infantry!
Ratmen advance steadily, arrows falling amongst the riflemen
The Captain takes down the last Poison Grenadier, settling a rather personal feud..
And as the Slaves turn to face the cavalry remnants and the archers advance onto the ridge to take on the remaining riflemen, it’s 3 to the Ratmen, 1 contested and 1 for the humans… and that’s it!
Heavy losses all round but the vastly superior numbers of Ratmen were better placed to soak them up, and I think I really needed to focus absolutely everything on annihilating one unit at a time – rather than getting my riflemen duelling with the archers and the cavalry mixing it up with Poison Grenadiers, we should have plowed everything into hammering the central Ratmen units the infantry were facing… still, plenty of time for another game!
Once again, a really fun game from the One Page Rules folks and a great “introductory” wargame – you can play this one with the nippers (and I intend to once my youngling stops regarding dice as tasty snack treats) as well as your mates and having everything immediately accessible is a big help keeping the game flowing. I could say it’s almost too simplistic, but… the guy’s stated intent was to produce a game that could fit onto one page! It’s a cracking fun game and a great framework to houserule extra bits and pieces on if you want more depth, and there’s plenty that we’ve learned about game design and economical rules writing that will be making it’s way into our next series of releases (probably next year sometime, don’t hold your breath!).
Meanwhile we’ve got some scenery to paint for the League Of Extraordinary Riveters on Dakkadakka.com, and something pretty cool (and big.. and VERY red) on the horizon to show off… stay thrifty out there, we’ll be back soon!
Anyhoo, recently he’s been putting up some battle reports using the system formerly known as 1page40k – Grimdark Future. This is billed as a fast playing, easy to use, quick and dirty version of the 40k we all know and sort-of-love, sort-of-loathe. Rules and army lists are free to download from the One Page Rules website here. And seeing as we are drawn to free stuff like a moth to the flame of a slow burning crack pipe, we were all over this.
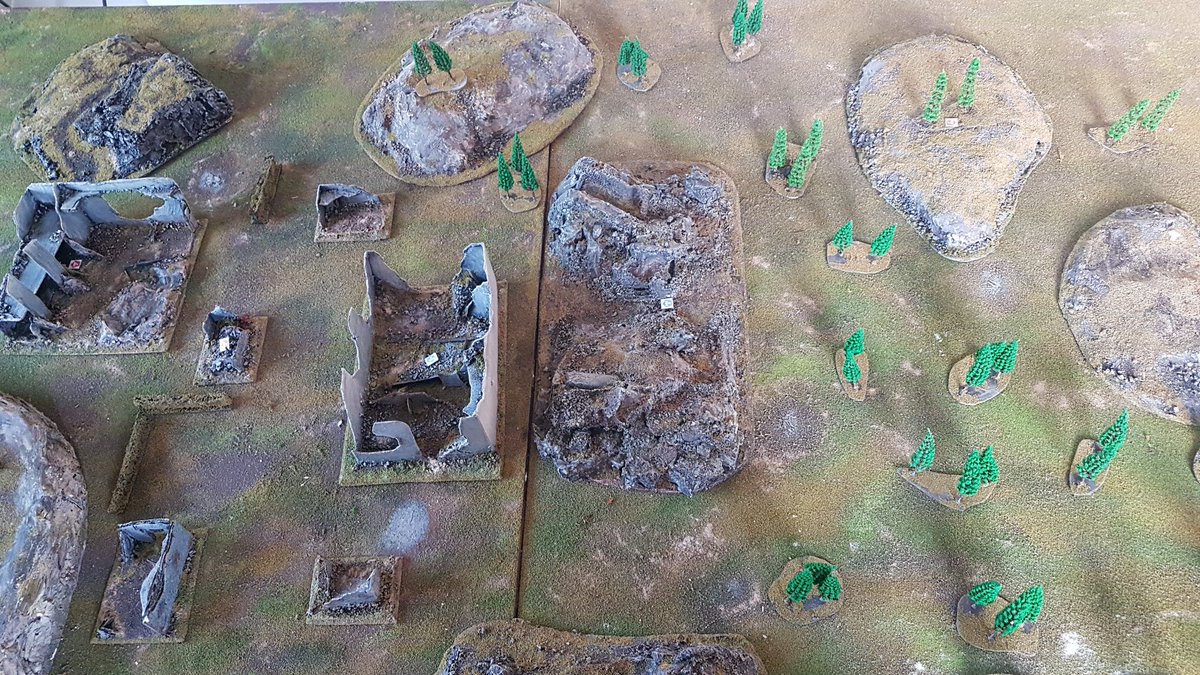
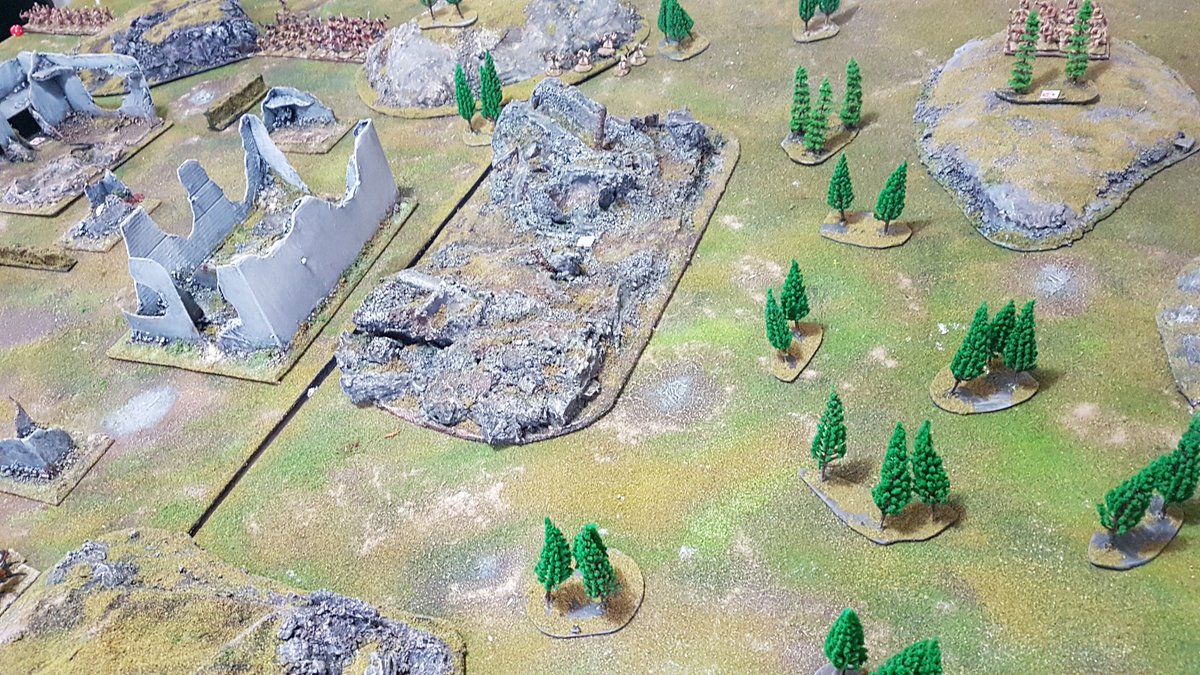
We set up terrain with a ruined village to the east and a disused plasma generator station to the west, set objectives (one of the generators, central hill, ruined church and a ruined shop)…and GAME ON!
Human Defence Force won the roll off and force the Orcs to deploy first:
Jim’s ladz took the southern table edge, concentrating forces in the village – effectively conceding the plasma generator but with the intent of focusing on the central three and hoping to overwhelm the HDF at short range
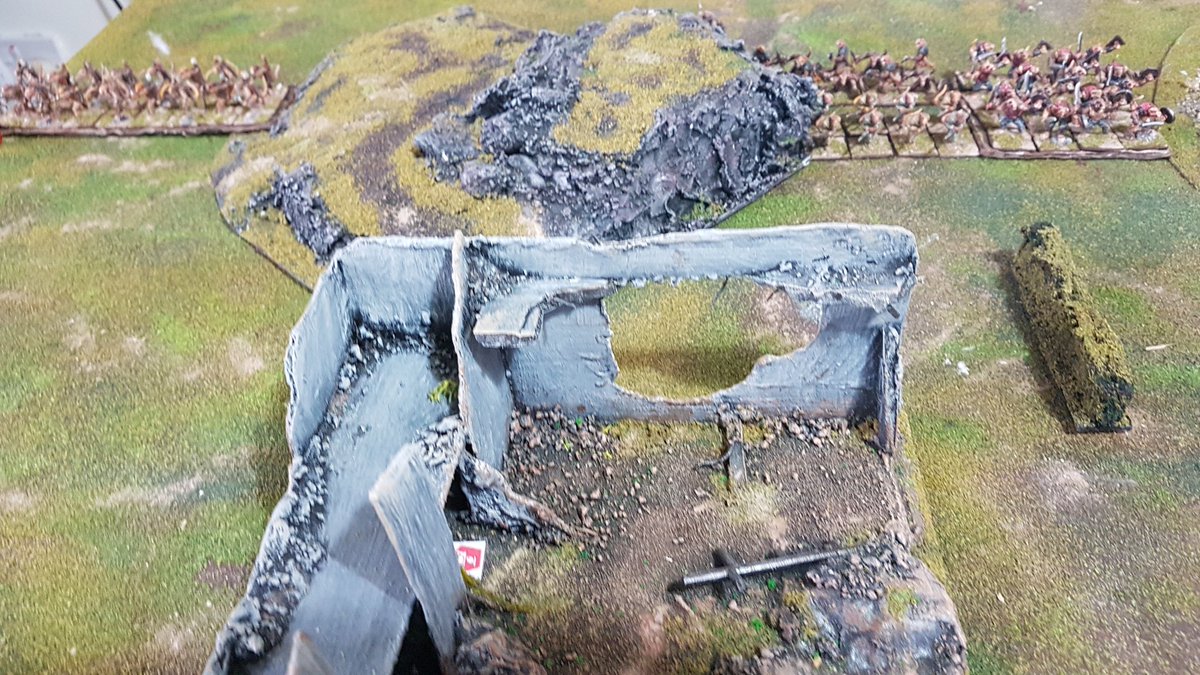
Big Red packed with Warlord, Power Armoured Orcs and Commando Orcs with the task of seizing and holding the two village objectives. Meanwhile the other mob would head for the central objective in the hills
HDF infantry cluster in cover opposing the main orc force – commander, infantry and conscripts along with heavy machinegun team
The HDF is ready – Hoo-AH!
And battle was joined!
Action erupts almost immediately as the Warlord, the Commando Orcs and the Power Armoured Orcs leap off their transport and straight away mix it up with the HDF heavy machinegun team – losing a PA Orc and another wounded
HDF range superiority proving effective as long as humie can keep his distance, but if the Orcs can get in close…
Boyz mob climb the hill, taking an objective and lobbing a grenade into the HDF squad
HDF missile team open up on da boyz
The General wades in to the fray
“Where dey all gone?”
Transport holds the objective while the Warlord makes his way through the village
Commando Orcs hold the forward ruins objective, giving supporting fire while the Power Armour Orcs advance on the conscript squad and the Command squad
As we go into Turn 3, it’s 2 objectives to the Orcs, 1 to the HDF
HDF conscripts play cat and mouse with the VERY tough Power Armour Orcs
The General advances toward the Orc flank, a rolling firestorm…
From their perch near the plasma generator, HDF laser cannon team drop the Warlord
And as the final turn comes to a end, the General crashes into the Orc flank, taking the central objective and massacring the Commando Orcs.
End result, 2 objectives to the HDF (plasma generator and central hill) one to the Orc Marauders (ruined church, held by the transport)
Casualties – HDF lost a weapons team and some of the infantry squad, plus wounded Captain… the Orcs were pretty much down to the transport and their Power Armour elites, and even they were pretty beaten up.
So a pretty decisive victory!
Thoughts on the game? A LOT of fun. Grimdark Future is simple, fast playing and intuitive, absolutely brilliant for a quick throw down kickabout. We did wonder about the balance of point values given the pounding the Orcs took, but Jim did point out the he might just’ve sucked at playing the game.
So, a new system, and props to OPR designer Gaetano Ferrara for the effort he’s put into creating a fun and fast game that really benefits from not being supported by a major model company (more thoughts on that another day). We had a blast and next up on the list is OPR’s “Age Of Fantasy- Regiments” – we’ll let you know!
(Side note – free rules and army lists, 1/72 miniatures, scratchbuilt terrian and vehicles… could this be the cheapest wargame ever played?)
So first out of the blocks, an idea I’ve been kicking around for a while – the infamous Kugelpanzer, or ball tank. These things seem to be staple of retro sci-fi, without really having a defined role, so I figured they could work as an armoured recon troop- with a bit of a twist! These things would be packing laser cannons- three each. These will be capable of rapid fire against infantry and light vehicles, but by combining their fire together they will be able to fire a single high intensity laser blast capable of obliterating even a Soviet Colossus or IS-6 Rampager!
It’s actually a bit of a challenge “feeling out” the character of this army – sandwiched between the lumbering juggernaut of the Holy Soviet Army and the elite, hi tech but short on numbers feel of the Atlantic Alliance, it’s a bit of a challenge to find where the European League should sit. So we’ve gone for a slightly ragtag, heterogenous feel – bizarre clunky specialised units that are very good at one thing, but suck at everything else. Kind of like a 1950’s Eldar to the AA’s Space Marines or HSE Guard, if you’ll allow the metaphor.
Anyway, enough waffle – on to the build!
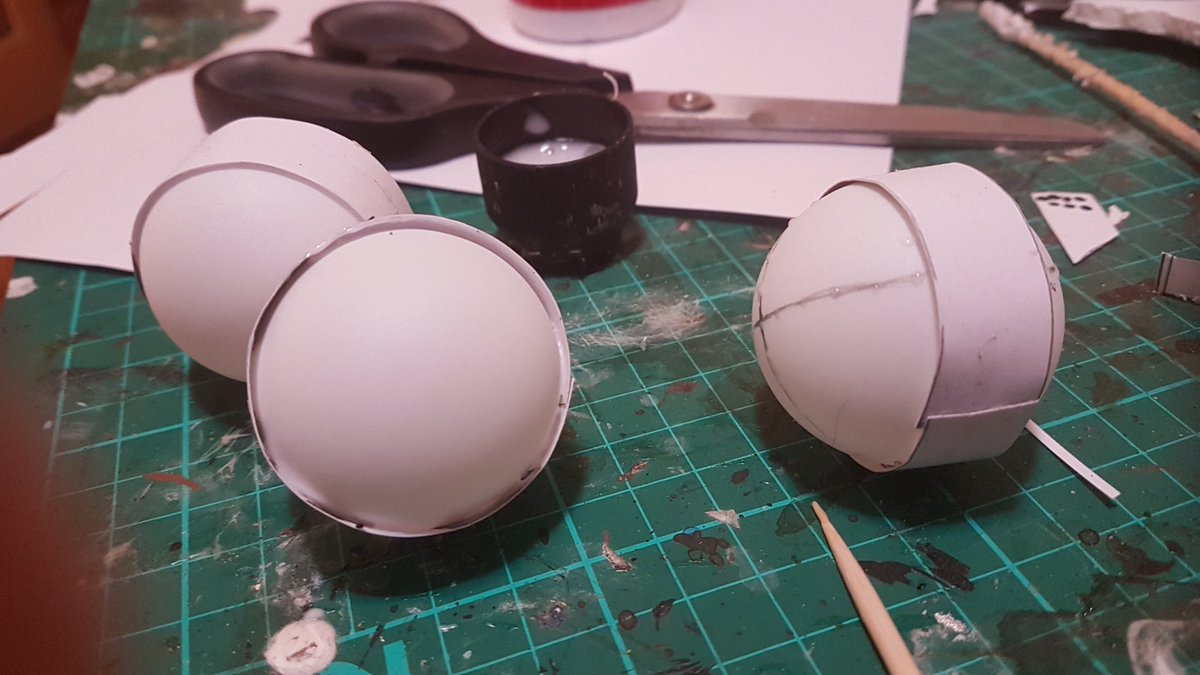
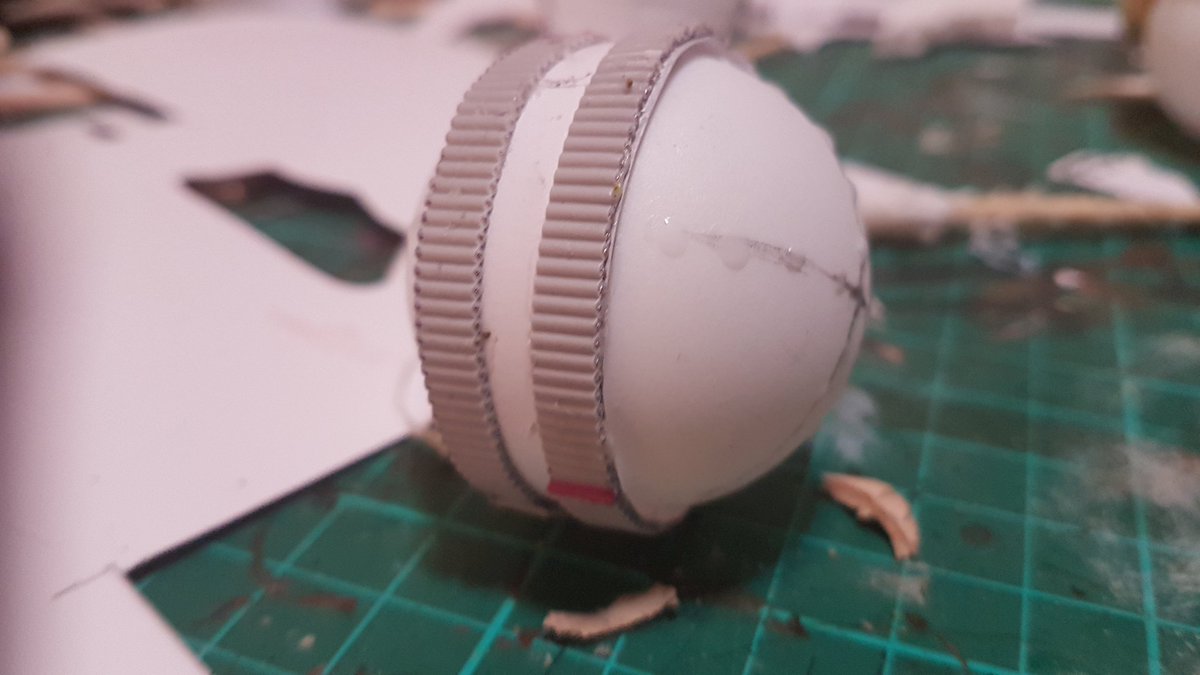
We begin with (drumroll please)…. ping pong balls! A bag of 20 off eBay for a couple of quid. I googled “ping pong ball diameter” – seriously – and discovered that international regulations – seriously – specify 40mm. Thus reassured, I cut out 40mm x 15mm strips of thin card which I aligned as centrally as possible. These would serve as mounts for the tracks, which I cut as 5mm wide strips from IDE cables (a trick learned from master scratchbuilder Zrunelord)
You might notice the crosses sketched on the balls – this was my attempt to measure out a centre point and give myself a line to place rivets along (done with tacky glue, a fast-acting mix of PVA and isopropyl alcohol, applied with a cocktail stick)
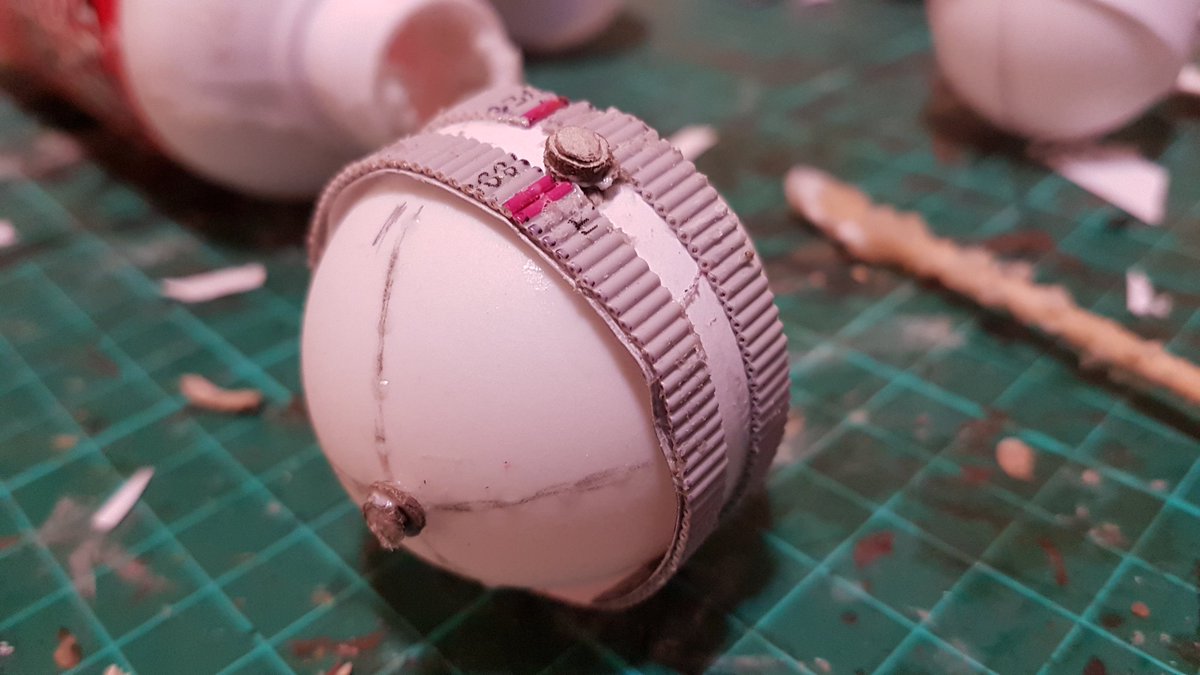
Tracks and rivets added
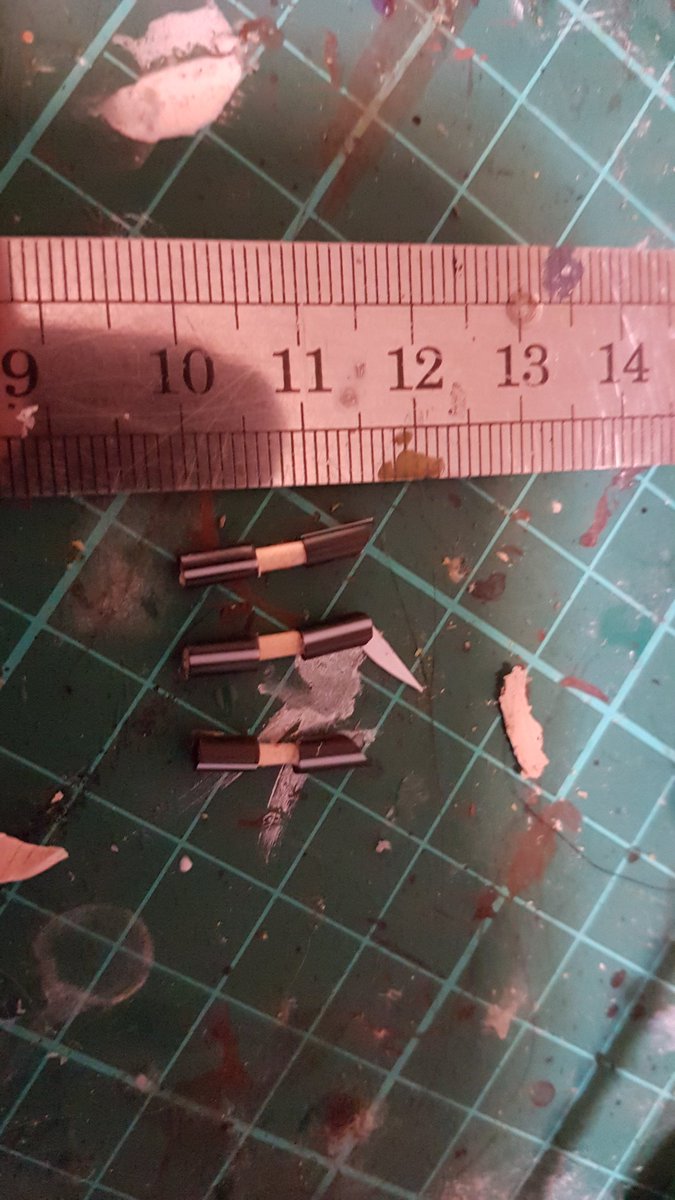
After that, all that remained were the guns! 3 laser cannons per tank, one per side and a centrally mounted top one. I made these by chopping up a 1cm length of cocktail straw and then supergluing a 5mm length of drinking straw to each end, like so:
Laser cannons ready!
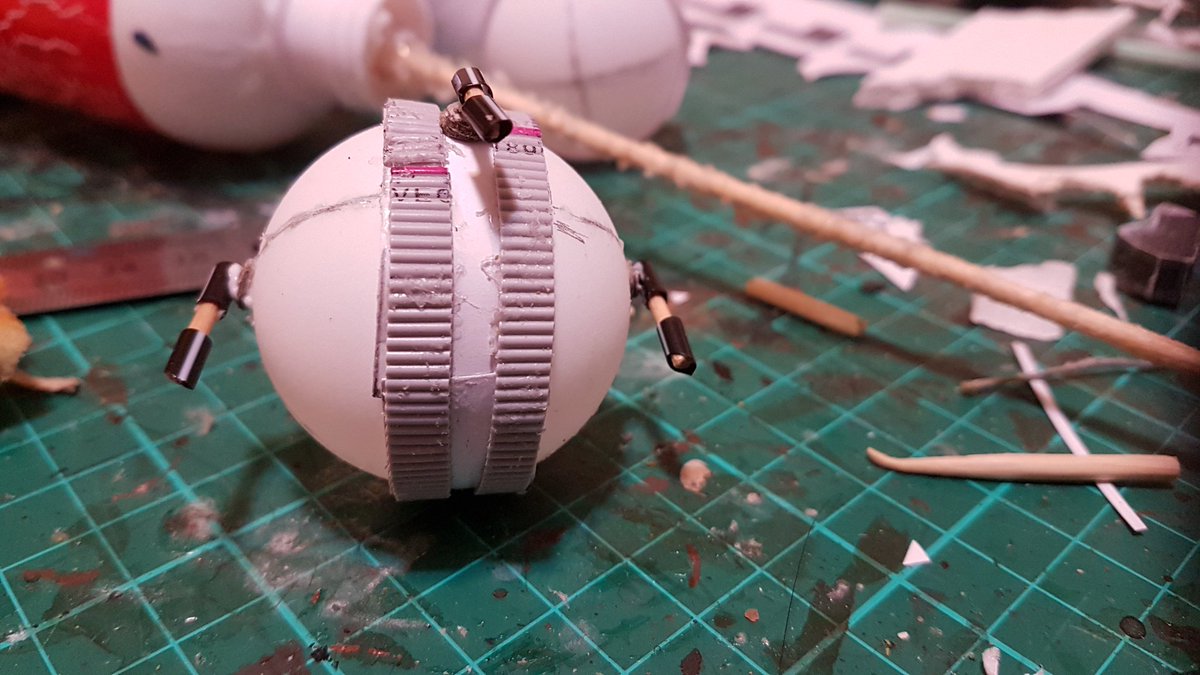
Hole punched thick card superglued to the hull as spacers/ weapon mount points
All done and ready for priming!
A coat of white primer and a base coat of Crafter’s Choice Fawn later, I added lines of brown and Vallejo Russian Green (irony!) to create the WW2 “Dunkelgelb” style camouflage pattern. The whole thing then gt a thinned wash of brown ink, an unthinned in wash of Vallejo Smokey Ink in the crevices, before a final drybrush with bine craft paint to catch the rivets. I applied sponge weathering using both black and gun metal, and then knocked up a texture paste from sand, PVA and dark brown paint – this got smeared around the tracks before being drybrushed with a lighter brown and blended around the tracks (in truth I think I got a bit carried away here, but oh well – northern Europe can get pretty muddy..)
Anyhow – pics!
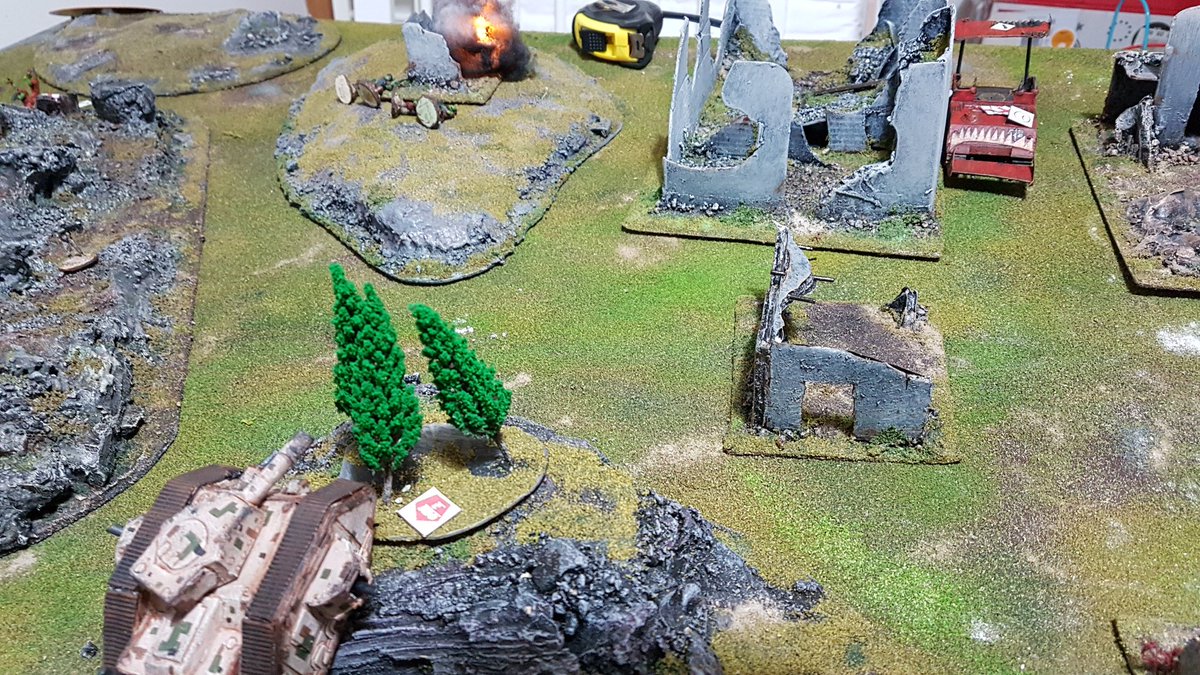
The Kugelpanzer troop lead League infantry through a ruined urban landscape
Looking forward to getting these on the table soon – can they beat the fate of all painted models, or will they cover themselves with glory taking down Stompy Uncle Joe? Stay tuned, stay thrifty, see you soon!